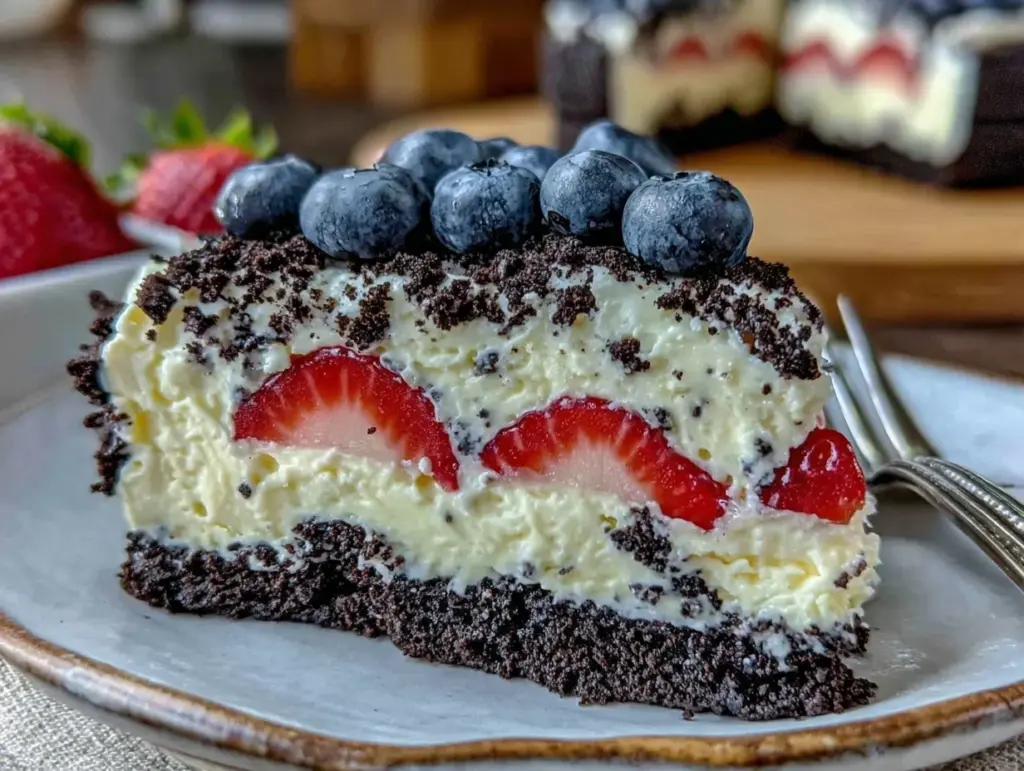
Late July afternoon, and the only thing I want is the quiet ritual of assembling an Easy No-Bake Oreo Flag Cake with Creamy Layers. There’s this particular stillness in the kitchen then—the hum of the fridge, the faint scent of melting chocolate, and the soft crinkle of Oreo wrappers as I peel them open one by one. It’s not about putting on a show or impressing a crowd, honestly. It’s that calm moment where layering crushed cookies and creamy filling becomes a kind of meditation.
This cake feels right for that slow summer day when fireworks are still hours away but the anticipation is thick in the air. It’s easy to make, no oven needed, and yet it carries this quiet pride—like a secret handshake between tradition and simplicity. The layers of crushed Oreos and luscious cream are like a soft, indulgent pause, the kind that makes you realize some recipes stick around because they bring a little comfort without fuss.
I remember the first time I mixed together the creamy layers for this cake, wondering if it would hold up without baking. Turns out, it not only holds—it shines. The Oreo flag pattern isn’t just festive; it’s a reminder that sometimes the best desserts are the ones you build slowly, thoughtfully, layer by layer. It’s a treat that feels like a small celebration on its own, no matter the occasion.
So, here’s the thing about this Easy No-Bake Oreo Flag Cake with Creamy Layers: it’s a quiet, unpretentious kind of joy. If you like the idea of a dessert that’s as much about the process as the payoff, this recipe is going to feel like a friend you trust in the kitchen.
Why You’ll Love This Recipe
Honestly, this Easy No-Bake Oreo Flag Cake with Creamy Layers has become my go-to whenever I want something that’s both impressive and effortless. I’ve tested it countless times (and yes, eaten way too much of it), and here’s why it holds a special place in my kitchen:
- Quick & Easy: You can have this cake ready in under 30 minutes—perfect for those last-minute get-togethers or when you just want something sweet without the usual baking marathon.
- Simple Ingredients: No fancy or hard-to-find items here. Oreos, cream cheese, whipped cream—probably sitting in your pantry or fridge right now.
- Perfect for Patriotic Holidays: The flag design makes it ideal for Independence Day, Memorial Day, or anytime you want to bring a little red, white, and blue to the table.
- Crowd-Pleaser: Kids and adults alike can’t resist this one. The creamy layers and Oreo crunch are a combo that’s hard to beat.
- Unbelievably Delicious: The texture is dreamy—soft cream, crunchy cookie crumbs, and that hint of chocolate sweetness all mingling just right.
What sets this recipe apart is how it balances the creamy layers without being too heavy. I like to blend the cream cheese and whipped topping just enough to keep it light and fluffy. Plus, the no-bake aspect means it’s one less thing to worry about in the heat of summer. If you want to try something a bit different, check out my Cranberry Fluff Dessert for another cool, creamy option.
This cake isn’t just a recipe; it’s a quiet promise of something deliciously simple, perfect for those moments you want to savor without any fuss.
What Ingredients You Will Need
This recipe calls for straightforward, pantry-friendly ingredients that come together to create something far from ordinary. The crushed Oreos bring that perfect crunch and chocolate flavor, while the creamy layers melt on your tongue. Here’s what you’ll gather:
- For the Base and Layers:
- 32 Oreo cookies (regular or golden if you prefer), crushed (about 3 cups) – I usually go for the classic Oreos for that iconic flavor
- 8 oz (225 g) cream cheese, softened (adds richness and tang)
- 2 cups (480 ml) heavy whipping cream, chilled (for fluffy whipped cream layers)
- 1 cup (120 g) powdered sugar (to sweeten the cream cheese mixture)
- 1 teaspoon pure vanilla extract (for subtle warmth and depth)
- For the Flag Decoration:
- Fresh strawberries, sliced (for the red stripes)
- Blueberries (for the blue field of the flag)
- Extra crushed Oreos or white chocolate chips (optional, to add contrast in the layers)
This recipe is flexible. If you need to avoid dairy, consider swapping cream cheese with a dairy-free alternative and use coconut cream instead of heavy cream. For a gluten-free option, check out my tips in the Mini Cheese Balls Recipe blog for handling substitutions in party foods.
Choosing good-quality cream cheese makes a difference—I usually reach for Philadelphia brand for that smooth texture. When picking Oreos, fresh ones are best, but if you’re in a pinch, slightly stale cookies still work fine since they’ll soften in the cream layers.
Equipment Needed
Good news—this Easy No-Bake Oreo Flag Cake with Creamy Layers requires very minimal equipment. Here’s what you’ll want on hand:
- 8×8 inch (20×20 cm) square baking dish or a similar size glass or plastic container
- Mixing bowls (one large for whipping cream and one medium for cream cheese mix)
- Electric hand mixer or stand mixer (to whip the cream and mix the cream cheese smoothly)
- Spatula for folding and spreading layers evenly
- Measuring cups and spoons (precision helps, but eyeballing works too)
- Food processor or rolling pin (to crush Oreos finely; if you don’t have these, place cookies in a zip-top bag and crush with a heavy pan)
If you don’t have an electric mixer, whipping cream by hand is doable but takes some muscle and patience. I once tried—let’s just say I earned my dessert that day! For budget-friendly options, a sturdy whisk and some elbow grease can get you through. Glass dishes are great because you can see the layers as you build, which is a nice visual cue and adds to the experience.
Preparation Method
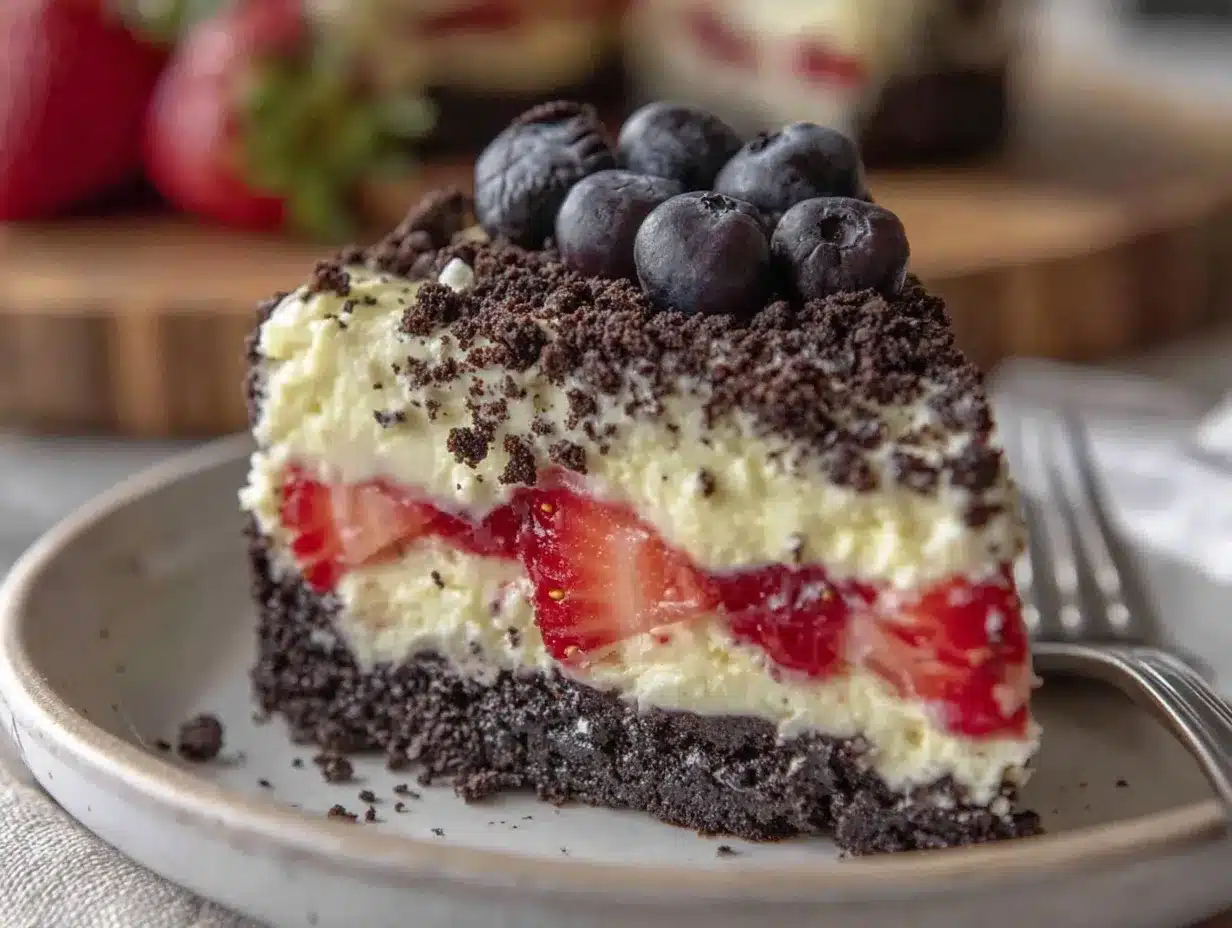
- Prepare the Oreo Crumbs: Place the Oreos in a food processor and pulse until finely crushed. If you don’t have a processor, put the cookies in a sealed plastic bag and crush them with a rolling pin until you get fine crumbs. Set aside about ½ cup of crumbs for topping and decoration. (Time: 5 minutes)
- Make the Cream Cheese Mixture: In a medium bowl, beat the softened cream cheese with powdered sugar and vanilla extract until smooth and creamy. No lumps! This usually takes about 3-4 minutes with a mixer. (Time: 5 minutes)
- Whip the Cream: In a large bowl, whip the heavy cream until stiff peaks form. This means when you lift the whisk, the cream should hold its shape without drooping. (Time: 5-7 minutes)
- Combine Cream and Cream Cheese: Gently fold about one-third of the whipped cream into the cream cheese mixture to lighten it. Then fold in the remaining whipped cream carefully—don’t overmix or you’ll lose the fluffiness. (Time: 3-4 minutes)
- Layer the Cake: Start by spreading a layer of crushed Oreos evenly on the bottom of your dish (about 1 cup). Then add a generous layer of the creamy mixture on top (about 1/3 of it), smoothing it out gently with your spatula. Repeat the layers until all Oreos and cream are used, finishing with a creamy layer. (Time: 10 minutes)
- Create the Flag Decoration: Arrange blueberries in the top left corner to mimic the blue field. Lay out sliced strawberries in neat rows for the red stripes. Sprinkle the reserved Oreo crumbs between the stripes to form the white stripes. (Time: 10 minutes)
- Chill: Cover the cake with plastic wrap and refrigerate for at least 4 hours or overnight. This helps the layers set and flavors meld together. (Time: 4+ hours)
- Serve: Slice with a sharp knife dipped in hot water for clean cuts. Enjoy the creamy, crunchy layers in every bite.
Pro tip: When folding the whipped cream into the cream cheese, use a gentle hand and a spatula—think slow, deliberate strokes. It’s tempting to mix fast for speed, but that kills the light texture. Also, don’t rush the chilling; the cake tastes best when it’s had time to settle.
Cooking Tips & Techniques
Making an Easy No-Bake Oreo Flag Cake with Creamy Layers might look simple, but a few tricks help it come out just right every time. Here’s what I’ve learned the hard way:
- Softened Cream Cheese is Key: If your cream cheese is too firm, you’ll get lumps. Leave it out at room temperature for at least an hour before starting, or microwave it in short bursts (10 seconds) to soften, but don’t melt it.
- Whipping Cream to Stiff Peaks: Watch closely when whipping heavy cream; if you go too far, it turns grainy and starts becoming butter. Stop as soon as peaks hold their shape.
- Folding Technique: Folding is about combining ingredients gently to keep air in. Use a spatula to scoop from underneath and turn over—don’t stir or beat.
- Cookie Crumbs Texture: For the best texture, pulse Oreos until fine but not powdery. If crumbs are too coarse, layers won’t hold well; too fine and it feels dusty. Finding that middle ground is worth it.
- Chill Time: Patience here pays off. The cake needs time to set so the creamy layers firm up and the cookie crumbs soften just right.
- Multitasking: While the cake chills, consider preparing a simple appetizer like my Fresh Shrimp Salad Appetizers—both are crowd-friendly and can be prepped ahead.
One time, I skipped chilling overnight and the cake was a little wobbly — lesson learned! Now I always plan ahead, and it’s worth the wait.
Variations & Adaptations
The beauty of this no-bake Oreo cake is how easy it is to tweak. Here are a few ideas I’ve tried or thought up to make it your own:
- Dairy-Free Version: Swap cream cheese with a plant-based cream cheese and heavy cream with coconut cream. The texture changes slightly but stays deliciously creamy.
- Seasonal Fruit Variations: Instead of strawberries and blueberries, try raspberries and blackberries for a different color palette and tartness.
- Chocolate Lover’s Twist: Add a layer of chocolate ganache in between the cream and cookie layers for extra richness.
- Mini Flag Cakes: Use smaller dishes or individual cups to make personal-sized flag cakes—great for parties or picnics.
- Healthier Swap: Use light cream cheese and whipped topping, or Greek yogurt mixed with a bit of honey for a tangy, lighter filling.
When I made this cake for a summer picnic, I swapped in raspberries and blackberries since strawberries were out of season. It gave the cake a slightly different flavor but kept the patriotic spirit alive. You can also try layering the cake in a clear trifle bowl for a pretty presentation that shows off all the layers beautifully.
Serving & Storage Suggestions
This cake is best served chilled, straight from the fridge. The creamy layers are cool and refreshing, perfect for warm weather. Use a sharp knife dipped in hot water between slices to get clean, neat servings without smudging the layers.
Pair it with simple beverages like iced tea or lemonade to complement the sweet richness. For a heartier spread, serve alongside light appetizers such as Creamy Cheese Stuffed Cherry Tomatoes or the Zesty Garlic Marinated Mushrooms.
Store leftovers in an airtight container in the refrigerator for up to 3 days. The flavors deepen with time, but the cookie layers may soften a bit more. If you want to store it longer, freeze it covered tightly for up to one month; thaw overnight in the fridge before serving.
Reheat is not recommended since it’s a no-bake dessert, but letting it sit at room temperature for 10-15 minutes before serving helps bring out flavor nuances.
Nutritional Information & Benefits
This Easy No-Bake Oreo Flag Cake with Creamy Layers is an indulgent treat, but it can fit into your balanced lifestyle when enjoyed in moderation. Here’s a rough estimate per serving (assuming 8 servings):
| Calories | 350-400 kcal |
|---|---|
| Fat | 25 g |
| Carbohydrates | 30 g |
| Protein | 4 g |
| Sugar | 22 g |
Key health notes: Cream cheese adds calcium and protein, while heavy cream contributes fat that helps with satiety. Oreos do contain gluten and dairy, so be mindful if you have allergies or intolerances. This dessert is not low-carb but works well as an occasional celebratory sweet.
Personally, I believe that food like this is about joy and connection more than strict nutrition. It’s a way to bring people together with a smile and a shared love for simple, creamy treats.
Conclusion
So, there you have it—an Easy No-Bake Oreo Flag Cake with Creamy Layers that’s as approachable as it is delicious. It’s a recipe that fits those quiet kitchen moments and the lively summer celebrations alike. The creamy layers, the crunchy cookie texture, and the fresh fruit decoration make it a dish you’ll want to return to again and again.
Feel free to tweak it to your taste—whether that means swapping fruits, trying dairy-free options, or making individual servings. This cake is flexible but always comforting, the kind of dessert that feels like a gentle pat on the back after a busy day.
When I make this cake, I’m reminded that sometimes the simplest recipes hold the most meaning—and it’s the small rituals in the kitchen that stick with us the longest. I’d love to hear how you make this recipe your own, so don’t hesitate to share your versions and tips!
FAQs
Can I use different cookies instead of Oreos?
Yes! You can try chocolate wafer cookies or even gluten-free cookie alternatives. Just make sure they crush well and have a similar texture.
How long should I chill the cake before serving?
At least 4 hours is best, but overnight chilling helps the layers set perfectly and the flavors meld.
Is it possible to make this cake ahead of time?
Absolutely. You can prepare it a day or two in advance and keep it refrigerated until ready to serve.
Can I make this cake vegan?
With substitutions like vegan cream cheese and coconut-based whipped cream, yes. The texture will be a bit different but still tasty.
What’s the best way to slice the cake cleanly?
Use a sharp knife dipped in hot water and wiped dry before slicing. This helps create clean cuts without smearing the layers.
Pin This Recipe!
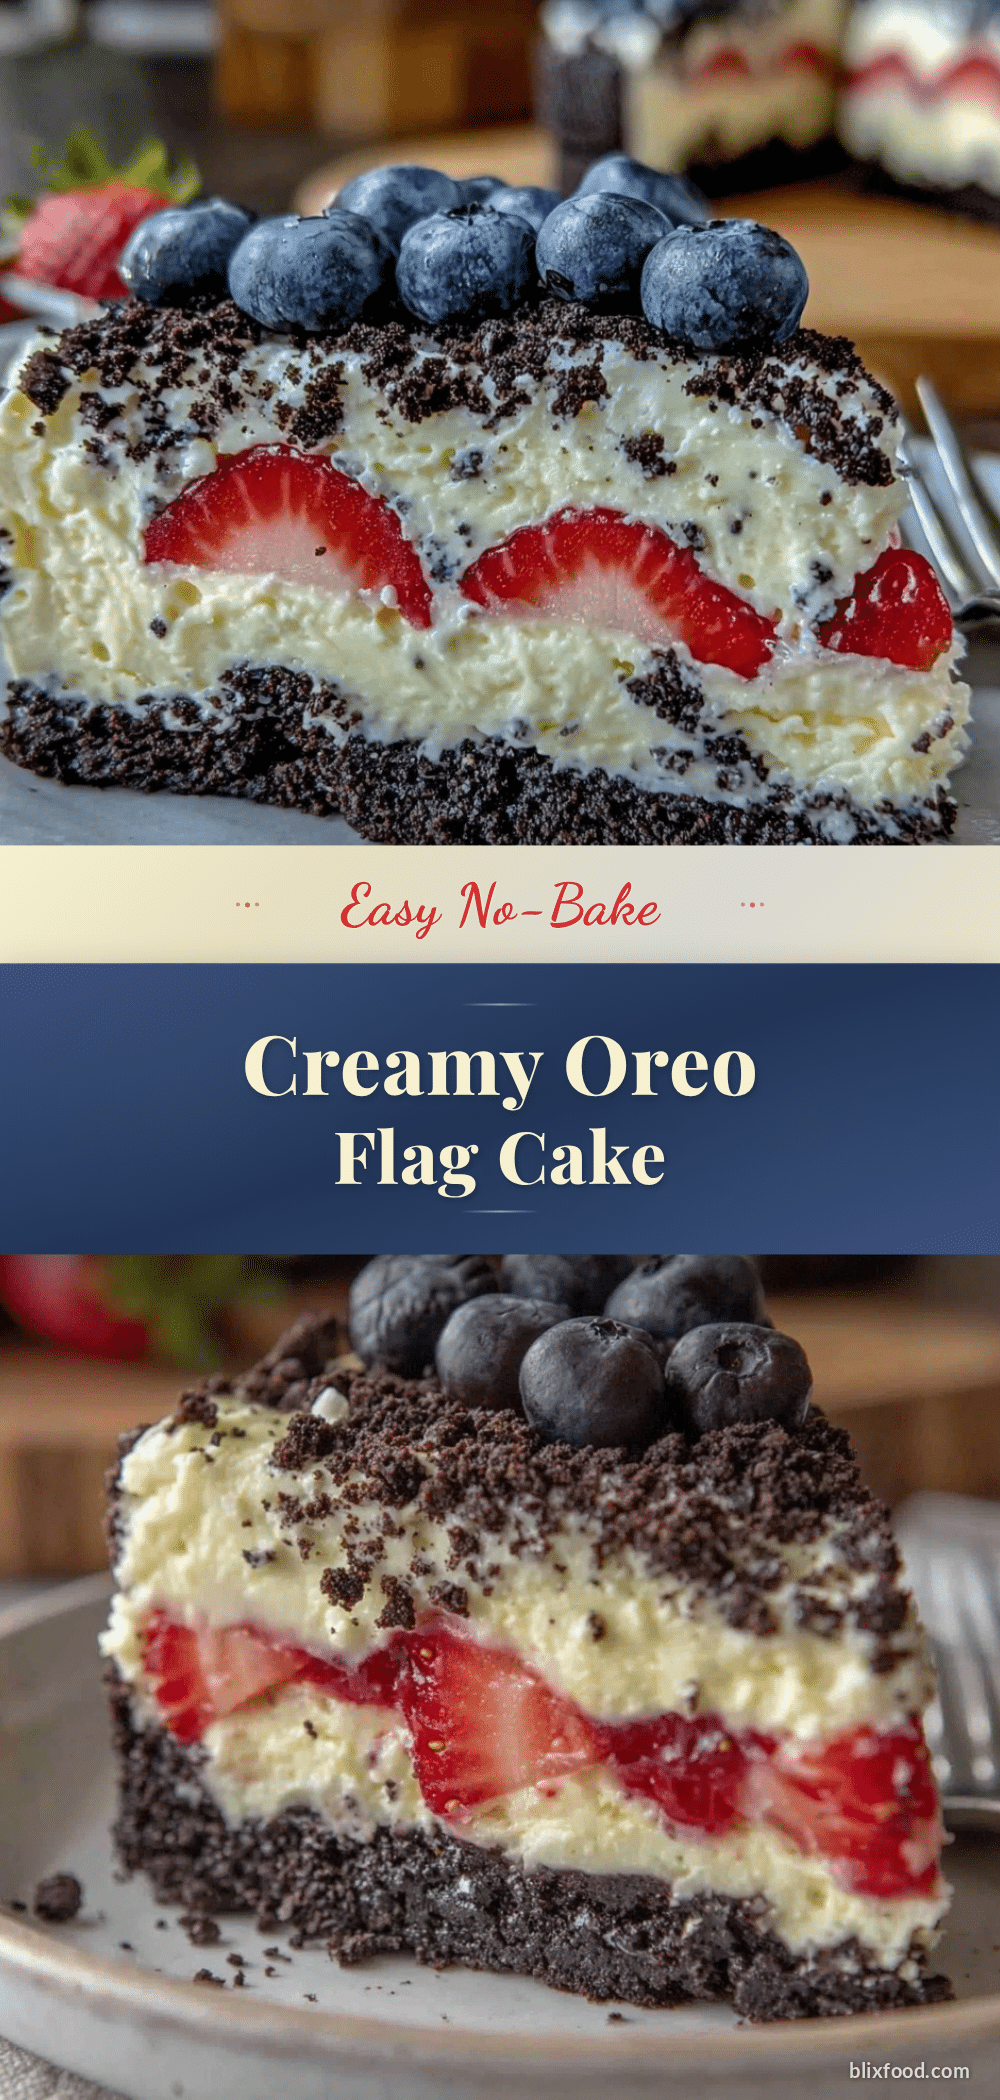
Easy No-Bake Oreo Flag Cake Recipe with Creamy Layers to Impress

A simple, no-bake Oreo cake featuring creamy layers and a patriotic flag decoration, perfect for summer celebrations and quick to assemble.
- Prep Time: 20 minutes
- Cook Time: 0 minutes
- Total Time: 4 hours 20 minutes
- Yield: 8 servings 1x
- Category: Dessert
- Cuisine: American
Ingredients
- 32 Oreo cookies (regular or golden), crushed (about 3 cups)
- 8 oz (225 g) cream cheese, softened
- 2 cups (480 ml) heavy whipping cream, chilled
- 1 cup (120 g) powdered sugar
- 1 teaspoon pure vanilla extract
- Fresh strawberries, sliced (for the red stripes)
- Blueberries (for the blue field of the flag)
- Extra crushed Oreos or white chocolate chips (optional, for contrast in layers)
Instructions
- Place the Oreos in a food processor and pulse until finely crushed. If you don’t have a processor, put the cookies in a sealed plastic bag and crush them with a rolling pin until you get fine crumbs. Set aside about ½ cup of crumbs for topping and decoration.
- In a medium bowl, beat the softened cream cheese with powdered sugar and vanilla extract until smooth and creamy, about 3-4 minutes with a mixer.
- In a large bowl, whip the heavy cream until stiff peaks form, about 5-7 minutes.
- Gently fold about one-third of the whipped cream into the cream cheese mixture to lighten it. Then fold in the remaining whipped cream carefully—don’t overmix.
- Start by spreading a layer of crushed Oreos evenly on the bottom of your dish (about 1 cup). Then add a generous layer of the creamy mixture on top (about 1/3 of it), smoothing it out gently with your spatula. Repeat the layers until all Oreos and cream are used, finishing with a creamy layer.
- Arrange blueberries in the top left corner to mimic the blue field. Lay out sliced strawberries in neat rows for the red stripes. Sprinkle the reserved Oreo crumbs between the stripes to form the white stripes.
- Cover the cake with plastic wrap and refrigerate for at least 4 hours or overnight to set and meld flavors.
- Slice with a sharp knife dipped in hot water for clean cuts and serve.
Notes
Use softened cream cheese to avoid lumps. Whip cream to stiff peaks but avoid overwhipping to prevent graininess. Fold whipped cream gently into cream cheese mixture to keep it light and fluffy. Chill at least 4 hours or overnight for best results. Use a sharp knife dipped in hot water for clean slicing.
Nutrition
- Serving Size: 1 slice (1/8 of cake
- Calories: 375
- Sugar: 22
- Fat: 25
- Carbohydrates: 30
- Protein: 4
Keywords: no-bake cake, Oreo cake, flag cake, patriotic dessert, easy dessert, creamy layers, summer dessert, no oven dessert