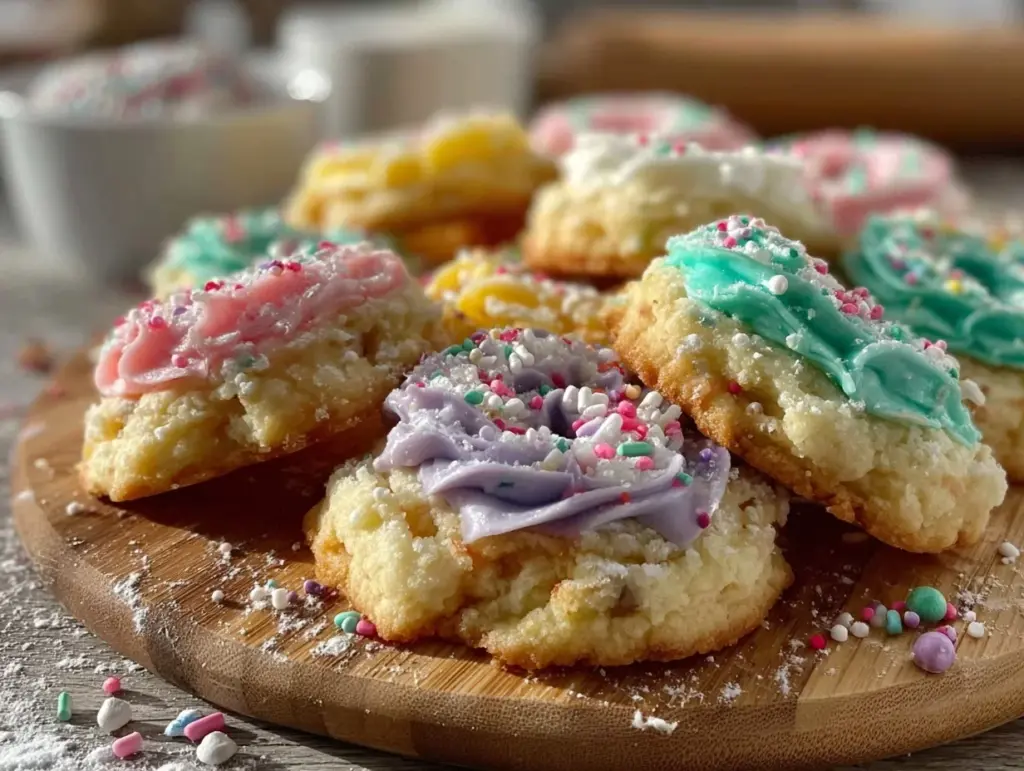
The last cookie disappeared in a blink — a little hand clutching crumbs, eyes wide with delight. “Can I have the recipe?” came the chorus from the kids gathered around the table, already plotting their next batch. Honestly, I wasn’t expecting such a fuss. You know, it started as a quick idea to make something playful for a rainy afternoon, just a simple batch of sugar cookies cut into letters of the alphabet. But seeing those vibrant, colorful icing designs bring the whole thing to life — and watching everyone spell out their names with those sweet treats — well, that was a quiet victory I didn’t see coming.
It’s funny how a recipe like this sticks with you. Not because it’s fancy or complicated, but because it turns baking into a shared moment. I remember rolling out the dough in my tiny kitchen, the scent of vanilla and butter filling the air, while my mind wandered to how these cookies might brighten a day. And now, every time I bring them out, there’s a little spark in the room — a little fun, a touch of color, and a lot of smiles. That’s why this recipe has become a staple for me, a gentle reminder that sometimes the simplest treats make the biggest memories.
So this isn’t just about sugar cookies. It’s about the joy of creating something together, the patience to get the icing just right, and the quiet pride when those cookies vanish before you even get a proper taste. If you’re looking for a way to add a bit of whimsy and sweetness to your kitchen, these Perfect ABC Letter Sugar Cookies with Colorful Icing might just be your new go-to. Trust me, once you try them, you’ll understand why they keep coming back for more — and why I’m still a little surprised every time.
Why You’ll Love This Recipe
I’ve baked sugar cookies in a dozen different ways, but these ABC letter sugar cookies stand out for all the right reasons. Over time, I’ve refined this recipe through trial and, well, a few cookie catastrophes (ever tried cutting letters with dough that’s too sticky? Not fun). What makes these cookies so special is how they bring color, fun, and a touch of nostalgia to your baking without any fuss.
- Quick & Easy: You can mix, chill, roll, and cut the dough in under 30 minutes, perfect for squeezing in some creativity even on busy afternoons.
- Simple Ingredients: No need to hunt down exotic items. Basic pantry staples like butter, sugar, and flour form the base, with just a few extras for the icing.
- Perfect for Learning & Play: Great for kids’ parties, back-to-school treats, or even just a weekend activity. The letter shapes keep little hands busy and curious.
- Crowd-Pleaser: Everyone from toddlers to adults can’t resist these charming cookies, especially once they’re decked out in colorful icing.
- Unbelievably Delicious: Crisp edges with a tender crumb inside, plus that touch of vanilla — it’s classic comfort food, but with a cheerful twist.
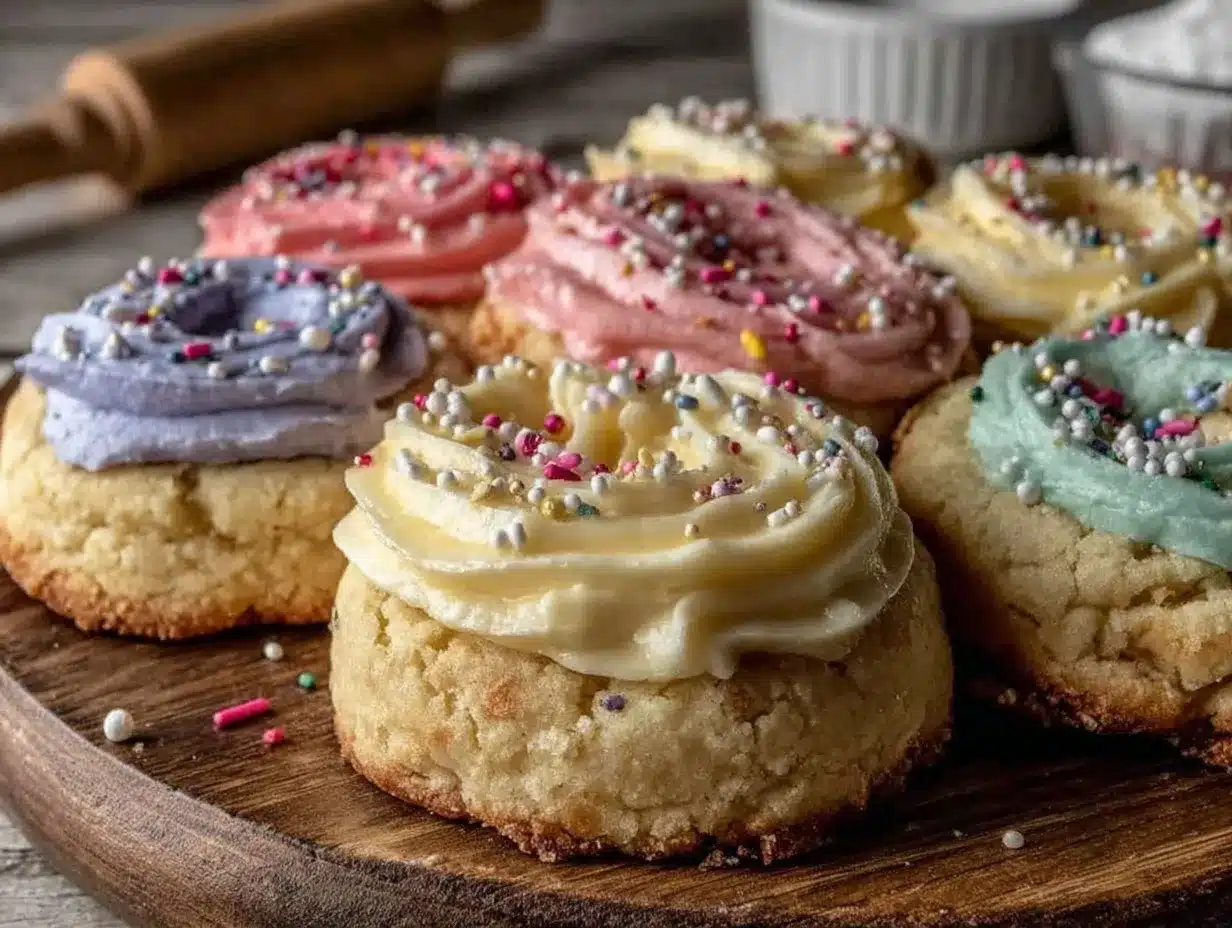
What sets this apart? The icing technique. I’ve found that using gel food colors mixed with a simple royal icing recipe makes decorating not just easier, but more fun and forgiving. You don’t need to be a pro to get smooth, vibrant results. Plus, there’s something about spelling out messages or names on cookies that makes the whole experience feel personal and a bit magical.
Honestly, these cookies aren’t just treats; they’re little moments of joy you bake into your day. Whether you’re sharing with friends or saving the best letters for yourself, this recipe sticks around because it’s as much about the experience as it is about the flavor.
What Ingredients You Will Need
This recipe uses simple, wholesome ingredients to deliver bold flavor and satisfying texture without the fuss. Most of these are pantry staples, making it easy to whip up a batch whenever the cookie craving hits. Plus, the colorful icing ingredients are easy to customize based on what you have on hand or your favorite hues.
- For the Sugar Cookie Dough:
- 2 ¾ cups (345g) all-purpose flour, sifted (for best texture, I like King Arthur flour)
- 1 teaspoon baking powder
- ½ teaspoon salt
- 1 cup (227g) unsalted butter, softened (room temperature is key for creaminess)
- 1 ½ cups (300g) granulated sugar
- 1 large egg, room temperature
- 1 ½ teaspoons pure vanilla extract (a good quality extract makes a difference)
- 2 tablespoons heavy cream or whole milk (adds tenderness to the dough)
- For the Colorful Royal Icing:
- 3 cups (360g) powdered sugar, sifted to avoid lumps
- 2 tablespoons meringue powder (for that perfect stiff-but-pipeable consistency)
- 6 tablespoons warm water, adjust as needed
- Gel food coloring in assorted colors (I usually use AmeriColor gels for vibrant, rich hues)
- Optional: ½ teaspoon vanilla or almond extract for flavor boost
If you want to swap things up, almond flour works as a gluten-free option, but expect a slightly different texture. For dairy-free needs, coconut milk or almond milk can replace heavy cream in the dough, and vegan butter works well too. For icing, meringue powder is a game-changer, but if you don’t have it, egg whites can be a substitute — just be mindful of freshness and safety.
Equipment Needed
- Mixing bowls: A large one for the dough and a smaller one for the icing.
- Electric mixer: Stand or hand mixer makes creaming butter and sugar way easier.
- Measuring cups and spoons: Precision helps the dough come out just right.
- Rolling pin: A smooth, even roll is crucial for uniform cookie thickness.
- Alphabet cookie cutters: You can find sets online or at craft stores; I recommend metal ones for sharp edges.
- Baking sheets lined with parchment paper or silicone mats to prevent sticking.
- Cooling racks: Let cookies cool evenly and avoid sogginess.
- Small piping bags or plastic sandwich bags for icing application. Fine piping tips help with detailed decorating, but a cut corner works fine for beginners.
If you don’t have specialized cookie cutters, you can use a sharp knife to carefully cut letters freehand, but it takes patience. Also, investing in a good silicone mat is worth it if you bake often — cleanup is a breeze, and the cookies bake evenly. I’ve tried cheaper alternatives, but quality equipment really shines, especially when you’re decorating with royal icing.
Preparation Method
- Mix the dry ingredients: In a medium bowl, whisk together 2 ¾ cups (345g) of sifted all-purpose flour, 1 teaspoon baking powder, and ½ teaspoon salt. Set aside. This ensures even distribution and avoids clumps.
- Cream butter and sugar: Using an electric mixer, beat 1 cup (227g) softened unsalted butter with 1 ½ cups (300g) granulated sugar on medium speed for about 3-4 minutes until light and fluffy. You’ll notice the mixture lighten in color — that’s your cue it’s aerated well.
- Add egg, vanilla, and cream: Beat in 1 large room-temperature egg, 1 ½ teaspoons vanilla extract, and 2 tablespoons heavy cream. Mix until just combined; don’t overdo it or the dough might get tough.
- Combine wet and dry: Gradually add the flour mixture to the wet ingredients, mixing on low speed. When the dough starts to clump, switch to using your hands to finish combining. The dough should be soft but not sticky. If it’s too sticky, sprinkle a little more flour.
- Chill the dough: Flatten the dough into a disk, wrap tightly with plastic wrap, and refrigerate for at least 1 hour. Chilling firms the dough and makes it easier to roll without sticking or losing shape.
- Preheat oven and prepare baking sheets: Preheat your oven to 350°F (175°C). Line baking sheets with parchment or silicone mats.
- Roll and cut letters: Lightly flour your work surface and rolling pin. Roll out the dough to about ¼ inch (6 mm) thick. Use your alphabet cookie cutters to cut out letters. Arrange them about 1 inch (2.5 cm) apart on the baking sheets.
- Bake: Bake the cookies for 8-10 minutes or until the edges just start to turn golden. Watch closely; you want them pale with crisp edges, not browned.
- Cool completely: Transfer cookies to wire racks to cool before icing. Warm cookies will melt the icing and ruin the design.
- Make royal icing: In a bowl, combine 3 cups (360g) powdered sugar and 2 tablespoons meringue powder. Add 6 tablespoons warm water gradually, mixing on low until smooth. Add vanilla or almond extract if desired. Adjust water to get a thick but pipeable consistency.
- Color and decorate: Divide icing into small bowls and tint with gel food coloring. Use piping bags with small tips or plastic bags with tiny snips. Decorate cookies with outlines, fills, polka dots, or fun patterns. Let the icing dry for several hours or overnight for best results.
TIP: If your dough feels too soft after chilling, pop it back in the fridge for 15-20 minutes before rolling. Also, if you’re new to royal icing, practicing on parchment before piping on cookies can save you from nervous mistakes.
Cooking Tips & Techniques
Working with sugar cookies and royal icing can seem tricky, but a few tricks make all the difference. First, don’t skip chilling the dough. It’s crucial for keeping those letter shapes sharp during baking. I once baked a batch without chilling — the cookies puffed and lost their crisp edges, turning into more of a blob than a letter. Learned that the hard way!
When rolling the dough, keep the thickness consistent. Too thin and the cookies become brittle; too thick and they might underbake in the center. About ¼ inch (6 mm) is the sweet spot.
For icing, use gel colors instead of liquid food coloring. They provide vibrant colors without thinning the icing. Adjust icing consistency by adding water drop by drop — too thin and it will run; too thick and it’s hard to pipe.
Outline first, then flood with thinner icing for a smooth, polished look. Let the outline crust for a few minutes before filling in to avoid bleeding colors.
Don’t rush the drying process. I usually let decorated cookies rest overnight (or at least 6 hours) to harden the icing fully. It’s tempting to grab one right away, but patience pays off.
Finally, multitasking works well here: While cookies bake, prep your icing and colors. That way, you’re ready to decorate as soon as cookies cool.
Variations & Adaptations
These ABC letter sugar cookies can be customized in lots of fun ways, depending on your mood, occasion, or dietary needs.
- Dietary adjustments: Use almond flour or gluten-free flour blends to make these gluten-free. Swap butter for coconut oil or vegan butter for dairy-free versions. For the icing, aquafaba can replace meringue powder for a vegan-friendly royal icing alternative.
- Flavor twists: Add citrus zest (lemon, orange) to the dough for a bright note. Or try almond or peppermint extract in the icing for a seasonal variation.
- Seasonal themes: Swap gel colors to match holidays — pastel for Easter, red and green for Christmas, or bold primary colors for birthday parties.
- Size and shape: Besides letters, use number cutters or simple shapes like stars and hearts to mix it up. For a kid-friendly activity, let them decorate plain round cookies with their favorite icing colors.
- Personal tried variation: One time, I added a tiny pinch of cinnamon and nutmeg to the dough, giving it a cozy warmth that paired wonderfully with the colorful icing — especially for fall baking.
Serving & Storage Suggestions
These cookies are best served at room temperature, allowing the icing to be firm yet tender. They make charming additions to tea parties, school lunchboxes, or festive cookie trays. Pair with a warm cup of milk, tea, or even a fresh fruit punch for a complete treat.
For storage, place cookies in an airtight container layered with parchment paper to keep icing intact. They’ll stay fresh for up to 5 days at room temperature. Avoid refrigeration, which can soften the icing and affect texture.
If you want to save them longer, freeze undecorated cookies wrapped tightly in plastic wrap, then place in a freezer-safe bag for up to 3 months. Thaw completely before icing.
Reheating isn’t necessary, but if you like cookies a little warm, a few seconds in the microwave can soften them slightly — just be careful not to melt the icing.
Interestingly, the flavors tend to mellow and deepen after a day, so sometimes letting cookies sit overnight in their container actually improves the tasting experience.
Nutritional Information & Benefits
Each cookie (depending on size) roughly contains:
| Nutrient | Per Cookie |
|---|---|
| Calories | 120-150 kcal |
| Fat | 6-8g (mostly from butter) |
| Carbohydrates | 18-20g (mainly from sugar and flour) |
| Protein | 1-2g |
| Sugar | 10-12g |
While these cookies are a sweet treat, butter provides some essential fat-soluble vitamins, and eggs add a touch of protein. Using real vanilla extract adds aroma without artificial additives. For those mindful of allergens, keep in mind this recipe contains gluten, dairy, and eggs. Substitutions can help adapt to most dietary needs.
From a wellness perspective, baking at home means control over ingredients and portion sizes, which beats store-bought cookies any day. Plus, the joy and connection these cookies bring are a sweet bonus to your well-being.
Conclusion
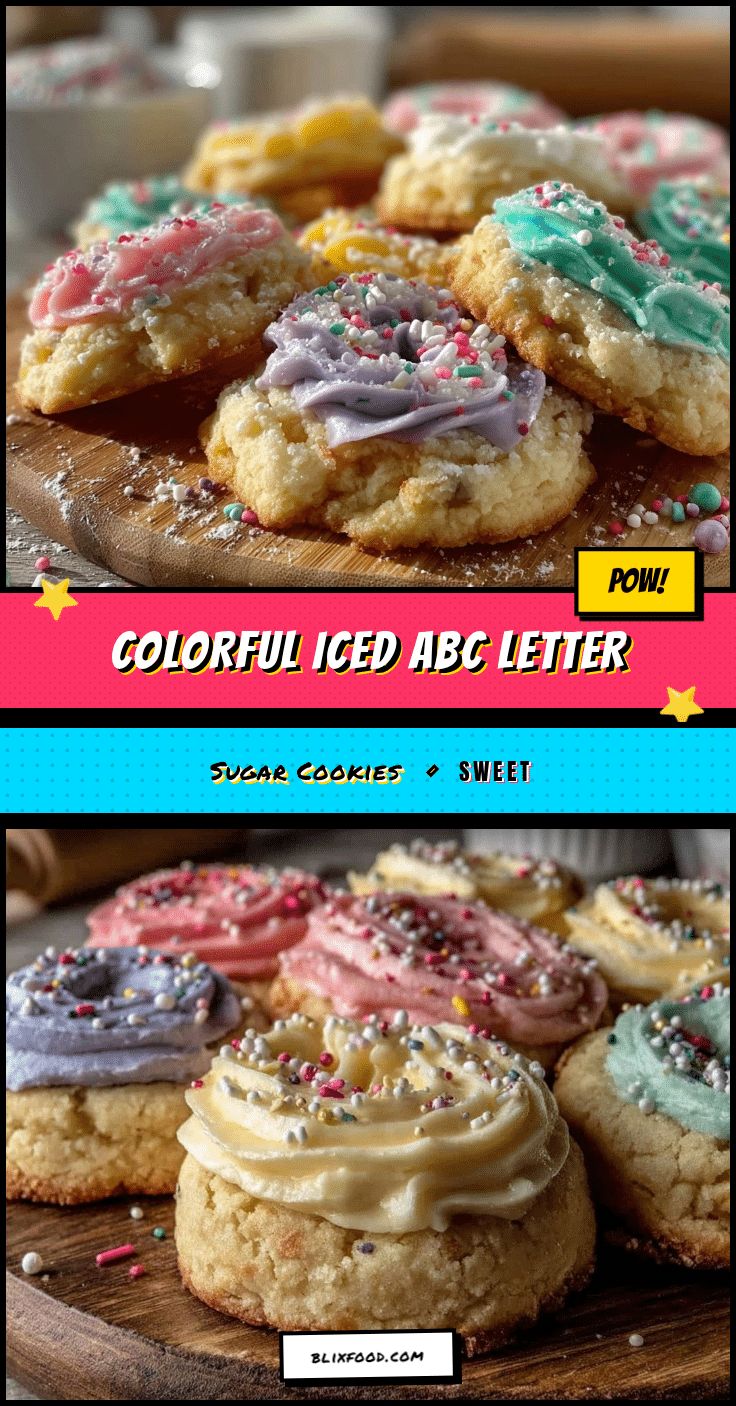
These Perfect ABC Letter Sugar Cookies with Colorful Icing are more than just dessert — they’re a way to bring a little lighthearted fun and creativity into your kitchen. Whether you’re teaching a child their letters, decorating for a party, or simply craving a sweet bake, this recipe offers a reliable, tasty, and visually delightful option.
Feel free to tweak the colors, flavors, or shapes to suit your vibe. I love how this recipe invites personalization and sharing — it’s been a quiet favorite in my house for good reason. If you decide to give it a try, I’d love to hear how your batch turned out or what special touches you added.
Happy baking, and may your cookie jar always be full of color and cheer!
FAQs about Perfect ABC Letter Sugar Cookies
How long do these sugar cookies stay fresh?
Stored in an airtight container at room temperature, they stay fresh for up to 5 days. For longer storage, freeze un-iced cookies for up to 3 months.
Can I use food coloring other than gel?
Gel food coloring is best for vibrant colors without affecting icing consistency. Liquid colors can work but may thin out the icing and dull colors.
What if I don’t have alphabet cookie cutters?
You can carefully cut letters freehand with a sharp knife or use number and shape cutters for variety. Alternatively, simple shapes like stars or hearts work great too.
Can I make these cookies vegan?
Yes! Use vegan butter, a flaxseed or chia egg substitute, and plant-based milk in the dough. For icing, aquafaba can replace meringue powder or egg whites.
How do I fix runny royal icing?
Add a little more powdered sugar gradually to thicken. Also, avoid adding too much water at once — small increments keep control over the consistency.
For a fun savory complement to your baking day, you might enjoy pairing these cookies with some light appetizers like the creamy cheese stuffed cherry tomatoes or the fresh shrimp salad appetizers, balancing sweet and savory flavors wonderfully.
Pin This Recipe!
Perfect ABC Letter Sugar Cookies Recipe Easy Homemade Colorful Icing Tutorial
These ABC letter sugar cookies are quick, easy, and fun to make, featuring crisp edges, tender crumb, and vibrant royal icing decorations perfect for kids and parties.
- Prep Time: 30 minutes
- Cook Time: 10 minutes
- Total Time: 1 hour 40 minutes
- Yield: About 24-30 cookies (depending on size) 1x
- Category: Dessert
- Cuisine: American
Ingredients
- 2 ¾ cups (345g) all-purpose flour, sifted
- 1 teaspoon baking powder
- ½ teaspoon salt
- 1 cup (227g) unsalted butter, softened (room temperature)
- 1 ½ cups (300g) granulated sugar
- 1 large egg, room temperature
- 1 ½ teaspoons pure vanilla extract
- 2 tablespoons heavy cream or whole milk
- 3 cups (360g) powdered sugar, sifted
- 2 tablespoons meringue powder
- 6 tablespoons warm water, adjust as needed
- Gel food coloring in assorted colors
- Optional: ½ teaspoon vanilla or almond extract for icing flavor
Instructions
- Mix the dry ingredients: In a medium bowl, whisk together 2 ¾ cups sifted all-purpose flour, 1 teaspoon baking powder, and ½ teaspoon salt. Set aside.
- Cream butter and sugar: Using an electric mixer, beat 1 cup softened unsalted butter with 1 ½ cups granulated sugar on medium speed for 3-4 minutes until light and fluffy.
- Add egg, vanilla, and cream: Beat in 1 large room-temperature egg, 1 ½ teaspoons vanilla extract, and 2 tablespoons heavy cream. Mix until just combined.
- Combine wet and dry: Gradually add the flour mixture to the wet ingredients, mixing on low speed. Finish combining by hand if needed. Dough should be soft but not sticky.
- Chill the dough: Flatten dough into a disk, wrap tightly with plastic wrap, and refrigerate for at least 1 hour.
- Preheat oven and prepare baking sheets: Preheat oven to 350°F (175°C). Line baking sheets with parchment paper or silicone mats.
- Roll and cut letters: Lightly flour surface and rolling pin. Roll dough to about ¼ inch (6 mm) thick. Use alphabet cookie cutters to cut letters and arrange 1 inch apart on baking sheets.
- Bake: Bake cookies for 8-10 minutes until edges just start to turn golden but cookies remain pale.
- Cool completely: Transfer cookies to wire racks to cool before icing.
- Make royal icing: In a bowl, combine 3 cups powdered sugar and 2 tablespoons meringue powder. Gradually add 6 tablespoons warm water, mixing until smooth. Add optional vanilla or almond extract. Adjust water for thick but pipeable consistency.
- Color and decorate: Divide icing into small bowls, tint with gel food coloring. Use piping bags or plastic bags with small snips to decorate cookies. Let icing dry for several hours or overnight.
Notes
Chill dough for at least 1 hour to keep letter shapes sharp. Use gel food coloring for vibrant icing without thinning. Outline icing first, let crust, then flood for smooth finish. Let decorated cookies dry overnight for best results. If dough is too soft after chilling, refrigerate 15-20 more minutes before rolling. Practice piping on parchment before decorating cookies.
Nutrition
- Serving Size: 1 cookie
- Calories: 120150
- Sugar: 1012
- Sodium: 80100
- Fat: 68
- Saturated Fat: 45
- Carbohydrates: 1820
- Fiber: 1
- Protein: 12
Keywords: sugar cookies, alphabet cookies, royal icing, colorful cookies, kids baking, easy sugar cookies, homemade cookies, letter cookies