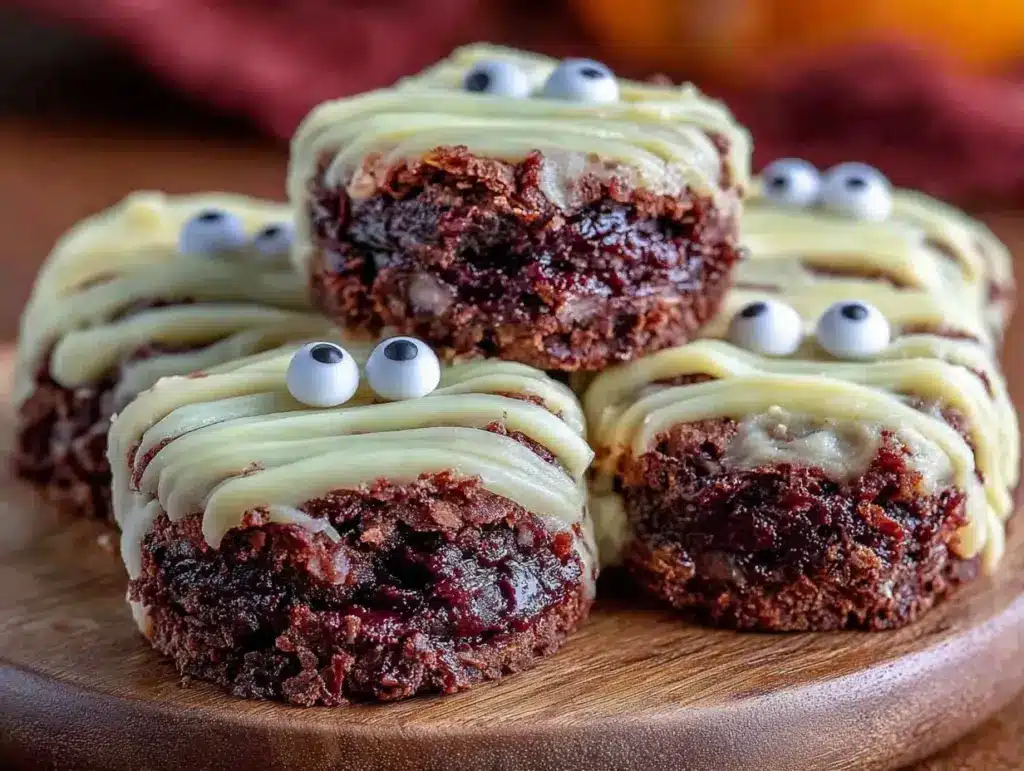
Early October, and the kitchen feels quiet except for the soft hum of the oven. The air smells faintly of melted chocolate and something sweetly nostalgic, like the way Halloween used to feel when I was a kid. The daylight fades outside, but inside, I’m carefully piping thin, white lines over little squares of rich, fudgy brownie—creating the perfect mummy wraps. Those candy eyes, staring up with just the right mix of spooky and silly, always make me smile. This recipe for Perfect Mummy Brownie Bites with White Chocolate and Candy Eyes isn’t just about a Halloween treat; it’s a slow, comforting ritual that pulls a little magic into the everyday kitchen hum. It’s the kind of treat you want to make on a chilly evening when the world outside seems to blur into shadows, and you’re craving something cozy yet playful.
I first stumbled onto this idea after experimenting with white chocolate drizzle on brownies one late October night, hoping to make something fun for a small gathering. The texture of the brownies, dense but tender, combined with the creamy sweetness of the white chocolate ribbons and those quirky candy eyes, just clicked. Honestly, it’s the kind of recipe that sticks because it’s simple, but with personality—like a quiet nod to the Halloween spirit without the fuss or mess. Plus, these bites are easy to share, which means more chances to see that delighted look when someone picks one up.
There’s something quietly satisfying about crafting each mummy bite by hand, layering ribbons of white chocolate slowly and deliberately, like wrapping a tiny edible bandage. It’s not rushed, it’s not flashy, but it’s exactly what you want when you’re settling into the season. These Perfect Mummy Brownie Bites with White Chocolate and Candy Eyes hold a little promise: that Halloween treats can be fun, simple, and a touch nostalgic, all in one.
Why You’ll Love This Recipe
Trust me, this isn’t just another Halloween brownie recipe. Over many seasons of testing and tweaking, I’ve found this version to be the most satisfying for a few reasons:
- Quick & Easy: You’ll have these ready in under an hour, making them perfect for last-minute Halloween parties or unexpected trick-or-treat visitors.
- Simple Ingredients: No need to hunt down specialty items—most ingredients are pantry staples, and the candy eyes are just a fun finishing touch.
- Perfect for Halloween Parties: These bites charm kids and adults alike, fitting in perfectly with spooky spreads or alongside more savory options like a zesty garlic marinated mushroom appetizer.
- Crowd-Pleaser: The chewy, fudgy brownie base combined with the sweet, creamy white chocolate stripes makes these bites an instant hit every time.
- Unbelievably Delicious: The contrast between the deep chocolate flavor and the delicate white chocolate wrap is just right—never too sweet or overwhelming.
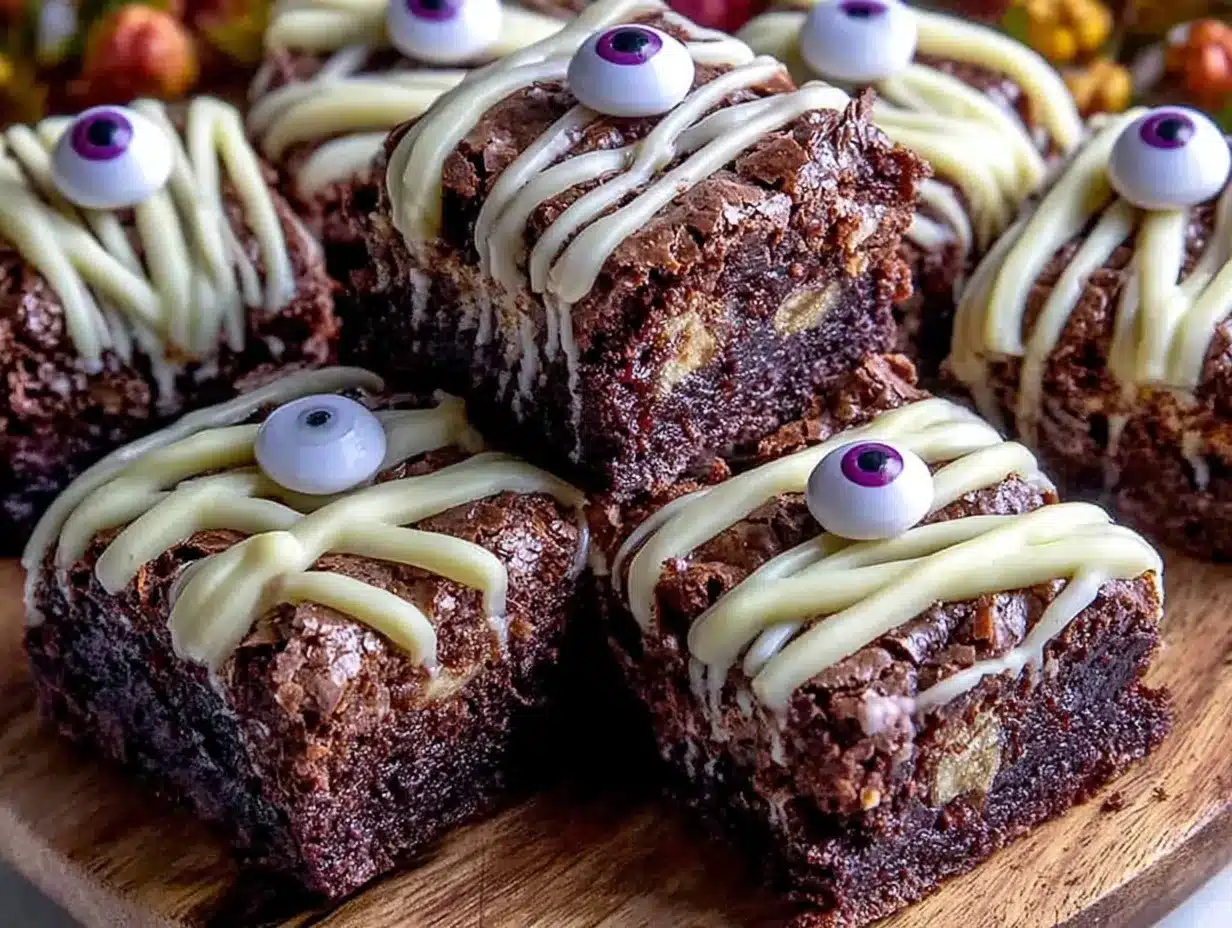
What really sets these Perfect Mummy Brownie Bites apart is the way the white chocolate is applied. Instead of a simple drizzle, the thin, deliberate lines mimic mummy wrappings in a way that’s playful but elegant. Plus, I’ve found that using a small piping bag rather than just drizzling with a spoon gives a cleaner, more professional look (even if you’re just making these for yourself). The candy eyes, of course, are the final whimsical touch that brings these brownies to life.
This recipe isn’t just about a sweet snack; it’s about capturing a quiet moment of joy in the middle of October, turning the familiar into something a little more festive without fuss or stress.
What Ingredients You Will Need
This recipe uses simple, wholesome ingredients to bring a rich, fudgy brownie base wrapped with creamy white chocolate “bandages” and playful candy eyes. Most of these are pantry staples, and the candy eyes add that perfect Halloween touch without much effort.
- For the Brownie Base:
- Unsalted butter – 1/2 cup (113g), melted (adds richness and keeps brownies moist)
- Granulated sugar – 1 cup (200g)
- Brown sugar – 1/2 cup (110g), packed (for a deep caramel flavor)
- Large eggs – 2, room temperature
- Pure vanilla extract – 1 tsp
- All-purpose flour – 3/4 cup (95g)
- Unsweetened cocoa powder – 1/3 cup (35g), sifted (I recommend Valrhona for the best chocolate depth)
- Salt – 1/4 tsp
- Chocolate chips or chunks – 1/2 cup (90g), optional for extra gooey pockets
- For the White Chocolate “Mummy Wraps”:
- White chocolate chips or candy melts – 1 cup (170g), good quality (I prefer Ghirardelli for smooth melting)
- Vegetable oil – 1 tsp (optional, for thinning chocolate to pipe easily)
- Decoration:
- Candy eyeballs – about 24 pieces (depending on brownie bites) – available at most baking supply stores or online
If you’re short on candy eyes, you can also make your own with tiny dots of black icing or melted dark chocolate on white chocolate discs. For a gluten-free version, swapping the all-purpose flour for almond flour works surprisingly well, though the texture will be a bit different.
Equipment Needed
- 8×8 inch (20×20 cm) square baking pan – for the brownie base. You can also use a round pan, but square makes cutting easy.
- Mixing bowls – one for wet ingredients, one for dry.
- Whisk and spatula – for mixing batter.
- Small piping bag or resealable plastic bag – for piping the white chocolate wraps. A zip-top bag with a tiny corner snipped works fine if you don’t have a piping set.
- Microwave-safe bowl or double boiler – to melt white chocolate.
- Cooling rack – to let brownies cool completely before decorating.
- Toothpicks or small offset spatula – handy for adjusting candy eyes placement.
If you don’t have a cooling rack, placing the pan on a folded kitchen towel helps the brownies cool evenly. I used to try piping with a spoon before discovering the magic of a piping bag—it really makes those mummy lines look neat and deliberate. For melting white chocolate, I find a double boiler gives better control and prevents burning, but a microwave in short bursts works too (just watch it closely!).
Preparation Method
- Preheat your oven to 350°F (175°C). Lightly grease your 8×8 inch baking pan or line it with parchment paper, leaving a bit overhang for easy removal.
- Mix the wet ingredients: In a medium bowl, whisk together the melted unsalted butter, granulated sugar, and brown sugar until smooth and glossy. Add the eggs one at a time, whisking well after each addition. Stir in vanilla extract.
- Prepare the dry ingredients: In a separate bowl, sift together the flour, unsweetened cocoa powder, and salt.
- Combine wet and dry: Add the dry ingredients gradually into the wet mixture, folding gently with a spatula just until combined. Avoid overmixing—some streaks of flour are okay. If using chocolate chips, fold them in now.
- Pour the batter into the prepared pan and spread evenly with a spatula. Tap the pan lightly on the counter to remove air bubbles.
- Bake for 25-30 minutes, or until a toothpick inserted near the center comes out with a few fudgy crumbs but not wet batter. The brownies should feel set but soft when you press the surface gently.
- Cool completely: Remove the brownies from the oven and place the pan on a cooling rack. Let them cool fully (about 1 hour) before decorating. This step is key so the white chocolate doesn’t melt or smear.
- Melt the white chocolate: Using a double boiler or microwave, gently melt the white chocolate chips with 1 teaspoon of vegetable oil. Stir until smooth and slightly runny but not too thin.
- Cut brownies into bite-sized squares (about 1½ inch / 4 cm each). Place candy eyes on each square, gently pressing to secure.
- Pipe the mummy wraps: Transfer the melted white chocolate to a piping bag or plastic bag with a small tip/snipped corner. Draw thin, uneven lines across each brownie bite to mimic mummy bandages. Let the lines overlap slightly but don’t cover the candy eyes completely.
- Set the chocolate: Allow the white chocolate to harden at room temperature for about 15-20 minutes, or speed up by chilling in the fridge for 10 minutes.
If the white chocolate thickens while piping, gently rewarm it in short bursts. And if you accidentally smudge a line, a toothpick dipped in warm water helps smooth it out. I learned the hard way that patience during cooling makes all the difference here.
Cooking Tips & Techniques
Getting the perfect texture and look for these Perfect Mummy Brownie Bites takes a few careful moves:
- Don’t overbake your brownies. You want them fudgy, not cakey. Pull them out just as edges start to set but the center still jiggles slightly.
- Cool completely before decorating. This might feel like waiting forever, but trust me, white chocolate won’t behave if the brownies are warm.
- Use a piping bag for precision. Trying to drizzle with a spoon leads to messy, uneven “bandages.” A small tip or snipped corner of a bag lets you control the width and flow.
- Thin the white chocolate slightly. Adding a teaspoon of vegetable oil or shortening makes it easier to pipe those thin lines without breaking.
- Practice your piping on parchment paper first. It helps get a feel for the flow and spacing of the mummy wraps before committing to the brownies.
- Work in small batches. If you’re making a lot, melt white chocolate in portions to keep it from hardening mid-piping.
I once tried piping all the white chocolate at once and ended up with a clumpy mess. Lesson learned: slow and steady wins the mummy race. Also, placing candy eyes before the white chocolate hardens lets them stick naturally without extra glue or frosting.
Variations & Adaptations
While the classic chocolate and white chocolate combo is hard to beat, you can tweak these treats to suit different tastes or occasions:
- Peanut Butter Mummy Brownies: Swirl peanut butter into your brownie batter before baking for a nutty layer beneath the mummy wraps.
- Dark Chocolate Mummies: Use dark chocolate candy melts instead of white chocolate for a spookier, more intense look.
- Gluten-Free Version: Swap the all-purpose flour for an equal amount of almond flour or a gluten-free baking blend for fudgy bites that everyone can enjoy.
- Vegan Adaptation: Use flax eggs (1 tbsp flaxseed meal + 3 tbsp water per egg) and dairy-free butter. Choose dairy-free white chocolate or coconut-based candy melts.
- Seasonal Twist: Add a pinch of pumpkin pie spice to the batter for an autumnal flavor that pairs beautifully with the chocolate.
One of my favorite tweaks was adding a handful of chopped toasted pecans into the batter for extra crunch—reminded me of the nutty accents in a festive cranberry cream cheese spread I love serving at holiday gatherings. It’s a little unexpected but so good.
Serving & Storage Suggestions
These Perfect Mummy Brownie Bites are best served at room temperature so the brownies are soft and the white chocolate “bandages” have a gentle snap. Arrange them on a festive platter with other Halloween treats or pair with a glass of cold milk for the ultimate nostalgic snack.
If you’re hosting a party, these bites fit right in with savory options like creamy spinach artichoke dip or crispy garlic butter shrimp bites for a well-rounded spread.
To store, keep the mummy bites in an airtight container at room temperature for up to 3 days. For longer storage, refrigerate for up to a week or freeze unwrapped brownie squares before decorating for up to 2 months (decorate after thawing). When reheating refrigerated bites, let them come to room temperature for the best texture—microwaving can make the white chocolate sweat or melt.
Interestingly, the flavors tend to deepen after a day, with the chocolate becoming even more pronounced. So if you have the patience, make these a day ahead and enjoy the mellowed richness.
Nutritional Information & Benefits
Each Perfect Mummy Brownie Bite contains roughly 120-140 calories, depending on size and exact ingredients. The brownies provide a good dose of energy from the combination of sugar, butter, and cocoa, making them a satisfying treat for an occasional indulgence.
Cocoa powder is rich in antioxidants and has mood-enhancing properties, which feels fitting for a Halloween treat designed to bring a smile. Using quality white chocolate with less artificial additives makes for a cleaner flavor and fewer processed ingredients.
For those watching allergens, note that this recipe contains dairy, eggs, and gluten (unless adapted). Substituting with gluten-free flour and dairy-free alternatives can make it suitable for many dietary preferences.
Personally, I appreciate that this recipe balances indulgence with simplicity, allowing me to enjoy a sweet moment without feeling weighed down—perfect for a seasonal treat that’s more about fun and flavor than excess.
Conclusion
These Perfect Mummy Brownie Bites with White Chocolate and Candy Eyes are truly a little slice of Halloween joy. They’re easy enough to whip up on a weekday evening but special enough to bring a touch of whimsy to your seasonal celebrations. I love how the combination of fudgy brownies, creamy white chocolate ribbons, and playful candy eyes turns simple ingredients into something memorable.
Feel free to customize the flavors or decorations to fit your style—whether that means adding a sprinkle of sea salt, swapping in vegan ingredients, or trying out a seasonal spice. It’s your chance to make a quiet, sweet moment in the kitchen that feels just right for this time of year.
I’d love to hear how your mummy brownies turn out or what creative twists you add. Sharing recipes and stories like this is what makes cooking feel like a small, comforting ritual. Here’s hoping these bites bring a little spooky fun and lots of smiles to your Halloween table.
FAQs About Perfect Mummy Brownie Bites
Can I make the brownies ahead of time?
Yes! Bake and cool the brownies a day in advance. Store them wrapped tightly at room temperature, then decorate with white chocolate and candy eyes when ready to serve.
What if I don’t have candy eyes?
No worries. You can use small dots of melted dark chocolate or black icing on white chocolate discs to create eyes. Alternatively, mini chocolate chips can work for a simpler look.
Can I use dark or milk chocolate instead of white chocolate for the mummy wraps?
Absolutely. Dark chocolate or milk chocolate can be melted and piped similarly, giving a different but equally tasty effect.
How do I prevent the white chocolate from seizing when melting?
Use gentle, low heat—either a double boiler or microwave in short 20-second bursts, stirring frequently. Adding a teaspoon of vegetable oil helps keep it smooth.
Are these brownies gluten-free?
The base recipe uses all-purpose flour, but you can substitute a gluten-free baking blend or almond flour to make them gluten-free. Texture will vary slightly.
Pin This Recipe!
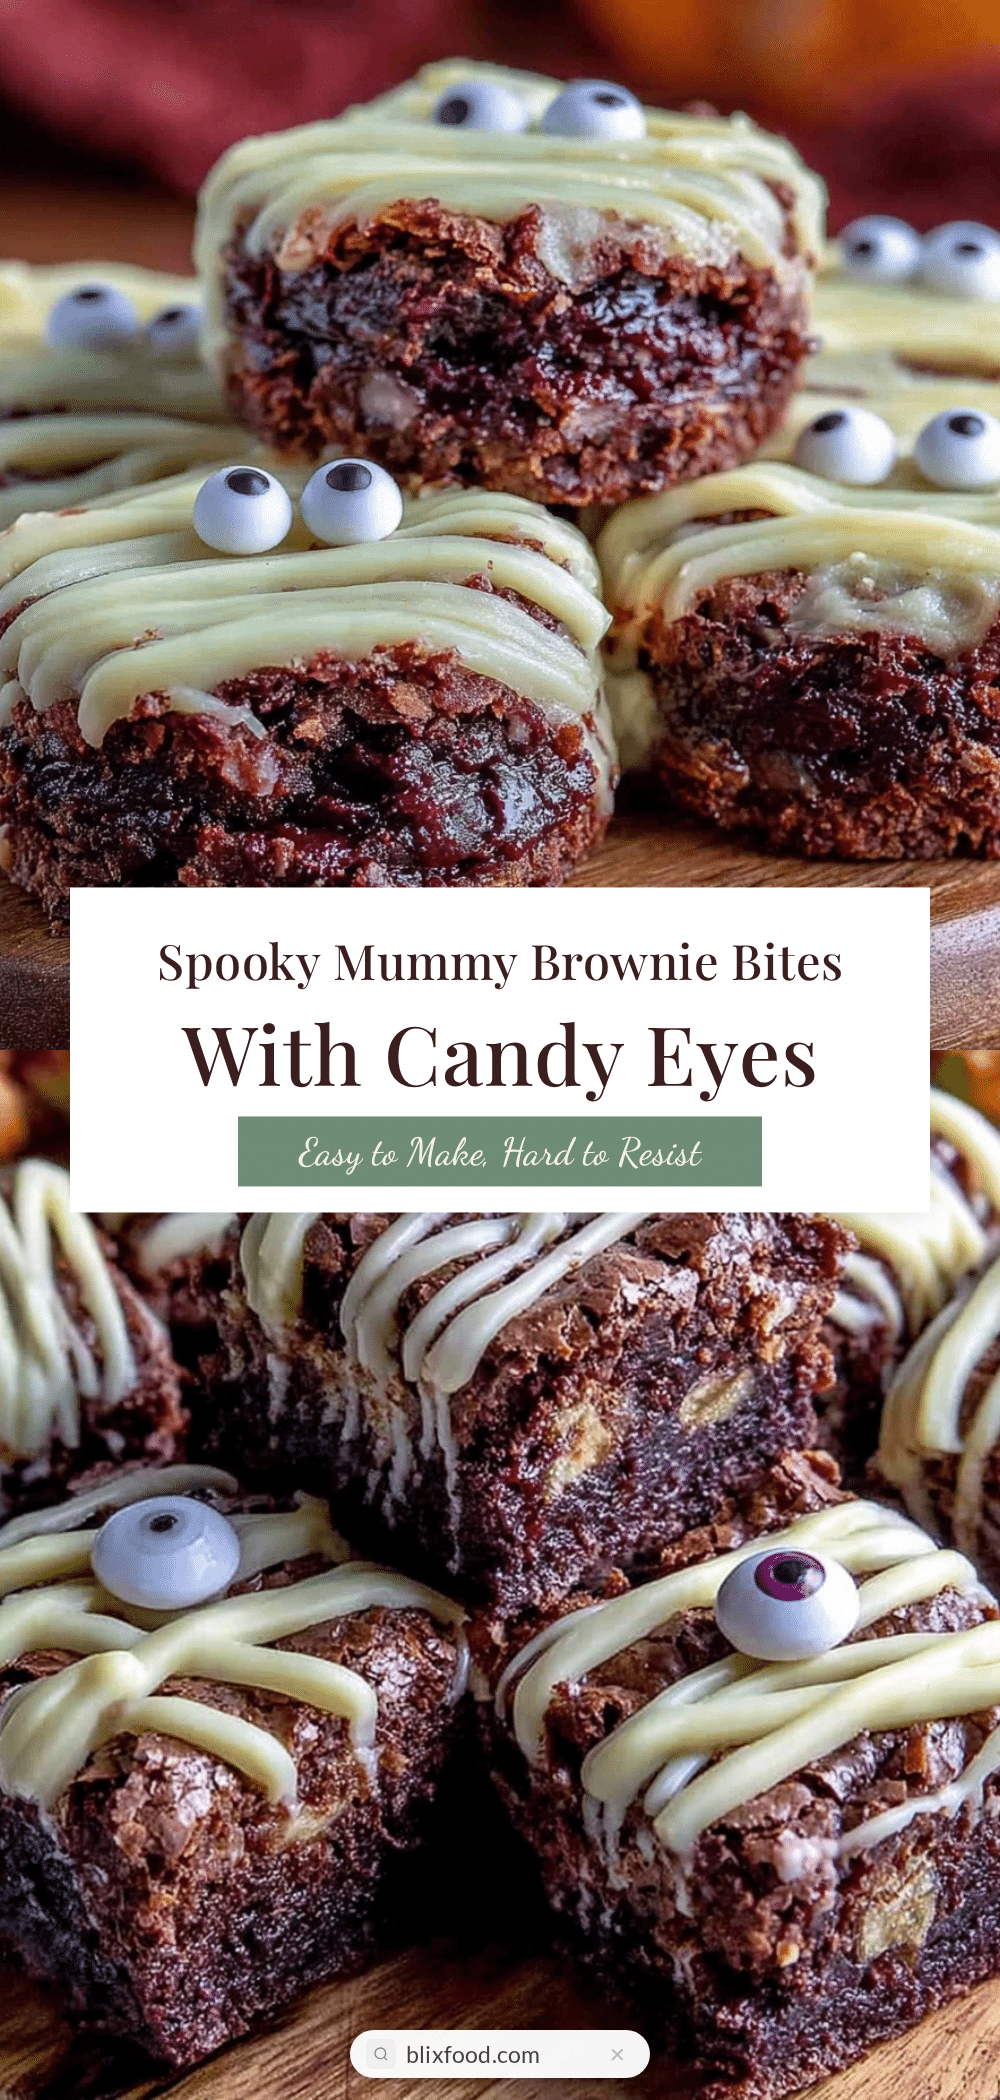
Perfect Mummy Brownie Bites Recipe Easy Homemade Halloween Treats with White Chocolate Candy Eyes

These Perfect Mummy Brownie Bites combine a rich, fudgy brownie base with creamy white chocolate ribbons and playful candy eyes, making a fun and nostalgic Halloween treat that’s quick and easy to prepare.
- Prep Time: 15 minutes
- Cook Time: 30 minutes
- Total Time: 1 hour 45 minutes
- Yield: 24 brownie bites 1x
- Category: Dessert
- Cuisine: American
Ingredients
- 1/2 cup (113g) unsalted butter, melted
- 1 cup (200g) granulated sugar
- 1/2 cup (110g) brown sugar, packed
- 2 large eggs, room temperature
- 1 tsp pure vanilla extract
- 3/4 cup (95g) all-purpose flour
- 1/3 cup (35g) unsweetened cocoa powder, sifted
- 1/4 tsp salt
- 1/2 cup (90g) chocolate chips or chunks (optional)
- 1 cup (170g) white chocolate chips or candy melts
- 1 tsp vegetable oil (optional, for thinning chocolate)
- About 24 candy eyeballs
Instructions
- Preheat your oven to 350°F (175°C). Lightly grease an 8×8 inch baking pan or line it with parchment paper, leaving a bit overhang for easy removal.
- In a medium bowl, whisk together the melted unsalted butter, granulated sugar, and brown sugar until smooth and glossy. Add the eggs one at a time, whisking well after each addition. Stir in vanilla extract.
- In a separate bowl, sift together the flour, unsweetened cocoa powder, and salt.
- Add the dry ingredients gradually into the wet mixture, folding gently with a spatula just until combined. Avoid overmixing—some streaks of flour are okay. If using chocolate chips, fold them in now.
- Pour the batter into the prepared pan and spread evenly with a spatula. Tap the pan lightly on the counter to remove air bubbles.
- Bake for 25-30 minutes, or until a toothpick inserted near the center comes out with a few fudgy crumbs but not wet batter. The brownies should feel set but soft when you press the surface gently.
- Remove the brownies from the oven and place the pan on a cooling rack. Let them cool fully (about 1 hour) before decorating.
- Using a double boiler or microwave, gently melt the white chocolate chips with 1 teaspoon of vegetable oil. Stir until smooth and slightly runny but not too thin.
- Cut brownies into bite-sized squares (about 1½ inch / 4 cm each). Place candy eyes on each square, gently pressing to secure.
- Transfer the melted white chocolate to a piping bag or plastic bag with a small tip/snipped corner. Draw thin, uneven lines across each brownie bite to mimic mummy bandages. Let the lines overlap slightly but don’t cover the candy eyes completely.
- Allow the white chocolate to harden at room temperature for about 15-20 minutes, or speed up by chilling in the fridge for 10 minutes.
Notes
Do not overbake the brownies to keep them fudgy. Cool completely before decorating to prevent white chocolate from melting or smearing. Use a piping bag for neat mummy wraps. Thin white chocolate with vegetable oil for easier piping. Practice piping on parchment paper first. Work in small batches when melting white chocolate to avoid hardening mid-piping. Candy eyes can be substituted with small dots of melted dark chocolate or black icing on white chocolate discs.
Nutrition
- Serving Size: 1 brownie bite (abou
- Calories: 130
- Sugar: 14
- Sodium: 55
- Fat: 7
- Saturated Fat: 4
- Carbohydrates: 18
- Fiber: 1
- Protein: 2
Keywords: Halloween brownies, mummy brownie bites, white chocolate brownies, Halloween treats, easy brownie recipe, candy eyes brownies, fudgy brownies