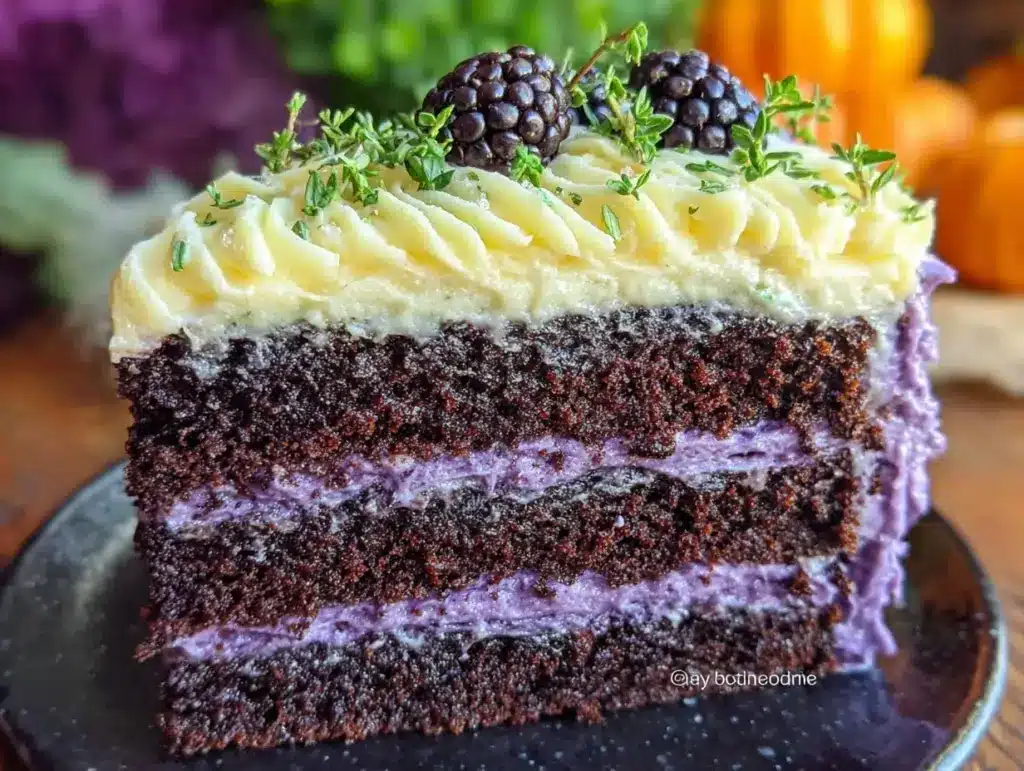
I figured a spooky Halloween cake means black and orange—turns out, purple can steal the show. When I first thought about making a Decadent Black Velvet Halloween Layer Cake with Purple Ombre Frosting, I imagined a simple black cake with the usual orange frosting. But as I got into it, the deep, rich black layers paired with a dreamy purple gradient frosting completely flipped my expectations. The cake was moist beyond belief, with a slight cocoa undertone that didn’t scream “Halloween kitsch” but whispered it elegantly. The frosting? Smooth, creamy, and that slow fade from light lilac to royal purple looked so good it almost felt wrong to cut into it.
There was a moment, right after I spread the first layer of frosting, when I realized this wasn’t just another holiday dessert. It was the kind of cake you’d want to bring out not just for Halloween but for any time you need to impress without fussing over complicated recipes or hard-to-find ingredients. Honestly, the whole process taught me that Halloween baking doesn’t have to be loud or cheesy; it can be sleek, indulgent, and just a touch unexpected.
After trying this recipe a few times—each iteration getting better—I finally settled on this version because it hits the sweet spot between dramatic and doable. If you like cakes that look like art but taste like a hug, this black velvet with purple ombre frosting is your new go-to. It’s a little mysterious, a little playful, and just the right kind of decadent to make you feel like you nailed Halloween without even trying that hard.
Why You’ll Love This Recipe
- Quick & Easy: The cake comes together in under 1 hour of active prep, making it perfect for last-minute Halloween plans.
- Simple Ingredients: No need for specialty stores—basic pantry items and a few common baking staples make this a breeze.
- Perfect for Halloween Parties: The black velvet layers paired with purple ombre frosting create a festive yet elegant centerpiece.
- Crowd-Pleaser: Kids and adults alike rave about the tender crumb and smooth cream cheese frosting with just the right hint of tang.
- Unbelievably Delicious: The cocoa-infused layers and subtly tangy frosting blend into a flavor combo that feels indulgent but never too sweet.
This isn’t just another Halloween cake—you’ll notice the care in the way the black velvet gets that deep, almost smoky cocoa flavor without bitterness. The purple ombre frosting isn’t just for looks either; the cream cheese base keeps it luscious and balanced. I’ve tried versions with orange and green, but the purple gradient adds a kind of mysterious charm that surprises every time. Also, mixing the frosting colors in graduated bowls is way less finicky than I feared—just a few swipes of the spatula, and you get a stunning fade effect that looks like you spent hours fussing over it.
Honestly, this cake fits the bill when you want a dessert that feels special but won’t leave you exhausted by the time guests arrive. Whether you’re hosting a spooky soirée or just craving something seasonal with a twist, this recipe holds its own and then some.
What Ingredients You Will Need
This recipe uses simple, wholesome ingredients to deliver bold flavor and satisfying texture without the fuss. Most are pantry staples you probably have on hand, and substitutions are super forgiving.
- For the Black Velvet Cake Layers:
- All-purpose flour (2 ½ cups / 312g) – for structure and tenderness
- Granulated sugar (2 cups / 400g) – the perfect sweetness level
- Unsweetened cocoa powder (¾ cup / 75g) – I recommend a natural cocoa like Hershey’s for that sharp, deep flavor
- Baking soda (1 ½ tsp) – helps the cake rise nicely
- Baking powder (1 tsp) – adds lightness
- Salt (1 tsp) – balances the sweetness
- Buttermilk (1 ½ cups / 360ml), room temperature – lends moisture and tang; if unavailable, mix 1 ½ cups milk with 1 ½ tbsp lemon juice and let sit 5 minutes
- Vegetable oil (1 cup / 240ml) – keeps the crumb tender
- Large eggs (3), room temperature – for richness and structure
- Vanilla extract (2 tsp) – adds warmth and depth
- Black food coloring (2 tbsp) – gel or paste form works best for that intense black without altering the batter’s consistency
- For the Purple Ombre Cream Cheese Frosting:
- Cream cheese (16 oz / 450g), softened – the creamy base that’s never too sweet
- Unsalted butter (½ cup / 113g), softened – for smooth texture and richness
- Powdered sugar (4 cups / 480g), sifted – for sweetness and structure
- Vanilla extract (1 tsp) – subtle flavor enhancer
- Milk or heavy cream (2-3 tbsp as needed) – to loosen frosting if it feels too thick
- Purple gel food coloring – to create the ombre effect (a little goes a long way)
If you’re looking for a gluten-free option, swapping the flour for a 1:1 gluten-free baking blend works well here, though the texture will be slightly different. For dairy-free, coconut cream cheese and vegan butter substitutes can hold their own, though the frosting may be less stable at room temperature. I’ve personally stuck with traditional dairy for the creamiest finish.
Equipment Needed
- Two 8-inch round cake pans (preferably non-stick or well-greased) – a must for those perfectly even layers
- Mixing bowls (at least 3) – to separate batter and frosting colors easily
- Electric mixer (stand or hand-held) – speeds up creaming and frosting, though a sturdy whisk can work in a pinch
- Measuring cups and spoons – accuracy matters for baking
- Rubber spatula – great for scraping bowls and smoothing frosting
- Offset spatula or butter knife – essential for that smooth frosting finish
- Cooling racks – prevent soggy cake bottoms
- Food coloring brushes or toothpicks – for controlling purple frosting shades during ombre assembly
Personally, I’ve found investing in a good quality offset spatula makes frosting much less of a hassle. If you don’t have cake pans, you can use a 9×13-inch pan and slice into layers after baking, but it’s more fiddly. For those tight on budget, silicone pans are a forgiving alternative and clean up easily. Just be sure to check your oven temp because baking times might shift slightly with different pans.
Preparation Method
- Preheat and Prep: Preheat your oven to 350°F (175°C). Grease and flour your two 8-inch pans or line them with parchment paper. This helps the cakes release cleanly after baking.
- Mix Dry Ingredients: In a large bowl, sift together 2 ½ cups flour, ¾ cup cocoa powder, 2 cups sugar, 1 ½ tsp baking soda, 1 tsp baking powder, and 1 tsp salt. Whisk these gently to combine. This ensures your cocoa and leavening agents are evenly distributed, preventing any bitter pockets or lopsided rising.
- Mix Wet Ingredients: In a separate bowl, whisk together 1 ½ cups buttermilk, 1 cup vegetable oil, 3 large eggs, 2 tsp vanilla extract, and 2 tbsp black gel food coloring. The color will be dark but not jet black yet—don’t worry, it deepens in the oven.
- Combine Wet and Dry: Slowly add the wet mixture to the dry ingredients, stirring gently with a spatula until just combined. Overmixing is the enemy here; it can make the cake dense. The batter should be smooth and pourable but not runny.
- Bake: Divide the batter evenly between the two pans (about 3 cups batter per pan). Bake at 350°F (175°C) for 30-35 minutes, or until a toothpick inserted in the center comes out clean or with a few moist crumbs. The cake will spring back lightly when touched.
- Cool: Let the cakes cool in their pans for 15 minutes, then transfer to wire racks to cool completely. This step is crucial because frosting warm cake can turn it into a crumbly mess.
- Prepare Frosting: In a large bowl, beat 16 oz softened cream cheese and ½ cup softened unsalted butter until smooth and fluffy (about 3-4 minutes). Gradually add 4 cups powdered sugar, mixing on low speed until incorporated, then increase speed to medium-high and beat until creamy. Add 1 tsp vanilla and 2-3 tbsp milk or cream to achieve desired consistency.
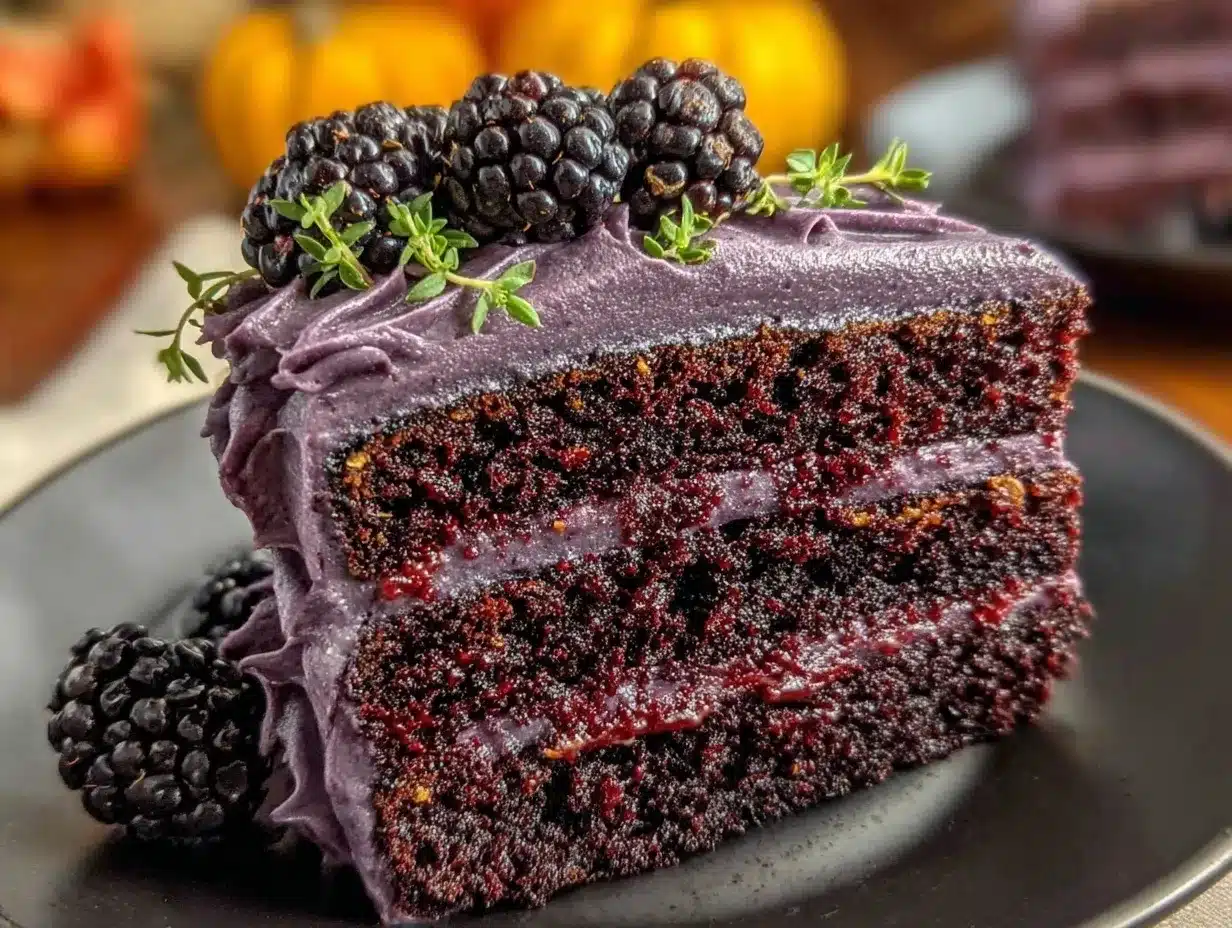
- Create Purple Ombre: Divide frosting into 4 bowls. Leave one bowl white or very pale purple, then tint the others with increasing amounts of purple gel food coloring to create a light-to-dark gradient. I usually start with just a tiny dot in the first bowl and add a little more into the last—remember, gel color is potent!
- Assemble the Cake: Place one cake layer on your serving plate. Spread the lightest purple frosting evenly over the top (about ½ cup). Add the second cake layer. Use the medium-light purple frosting to cover the top and sides, then repeat with the medium and darkest shades to finish the ombre effect on the sides. Smooth the frosting with an offset spatula, blending the colors gently where they meet for a seamless gradient.
- Chill and Set: Refrigerate the cake for at least one hour before serving. This helps the frosting firm up for clean slices and lets the flavors meld beautifully.
If your frosting feels too thick while spreading, don’t hesitate to add a splash more milk. Conversely, if it’s too thin, a bit more powdered sugar will thicken it up. Also, take your time smoothing the frosting—rushing this step can make the ombre effect look patchy.
Cooking Tips & Techniques
One trick I learned the hard way is to really trust the buttermilk in this black velvet cake. It keeps the crumb moist and adds a slight tang that balances the cocoa’s bitterness. Skimping on it or using straight milk will make the cake taste flat and dry.
When mixing the batter, folding gently is your friend. Overmixing develops gluten and results in a chewy cake, which is the last thing you want here.
For the frosting, softened cream cheese and butter are key. If they’re too cold, the frosting will be lumpy; too warm, and it can get runny. I usually leave them out for about an hour at room temperature before starting.
Creating the purple ombre effect is easier than it looks. Use small bowls for each shade and a clean spatula or spoon to apply each layer. Don’t press too hard when smoothing the frosting—light, even strokes help blend the colors naturally.
Lastly, chilling the assembled cake is a lifesaver. It firms up the frosting and makes slicing neater. I’ve found that a sharp serrated knife dipped in hot water and wiped dry before cutting also helps get clean cake slices without dragging crumbs.
Variations & Adaptations
- Flavor Twist: Add 1 tsp espresso powder to the dry ingredients for a mocha black velvet that’s subtly complex.
- Seasonal Spin: Swap the purple ombre frosting for a green gradient for a witchy vibe or deep orange for a classic Halloween look.
- Dietary Adaptation: Use almond flour or a gluten-free flour blend instead of all-purpose for a gluten-free cake. Be mindful that texture will be slightly different but still delicious.
- Alternative Frosting: Substitute cream cheese frosting with a stabilized whipped coconut cream for a dairy-free and lighter option—perfect for warm weather Halloween parties.
- Personal Variation: I once added a thin layer of homemade blackberry jam between the cake layers for a tart surprise that paired beautifully with the purple theme.
For those interested in different techniques, you could bake the cake layers in a sheet pan and cut them into fun shapes like bats or pumpkins, then stack and frost as usual. It’s a playful way to mix things up at your Halloween gathering.
Serving & Storage Suggestions
This cake is best served chilled or at cool room temperature. The cream cheese frosting firms up nicely when cold but softens just right when left out for 15-20 minutes before slicing.
Pair it with a simple black coffee or a spiced chai latte to complement the cake’s richness and subtle cocoa notes. For a party, sliced fresh blackberries or a drizzle of raspberry coulis on the side add a lovely tart contrast.
Store leftover cake in an airtight container in the refrigerator for up to 4 days. You can also freeze individual slices wrapped tightly in plastic wrap and foil for up to 2 months; thaw overnight in the fridge before serving.
When reheating, avoid microwaving as it can ruin the frosting. Instead, let slices warm at room temperature to bring out the flavor and soften the cream cheese frosting naturally.
Over time, the flavors meld beautifully—the cocoa intensifies, and the tang of the frosting becomes more pronounced, making the cake even more enjoyable the next day.
Nutritional Information & Benefits
One slice of this decadent black velvet cake (about 1/12th of the cake) contains approximately:
| Calories | 380 kcal |
|---|---|
| Fat | 22g |
| Carbohydrates | 42g |
| Protein | 5g |
| Sugar | 32g |
Key ingredients like cocoa powder offer antioxidants, and the cream cheese adds a dose of calcium and protein. This cake isn’t low-calorie by any means, but it’s a treat that balances indulgence with some wholesome ingredients, especially when you bake it from scratch.
It’s naturally gluten-containing unless substituted, and contains dairy and eggs, so those with allergies should consider the adaptations mentioned earlier.
From a wellness perspective, making your own cake lets you control the quality of ingredients and avoid preservatives found in store-bought versions. Plus, the simple ingredient list means you know exactly what’s going into your dessert.
Conclusion
This Decadent Black Velvet Halloween Layer Cake with Purple Ombre Frosting is one of those recipes that sneakily becomes a favorite because it’s both stunning and surprisingly straightforward. The rich black velvet layers paired with the creamy purple gradient frosting offer a sophisticated twist on traditional Halloween sweets.
Feel free to tweak the frosting colors or add your own fillings to match your style. I love how this cake turns a seasonal classic into something uniquely elegant yet approachable.
It’s the kind of cake that sparks compliments and invites second slices without any drama. If you try it, I’d love to hear how you made it yours—drop a comment or share your photos to keep the spooky baking fun going!
Happy Halloween baking, and may your kitchen be filled with sweet moments and purple frosting smudges.
FAQs
What makes black velvet cake different from red velvet?
Black velvet cake uses cocoa powder and black food coloring to create a deep black color and richer chocolate flavor, whereas red velvet has a reddish hue with a hint of cocoa and usually uses vinegar and buttermilk for tang.
Can I use regular food coloring instead of gel for the frosting?
Gel food coloring is preferred because it produces vibrant colors without thinning the frosting. Regular liquid food coloring can make the frosting too runny.
How do I prevent the cake from sticking to the pans?
Grease the pans with butter or oil and dust with flour, or line them with parchment paper circles for easy release.
Can I make this cake a day ahead?
Absolutely. Bake and frost the cake a day in advance, then refrigerate. Bring to room temperature before serving for the best texture and flavor.
How do I fix frosting that’s too thick or too thin?
If frosting is too thick, add a teaspoon of milk or cream at a time until spreadable. If too thin, add powdered sugar gradually to thicken it up.
For a Halloween spread that pairs well with this cake, consider some easy party appetizers like the Festive Cranberry Cream Cheese Spread or the Creamy Salmon Dip. Both add a savory contrast to the sweetness and keep your party menu balanced and inviting.
Pin This Recipe!
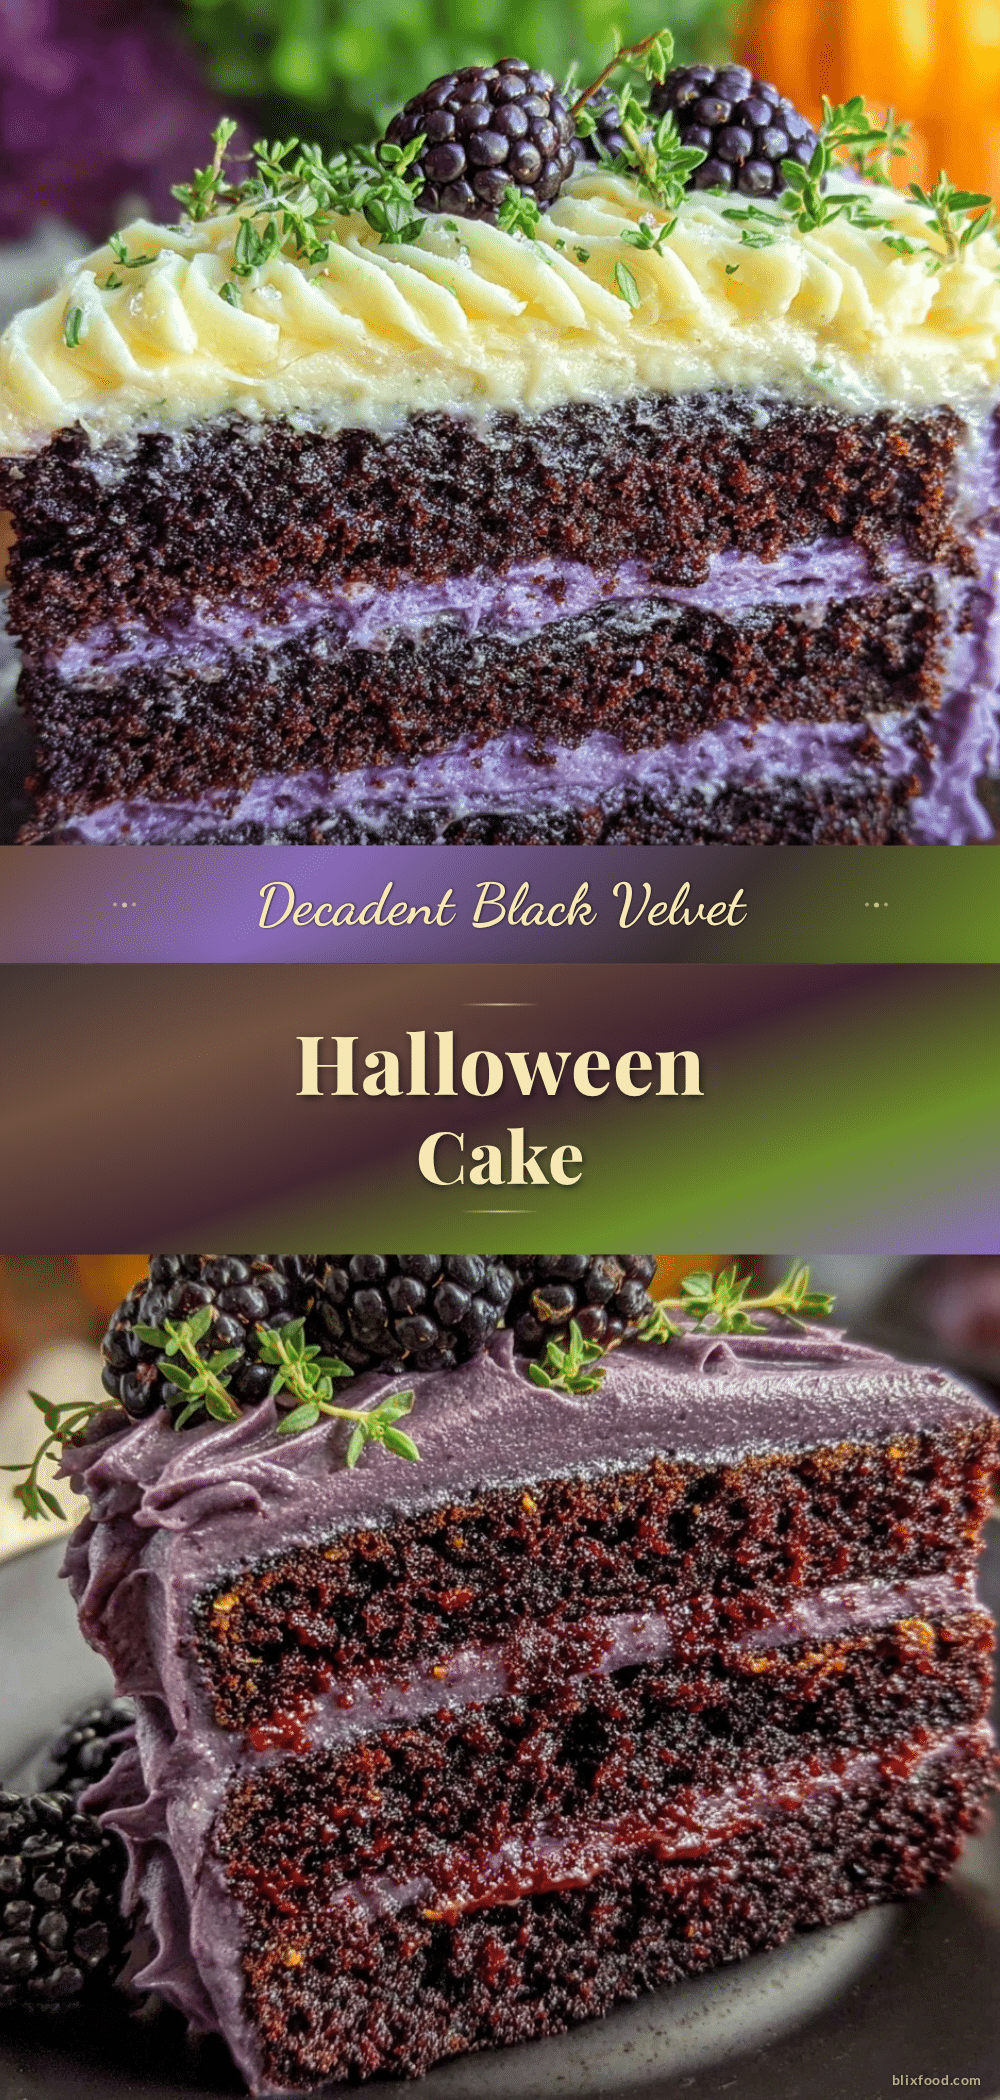
Decadent Black Velvet Halloween Layer Cake with Purple Ombre Frosting
A moist black velvet cake with a slight cocoa undertone paired with a smooth, creamy purple ombre cream cheese frosting. Perfect for Halloween or any occasion needing an elegant, indulgent dessert.
- Prep Time: 20 minutes
- Cook Time: 35 minutes
- Total Time: 1 hour 15 minutes
- Yield: 12 servings 1x
- Category: Dessert
- Cuisine: American
Ingredients
- 2 ½ cups all-purpose flour (312g)
- 2 cups granulated sugar (400g)
- ¾ cup unsweetened cocoa powder (75g), natural cocoa recommended
- 1 ½ tsp baking soda
- 1 tsp baking powder
- 1 tsp salt
- 1 ½ cups buttermilk (360ml), room temperature (or 1 ½ cups milk + 1 ½ tbsp lemon juice, let sit 5 minutes)
- 1 cup vegetable oil (240ml)
- 3 large eggs, room temperature
- 2 tsp vanilla extract
- 2 tbsp black gel food coloring
- 16 oz cream cheese (450g), softened
- ½ cup unsalted butter (113g), softened
- 4 cups powdered sugar (480g), sifted
- 1 tsp vanilla extract
- 2–3 tbsp milk or heavy cream (as needed)
- Purple gel food coloring (amount varies for ombre effect)
Instructions
- Preheat oven to 350°F (175°C). Grease and flour two 8-inch round cake pans or line with parchment paper.
- In a large bowl, sift together flour, cocoa powder, sugar, baking soda, baking powder, and salt. Whisk gently to combine.
- In a separate bowl, whisk together buttermilk, vegetable oil, eggs, vanilla extract, and black gel food coloring.
- Slowly add wet ingredients to dry ingredients, stirring gently with a spatula until just combined. Batter should be smooth and pourable but not runny.
- Divide batter evenly between the two pans (about 3 cups per pan). Bake for 30-35 minutes or until a toothpick inserted in the center comes out clean or with a few moist crumbs.
- Let cakes cool in pans for 15 minutes, then transfer to wire racks to cool completely.
- For frosting, beat cream cheese and butter until smooth and fluffy (3-4 minutes). Gradually add powdered sugar on low speed, then beat on medium-high until creamy.
- Add vanilla extract and milk or cream to reach desired consistency.
- Divide frosting into 4 bowls. Leave one bowl white or very pale purple, tint the others with increasing amounts of purple gel food coloring to create a light-to-dark gradient.
- Place one cake layer on serving plate. Spread lightest purple frosting evenly over the top (about ½ cup).
- Add second cake layer. Use medium-light purple frosting to cover top and sides, then repeat with medium and darkest shades to finish the ombre effect on sides.
- Smooth frosting with an offset spatula, blending colors gently where they meet for a seamless gradient.
- Refrigerate cake for at least 1 hour before serving to firm frosting and meld flavors.
Notes
Use buttermilk for moist crumb and slight tang; avoid overmixing batter to prevent dense cake. Soften cream cheese and butter before frosting to avoid lumps. Use gel food coloring for vibrant frosting without thinning. Chill cake before slicing for clean cuts. A serrated knife dipped in hot water helps slice neatly. Frosting thickness can be adjusted with milk or powdered sugar.
Nutrition
- Serving Size: 1 slice (1/12th of c
- Calories: 380
- Sugar: 32
- Fat: 22
- Carbohydrates: 42
- Protein: 5
Keywords: black velvet cake, Halloween cake, purple ombre frosting, cream cheese frosting, chocolate cake, layered cake, spooky dessert