Introduction
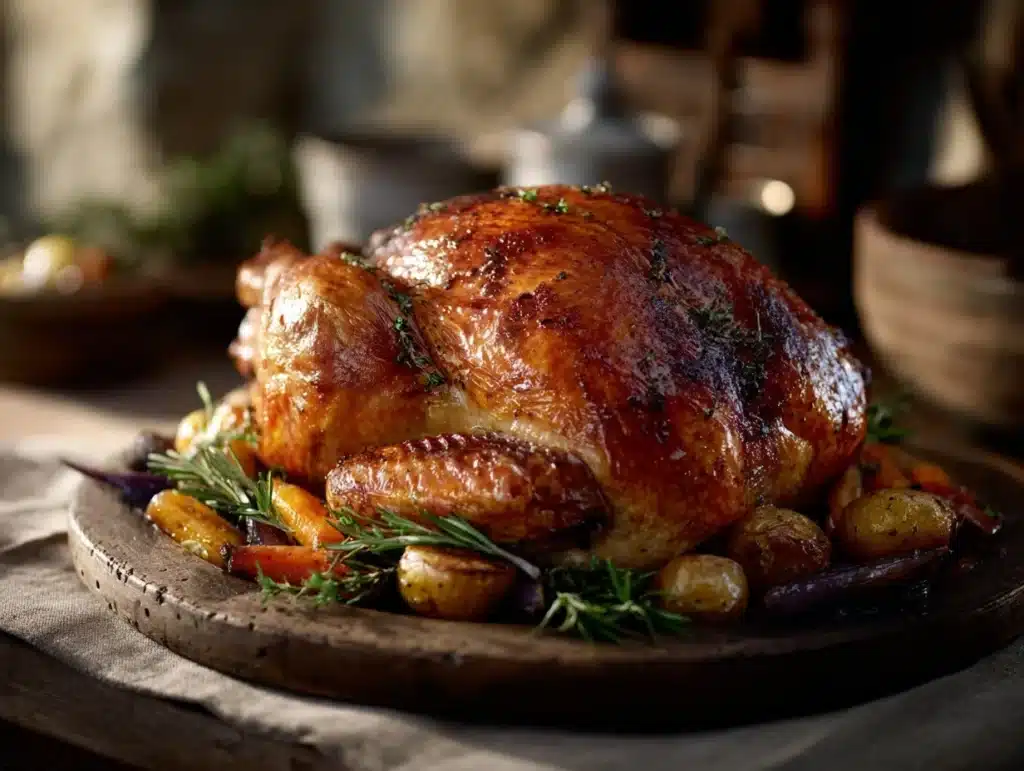
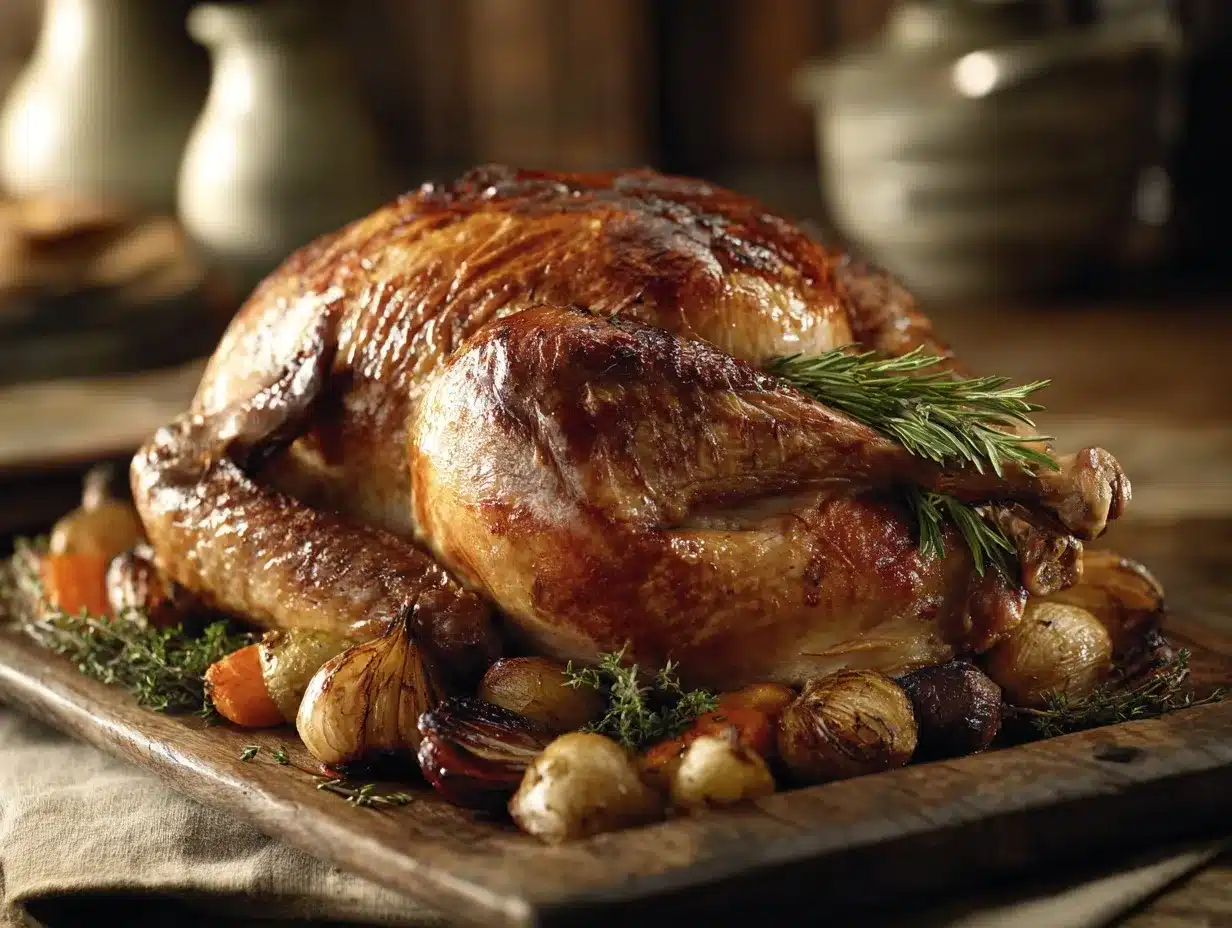
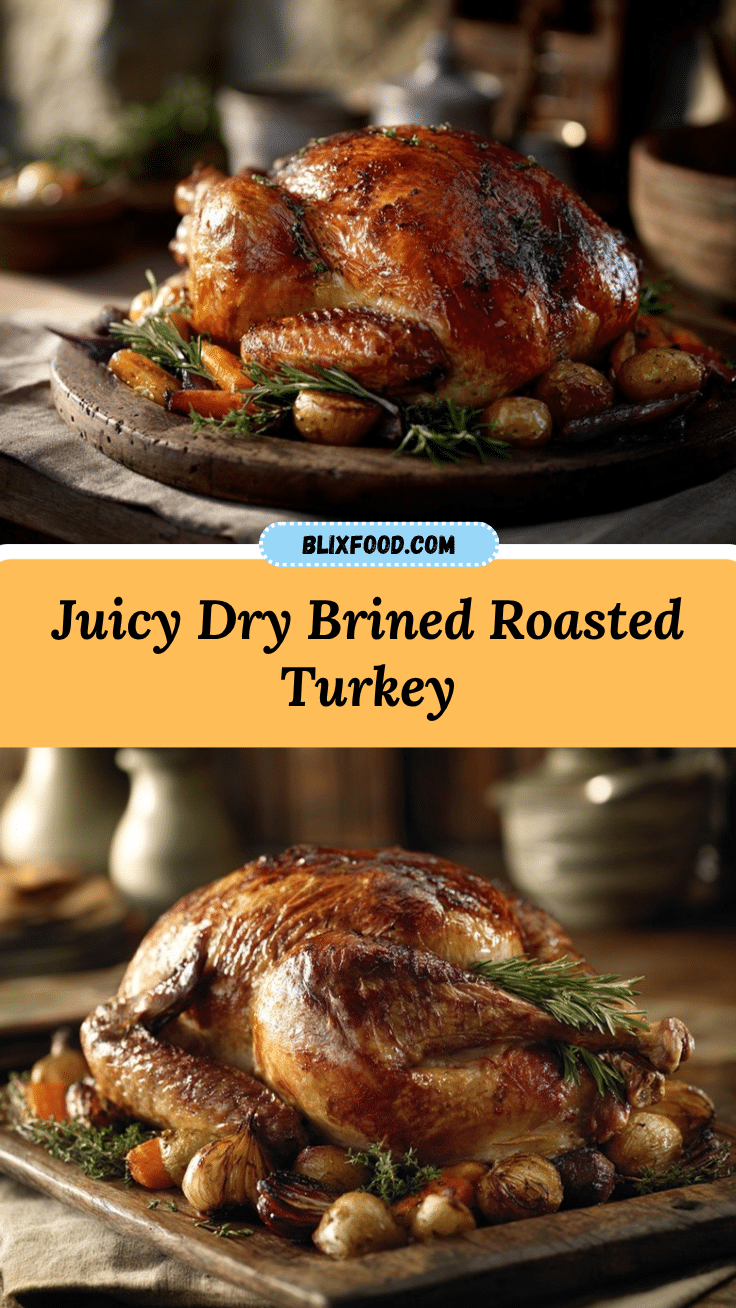
The aroma of roasted turkey wafting through the house—I can almost hear the laughter of family and friends gathered around the table. This Perfect Dry Brined Roasted Turkey Recipe for holidays is my go-to solution for a show-stopping centerpiece that’s juicy, flavorful, and ridiculously easy to make. Trust me, once you try dry brining, you’ll never go back to the wet brine method. I discovered this technique years ago while trying to streamline holiday prep, and it has been a game-changer ever since.
Unlike the traditional wet brine method, dry brining doesn’t require lugging around a heavy container or dealing with gallons of liquid. Instead, you use a blend of salt and seasonings to transform your turkey into a tender, mouthwatering masterpiece. Whether you’re hosting an intimate gathering or a big family feast, this recipe is sure to win hearts—and second helpings!
So, grab your apron, roll up your sleeves, and let’s make a turkey everyone will be talking about all year long!
Why You’ll Love This Recipe
- Easy to Prepare: No messy liquid brines here! Just season, refrigerate, and roast—it’s as simple as that.
- Unbelievably Juicy: Dry brining locks in moisture, ensuring every bite is succulent and tender.
- Flavorful to the Max: The salt and seasoning penetrate deep into the meat, giving you flavor in every single bite.
- Perfect for Holidays: Thanksgiving, Christmas, or any special occasion—this turkey recipe will be the star of your table.
- Impress Your Guests: The golden-brown, crispy skin paired with juicy meat makes this a jaw-dropping centerpiece.
This isn’t just another roasted turkey recipe—it’s the ultimate guide to achieving that perfect combination of crisp skin and tender meat. Plus, the dry brine method is so forgiving that even if you’re not a seasoned cook, you’ll feel like a pro. No need to stress about timing or complicated techniques; this turkey is the epitome of simplicity and flavor.
What Ingredients You Will Need
This recipe uses a handful of simple, accessible ingredients that pack a flavor punch. Here’s what you’ll need:
- Turkey: 12–14 pounds, fresh or thawed (make sure to remove the giblets).
- Kosher Salt: The key to dry brining—fine salt won’t work as well.
- Black Pepper: Freshly ground for the best flavor.
- Garlic Powder: Adds a subtle, savory depth.
- Paprika: For a smoky flavor and beautiful golden color.
- Thyme: Fresh or dried—use what you have handy.
- Rosemary: Fresh leaves add an aromatic touch (you can chop them up for more flavor).
- Olive Oil: Helps the seasonings stick while promoting crispy skin.
- Unsalted Butter: Softened for rubbing under the skin (adds richness).
- Onion: Quartered, for stuffing the cavity.
- Lemon: Halved, for a touch of brightness.
If you’re missing any of these, don’t stress! You can swap out fresh herbs for dried ones, or use other spices like sage or even a little cayenne for heat.
Equipment Needed
Here’s a list of tools to make roasting your turkey a breeze:
- Roasting Pan: A sturdy pan with a rack to allow air circulation around the turkey.
- Kitchen Twine: For trussing the turkey’s legs to ensure even cooking.
- Meat Thermometer: Essential for checking if the turkey is cooked to perfection.
- Mixing Bowl: For combining your dry brine mixture.
- Pastry Brush: Useful for applying oil over the turkey.
- Aluminum Foil: To tent the turkey if needed.
If you don’t have a roasting pan, you can use a sturdy baking sheet with a cooling rack on top—it works just as well. For the meat thermometer, a digital instant-read one is the easiest option.
Preparation Method
- Prepare the Turkey: Remove the giblets and neck from the turkey cavity. Pat the turkey dry with paper towels.
- Make the Dry Brine: In a mixing bowl, combine 3 tablespoons of kosher salt, 1 tablespoon of black pepper, 1 teaspoon of garlic powder, 1 teaspoon of paprika, and 1 teaspoon of dried thyme.
- Brine the Turkey: Rub the dry brine mixture all over the turkey—don’t forget the underside and inside the cavity. Place the turkey on a rack in your roasting pan, cover loosely with foil, and refrigerate for 24–48 hours.
- Prep for Roasting: Remove the turkey from the fridge about 1 hour before roasting to bring it to room temperature. Preheat your oven to 325°F (165°C).
- Add Seasonings: Rub 4 tablespoons of softened unsalted butter under the turkey’s skin. Brush olive oil over the outside of the turkey to promote crispy skin.
- Stuff the Cavity: Place the quartered onion, halved lemon, and sprigs of rosemary inside the turkey cavity for added flavor.
- Roast the Turkey: Roast the turkey in the preheated oven for about 3–3.5 hours, or until the internal temperature reaches 165°F (74°C) in the thickest part of the breast and 175°F (79°C) in the thigh.
- Tent with Foil: If the skin starts to get too dark during roasting, tent the turkey loosely with aluminum foil.
- Rest Before Carving: Let the turkey rest for at least 20–30 minutes before carving. This helps the juices redistribute for maximum tenderness.
Cooking Tips & Techniques
Here are some handy tips to make your turkey absolutely foolproof:
- Don’t Rush the Dry Brine: Allowing the salt to work its magic for at least 24 hours is key to deeply flavorful turkey.
- Season Evenly: Make sure to rub the brine everywhere, including under the skin and in the cavity.
- Use a Meat Thermometer: Don’t rely on guesswork—this is the best way to ensure your turkey is cooked perfectly.
- Butter Under the Skin: This trick keeps the meat juicy and adds a layer of rich flavor.
- Rest the Turkey: Skipping the resting step can make your turkey lose precious juices—it’s worth the wait!
And if you’re worried about crisp skin, make sure the turkey is as dry as possible before roasting. A paper towel pat-down works wonders!
Variations & Adaptations
Want to switch things up or cater to specific needs? Here are some ideas:
- Herb Variations: Swap rosemary and thyme for sage, parsley, or tarragon for a different flavor profile.
- Spice It Up: Add a teaspoon of cayenne or smoked chili powder to the dry brine for a subtle kick.
- Gluten-Free Option: This recipe is already gluten-free, but double-check any seasoning blends for hidden gluten.
- Smoked Turkey: If you have a smoker, you can follow the same brining steps and smoke the turkey for a deliciously bold flavor.
- Smaller Birds: Cooking for a smaller crowd? Use a turkey breast instead of a whole turkey and adjust the cooking time accordingly.
I’ve even tried adding maple syrup to the butter for a hint of sweetness—it’s amazing!
Serving & Storage Suggestions
Your Perfect Dry Brined Roasted Turkey is best served hot and fresh, but here are some tips to make the most of your leftovers:
- Serving: Arrange the carved turkey on a large platter with fresh herbs and citrus slices for a stunning presentation. Serve with classic holiday sides like stuffing, mashed potatoes, and cranberry sauce.
- Storage: Store leftover turkey in an airtight container in the refrigerator for up to 4 days.
- Freezing: Freeze leftover turkey in an airtight freezer-safe bag for up to 2 months. Thaw in the refrigerator before reheating.
- Reheating: Warm the turkey in the oven at 300°F (150°C) covered with foil until heated through, or microwave individual portions for quick reheating.
- Flavors Over Time: The turkey will stay juicy when properly stored, and the flavors from the brine will deepen slightly after a day or two.
Nutritional Information & Benefits
Here’s what makes this turkey recipe a healthier choice:
- Calories: About 250 calories per serving (based on a 4-ounce serving).
- Protein: Packed with lean protein—great for muscle recovery and satiety.
- Low Carb: Perfect for those following low-carb or keto diets.
- Rich in Vitamins: Turkey is a great source of B vitamins, selenium, and zinc.
- Allergen-Friendly: Naturally gluten-free; simply ensure seasonings are allergen-safe.
This turkey is not only delicious but also a nutritious centerpiece for your holiday table.
Conclusion
If you’re looking to impress your guests without the stress, this Perfect Dry Brined Roasted Turkey Recipe is exactly what you need. It’s flavorful, juicy, and so easy to prepare. I love how the dry brine method simplifies the process while delivering unmatched results.
FAQs
How long should I dry brine the turkey?
You should dry brine the turkey for at least 24 hours, but 48 hours is even better for deeper flavor.
Can I use table salt for the dry brine?
No, kosher salt is recommended because its larger grains are perfect for brining and don’t make the turkey overly salty.
What’s the best way to ensure crispy skin?
Pat the turkey dry before roasting and brush it with olive oil to promote crispiness.
Can I make this recipe with a frozen turkey?
Yes, but make sure to fully thaw the turkey in the refrigerator before starting the dry brine process.
What should I do if my turkey cooks too quickly?
If your turkey starts to cook too quickly, tent it with foil and lower the oven temperature slightly.
Pin This Recipe!
Perfect Dry Brined Roasted Turkey Recipe for Holidays

This Perfect Dry Brined Roasted Turkey Recipe is a show-stopping centerpiece that’s juicy, flavorful, and ridiculously easy to make. The dry brine method ensures tender meat and crispy skin, perfect for any holiday feast.
- Prep Time: 15 minutes
- Cook Time: 3–3.5 hours
- Total Time: 3 hours 45 minutes
- Yield: 12 servings 1x
- Category: Main Course
- Cuisine: American
Ingredients
- 12–14 pounds turkey, fresh or thawed (make sure to remove the giblets)
- 3 tablespoons kosher salt
- 1 tablespoon black pepper, freshly ground
- 1 teaspoon garlic powder
- 1 teaspoon paprika
- 1 teaspoon dried thyme
- 4 tablespoons unsalted butter, softened
- 2 tablespoons olive oil
- 1 onion, quartered
- 1 lemon, halved
- Fresh rosemary sprigs
Instructions
- Remove the giblets and neck from the turkey cavity. Pat the turkey dry with paper towels.
- In a mixing bowl, combine 3 tablespoons of kosher salt, 1 tablespoon of black pepper, 1 teaspoon of garlic powder, 1 teaspoon of paprika, and 1 teaspoon of dried thyme to make the dry brine.
- Rub the dry brine mixture all over the turkey, including the underside and inside the cavity. Place the turkey on a rack in your roasting pan, cover loosely with foil, and refrigerate for 24–48 hours.
- Remove the turkey from the fridge about 1 hour before roasting to bring it to room temperature. Preheat your oven to 325°F (165°C).
- Rub 4 tablespoons of softened unsalted butter under the turkey’s skin. Brush olive oil over the outside of the turkey to promote crispy skin.
- Place the quartered onion, halved lemon, and sprigs of rosemary inside the turkey cavity for added flavor.
- Roast the turkey in the preheated oven for about 3–3.5 hours, or until the internal temperature reaches 165°F (74°C) in the thickest part of the breast and 175°F (79°C) in the thigh.
- If the skin starts to get too dark during roasting, tent the turkey loosely with aluminum foil.
- Let the turkey rest for at least 20–30 minutes before carving to allow the juices to redistribute.
Notes
[‘Allow the dry brine to work for at least 24 hours for maximum flavor.’, ‘Ensure the turkey is as dry as possible before roasting for crispy skin.’, ‘Use a meat thermometer to avoid guesswork and ensure perfect cooking.’, ‘Let the turkey rest before carving to retain juices.’]
Nutrition
- Serving Size: 4 ounces per serving
- Calories: 250
- Sodium: 500
- Fat: 10
- Saturated Fat: 3
- Carbohydrates: 1
- Protein: 35
Keywords: Dry brined turkey, roasted turkey, holiday turkey, Thanksgiving turkey, Christmas turkey