Let me set the scene: the aroma of sizzling bacon and roasted turkey mingling with the sweet scent of Hawaiian rolls as they toast up golden in the oven. It’s the kind of smell that makes your stomach rumble and your neighbors wander over just to ask, “What are you cooking?” The first time I pulled a tray of these Savory Baked Turkey and Bacon Ranch Sliders out of the oven, I swear, the kitchen practically buzzed with anticipation. The buttery tops, the gooey cheese, and that irresistible ranch flavor made it impossible to wait for them to cool—my family was hovering, forks in hand, ready to pounce.
I stumbled on this recipe years ago when trying to whip up something quick for a backyard potluck. My grandma always said, “If you want folks to remember your party, feed them something they’ll crave for weeks.” Honestly, she was spot on. These sliders have become a staple for game days, birthday bashes, and those last-minute “bring a dish” requests. When I was knee-high to a grasshopper, we’d make sandwiches for family picnics, but nothing ever stuck with me like the combo of turkey, bacon, creamy ranch, and those pillowy Hawaiian rolls.
Honestly, the best part is how dangerously easy these sliders are. You layer, you bake, you watch as people sneak them off the cooling rack (I can’t blame them!). My husband calls them “the ultimate comfort food” and my kids, well, they’d eat the whole pan if I let them. These Savory Baked Turkey and Bacon Ranch Sliders are perfect for potlucks, a sweet treat for after school, or to brighten up your Pinterest board with something drool-worthy. Trust me, they’ve been tested over and over again (in the name of research, of course), and they never last long at family gatherings or as gifts for friends. Every bite feels like a warm hug—bookmark this one, you’re going to want it again and again.
Why You’ll Love These Savory Baked Turkey and Bacon Ranch Sliders
You know what, after making these sliders more times than I can count, I can say with confidence—they’re a game-changer for any get-together. Years of recipe testing (and a few kitchen disasters, I’ll admit) have led me to this foolproof version. Here’s why you’ll love them:
- Quick & Easy: Done in under 30 minutes—no joke! Perfect for last-minute guests or when you just want a cozy dinner without fuss.
- Simple Ingredients: Everything in this recipe is easy to find, and you probably have most of it in your fridge right now. No specialty store trips required.
- Perfect for Parties: These sliders shine at game nights, potlucks, family dinners, or holiday brunches. They’re super portable and easy to serve.
- Crowd-Pleaser: Adults love the smoky bacon and ranch, while kids are obsessed with the gooey cheese and sweet rolls. It’s a win-win for picky eaters.
- Unbelievably Delicious: The combo of savory turkey, crispy bacon, creamy ranch, and buttery rolls is pure comfort. Every bite is soft, melty, and packed with flavor.
What sets these Savory Baked Turkey and Bacon Ranch Sliders apart? The ranch dressing is spread right onto the rolls, so every layer gets infused with tangy, herby goodness. Instead of just stacking the ingredients, I press them gently so the cheese melts into the turkey and bacon, making each slider perfectly gooey and cohesive. I’ve tried all sorts of tweaks—different cheeses, adding a brush of garlic butter, even swapping out the turkey for leftover roast chicken—and this method always wins.
Honestly, these sliders aren’t just good—they’re the kind of recipe you make again and again because they deliver that “eyes closed, smile wide” satisfaction with every bite. They’re comfort food at its best: fast, hearty, and insanely craveable. You’ll impress guests (without breaking a sweat), and you’ll turn a simple meal into something everyone remembers. If you love party food with soul, these sliders are calling your name!
What Ingredients You Will Need
This recipe uses simple, wholesome ingredients to deliver bold flavor and satisfying texture without any fuss. Most of these are pantry staples, and you can easily swap a few things if you need to. Here’s what you’ll need for the Savory Baked Turkey and Bacon Ranch Sliders:
- For the sliders:
- 12 Hawaiian rolls, split (King’s Hawaiian is my go-to for their pillowy sweetness)
- 8 oz (225g) sliced deli turkey (smoked or oven-roasted works best)
- 6 slices cooked bacon, chopped (crispy is key—try thick-cut for extra crunch)
- 6 slices Swiss cheese (or provolone, if you prefer a milder flavor)
- 1/2 cup (120ml) ranch dressing (Hidden Valley or homemade—make sure it’s thick and creamy)
- For the topping:
- 1/4 cup (60g) unsalted butter, melted
- 1 tbsp ranch seasoning mix (adds a punch of flavor to the tops)
- 1 tbsp chopped fresh parsley (for color and fresh taste)
- Optional add-ins:
- 1/2 cup (60g) shredded cheddar cheese (for extra gooeyness)
- Thinly sliced red onion (for a little zip)
- Pickled jalapeños (for heat, if you like it spicy)
Ingredient tips: For the turkey, I love using a high-quality deli brand like Boar’s Head—they slice it nice and thin, so it layers well. If you need these to be gluten-free, swap regular Hawaiian rolls for a gluten-free sandwich bun. You can use turkey bacon if you’re cutting down on pork. If you’re out of ranch dressing, mix mayonnaise with a little dry ranch seasoning and a splash of milk. For vegetarians, skip the bacon and add roasted mushrooms or grilled zucchini.
In summer, I sometimes swap the turkey for grilled chicken breast and throw in fresh basil. For the cheese, Swiss is classic, but Monterey Jack or Havarti are also awesome. The butter topping is what really makes these sliders stand out—don’t skip it! If you want a lighter version, use olive oil instead of butter, or reduced-fat ranch dressing. The beauty of this recipe is how flexible it is, so don’t be afraid to experiment or use up leftovers in your fridge.
Equipment Needed
- 1 large baking dish (9×13-inch, or similar size)
- Sharp bread knife (for splitting the rolls easily—serrated works best)
- Small bowl (for mixing the topping)
- Basting brush (to spread melted butter and ranch seasoning)
- Aluminum foil (to cover the sliders while baking)
- Spatula (for lifting out the sliders)
If you don’t have a 9×13-inch pan, just use any oven-safe dish that fits the rolls snugly. I’ve tried making these on a sheet pan lined with parchment, and it works in a pinch (just keep an eye on the butter so it doesn’t run off). For the basting brush, if you don’t have one, a spoon works fine—just drizzle the butter topping. My old bread knife never lets me down for slicing the rolls evenly. Maintenance tip: wipe down your bread knife right after slicing sticky Hawaiian rolls, or it’ll gum up.
Budget-friendly options: You can use disposable aluminum pans for parties—less cleanup, and you can even gift the whole batch. If you’re missing any specialty tools, don’t sweat it; these sliders are very forgiving. I’ve made them in everything from glass Pyrex to my grandma’s battered roasting pan, and they always turn out delicious.
Preparation Method

- Preheat your oven: Set to 350°F (175°C). This gives you time to prep everything else while the oven heats up.
- Prepare the rolls: Using a serrated bread knife, slice the entire sheet of Hawaiian rolls horizontally (keep them together!). Place the bottom half in your baking dish.
- Spread ranch dressing: Use half the ranch dressing (about 1/4 cup/60ml) and spread it evenly over the bottom half of the rolls. Don’t skimp—this is where the flavor starts.
- Layer turkey and cheese: Lay out the turkey slices evenly across the rolls, overlapping a bit. Next, add the Swiss cheese slices so they cover the turkey (you might need to cut some slices to fit the edges).
- Add bacon: Sprinkle the chopped, crispy bacon over the cheese layer. Try to get some bacon on every slider for maximum crunch and flavor.
- Optional add-ins: If you’re using shredded cheddar, red onion, or jalapeños, scatter them over the bacon now.
- Top with ranch: Drizzle the remaining ranch dressing evenly over the layers. Use a spatula to spread it into the corners so every bite gets ranchy goodness.
- Finish with roll tops: Place the top half of the rolls over the layered filling. Press down gently so everything sticks together.
- Make butter topping: In a small bowl, mix melted butter with ranch seasoning and chopped parsley. Brush this mixture over the tops of the rolls. Be generous—the buttery topping makes the sliders golden and flavorful.
- Cover and bake: Cover the dish loosely with foil and bake for 15 minutes. This melts the cheese and gets the sliders hot throughout.
- Uncover and crisp: After 15 minutes, remove the foil and bake another 5-7 minutes, until the tops are golden and slightly crisp. The cheese should be bubbling, and the tops will smell divine.
- Rest and slice: Let the sliders cool for 3-5 minutes before slicing. Use a spatula to lift out each slider. If the cheese seems too runny, let them rest a few extra minutes.
Troubleshooting tips: If the rolls start to brown too quickly, cover with foil again. If the cheese isn’t melting, check your oven temperature—it should be hot but not scorching. For extra crispy bacon, cook it just before assembling so it doesn’t get soggy. If your ranch is too thin, mix it with a bit of sour cream for added body.
Sensory cues: The sliders should be golden on top, with melted cheese oozing slightly from the sides. You’ll hear a faint sizzle as the butter bakes into the rolls. The smell—well, let’s just say you’ll know when they’re ready!
Efficiency tip: Prep all your layers before starting assembly. Cook the bacon ahead, slice the cheese, and have your ranch, butter, and seasoning ready. It’ll make the process smoother and keep your kitchen less chaotic.
Cooking Tips & Techniques for Perfect Sliders
Let’s face it—sliders sound simple, but a few tricks make a huge difference. After dozens of batches, these tips have saved me from soggy bottoms and bland bites:
- Don’t over-saturate: Too much ranch can make the rolls soggy. Spread it evenly, but avoid puddles—less is more for texture.
- Layering matters: Place cheese directly on the turkey so it melts and glues everything together. If you put bacon under the cheese, it can get chewy.
- Bake covered first: The initial foil cover helps melt the cheese and heat everything through without burning the tops.
- Finish uncovered: Uncovering lets the rolls get golden and just a bit crisp, which makes all the difference for texture.
- Test for doneness: Look for cheese bubbling at the edges and a slightly toasted top. If the rolls are pale, bake a few more minutes.
- Multitasking: While the sliders bake, prep a quick salad or whip up a dip. This is a go-to party move for me.
- Consistency tip: Use the same brand of rolls and turkey for best results—some rolls are drier or sweeter than others. King’s Hawaiian is my trusty pick.
Common mistakes? I’ve put too much ranch before and ended up with soggy sliders (yikes). I once used pre-shredded cheese—it didn’t melt as well as slices. Lesson learned: get the good stuff, and slice it yourself if you have to. Timing is key; don’t walk away for too long, or you might miss that perfect golden top. If you forget the foil, the tops can scorch. Just keep an eye on them, and you’ll be golden (pun intended)!
Honestly, every batch teaches me something new. Don’t be afraid to tweak the layers or toppings to match your family’s taste. These Savory Baked Turkey and Bacon Ranch Sliders are forgiving, so even if you mess up a little, they’ll still be delicious!
Variations & Adaptations
One of the best parts about these sliders is how easy they are to customize. Here are my favorite twists for different needs and occasions:
- Low-carb option: Swap out the Hawaiian rolls for mini lettuce wraps or low-carb buns. Use turkey bacon and reduced-fat cheese.
- Vegetarian version: Leave out the turkey and bacon, and load up with grilled veggies like zucchini, bell peppers, and mushrooms. Use ranch-flavored cream cheese for extra flavor.
- Spicy kick: Add sliced pepper jack cheese and pickled jalapeños between the turkey and bacon. Brush a little sriracha into the ranch for heat.
- Seasonal twist: In summer, replace turkey with grilled chicken and add fresh basil or arugula. In winter, use cranberry sauce for a holiday vibe.
- Dairy-free: Use vegan cheese slices and dairy-free ranch (like JUST brand). Skip the butter topping, or use olive oil instead.
- Gluten-free: Use gluten-free dinner rolls—Udi’s makes a good version.
For allergens, you can swap out regular bacon for turkey or plant-based bacon. The ranch can be homemade or store-bought, and there are plenty of vegan versions. Last month, I made these with leftover roasted chicken and a sprinkle of smoked paprika—it was a new favorite!
Don’t be afraid to try new combos. My kids love when I add shredded cheddar, and my husband prefers his with a layer of sliced tomatoes. The beauty of these sliders is they’re endlessly adaptable, so make them your own!
Serving & Storage Suggestions
These Savory Baked Turkey and Bacon Ranch Sliders are best served warm, straight from the oven. The cheese is gooey, the rolls are soft, and the butter topping is still glistening. For parties, I like to arrange them on a wooden board with a sprinkle of fresh parsley for color.
Serving ideas: Pair with a crisp coleslaw, potato chips, or a tangy pickle spear. For drinks, lemonade or iced tea are perfect, but they also go great with a light beer or sparkling water. If you’re hosting a brunch, serve alongside fruit salad or hash browns.
Storage: Leftovers keep well in an airtight container in the fridge for up to 3 days. To freeze, wrap individual sliders tightly in foil and freeze for up to 2 months. Reheat in the oven at 350°F (175°C) for 10-12 minutes, or microwave for 30 seconds (though the oven keeps the rolls from getting soggy).
Flavor development: Honestly, the flavors deepen overnight—the ranch and bacon soak into the rolls, making each bite even better the next day. For best texture, reheat in the oven with a sprinkle of extra cheese on top. These sliders even taste great cold, if you’re into that!
Nutritional Information & Benefits
Each slider (based on 12 sliders per batch) has about 200-250 calories, 12g protein, 12g fat, and 18g carbs. The turkey adds a lean protein boost, while bacon gives you a little healthy fat (and let’s face it, pure flavor). Swiss cheese is a great source of calcium, and ranch dressing—well, that’s just for happiness!
If you choose low-fat cheese and turkey bacon, you can cut down on calories and saturated fat. Hawaiian rolls have sugar, so for low-carb diets, substitute with keto-friendly buns. Allergens to watch for: dairy (cheese, ranch), gluten (rolls), and pork (bacon). For gluten-free, swap the bread; for dairy-free, use vegan cheese and ranch.
From a wellness perspective, I love these sliders for their balance of protein, carbs, and fat. They’re filling, satisfying, and easy to portion control. When you want a treat that doesn’t totally wreck your nutrition goals, just tweak the toppings and enjoy!
Conclusion
If you’re on the hunt for a party appetizer that’s easy, delicious, and guaranteed to disappear fast, these Savory Baked Turkey and Bacon Ranch Sliders on Hawaiian Rolls are your answer. They bring together comfort food flavors, crowd-pleasing textures, and a recipe that’s as flexible as your mood. Whether you make them for game day, family dinners, or a Pinterest-worthy brunch, you’ll be asked for the recipe—trust me, it happens every time.
Don’t hesitate to mix things up—try new cheeses, swap the meats, or add your favorite veggies. I love this recipe because it’s not just tasty, it’s a little bit nostalgic, a little bit indulgent, and always a ton of fun to eat. If you’re looking for a dish that feels like a warm hug and brings smiles all around, bookmark these sliders.
I’d love to hear how you make them your own—drop your tweaks, tips, or questions in the comments! Share this recipe with fellow slider-lovers, and don’t forget to pin it for your next party. Happy baking, and may your trays always come out golden!
FAQs – Savory Baked Turkey and Bacon Ranch Sliders
Can I make these sliders ahead of time?
Absolutely! Assemble them fully and refrigerate (covered) up to 24 hours before baking. Just add a few extra minutes to baking time if cold from the fridge.
What’s the best way to keep sliders warm for a party?
After baking, cover loosely with foil and keep in a low oven (about 200°F/95°C). They’ll stay soft and melty for up to an hour.
Can I use leftover Thanksgiving turkey?
Definitely! Leftover roast turkey works great—just slice it thin for easy layering. You might need a bit more ranch to keep it moist.
How do I make these sliders gluten-free?
Swap the Hawaiian rolls for a gluten-free dinner roll or mini sandwich bun. All other ingredients are naturally gluten-free.
What cheese works best if I don’t have Swiss?
Provolone, Monterey Jack, or Havarti are all delicious alternatives. Use your favorite—just aim for a cheese that melts well.
Pin This Recipe!
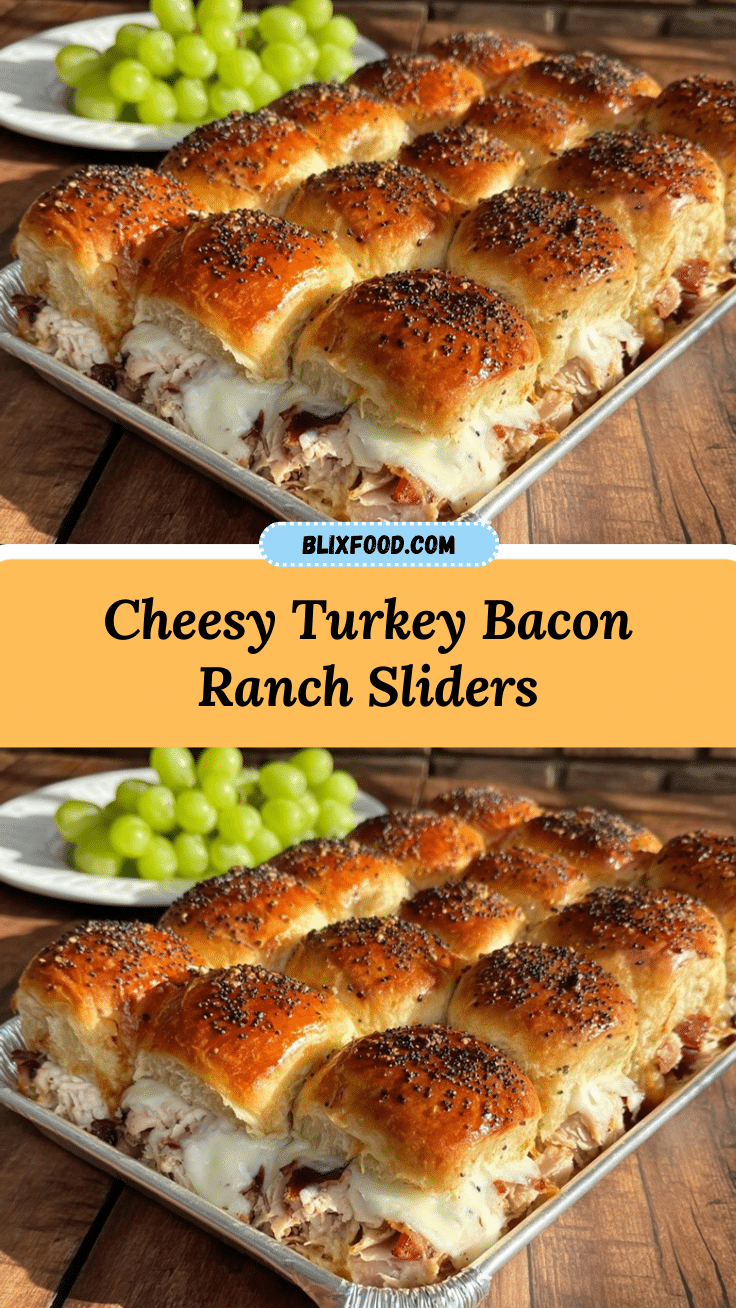
Savory Baked Turkey and Bacon Ranch Sliders

These easy party sliders feature layers of deli turkey, crispy bacon, creamy ranch, and gooey cheese baked between pillowy Hawaiian rolls. Perfect for potlucks, game days, or family gatherings, they’re a crowd-pleasing comfort food appetizer that comes together in under 30 minutes.
- Prep Time: 10 minutes
- Cook Time: 20-22 minutes
- Total Time: 32 minutes
- Yield: 12 sliders 1x
- Category: Appetizer
- Cuisine: American
Ingredients
- 12 Hawaiian rolls, split
- 8 oz sliced deli turkey (smoked or oven-roasted)
- 6 slices cooked bacon, chopped
- 6 slices Swiss cheese (or provolone)
- 1/2 cup ranch dressing
- 1/4 cup unsalted butter, melted
- 1 tbsp ranch seasoning mix
- 1 tbsp chopped fresh parsley
- Optional: 1/2 cup shredded cheddar cheese
- Optional: Thinly sliced red onion
- Optional: Pickled jalapeños
Instructions
- Preheat oven to 350°F (175°C).
- Using a serrated bread knife, slice the entire sheet of Hawaiian rolls horizontally, keeping them together. Place the bottom half in a large baking dish.
- Spread half the ranch dressing (about 1/4 cup) evenly over the bottom half of the rolls.
- Layer turkey slices evenly across the rolls, overlapping slightly.
- Add Swiss cheese slices over the turkey, cutting as needed to fit.
- Sprinkle chopped bacon over the cheese layer.
- If using, scatter shredded cheddar, red onion, or jalapeños over the bacon.
- Drizzle remaining ranch dressing evenly over the layers and spread into the corners.
- Place the top half of the rolls over the layered filling and press down gently.
- In a small bowl, mix melted butter with ranch seasoning and chopped parsley. Brush generously over the tops of the rolls.
- Cover the dish loosely with foil and bake for 15 minutes.
- Remove foil and bake another 5-7 minutes, until tops are golden and slightly crisp.
- Let sliders cool for 3-5 minutes before slicing. Use a spatula to lift out each slider.
Notes
Don’t over-saturate with ranch to avoid soggy rolls. Layer cheese directly on turkey for best melt. Use foil for the first part of baking to prevent burning. These sliders are highly adaptable—swap meats, cheeses, or add veggies as desired. For gluten-free, use GF rolls. Leftovers reheat best in the oven.
Nutrition
- Serving Size: 1 slider
- Calories: 225
- Sugar: 5
- Sodium: 480
- Fat: 12
- Saturated Fat: 6
- Carbohydrates: 18
- Fiber: 1
- Protein: 12
Keywords: turkey sliders, bacon ranch sliders, Hawaiian roll sliders, party appetizer, baked sliders, easy sliders, comfort food, game day recipe