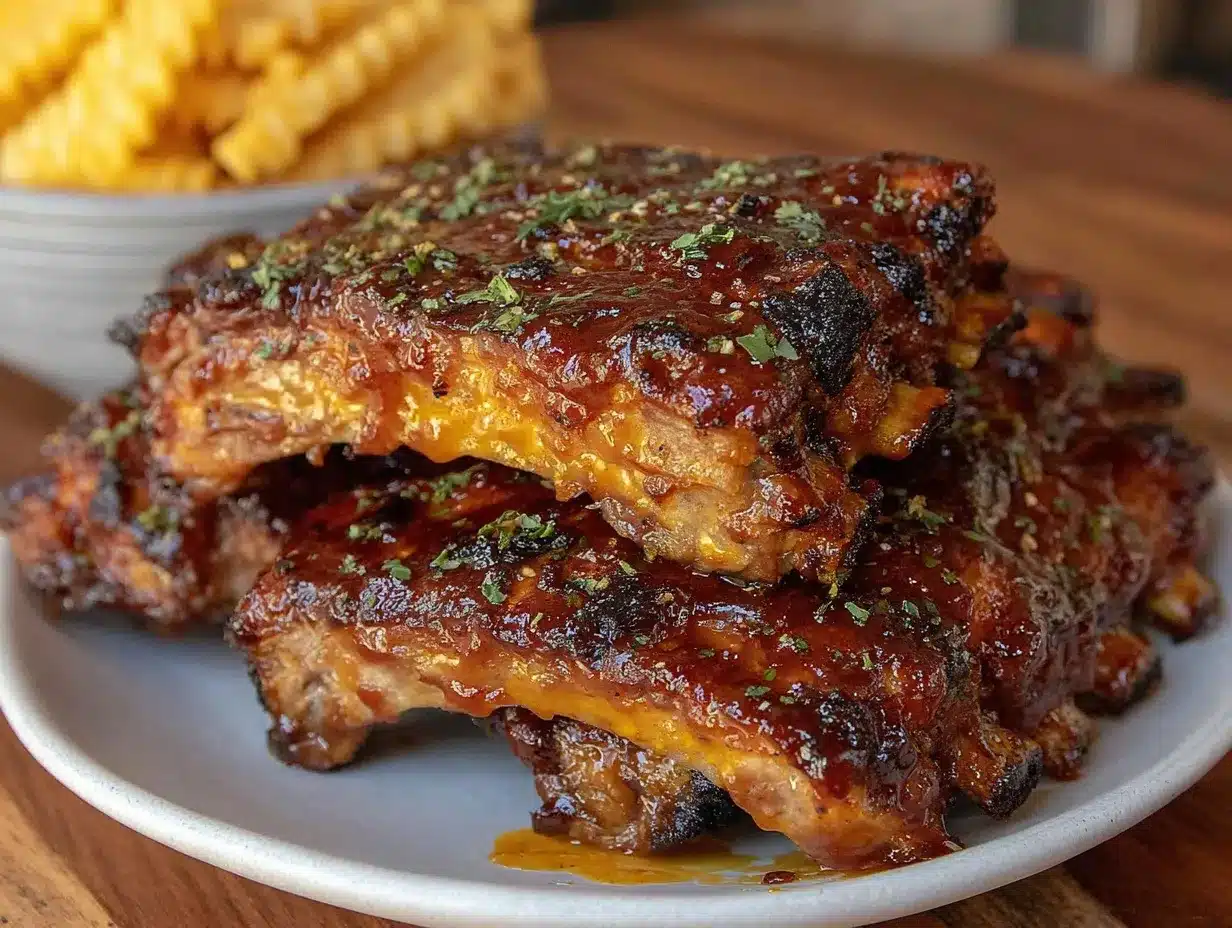
Let me set the scene: the charcoal is crackling, the scent of smoky spice rub drifts through the air, and there’s a sticky-sweet glaze bubbling away on the stove. It’s the kind of aroma that sends neighbors peeking over the fence and has your family hovering around the grill, napkins at the ready. The first time I made these grilled baby back ribs with honey BBQ glaze, I’ll never forget the anticipation. My uncle—who’s notoriously picky about ribs—stood by, arms crossed, skeptical. But as soon as that first slab came off the grill, caramelized and glistening, it was game over. I watched him take a bite, pause mid-chew, and break into a wide grin. That’s when you know you’ve hit something special—the kind of moment you tuck away for the next backyard cookout.
Honestly, I grew up thinking ribs were best left to the pros or someone’s BBQ pit master uncle. But years ago, after a soggy summer camping trip, I got determined to crack the code at home (rain or shine!). These baby back ribs are ridiculously doable, even if you’re more “weekend griller” than “competition pit boss.” The secret? A sweet, sticky honey BBQ glaze that turns a simple rib rack into a showstopper. My family can’t stop sneaking bites off the cutting board—sometimes before they even make it to the dinner table. And you know what? I can’t blame them.
Picture these ribs at your next summer gathering: friends laughing, kids chasing fireflies, and plates piled high with smoky, tender meat. Whether you’re planning a Fourth of July blowout, a chill weeknight dinner, or just want to brighten up your Pinterest feed, these grilled baby back ribs deliver pure, nostalgic comfort and a little bit of backyard magic. After testing (and retesting… in the name of research, of course), this recipe has become a staple for family reunions, neighborly cookouts, and even last-minute “what’s-for-dinner” nights. They feel like a warm hug on a plate—and trust me, you’re going to want to bookmark this one.
Why You’ll Love This Grilled Baby Back Ribs Recipe
There’s something about grilled baby back ribs that just calls for a crowd (or at least, a very hungry family). I’ve made this recipe more times than I can count—at birthday parties, lazy Sunday afternoons, and even for solo “treat yourself” dinners. Here’s why I keep coming back to this honey BBQ glazed version, and why you will too:
- Quick & Easy: These ribs come together in under two hours, start to finish. Perfect for those spontaneous summer cravings or when guests drop by unannounced.
- Simple Ingredients: No need for a trip to a fancy butcher or specialty shop. Everything you need is probably in your pantry or fridge right now.
- Perfect for Summer Grilling: These ribs shine at backyard barbecues, tailgate parties, or any time you want to show off your grill skills (with minimal effort, honestly).
- Crowd-Pleaser: I’ve yet to meet a kid (or adult!) who doesn’t go back for seconds. The sweet, sticky glaze and smoky meat are a classic duo.
- Ridiculously Delicious: The honey BBQ glaze creates a glossy, finger-licking finish that’s just the right balance of tangy and sweet. One bite, and you’ll see what I mean.
What sets this recipe apart? Instead of a long, slow smoke (which is great, but not always realistic), these ribs get a gentle oven bake to tenderize, then a quick finish on the grill for that perfect char. The honey BBQ sauce isn’t just brushed on—it’s layered, caramelized, and built up for maximum flavor. If you’ve ever had ribs that are dry, tough, or bland, you’ll appreciate how foolproof this method is. The glaze is my own twist, inspired by a roadside BBQ shack I stumbled on during a road trip, but tweaked at home until it was just right (and a little less messy, if we’re being honest!).
This isn’t just another rib recipe—it’s the one you’ll reach for every summer, the one that makes your eyes close for a second when you take that first bite. It’s comfort food, made a little lighter and a lot more fun. Whether you’re out to impress your in-laws or just want to eat with your hands and not care, these ribs deliver every single time.
What Ingredients You Will Need
This grilled baby back ribs recipe uses simple, honest ingredients that add up to bold flavor and a satisfying bite. Most of these are pantry basics, with a couple of fresh touches. Here’s what you’re looking at:
- For the Ribs:
- 2 racks baby back pork ribs (about 4 pounds/1.8 kg total)
- Kosher salt (for seasoning the meat evenly)
- Freshly ground black pepper
- Olive oil (for brushing—adds a nice base layer for the rub)
- For the Dry Rub:
- 2 tablespoons brown sugar (light or dark, your call)
- 1 tablespoon smoked paprika (regular works too, but smoked kicks up the BBQ flavor)
- 1 tablespoon garlic powder
- 1 tablespoon onion powder
- 1 teaspoon ground cumin
- 1 teaspoon chili powder (mild or hot, depending on your spice preference)
- 1/2 teaspoon ground cayenne pepper (optional, for a little kick)
- For the Honey BBQ Glaze:
- 1 cup BBQ sauce (I love Sweet Baby Ray’s or Stubb’s, but use your favorite)
- 1/3 cup honey (local honey if you can find it—makes a difference!)
- 2 tablespoons apple cider vinegar (adds tang and helps balance the sweetness)
- 1 tablespoon Dijon mustard (for a little zip)
- 1/2 teaspoon Worcestershire sauce (adds savory depth)
- Pinch of red pepper flakes (optional, if you like a little heat)
Ingredient Tips:
- If you want gluten-free ribs, double-check your BBQ sauce and Dijon mustard labels.
- For a bit of smokiness, try adding a teaspoon of liquid smoke to your glaze (just a dash goes a long way!).
- No honey? Maple syrup or agave work fine, but the flavor will be a bit different—honey gives that classic, sticky finish.
- If baby back ribs aren’t available, St. Louis-style ribs are a solid substitute—just add about 15 minutes to the baking time.
- For a spicier edge, increase the cayenne and red pepper flakes, or add a splash of hot sauce to the glaze.
That’s it! Nothing fancy, nothing hard to find. You can even prep the rub and glaze a day ahead, so you’re not scrambling when the grilling mood strikes. I’ve tried just about every brand of BBQ sauce out there, and honestly, as long as you love the flavor, it’ll work.
Equipment Needed
You don’t need a fancy outdoor kitchen to pull off these grilled baby back ribs—just some reliable basics (and maybe a cold drink for the grill master!). Here’s what I use:
- Grill: Charcoal or gas both work. Charcoal gives a smokier flavor, but gas is a bit easier for temperature control.
- Large baking sheet: For the initial oven bake (foil-lined for easy cleanup).
- Aluminum foil: Essential for wrapping the ribs and keeping them juicy.
- Mixing bowls: For the dry rub and glaze.
- Brush or spoon: For slathering on the honey BBQ glaze (I love a silicone brush, but a spoon works in a pinch).
- Tongs: For flipping and handling the ribs—way better than a fork, trust me.
- Sharp knife: For slicing the racks into portions.
Pro tip—if your grill doesn’t have a lid, you can tent the ribs with foil for a similar effect. I’ve used everything from a $20 tabletop grill to my dad’s ancient Weber kettle, and both get the job done. Just keep an eye on the heat. For the honey BBQ glaze, a small saucepan is handy, but you could even microwave it if you’re short on time (just stir well!).
If you’re on a budget, don’t stress about top-tier tools. The only thing I’d splurge on is a sturdy pair of tongs—they make flipping those sticky ribs way less stressful. And always let your tools cool before washing; learned that one the hard way!
Preparation Method
-
Prep the ribs (10 minutes):
Remove the membrane from the back of each rack. Slide a dull knife under the membrane and gently pull it off. (It’s slippery, but paper towels help grip!) Pat the ribs dry with paper towels. Season both sides with kosher salt and black pepper. -
Mix the dry rub (5 minutes):
In a small bowl, combine 2 tablespoons brown sugar, 1 tablespoon smoked paprika, 1 tablespoon garlic powder, 1 tablespoon onion powder, 1 teaspoon ground cumin, 1 teaspoon chili powder, and 1/2 teaspoon cayenne. Stir until evenly mixed. -
Rub the ribs (5 minutes):
Brush the ribs lightly with olive oil. Sprinkle the dry rub generously over both sides, pressing it in so it sticks. Don’t be shy—you want a nice, even layer. -
Bake the ribs (1 hour):
Preheat your oven to 300°F (150°C). Place the ribs meat-side up on a foil-lined baking sheet. Cover tightly with another sheet of foil (sealed at the edges). Bake for 1 hour. This low-and-slow start makes them tender without drying out. -
Make the honey BBQ glaze (while ribs bake):
In a small saucepan, mix 1 cup BBQ sauce, 1/3 cup honey, 2 tablespoons apple cider vinegar, 1 tablespoon Dijon mustard, 1/2 teaspoon Worcestershire sauce, and a pinch of red pepper flakes (if using). Heat over medium-low, stirring often, until it bubbles and thickens slightly (about 5 minutes). Set aside. -
Preheat the grill (10 minutes):
Heat your grill to medium (about 375°F/190°C). Clean and oil the grates. If using charcoal, arrange coals for indirect heat. -
Grill and glaze the ribs (15–20 minutes):
Carefully transfer the baked ribs to the hot grill, bone-side down. Brush a layer of honey BBQ glaze over the top. Grill, uncovered, for 5 minutes, then flip and glaze the other side. Repeat 2–3 times, flipping and glazing every 5 minutes, until the ribs are sticky and caramelized. Watch closely—the glaze can burn if left too long! -
Rest, slice, and serve (10 minutes):
Transfer the ribs to a cutting board (use tongs—they’re hot and sticky!). Let them rest for 5–10 minutes to keep the juices in. Slice between the bones and brush with any extra glaze.
Troubleshooting Tips:
- If your ribs seem tough after baking, give them another 15–20 minutes in the oven before grilling. Every rack is a bit different!
- If the glaze thickens too much, thin it with a splash of water or apple juice.
- If the ribs start to burn on the grill, move them to a cooler part of the grate and lower the heat.
Don’t stress about perfection—the first time I made these, I left them on the grill a little too long. They were still devoured! It’s all about that sticky, smoky, sweet payoff.
Cooking Tips & Techniques
After dozens of racks and a few failed experiments (like the time I tried grilling ribs straight from raw—don’t do it!), here are my best tips for rib perfection:
- Remove the membrane: This thin, silver layer on the bone side can make ribs chewy. Take an extra minute to get it off—your teeth will thank you.
- Dry rub is your friend: Don’t skimp on seasoning. Pressing the rub into the meat helps build that flavorful crust you want.
- Low and slow for tenderness: Baking the ribs first makes them fall-off-the-bone without drying out. Jumping straight to the grill can leave you with tough, chewy ribs (I learned that the hard way).
- Layer the glaze: Brush on the honey BBQ glaze in stages while grilling. This lets it caramelize without burning, and you get that sticky, lacquered finish.
- Keep an eye on your heat: Honey burns fast. If you notice singed spots, move the ribs to a cooler part of the grill and keep flipping.
- Let them rest: After grilling, rest the ribs so the juices redistribute. Cutting too soon can make them dry.
- Don’t be afraid of a little char: Those caramelized, crispy edges? That’s where the flavor lives.
Multitasking tip: Make the glaze while the ribs are baking. That way, you’re not scrambling when it’s time to grill. And if you’re making a big batch, keep finished ribs tented with foil until everyone’s ready to eat. Consistency comes with practice, but even “imperfect” ribs are better than no ribs at all!
Variations & Adaptations
One reason I love this grilled baby back ribs recipe is how easy it is to tweak for just about any taste or need. Here are some of my favorite twists:
- Spicy Sriracha Ribs: Swap half the honey for Sriracha or your favorite hot sauce in the glaze. Add extra red pepper flakes to the rub if you like things fiery.
- Maple-Dijon Glaze: Use maple syrup instead of honey and add a tablespoon more Dijon for a tangy, slightly smoky finish. Perfect for fall cookouts!
- Low-Sugar/Low-Carb Option: Use a sugar-free BBQ sauce and swap the honey for a low-carb sweetener like allulose or monk fruit. The flavor is still awesome, and you cut down on sugar.
- Oven-Only Method: If you don’t have a grill, finish the ribs under the broiler for 3–4 minutes. Watch closely—glaze burns quickly under the broiler!
- Allergen Swaps: Use a gluten-free BBQ sauce and mustard for sensitive eaters. If you need dairy-free, this recipe is already safe as written.
- Kid-Friendly: Skip the cayenne and red pepper flakes for a sweeter, milder rib that little ones will love.
My personal favorite? A smoky chipotle version with a little extra cumin in the rub and a spoonful of adobo sauce stirred into the glaze. It’s got a gentle kick that’s pretty irresistible. Don’t be afraid to experiment—ribs are all about making them your own.
Serving & Storage Suggestions
These grilled baby back ribs are best served hot off the grill, but they’re just as good at room temperature for a picnic or tailgate. Here’s how I like to serve and store them:
- Serving: Pile the ribs on a platter, brush with any leftover glaze, and sprinkle with chopped fresh parsley or green onions for color. Serve alongside classic sides like coleslaw, potato salad, or grilled corn on the cob. A big pitcher of lemonade or iced tea pairs perfectly!
- Storage: Cool leftovers completely, then wrap tightly in foil or store in an airtight container. Refrigerate for up to 4 days. For longer storage, freeze (wrapped well) for up to 2 months.
- Reheating: For best results, reheat ribs in a foil packet in a 300°F (150°C) oven until warmed through (about 15–20 minutes). You can also microwave individual portions, but they’ll be softer and a bit less caramelized.
- Flavor tip: The honey BBQ glaze gets even better after a day in the fridge—leftover ribs are a treat for lunch!
Honestly, the hardest part is saving any for later. But if you do, you’re in for a tasty snack or sandwich the next day.
Nutritional Information & Benefits
Here’s a ballpark idea for one serving (about 1/2 rack, with glaze):
- Calories: ~450
- Protein: 32g
- Carbohydrates: 22g
- Total fat: 24g
- Sugar: 15g
Health Benefits: Baby back ribs are a solid source of protein, B vitamins, and zinc. The honey in the glaze provides natural sweetness, and you can control added sugar by choosing your BBQ sauce wisely. For gluten-free folks, just use a certified sauce and mustard. As with any BBQ dish, moderation is key, but these ribs are a tasty splurge for special occasions. Personally, I love that this recipe lets you skip the deep frying and keep things relatively wholesome—plus, you get all the satisfaction of classic comfort food, with a little less guilt.
Conclusion
If you’ve been searching for a grilled baby back ribs recipe that’s easy, foolproof, and packed with flavor, this one’s for you. The honey BBQ glaze turns every bite into a sticky, smoky, sweet memory—one your family and friends will beg you to make again. Whether you tweak the rub or keep it classic, these ribs fit any summer meal, holiday, or “just because” craving.
I love this recipe because it brings everyone together—no one can resist a platter of shiny, caramelized ribs. Don’t be afraid to make it your own. Swap the glaze, tweak the spices, or double the batch for a crowd. I’d love to hear how it goes—drop a comment below with your favorite twist, share a pic, or let me know how you served them up!
Here’s to more backyard gatherings, messy fingers, and memories made around the grill. Happy cooking, and may your ribs always be tender and your glaze perfectly sticky!
Frequently Asked Questions
How long should I cook baby back ribs on the grill?
I bake the ribs in the oven for 1 hour, then finish them on the grill for 15–20 minutes, glazing every 5 minutes. This keeps them tender but still gives you that classic grilled flavor.
Can I make this recipe without a grill?
Absolutely! Finish the ribs under your oven broiler for 3–4 minutes per side, glazing as you go. Keep an eye out—they can burn fast under the broiler.
Can I use a different kind of BBQ sauce?
Yes, use your favorite! Tangy, sweet, smoky, or even spicy BBQ sauces all work. Just make sure it’s one you love since it’s a big part of the flavor.
How do I know when the ribs are done?
The meat should pull away from the bones easily, and you’ll see the ends of the bones peeking out. If you have a meat thermometer, look for 190–203°F (88–95°C) for truly tender ribs.
What can I serve with grilled baby back ribs?
Classic sides like coleslaw, cornbread, baked beans, or grilled veggies are always hits. For drinks, iced tea, lemonade, or even a cold beer pair well with the smoky flavors.
Pin This Recipe!

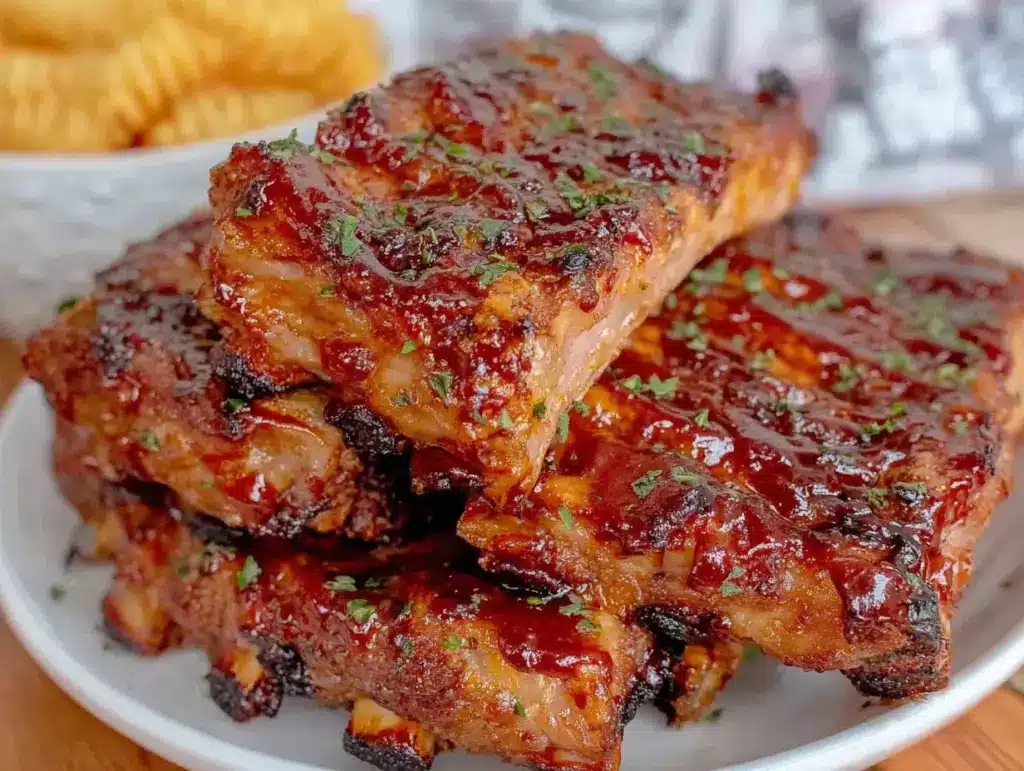
Grilled Baby Back Ribs with Easy Honey BBQ Glaze
These grilled baby back ribs are tender, smoky, and finished with a sticky-sweet honey BBQ glaze. Perfect for summer gatherings, they combine a simple dry rub, oven baking, and a quick grill for caramelized, crowd-pleasing results.
- Prep Time: 25 minutes
- Cook Time: 1 hour 25 minutes
- Total Time: 1 hour 50 minutes
- Yield: 4 servings 1x
- Category: Main Course
- Cuisine: American
Ingredients
- 2 racks baby back pork ribs (about 4 pounds total)
- Kosher salt
- Freshly ground black pepper
- Olive oil
- 2 tablespoons brown sugar
- 1 tablespoon smoked paprika
- 1 tablespoon garlic powder
- 1 tablespoon onion powder
- 1 teaspoon ground cumin
- 1 teaspoon chili powder
- 1/2 teaspoon ground cayenne pepper (optional)
- 1 cup BBQ sauce
- 1/3 cup honey
- 2 tablespoons apple cider vinegar
- 1 tablespoon Dijon mustard
- 1/2 teaspoon Worcestershire sauce
- Pinch of red pepper flakes (optional)
Instructions
- Remove the membrane from the back of each rack of ribs. Pat dry and season both sides with kosher salt and black pepper.
- In a small bowl, mix brown sugar, smoked paprika, garlic powder, onion powder, ground cumin, chili powder, and cayenne pepper.
- Brush ribs lightly with olive oil. Sprinkle dry rub generously over both sides, pressing it in.
- Preheat oven to 300°F. Place ribs meat-side up on a foil-lined baking sheet. Cover tightly with foil and bake for 1 hour.
- While ribs bake, combine BBQ sauce, honey, apple cider vinegar, Dijon mustard, Worcestershire sauce, and red pepper flakes in a saucepan. Heat over medium-low, stirring until slightly thickened (about 5 minutes). Set aside.
- Preheat grill to medium (about 375°F). Clean and oil grates. If using charcoal, arrange for indirect heat.
- Transfer baked ribs to grill, bone-side down. Brush with honey BBQ glaze. Grill uncovered for 5 minutes, flip and glaze the other side. Repeat 2–3 times, flipping and glazing every 5 minutes, until ribs are sticky and caramelized (15–20 minutes total).
- Transfer ribs to a cutting board and let rest for 5–10 minutes. Slice between bones and brush with extra glaze before serving.
Notes
Remove the membrane for tender ribs. Layer the glaze during grilling for a sticky finish. If ribs seem tough after baking, add 15–20 minutes more in the oven. For gluten-free, double-check BBQ sauce and mustard labels. Maple syrup or agave can substitute for honey. St. Louis-style ribs can be used; add 15 minutes to baking time.
Nutrition
- Serving Size: About 1/2 rack (appr
- Calories: 450
- Sugar: 15
- Sodium: 900
- Fat: 24
- Saturated Fat: 8
- Carbohydrates: 22
- Fiber: 1
- Protein: 32
Keywords: grilled ribs, baby back ribs, honey BBQ glaze, summer grilling, barbecue, easy ribs, pork ribs, backyard cookout