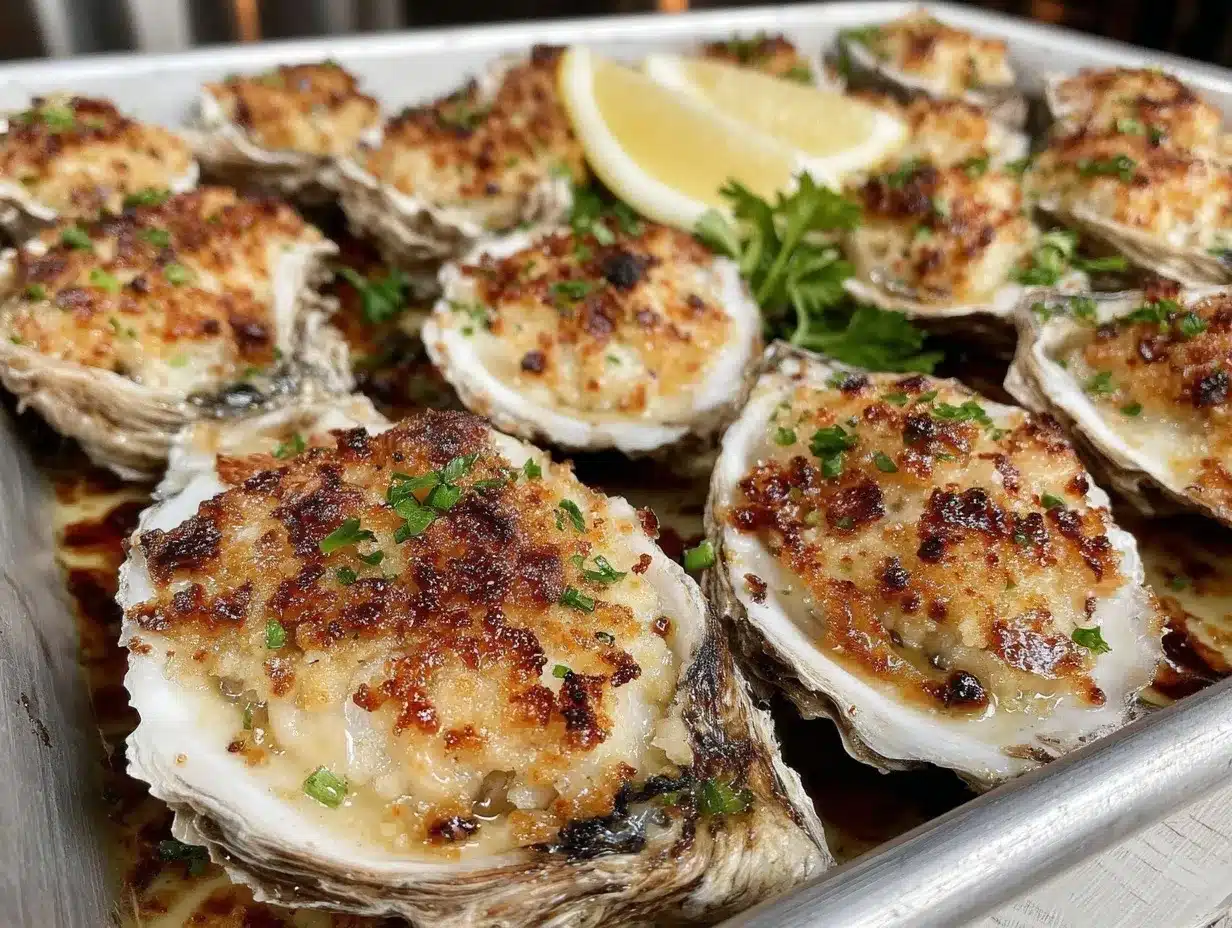
Let me tell you, the aroma that fills my kitchen whenever I slide a tray of baked oysters into the oven is downright magical. There’s this buttery garlic scent—rich and nutty—mingling with the ocean-bright freshness of the oysters themselves. The first time I tasted these perfect baked oysters with garlic butter and crispy breadcrumbs, I remember pausing, fork half-raised, just to savor the moment. It was the kind of pause where you can’t help but smile because, honestly, you know you’ve stumbled onto something truly special.
This recipe isn’t just about oysters—it’s about pure, nostalgic comfort. I first tried baked oysters years ago at a seaside family gathering, when I was knee-high to a grasshopper. My uncle, who swore by his “secret breadcrumb mix,” was always the first to claim the golden shells right off the baking tray. I’ve spent countless rainy weekends tweaking that mix, searching for the best balance of crunch and flavor. If I’m being honest, I wish I’d discovered this easy method for perfect baked oysters ages ago.
Whenever I make them now, my family can’t resist sneaking a few straight off the cooling rack. And I can’t blame them! The shells get hot, but that sizzling garlic butter and crispy crumb topping are just too tempting. These oysters are perfect for potlucks, a sweet treat for your kids (if they’re brave), or a way to brighten up your Pinterest board with something a little fancy but totally doable. The best part? I’ve tested and retested this recipe more times than I care to admit—in the name of research, of course. Now, it’s a staple for family gatherings, gifting, and those evenings when you want dinner to feel like a warm hug. You’re going to want to bookmark this one, trust me.
Why You’ll Love This Recipe
You know what? There’s nothing quite like finding a recipe that hits all the marks: easy, impressive, and downright delicious. My perfect baked oysters recipe isn’t just tasty—it’s the kind you’ll want to make again and again. Here’s why:
- Quick & Easy: Ready in under 30 minutes, which means you can whip up a batch even when you’re short on time. I’ve made these on weeknights and for last-minute get-togethers—always a hit.
- Simple Ingredients: No specialty shopping sprees needed. Most of these ingredients are pantry staples, and the oysters are available at any decent seafood market.
- Perfect for Any Occasion: These baked oysters are ideal for brunch spreads, potlucks, fancy dinners, or holiday mornings. They’re a crowd-pleaser on New Year’s Eve and just as good for a cozy night in.
- Crowd-Pleaser: I’ve yet to meet anyone (kids included!) who doesn’t rave about the crispy topping and rich, garlicky butter. Even the oyster skeptics in my family come around when these hit the table.
- Unbelievably Delicious: The contrast of the briny oyster, silky garlic butter, and golden breadcrumbs is pure comfort food. It’s the kind of bite that makes you close your eyes and smile.
What sets this perfect baked oysters recipe apart? I blend fresh garlic into the butter, then toss the breadcrumbs with a pinch of lemon zest—trust me, that hint of citrus makes all the difference. The oysters stay juicy, the topping is perfectly crisp, and the flavors are balanced (not too salty, not too fishy). I’m all about fuss-free methods, so you won’t need a fancy shucking knife or complicated prep. This is my best version, tested over countless batches—healthier, faster, and with all the soul-soothing satisfaction you crave. Whether you want to impress guests or just treat yourself, you’re in for a memorable experience.
What Ingredients You Will Need
This perfect baked oysters recipe is all about simple, high-quality ingredients working together to deliver bold flavor and satisfying crunch. Honestly, you might already have most of this in your kitchen. Here’s what you’ll need:
- Fresh oysters in the shell (1 dozen, scrubbed and shucked—ask your fishmonger to do this if you’re wary of shucking at home)
- Unsalted butter, softened (1/2 cup / 115 g; for that creamy, rich base)
- Garlic cloves, finely minced (3 large cloves; you want a punchy, aromatic flavor)
- Breadcrumbs (1/2 cup / 60 g; use panko for extra crunch, but regular works too)
- Fresh parsley, chopped (2 tbsp / 8 g; adds brightness and color)
- Lemon zest (from 1 lemon; trust me, this lifts everything)
- Parmesan cheese, grated (1/4 cup / 25 g; optional, but adds a lovely salty bite)
- Salt and pepper (to taste; I use flaky sea salt for finishing)
- Olive oil (1 tbsp / 15 ml; helps brown the topping nicely)
If you’re gluten-free, swap the breadcrumbs for a GF alternative—Schar brand works well. Dairy-free? Use plant-based butter and skip the Parmesan, or try nutritional yeast for a savory kick. When oysters aren’t in season, you can use good-quality jarred oysters (drained well). I’ve even tried a seafood mix in a pinch—shrimp and scallops work, but nothing beats the briny bite of fresh oysters.
I recommend getting oysters from a trusted fish market—ask for small, deep-cup varieties (like Kumamoto or Blue Point) for the best texture. If you’re feeling fancy, add a pinch of smoked paprika to the breadcrumb mix. In summer, I sometimes swap parsley for fresh dill or chives. And honestly, if you don’t have Parmesan, don’t sweat it. The garlic butter and crispy crumb topping do most of the heavy lifting.
Equipment Needed
- Baking tray (large enough to hold all the oysters in a single layer)
- Oven-safe oyster shells (if not using fresh shells, ceramic ramekins work in a pinch)
- Small mixing bowls (for the garlic butter and breadcrumb topping)
- Sharp knife (for mincing garlic and chopping parsley)
- Microplane or zester (to get that perfect lemon zest)
- Small spoon (for portioning the butter and topping onto each oyster)
- Oven mitts (those shells get hot!)
If you don’t have an oyster shucker, ask your fishmonger to do the job, or use a sturdy butter knife—just be careful! I’ve used silicone baking mats to keep the shells steady (budget-friendly and easy to clean). For the breadcrumbs, a food processor gives the best texture if you’re making your own, but store-bought works fine. Keep your tools clean, especially when working with seafood—no one likes gritty crumbs or lingering shell bits.
Honestly, I’ve made these oysters with everything from cast iron pans to disposable foil trays. The results are always tasty, but I do recommend a sturdy baking tray for even heat. If you’re hosting a crowd, invest in a shell rack for easy handling. Or, just nestle the shells in a bed of rock salt—an old-school tip that keeps them upright and looks pretty fancy.
Preparation Method
-
Preheat your oven to 425°F (220°C). Line a large baking tray with aluminum foil or a silicone baking mat for easy cleanup.
Prep time: 5 minutes. -
Prepare the garlic butter: In a small mixing bowl, blend 1/2 cup (115 g) unsalted butter with 3 finely minced garlic cloves. Stir in 2 tbsp (8 g) chopped parsley and the zest of 1 lemon. Season with a pinch of salt and pepper.
Sensory cue: The butter should smell bright and garlicky, and look pale green from the parsley.
Prep time: 3 minutes. -
Mix the crispy topping: Combine 1/2 cup (60 g) breadcrumbs, 1 tbsp (15 ml) olive oil, and 1/4 cup (25 g) grated Parmesan (if using) in a separate bowl. Toss until the crumbs are evenly coated and slightly damp.
Personal tip: If you want extra crunch, use panko and toast it lightly in a dry pan first.
Prep time: 2 minutes. -
Arrange the oysters: Place the shucked oysters on the baking tray, nestled in their shells. If the shells wobble, use crumpled foil or rock salt to steady them.
Troubleshooting: If you notice any dry or shriveled oysters, discard them—they’re past their prime.
Prep time: 2 minutes. -
Top each oyster: Spoon about 1 teaspoon (5 ml) of garlic butter onto each oyster, then sprinkle with a generous layer of the breadcrumb mixture.
Sensory cue: The topping should mound slightly, but not spill over.
Prep time: 5 minutes. -
Bake: Slide the tray into the oven and bake for 10-12 minutes, until the butter is bubbling and the topping is golden brown.
Sensory cue: You’ll see the crumbs crisp up and smell a nutty, garlicky aroma.
Warning: Oysters overbake quickly! Check at 10 minutes—if the tops are golden, they’re ready.
Prep time: 10-12 minutes. -
Cool slightly and serve: Let the oysters rest for 2 minutes before serving. The shells will be hot, so use oven mitts or tongs to transfer them to a platter.
Personal tip: A squeeze of fresh lemon over the top just before serving really brightens things up.
Prep time: 2 minutes.
If your topping isn’t browning, pop the tray under the broiler for 1-2 minutes—just keep an eye out so nothing burns. For efficiency, prep the garlic butter and breadcrumb mixture ahead of time. You can store both in the fridge for up to a day, which makes assembly a breeze.
Cooking Tips & Techniques
Making perfect baked oysters with garlic butter and crispy breadcrumbs is honestly simple, but I’ve learned a few tricks along the way (mostly from trial and error!).
- Don’t Overbake: Oysters cook quickly—overbaking can make them rubbery. Watch for bubbling butter and golden crumbs. If you’re unsure, err on the side of slightly underdone.
- Even Topping: Spread the breadcrumb mix evenly. If it piles up too much, the top might brown before the oyster cooks through. I use a small spoon for better control.
- Freshness Matters: Use the freshest oysters you can find—ask your fishmonger for harvest dates. Stale oysters just don’t taste as bright.
- Garlic Balance: Too much garlic can overpower the oysters. I stick to three cloves for a dozen shells. If you’re a garlic fiend, go wild—but taste the butter first!
- Broiling: For extra crispiness, broil the oysters for the last minute. Stay close by—the difference between golden and burnt is about 30 seconds.
One time, I forgot the olive oil in the crumbs and ended up with a dry, dusty topping. Lesson learned—oil is what makes them crunchy and golden! Timing is everything: I prep the butter and crumbs while the oven heats, and shuck the oysters last, so they stay juicy. If you’re multitasking, set a timer—distractions lead to overdone oysters, trust me.
Consistency is key. I use the same amount of butter and crumb topping for each shell, and always taste the garlic butter before assembly. Season well, but don’t overpower the oyster’s natural flavor. If you’re new to oyster shucking, watch a few videos or ask your fishmonger for advice. And most important: relax! Even imperfect baked oysters taste delicious.
Variations & Adaptations
One of the best things about perfect baked oysters is how easy they are to customize. Here are a few of my favorite twists:
- Gluten-Free: Use gluten-free breadcrumbs or crushed rice crackers. The crunch is different but still satisfying.
- Dairy-Free: Swap the butter for plant-based margarine and skip the Parmesan, or use nutritional yeast for a cheesy flavor.
- Spicy Kick: Add a pinch of cayenne or smoked paprika to the breadcrumb mix for a little heat.
- Herb Swap: Try dill, chives, or tarragon instead of parsley for a seasonal twist.
- Alternative Cooking: Grill the oysters on a hot barbecue for a smoky finish—just cover loosely with foil to keep the butter from dripping out.
- Cheesy Variation: Mix in crumbled blue cheese or feta for an extra savory topping.
- Allergen-Friendly: For nut allergies, avoid any nut-based cheeses or toppings.
Personally, I love adding a bit of lemon juice to the garlic butter in summer, and swapping in smoked paprika when the weather’s chilly. I even tried a version with finely chopped baby spinach for extra color and nutrients—worked like a charm! Try different breadcrumb brands to see what crunch you like best. And honestly, don’t be afraid to get creative.
Serving & Storage Suggestions
Baked oysters are best served hot—straight from the oven, when the butter is sizzling and the breadcrumbs are golden. Arrange them on a platter lined with rock salt or fresh herbs for a Pinterest-worthy presentation. A wedge of lemon on the side is always appreciated.
Pair with a crisp white wine, sparkling lemonade, or a light salad. For a heartier meal, serve alongside roasted potatoes, grilled asparagus, or crusty bread to soak up the garlicky butter.
If you have leftovers (rare, but it happens!), store the oysters in an airtight container in the fridge for up to 2 days. Reheat gently in a 350°F (180°C) oven for 5-7 minutes—avoid microwaving, as it can make them rubbery. The flavors actually deepen overnight, making them surprisingly tasty the next day. Freezing isn’t recommended, but you can prep the topping and butter in advance and freeze those for quick assembly later.
Nutritional Information & Benefits
Each serving (2 oysters) contains roughly:
- Calories: 120
- Protein: 7 g
- Fat: 8 g
- Carbohydrates: 6 g
- Sodium: 220 mg
Oysters are a great source of zinc, iron, and B vitamins. The garlic adds antioxidants, while olive oil offers heart-healthy fats. If you skip the cheese, this baked oysters recipe is naturally low-carb and gluten-free (with GF breadcrumbs). Watch out for shellfish allergies—these are not safe for those sensitive to seafood.
From a wellness perspective, I love how satisfying these oysters are without being heavy. They’re a treat, but also packed with nutrients that support energy and immunity. Moderation is key, but there’s nothing wrong with enjoying a few!
Conclusion
So, why should you try this perfect baked oysters recipe? It’s easy, quick, and guarantees rave reviews—even from oyster skeptics. You can tweak the toppings, swap out herbs, and make it your own. I honestly love how it brings big flavor with minimal fuss, and how every bite feels like a mini celebration.
Customize as you please—make it spicy, cheesy, or dairy-free. Share your tweaks and tips in the comments below; I’d love to hear what you come up with! If you have any questions or want to share your own oyster memories, don’t hesitate to reach out. And if you’re looking for a recipe that delivers pure comfort and a touch of fancy (without the stress), this is the one to bookmark. Happy baking!
FAQs
How do I shuck oysters safely?
If you’re new to shucking, ask your fishmonger to do it for you. If you’re feeling brave, use a sturdy knife and a thick towel to protect your hand. Twist gently until the shell pops open—practice makes perfect!
Can I use pre-shucked oysters for this recipe?
Yes! Just make sure they’re well-drained and nestled in oven-safe ramekins. The texture is a little different, but the flavor is still fantastic.
What’s the best way to get crispy breadcrumbs?
Mix the crumbs with olive oil and, if you have time, toast them lightly in a dry pan before topping the oysters. Panko breadcrumbs give the best crunch.
Can I make baked oysters ahead of time?
You can prepare the garlic butter and topping ahead, but bake the oysters right before serving for best texture and flavor. Leftovers can be reheated gently in the oven.
Are baked oysters safe for kids?
Yes, if they don’t have shellfish allergies and are comfortable with the texture. My kids love the crispy topping! Just be sure the oysters are fully cooked and cooled before serving.
Pin This Recipe!
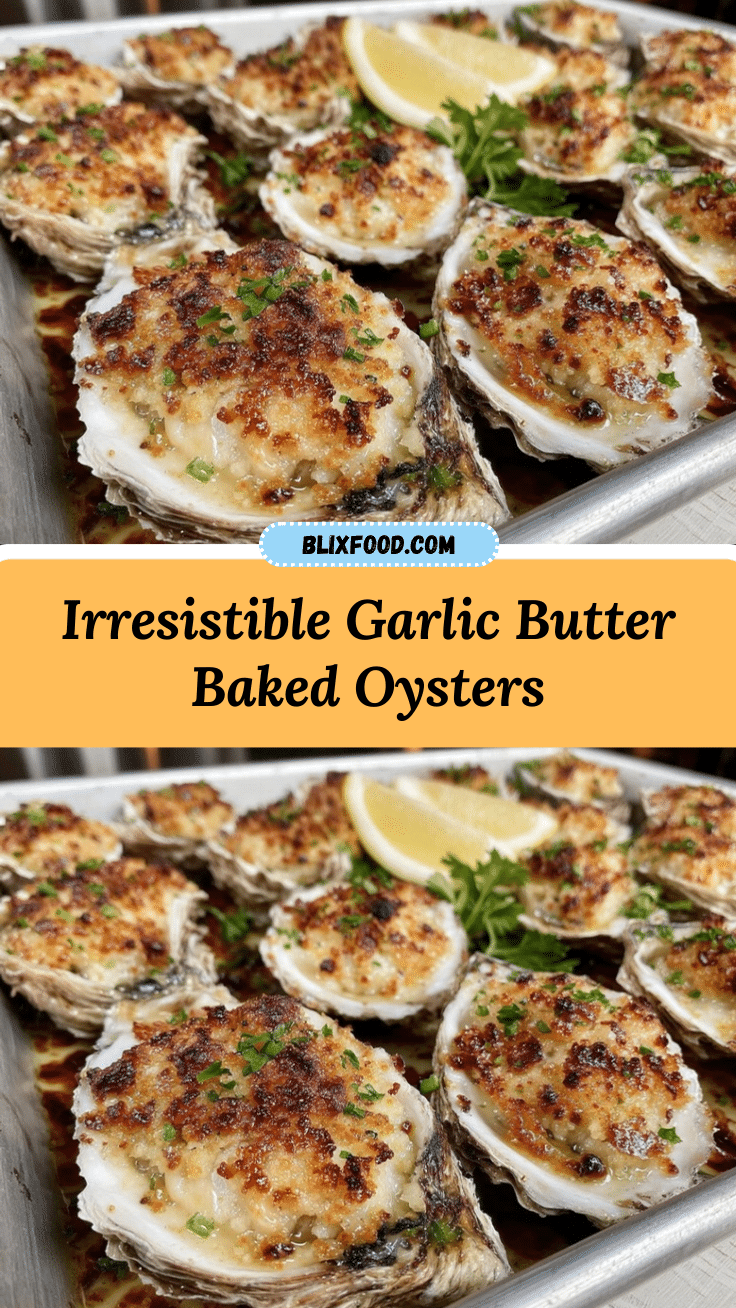
Perfect Baked Oysters Recipe: Easy Garlic Butter & Crispy Breadcrumbs

These baked oysters feature a rich garlic butter, crispy breadcrumb topping, and a hint of lemon zest for a comforting, crowd-pleasing appetizer. Quick to prepare and perfect for any occasion, this recipe delivers big flavor with minimal fuss.
- Prep Time: 15 minutes
- Cook Time: 12 minutes
- Total Time: 27 minutes
- Yield: 6 servings 1x
- Category: Appetizer
- Cuisine: American
Ingredients
- 1 dozen fresh oysters in the shell, scrubbed and shucked
- 1/2 cup unsalted butter, softened
- 3 large garlic cloves, finely minced
- 1/2 cup breadcrumbs (panko preferred for extra crunch)
- 2 tablespoons fresh parsley, chopped
- Zest of 1 lemon
- 1/4 cup grated Parmesan cheese (optional)
- Salt and pepper to taste (flaky sea salt recommended)
- 1 tablespoon olive oil
Instructions
- Preheat your oven to 425°F (220°C). Line a large baking tray with aluminum foil or a silicone baking mat for easy cleanup.
- In a small mixing bowl, blend unsalted butter with minced garlic. Stir in chopped parsley and lemon zest. Season with a pinch of salt and pepper.
- In a separate bowl, combine breadcrumbs, olive oil, and Parmesan cheese (if using). Toss until the crumbs are evenly coated and slightly damp.
- Place the shucked oysters on the baking tray, nestled in their shells. Use crumpled foil or rock salt to steady them if needed.
- Spoon about 1 teaspoon of garlic butter onto each oyster, then sprinkle with a generous layer of the breadcrumb mixture.
- Bake for 10-12 minutes, until the butter is bubbling and the topping is golden brown. Check at 10 minutes to avoid overbaking.
- Let the oysters rest for 2 minutes before serving. Use oven mitts or tongs to transfer them to a platter. Serve with a squeeze of fresh lemon.
Notes
For gluten-free, use GF breadcrumbs. For dairy-free, use plant-based butter and skip Parmesan or substitute nutritional yeast. Oysters cook quickly—avoid overbaking for best texture. Prep garlic butter and topping ahead for easy assembly. Broil for 1-2 minutes at the end for extra crispiness if desired.
Nutrition
- Serving Size: 2 oysters
- Calories: 120
- Sugar: 0.5
- Sodium: 220
- Fat: 8
- Saturated Fat: 4
- Carbohydrates: 6
- Fiber: 0.5
- Protein: 7
Keywords: baked oysters, garlic butter oysters, crispy breadcrumb oysters, seafood appetizer, easy oyster recipe, holiday oysters, comfort food, party food, oven baked oysters