Introduction
Imagine this: the sweet scent of fresh oranges mingling with warm vanilla wafting out of your kitchen, the kind of aroma that instantly transports you to a sunlit childhood summer day. That’s exactly what happens every time I bake a batch of these creamy homemade Orange Creamsicle Bars with their oh-so-buttery vanilla base. The first time I pulled these out of the oven, I was right back at the county fair—sticky fingers, big grins, and that classic creamsicle flavor that’s somehow both nostalgic and magical.
Years ago, when I was knee-high to a grasshopper, my grandma would hand me those orange-and-vanilla swirl popsicles on blistering afternoons, and I swear, I could never eat just one. Fast forward to a rainy weekend when I was trying to recreate that same joy (but in a grown-up dessert bar form), and after a few delicious experiments, these Orange Creamsicle Bars found their way into my life. You know what? I wish I’d thought of this recipe ages ago—it would have been the highlight of every bake sale and family picnic!
Honestly, my family can’t keep their hands off them. Every time I make these, folks hover near the cooling rack, sneaking little pieces before the bars are even set. My kids beg for them as after-school treats, and my friends always request the recipe (and a few extras to take home). They’re dangerously easy, packed with pure, nostalgic comfort, and look absolutely stunning on any dessert table—talk about a Pinterest showstopper! Whether you’re searching for the perfect potluck contribution, a sweet treat for your kids, or just a bright, creamy dessert to make your week a little sunnier, these Orange Creamsicle Bars hit the spot every single time.
After testing this recipe more times than I care to admit (in the name of research, of course), I can say with confidence: this one’s become a staple for family gatherings, gifting, and just-because moments. It feels like a warm hug in dessert form, and you’re going to want to bookmark this beauty—trust me!
Why You’ll Love This Orange Creamsicle Bars Recipe
I’ve baked a lot of bars in my life, but these Orange Creamsicle Bars with a buttery vanilla base are a cut above the rest. Here’s why you’ll be reaching for this recipe again and again (and why it’s earned a permanent spot on my dessert rotation):
- Quick & Easy: You can whip these up in just about 45 minutes, making them perfect for impromptu gatherings or satisfying sudden cravings—no chilling overnight required!
- Simple Ingredients: Most of what you need is probably already in your kitchen. No wild-goose chases for fancy extracts or specialty flours—just good old-fashioned pantry staples and fresh oranges.
- Perfect for Any Occasion: These bars are great for brunch spreads, bake sales, birthday parties, or lazy weekends when you want a sweet pick-me-up. They look as pretty as they taste, too!
- Crowd-Pleaser: Adults love the sophisticated vanilla-citrus flavor, and kids go wild for the creamy texture and bright color. I’ve never seen leftovers last past day two (if that long).
- Unbelievably Delicious: The combination of a rich, buttery vanilla base and a creamy, tangy orange layer is pure comfort food. Every bite delivers that dreamy creamsicle flavor with just the right balance of sweet and tart.
What sets this Orange Creamsicle Bars recipe apart? For starters, blending fresh orange zest with real cream cheese creates a filling that’s ultra-smooth (no weird lumps or graininess). The buttery vanilla shortbread base is just thick enough to hold up but soft enough to melt in your mouth. I’ve tested different methods—zesting vs. juicing, all-butter vs. a butter-oil combo—and this version nails the perfect texture every single time.
These bars aren’t just another dessert. They’re the kind of treat that makes you pause after the first bite, close your eyes, and feel like a kid again. They’re comforting but light, just the right amount of sweet, and somehow manage to taste both classic and new. I love that they impress guests without taking all day, and they turn the most ordinary afternoon into something special. So go ahead: spoil yourself (and your loved ones)—these Orange Creamsicle Bars are the real deal.
What Ingredients You Will Need
This recipe uses simple, wholesome ingredients to deliver big creamsicle flavor and a melt-in-your-mouth texture, all without any fuss. Most of these are pantry or fridge staples, and the few fresh items make all the difference in taste and aroma.
- For the Buttery Vanilla Base:
- 1 cup (226g) unsalted butter, softened (for that rich, melt-away base)
- 3/4 cup (150g) granulated sugar
- 2 teaspoons pure vanilla extract (I love using Nielsen-Massey for a strong vanilla flavor)
- 2 cups (250g) all-purpose flour (King Arthur is my go-to for consistent results)
- 1/2 teaspoon salt
- For the Creamy Orange Layer:
- 8 oz (225g) cream cheese, softened (full-fat for creaminess; you can use Neufchâtel for a lighter version)
- 2/3 cup (130g) granulated sugar
- 2 large eggs, room temperature
- 1/2 cup (120ml) freshly squeezed orange juice (about 2 medium oranges, strained for smoothness)
- 2 tablespoons orange zest (from about 2 oranges—zest before juicing!)
- 1 teaspoon vanilla extract
- 2 tablespoons all-purpose flour
- Pinch of salt
- Optional: a few drops of orange food coloring (if you want that classic creamsicle hue)
- For the Creamsicle Glaze (optional but recommended):
- 1 cup (120g) powdered sugar, sifted
- 2-3 tablespoons orange juice
- 1/2 teaspoon vanilla extract
- Orange zest for sprinkling on top
Ingredient Tips: If you want a gluten-free version, swap the flour for a 1:1 gluten-free baking blend. For a dairy-free option, use plant-based butter and cream cheese, but note that texture may vary slightly. When oranges are in season, choose navel or Cara Cara for the best color and sweetness. If you’re short on time, bottled orange juice works in a pinch, but fresh truly brings these bars to life. And if you like an extra punch of citrus, toss in a dash of lemon zest along with the orange.
Trust me—the fresher the ingredients, the brighter the flavor. Don’t skip the zest; it’s what makes these bars sing!
Equipment Needed
- 8×8-inch (20×20 cm) square baking pan: Standard size for thick, bakery-style bars. If you only have a 9×9, bars will be thinner but still tasty.
- Parchment paper: For easy lifting and no sticking (your future self will thank you).
- Mixing bowls: At least two—one for the base, one for the filling.
- Electric mixer: A hand or stand mixer works for creaming the butter and cream cheese. You can do it by hand, but it’s a workout!
- Microplane or fine grater: For zesting oranges. In a pinch, use the smallest holes on a box grater.
- Measuring cups and spoons: Precision counts, especially for baking.
- Rubber spatula: Handy for scraping bowls and smoothing layers.
- Whisk: For blending the glaze.
- Cooling rack: Optional, but helps bars set evenly.
If you don’t have parchment, just grease your pan well with butter or nonstick spray. I’ve made these in glass and metal pans—metal gives a crisper base but watch your bake time. For budget-friendly options, dollar store spatulas and bowls work just fine. Keep your zester sharp and always wash it right away (dried zest is a bear to clean off!).
Preparation Method
-
Prep the Pan:
Line your 8×8-inch (20×20 cm) pan with parchment paper, leaving overhang for easy lifting. If you’re using a metal pan, a quick spritz of nonstick spray helps. Preheat your oven to 350°F (175°C). -
Make the Buttery Vanilla Base:
In a medium bowl, cream together 1 cup (226g) unsalted butter and 3/4 cup (150g) sugar until light and fluffy (about 2-3 minutes with a hand mixer). Beat in 2 teaspoons vanilla extract. Add 2 cups (250g) all-purpose flour and 1/2 teaspoon salt; mix until just combined and crumbly. Don’t overmix—a few dry streaks are okay.
Tip: If your dough feels very dry, add 1 tablespoon of milk, but it should hold together when pressed. -
Press & Bake the Base:
Press the dough evenly into the prepared pan, using your hands or the bottom of a measuring cup. Bake for 18-20 minutes, until just set and edges are barely golden. It shouldn’t brown much—watch closely near the end.
Sensory cue: The kitchen will start smelling like sugar cookies! -
Prepare the Creamy Orange Layer:
While the base bakes, beat 8 oz (225g) cream cheese and 2/3 cup (130g) sugar together until silky smooth (no lumps!). Add 2 eggs, one at a time, beating well after each. Mix in 1/2 cup (120ml) orange juice, 2 tablespoons zest, and 1 teaspoon vanilla extract. Add 2 tablespoons flour and a pinch of salt; beat until just combined. If using, add a drop or two of orange food coloring.
Warning: Overmixing can make the filling too airy—stop when everything is incorporated. -
Pour & Bake Again:
Pour the orange mixture over the hot base, spreading evenly. Return to oven and bake for 22-25 minutes, until the edges are set but the center jiggles slightly (like cheesecake).
Troubleshooting: If the top cracks, don’t worry! The glaze will cover it. -
Cool Completely:
Allow bars to cool in the pan for 1 hour, then refrigerate for at least 2 hours (overnight is even better). This helps them slice cleanly.
Personal tip: Chill the bars before glazing for a neater finish. -
Make the Glaze:
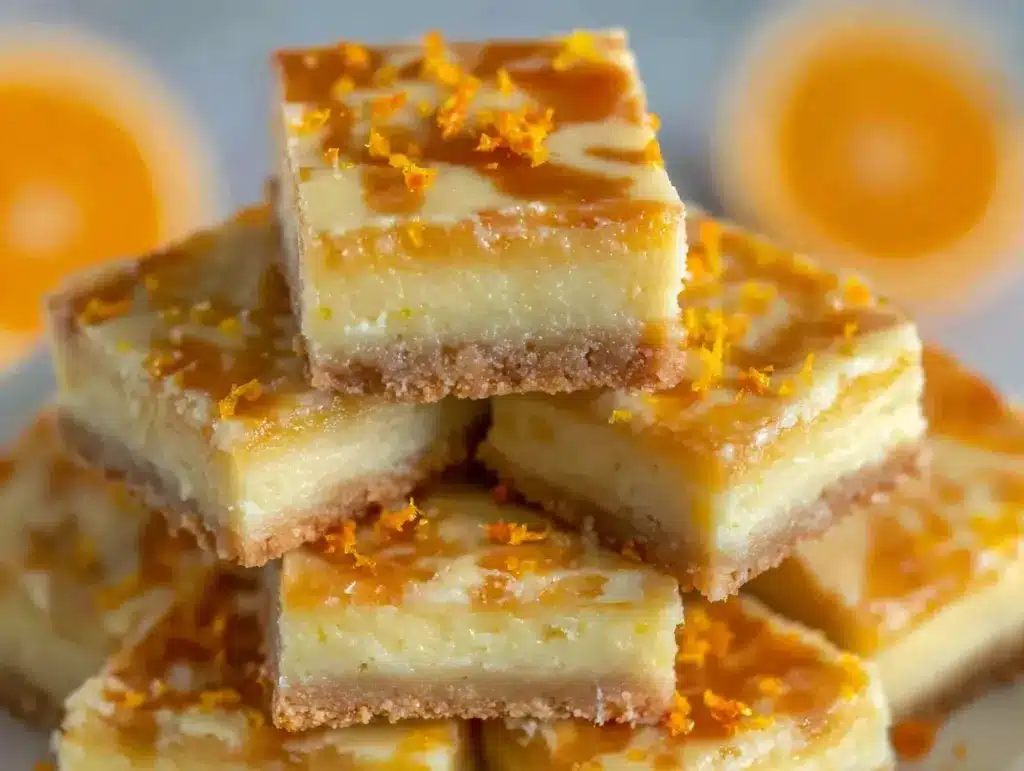
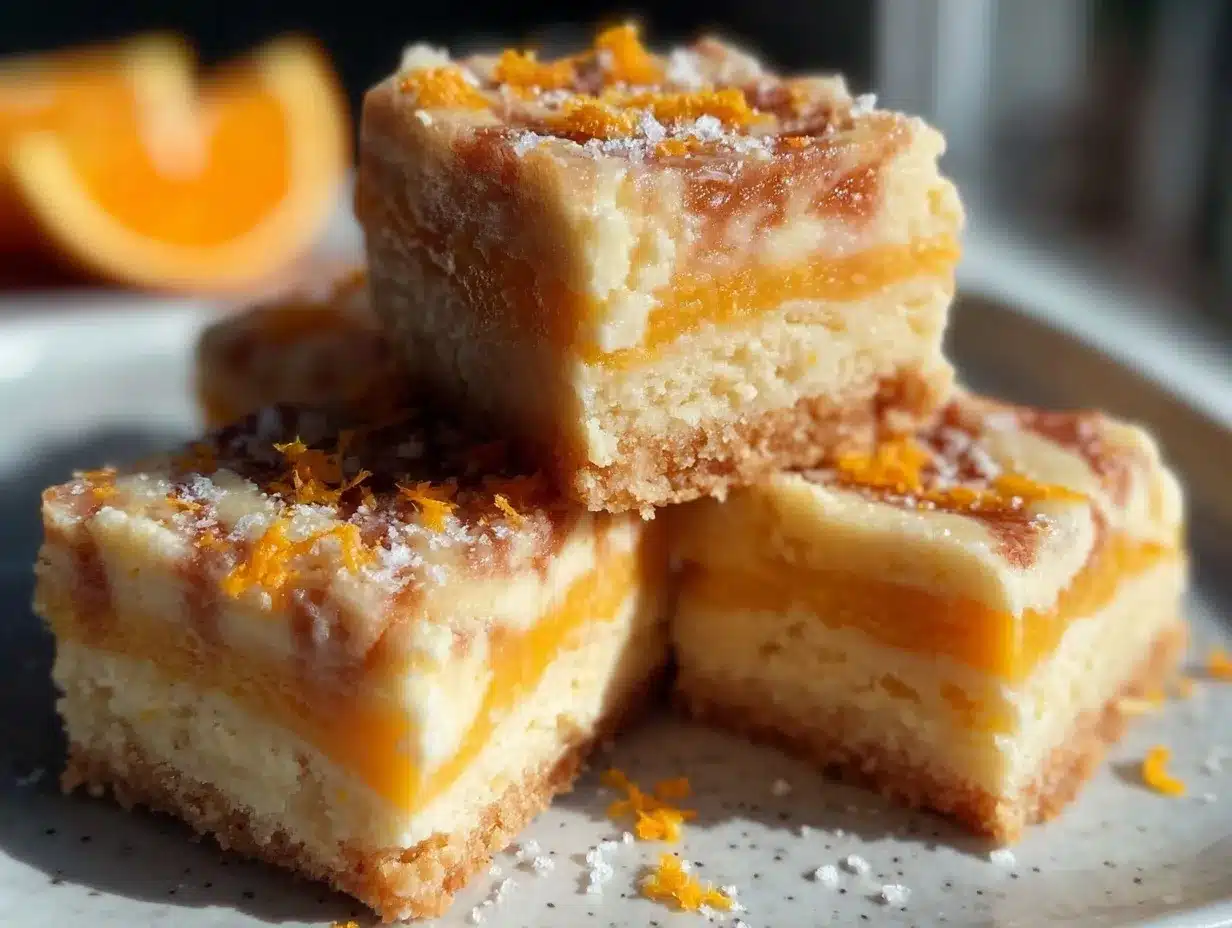
Whisk 1 cup (120g) powdered sugar, 2-3 tablespoons orange juice, and 1/2 teaspoon vanilla until smooth. Drizzle or spread over chilled bars. Sprinkle with extra zest for a pop of color. -
Slice & Serve:
Lift bars out using parchment overhang, then cut into 16 squares using a sharp knife (wipe between cuts for clean edges).
Efficiency hack: While the base bakes, zest and juice your oranges and prep the filling. If you’re making these for a crowd, double the recipe and use a 9×13-inch pan (just add 5 minutes to each bake time). Don’t rush the chilling step—it really makes a difference!
Cooking Tips & Techniques
Over the years—and dozens of batches—I’ve picked up some tricks that guarantee dreamy Orange Creamsicle Bars every time:
- Room Temperature Ingredients: Make sure your butter, cream cheese, and eggs are at room temp. Cold ingredients can cause the filling to lump or the base to turn out tough.
- Don’t Overmix: Once you add the flour to the base or the eggs to the filling, mix just until combined. Overworking dough creates a hard crust, and too much air in the filling leads to cracks.
- Bake in Two Stages: Baking the base first keeps it crisp and prevents soggy bottoms (learned this the hard way—nobody likes mushy bars).
- Watch the Jiggle: The filling should jiggle slightly in the center when you pull it out, kind of like cheesecake. It’ll set up perfectly in the fridge.
- Chill for Clean Cuts: If you’re in a hurry, pop the pan in the freezer for 30 minutes after cooling. Use a hot knife (run under warm water, dry off) for bakery-perfect slices.
- Zest First, Then Juice: It’s way easier to zest whole oranges than juiced halves. Trust me, I’ve tried both ways and there’s no contest.
- Glaze at the Last Minute: Spread the glaze after chilling, not before. Otherwise, it can melt and slide off.
Common mistakes? Rushing the chill time (bars get messy), using bottled juice (flavor is flat), or forgetting to line the pan (hello, stuck-on disaster). If you’re multitasking, prep the base and filling at the same time for speed. Consistency is all about fresh zest, careful mixing, and patience during chilling. You’ll thank yourself later!
Variations & Adaptations
One of the best things about this Orange Creamsicle Bars recipe is how easily you can tweak it for any preference or occasion:
- Gluten-Free: Swap the all-purpose flour for a 1:1 gluten-free baking blend. I’ve tried Bob’s Red Mill and it works like a charm—just as buttery and tender.
- Dairy-Free: Use plant-based butter and vegan cream cheese. The texture is a little softer, but the flavor is still out-of-this-world citrusy.
- Lemon-Lime Twist: Substitute half the orange juice and zest with lemon or lime for a tangy, zippy version. I love this for summer parties!
- Berry Creamsicle: Add 1/2 cup (75g) chopped fresh strawberries or raspberries to the filling for a sweet-tart surprise.
- Different Cooking Methods: You can bake these in a muffin tin with liners for individual creamsicle bites—reduce the baking time by about 5 minutes.
- Nutty Crunch: Sprinkle toasted sliced almonds or coconut flakes on top of the glaze for a little extra pizzazz.
Allergen substitutions are simple—use nut-free alternatives and oat-based flours if needed. My personal favorite? The lemon-lime version with a coconut glaze (it’s like a creamsicle vacation in a bar). Don’t be afraid to experiment—these bars are super forgiving!
Serving & Storage Suggestions
For the best experience, serve these Orange Creamsicle Bars chilled or at cool room temperature. The creamy filling sets up beautifully, and the citrus flavor shines brightest when cold. Arrange the bars on a white platter for a pop of color, and sprinkle a little extra orange zest right before serving for a pretty finish.
Pair with iced tea, sparkling lemonade, or (let’s be honest) a hot cup of coffee. They’re lovely as part of a dessert buffet, alongside fresh fruit or vanilla ice cream.
To store, cover and refrigerate for up to 5 days. The flavors actually deepen after a day in the fridge, so if you can wait, they’re even better on day two! For longer storage, wrap tightly and freeze for up to 2 months; thaw in the fridge overnight before serving. If you like your glaze a little softer, let bars sit at room temp for 10 minutes before eating. These bars rarely last long enough to worry about leftovers—but it’s nice to know you can make them ahead for parties or gifts.
Nutritional Information & Benefits
Each Orange Creamsicle Bar (1 of 16) is about 190 calories, with 8g fat, 28g carbs, and 2g protein. You get a nice dose of vitamin C from all that fresh orange juice and zest! The base uses real butter, so there are some healthy fats, and the cream cheese filling adds calcium.
If you’re gluten-free or dairy-free, it’s easy to adapt with the substitutions above. Just remember, these do contain eggs, wheat, and dairy unless modified. I love that they satisfy a sweet tooth without being overly rich or heavy—just right for a bright pick-me-up. As always, enjoy in moderation (but don’t be surprised if you go back for seconds!).
Conclusion
These Creamy Homemade Orange Creamsicle Bars with their buttery vanilla base are the kind of treat you’ll want to make again and again. They’re simple, crowd-pleasing, and brimming with nostalgic flavor—like the creamsicle pops of your childhood, but with a grown-up twist.
Feel free to put your own spin on them. Whether it’s a gluten-free base or a berry twist, these bars are as flexible as they are delicious. Honestly, they brighten up any day, and they have a way of disappearing fast at every gathering!
This recipe means a lot to me because it brings together everything I love about baking—easy, memorable, and made for sharing. If you whip up a batch, I’d love to hear how they turn out. Leave a comment, share with your friends, and don’t forget to pin this recipe for next time. Happy baking (and snacking)!
FAQs About Orange Creamsicle Bars
Can I use bottled orange juice instead of fresh?
Fresh orange juice really makes these bars shine, but in a pinch, bottled juice works. Just make sure it’s not from concentrate and add extra zest for flavor.
How do I store Orange Creamsicle Bars?
Store covered in the refrigerator for up to 5 days. For longer storage, wrap and freeze for up to 2 months. Thaw overnight in the fridge before serving.
Can I make these bars gluten-free?
Absolutely! Use a 1:1 gluten-free flour blend in both the base and filling. The bars will still be tender and delicious.
What if I don’t have cream cheese?
You can substitute with Neufchâtel cheese or a thick Greek yogurt for a lighter version, though the texture will be a bit softer and more tangy.
Can I double the recipe?
Yes! Double all ingredients and bake in a 9×13-inch pan. Add about 5 minutes to each bake time and check for doneness as usual.
Pin This Recipe!
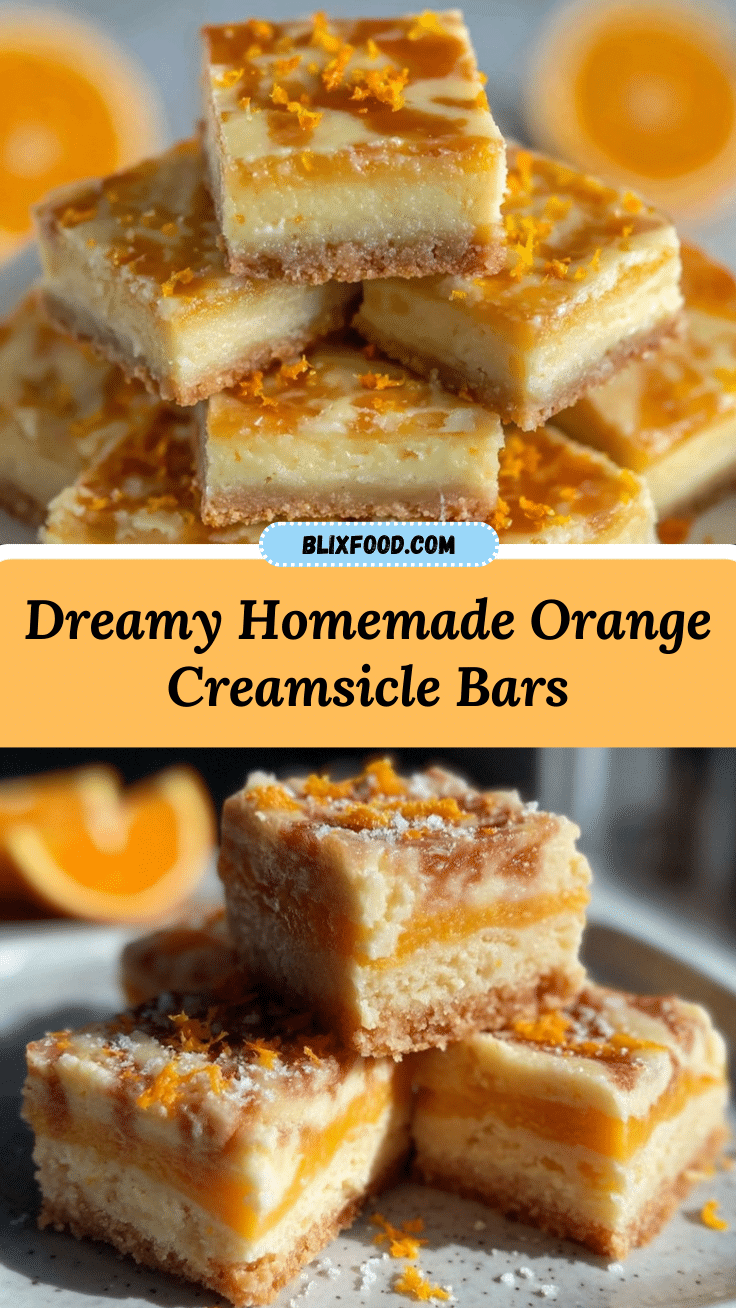
Orange Creamsicle Bars
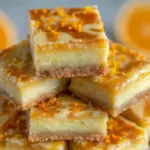
These Orange Creamsicle Bars feature a buttery vanilla shortbread base topped with a creamy, tangy orange layer and optional citrus glaze. Nostalgic, easy to make, and perfect for any occasion, they deliver classic creamsicle flavor in a grown-up dessert bar form.
- Prep Time: 15 minutes
- Cook Time: 45 minutes
- Total Time: 1 hour
- Yield: 16 bars 1x
- Category: Dessert
- Cuisine: American
Ingredients
- 1 cup unsalted butter, softened
- 3/4 cup granulated sugar
- 2 teaspoons pure vanilla extract
- 2 cups all-purpose flour
- 1/2 teaspoon salt
- 8 oz cream cheese, softened
- 2/3 cup granulated sugar
- 2 large eggs, room temperature
- 1/2 cup freshly squeezed orange juice (about 2 medium oranges, strained)
- 2 tablespoons orange zest (from about 2 oranges)
- 1 teaspoon vanilla extract
- 2 tablespoons all-purpose flour
- Pinch of salt
- Optional: a few drops of orange food coloring
- 1 cup powdered sugar, sifted (for glaze)
- 2–3 tablespoons orange juice (for glaze)
- 1/2 teaspoon vanilla extract (for glaze)
- Orange zest for sprinkling on top (for glaze)
Instructions
- Line an 8×8-inch baking pan with parchment paper, leaving overhang for easy lifting. Preheat oven to 350°F (175°C).
- In a medium bowl, cream together butter and sugar until light and fluffy (2-3 minutes). Beat in vanilla extract.
- Add flour and salt to the butter mixture; mix until just combined and crumbly. If dough is very dry, add 1 tablespoon milk.
- Press dough evenly into prepared pan. Bake for 18-20 minutes, until just set and edges are barely golden.
- While base bakes, beat cream cheese and sugar together until smooth. Add eggs one at a time, beating well after each.
- Mix in orange juice, orange zest, and vanilla extract. Add flour and pinch of salt; beat until just combined. Add orange food coloring if desired.
- Pour orange mixture over hot base, spread evenly. Bake for 22-25 minutes, until edges are set but center jiggles slightly.
- Cool bars in pan for 1 hour, then refrigerate at least 2 hours (overnight is best).
- Whisk powdered sugar, orange juice, and vanilla extract until smooth. Drizzle or spread glaze over chilled bars. Sprinkle with extra orange zest.
- Lift bars out using parchment overhang. Cut into 16 squares with a sharp knife, wiping between cuts for clean edges.
Notes
For gluten-free bars, use a 1:1 gluten-free flour blend. For dairy-free, substitute plant-based butter and cream cheese. Chill bars thoroughly before glazing and slicing for clean cuts. Fresh orange juice and zest provide the best flavor. Double the recipe for a 9×13-inch pan, adding 5 minutes to bake times. Bars store well refrigerated for up to 5 days or frozen for 2 months.
Nutrition
- Serving Size: 1 bar (1/16 of recip
- Calories: 190
- Sugar: 18
- Sodium: 90
- Fat: 8
- Saturated Fat: 5
- Carbohydrates: 28
- Protein: 2
Keywords: orange creamsicle bars, dessert bars, citrus bars, easy baking, summer treat, vanilla shortbread, cream cheese bars, homemade creamsicle, potluck dessert, kid-friendly dessert