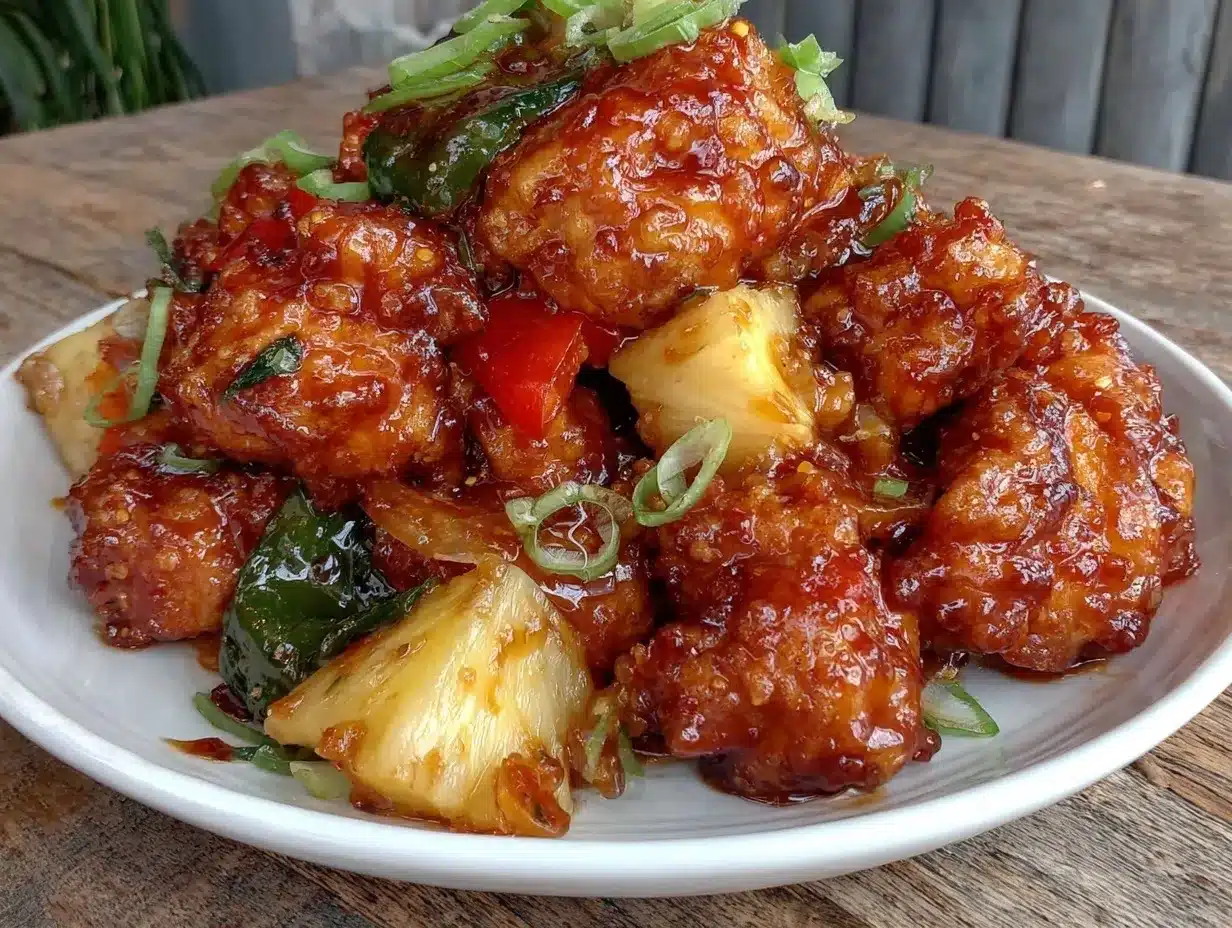
Let me tell you, the scent of sizzling chicken coated in a glossy, tangy-sweet sauce wafting from my skillet is enough to make anyone’s mouth water. The first time I made this Crispy Sweet and Sour Chicken Delight, I was instantly hooked — the kind of moment where you pause, take a deep breath, and just smile because you know you’re onto something truly special. Years ago, when I was knee-high to a grasshopper, my grandma whipped up a similar dish that felt like a warm hug on a rainy day. I always wished I’d discovered this recipe sooner; it’s dangerously easy and delivers pure, nostalgic comfort in every bite.
You know what’s great? My family couldn’t stop sneaking pieces off the cooling rack (and honestly, I can’t really blame them). It’s perfect for potlucks, a sweet treat for your kids after school, or to brighten up your Pinterest cookie board with something savory and bright. I’ve tested this recipe multiple times — in the name of research, of course — and it’s become a staple for family gatherings and gifting. If you haven’t tried this Crispy Sweet and Sour Chicken Delight yet, you’re going to want to bookmark this one.
Why You’ll Love This Crispy Sweet and Sour Chicken Delight Recipe
Honestly, this recipe hits all the right notes and here’s why you’ll keep coming back for more:
- Quick & Easy: Comes together in under 30 minutes, perfect for busy weeknights or last-minute cravings.
- Simple Ingredients: No fancy grocery trips needed; you likely have everything in your kitchen already.
- Perfect for Any Occasion: Great for cozy dinners, casual get-togethers, or a family favorite that everyone asks for again.
- Crowd-Pleaser: Always gets rave reviews from kids and adults alike — the crispy coating combined with that tangy sauce is irresistible.
- Unbelievably Delicious: The texture and flavor combo here is next-level comfort food — crispy, juicy chicken paired with a perfectly balanced sweet and sour glaze.
What sets this Crispy Sweet and Sour Chicken Delight apart is the crispy coating that stays crunchy even after tossing in the sauce. The secret? A light dusting of cornstarch combined with a quick double-fry technique that I learned after a few kitchen mishaps. Plus, the sauce is balanced just right — tangy enough to make your taste buds dance but sweet enough to keep it comforting. This isn’t just another sweet and sour chicken recipe; it’s the best version you’ll find, no joke.
When you take that first bite and close your eyes, you’ll feel it — that soul-soothing satisfaction that makes you want to cook it again next week (and the week after). Perfect for impressing guests without any stress or turning a simple dinner into something memorable.
What Ingredients You Will Need
This Crispy Sweet and Sour Chicken Delight uses simple, wholesome ingredients to deliver bold flavor and a satisfying crunch without any fuss. Here’s what you’ll need to bring this dish to life:
- For the Chicken:
- 1 lb (450g) boneless, skinless chicken thighs or breasts, cut into bite-size pieces (thighs stay juicier)
- 1/2 cup (65g) all-purpose flour (you can swap with gluten-free flour blend if needed)
- 1/2 cup (65g) cornstarch (for that extra crispy coating)
- 2 large eggs, beaten (room temperature)
- Salt and pepper, to taste
- Vegetable oil or canola oil, for frying (enough for shallow frying)
- For the Sweet and Sour Sauce:
- 1/2 cup (120ml) pineapple juice (fresh or canned works)
- 1/4 cup (60ml) rice vinegar or white vinegar
- 1/3 cup (67g) granulated sugar (adjust to taste)
- 3 tbsp ketchup (adds depth and color)
- 1 tbsp soy sauce (I prefer Kikkoman for consistency)
- 2 tsp cornstarch mixed with 2 tbsp cold water (for thickening)
- For the Veggies (Optional but Recommended):
- 1 small red bell pepper, cut into chunks
- 1 small green bell pepper, cut into chunks
- 1/2 cup (75g) pineapple chunks (fresh or canned)
- 2 green onions, sliced (for garnish)
Tip: If you want to make this gluten-free, swap the all-purpose flour with almond flour or a gluten-free blend and ensure your soy sauce is gluten-free tamari. For a dairy-free option, this recipe is naturally so no worries there!
Equipment Needed
- Large mixing bowls for coating the chicken
- Deep skillet or wok for frying (I love my heavy-bottomed cast iron pan for even heat)
- Slotted spoon or tongs for turning and removing chicken pieces
- Small saucepan or skillet to prepare the sauce (optional but helps with stirring sauce separately)
- Measuring cups and spoons for accuracy
- Paper towels or a wire rack for draining fried chicken
If you don’t have a wok, a deep skillet with high sides works just fine. For frying, I recommend a thermometer if you want to be precise; otherwise, a wooden chopstick test (bubbles form around the stick) works well. Don’t forget to keep your oil at a steady temperature to avoid soggy chicken — trust me, I’ve learned that the hard way more than once!
Preparation Method
- Prep the chicken: Rinse and pat dry the chicken pieces with paper towels. Season lightly with salt and pepper. (This step helps the coating stick better.)
- Set up coating stations: In one bowl, mix the flour and cornstarch. In another bowl, beat the eggs. This two-step coating ensures the chicken gets that signature crunch.
- Coat the chicken: Dip each piece first into the egg, then dredge thoroughly in the flour-cornstarch mix. Place coated pieces on a plate or tray. Don’t overcrowd them, or they’ll stick together.
- Heat the oil: Pour about 1-2 inches (2.5-5 cm) of oil into your skillet or wok. Heat over medium-high heat to about 350°F (175°C). Use a thermometer or test with a small piece of bread that should sizzle immediately.
- First fry: Fry the chicken pieces in batches, about 3-4 minutes per batch, until lightly golden but not fully cooked. Remove and drain on paper towels or wire rack.
- Prepare the sweet and sour sauce: While the chicken rests, combine pineapple juice, vinegar, sugar, ketchup, and soy sauce in a small saucepan. Bring to a simmer over medium heat, stirring until sugar dissolves.
- Thicken the sauce: Stir the cornstarch slurry (cornstarch + water) and slowly add to the simmering sauce. Keep stirring until sauce thickens to a glossy coating consistency, about 2 minutes.
- Final fry: Return the chicken to the hot oil for another 2 minutes until deep golden and crispy. Drain again on paper towels.
- Combine with veggies and sauce: In a large mixing bowl or wok, toss the crispy chicken with bell peppers, pineapple chunks, and the sweet and sour sauce. Toss gently to coat without breaking the crispiness.
- Serve: Garnish with sliced green onions and serve immediately with steamed rice or noodles for a complete meal.
Tip: Don’t rush the frying steps; the double-fry is key to that irresistible crunch. If your sauce seems too thick, thin with a splash of water or pineapple juice. Also, keep an eye on the veggies — they should be crisp-tender, not mushy.
Cooking Tips & Techniques
Here’s what I’ve learned after many batches of this Crispy Sweet and Sour Chicken Delight:
- Double frying is a game-changer: The first fry cooks the chicken through, and the second fry crisps up the coating perfectly. Skipping this makes the chicken soggy once sauced.
- Oil temperature matters: Too hot and the coating burns before the chicken cooks; too cool and the chicken absorbs oil and gets greasy. Aim for a steady 350°F (175°C).
- Use cornstarch in the coating: It’s the secret weapon for that light, crunchy texture.
- Don’t overcrowd the pan: Crowding lowers oil temperature, leading to soggy chicken.
- Let the chicken rest briefly between fries: This helps the crust set and prevents breakage during the second fry.
- Sauce consistency: The sauce should be thick enough to cling to the chicken but not so thick that it turns into a paste.
- Multitasking tip: Prep and slice veggies while the chicken is frying to save time.
Believe me, I’ve made plenty of soggy chicken before getting this right — patience and temperature control truly pay off. And don’t forget to taste the sauce before tossing; a little extra sugar or vinegar can make a big difference based on your preference.
Variations & Adaptations
Want to switch things up? Here are some tasty ways to make this Crispy Sweet and Sour Chicken Delight your own:
- Gluten-Free Version: Use almond flour or a gluten-free flour blend with cornstarch. Also, swap soy sauce for tamari to keep it gluten-free.
- Low-Carb Adaptation: Swap all-purpose flour with crushed pork rinds or coconut flour for coating. Use a sugar substitute like erythritol in the sauce.
- Veggie-Forward: Add extra veggies like snap peas, carrots, or baby corn for a colorful, nutrient-packed meal.
- Baked Option: For a lighter version, bake the coated chicken pieces at 425°F (220°C) for 20-25 minutes, flipping halfway. Toss with sauce after baking.
- Sweet & Spicy: Add a teaspoon of chili garlic sauce or red pepper flakes to the sauce for a kick.
Personally, I’ve tried adding crushed cashews on top for crunch and it’s a fantastic texture contrast. Feel free to customize based on what you have in the fridge or your dietary needs. This recipe welcomes creativity!
Serving & Storage Suggestions
This Crispy Sweet and Sour Chicken Delight is best served hot right after tossing in the sauce to keep the crispiness intact. Serve it over steamed jasmine rice or fluffy white rice for a classic combo. For a more filling meal, pair it with stir-fried greens or simple steamed broccoli. A cold glass of iced tea or a light lager complements the tangy and sweet flavors nicely.
Leftovers? No worries! Store in an airtight container in the refrigerator for up to 3 days. The chicken might soften a bit, but reheating in a hot oven or toaster oven at 350°F (175°C) for 8-10 minutes helps regain some crunch. Avoid microwaving if you want to keep that texture.
Flavors tend to deepen and mellow after a day, so leftovers can be even better the next day. Just add fresh green onions or a squeeze of lime before serving to brighten things up.
Nutritional Information & Benefits
This Crispy Sweet and Sour Chicken Delight provides a balanced mix of protein, carbs, and fats. Here’s an estimated breakdown per serving (makes about 4 servings):
| Calories | Protein | Carbs | Fat |
|---|---|---|---|
| Approximately 400-450 kcal | 30g | 35g | 15g |
Chicken thighs offer juicy protein and are rich in B vitamins. Pineapple juice supplies vitamin C and bromelain, which aids digestion. Using cornstarch instead of heavy batters keeps the coating light. For gluten-sensitive diets, the recipe is easily adaptable with simple substitutions.
From a wellness perspective, this dish is a satisfying comfort food that doesn’t skimp on flavor or texture. Moderation is key, but it’s a great way to enjoy a balanced meal that feels indulgent without being overly heavy.
Conclusion
In a nutshell, this Crispy Sweet and Sour Chicken Delight recipe is a winner for anyone craving a quick, tasty meal that’s bursting with flavor and texture. It’s easy to customize, friendly to most diets with simple swaps, and most importantly, it tastes like you put a lot of effort in — when really, it’s dangerously easy.
Give it a try, tweak it to your liking, and watch it become your go-to recipe for busy nights or special occasions. I love this recipe because it brings my family together around the table, sharing those happy, satisfied smiles. Now, I’d love to hear from you — how did your Crispy Sweet and Sour Chicken Delight turn out? Drop a comment, share your twists, or ask questions!
Happy cooking, and remember: great meals don’t have to be complicated!
FAQs About Crispy Sweet and Sour Chicken Delight
Can I use chicken breasts instead of thighs?
Absolutely! Chicken breasts work fine but can be less juicy. Just avoid overcooking and consider marinating briefly for tenderness.
What’s the best way to keep the chicken crispy after adding the sauce?
Toss the chicken quickly with the sauce right before serving and serve immediately. Double frying the chicken helps keep that crunch longer.
Can I prepare this recipe ahead of time?
You can prep the sauce and chicken coating ahead, but fry the chicken fresh just before serving to maintain crispiness.
Is there a vegetarian alternative?
Try substituting firm tofu or cauliflower florets, coated and fried similarly, for a tasty vegetarian twist.
How do I adjust the sweetness or tanginess?
Simply tweak the sugar or vinegar amounts in the sauce to suit your palate — start small and taste as you go.
Pin This Recipe!
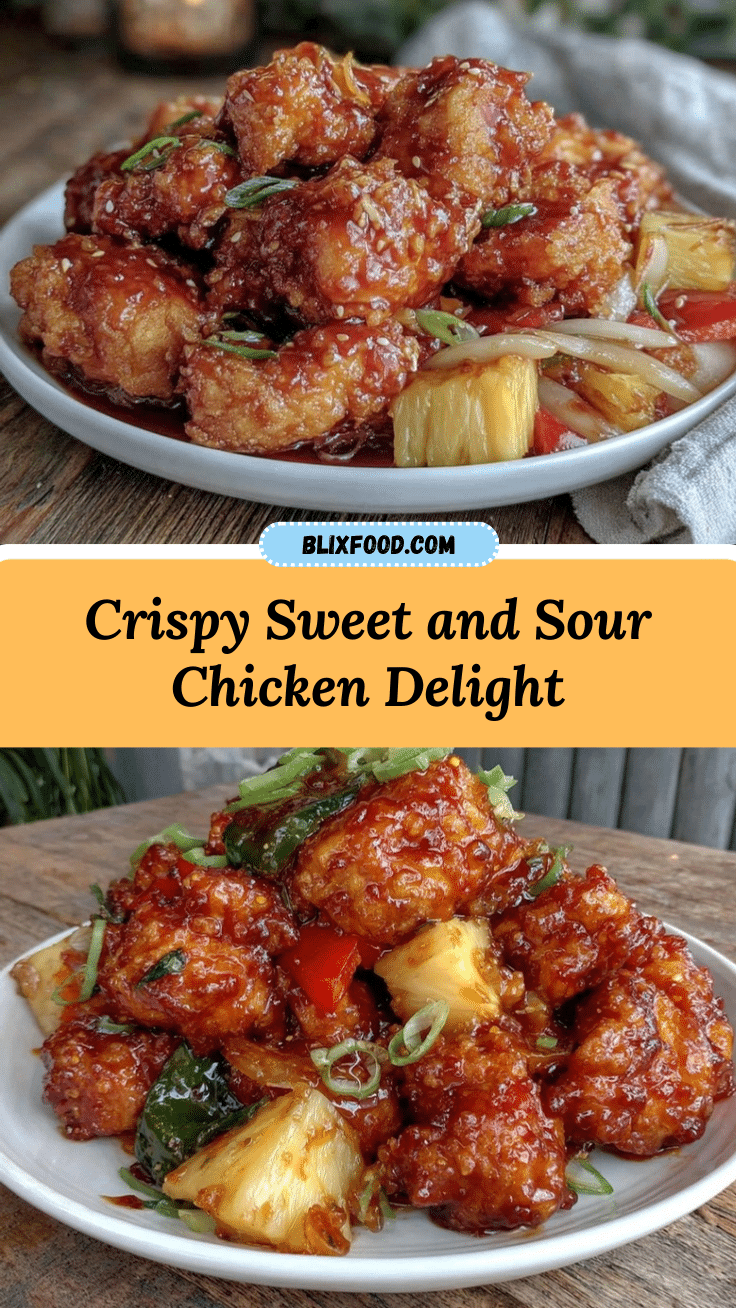
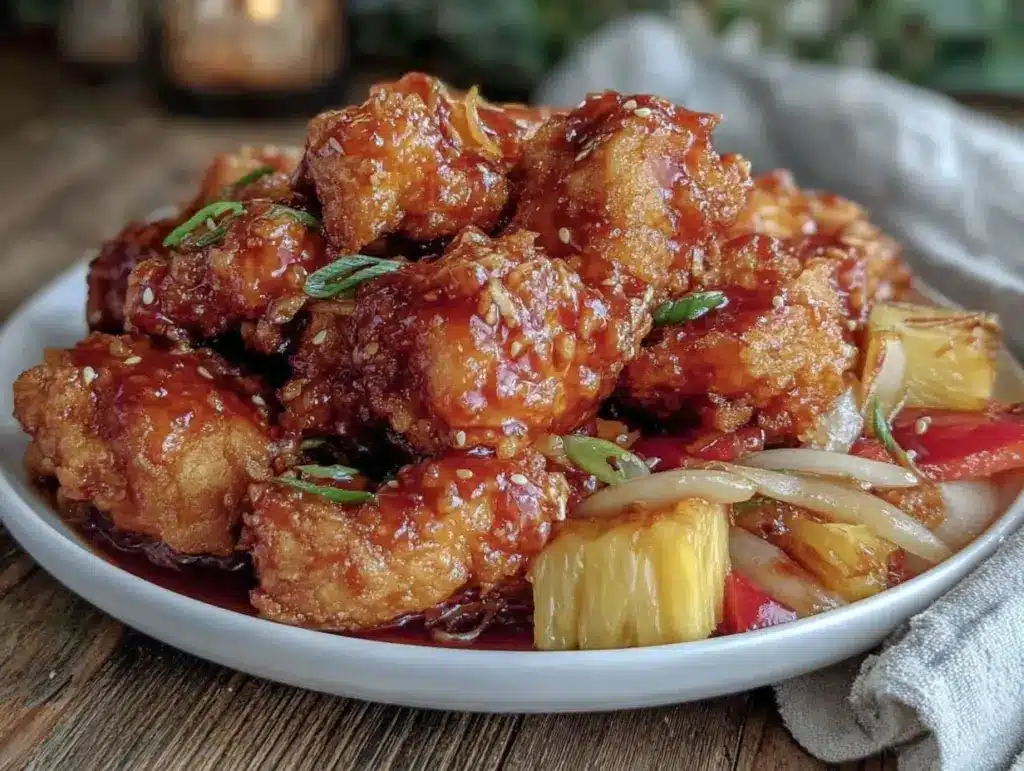
Crispy Sweet and Sour Chicken Delight

A quick and easy 30-minute meal featuring crispy double-fried chicken coated in a tangy and sweet sauce, perfect for family dinners and gatherings.
- Prep Time: 10 minutes
- Cook Time: 20 minutes
- Total Time: 30 minutes
- Yield: 4 servings 1x
- Category: Main Course
- Cuisine: Asian
Ingredients
- 1 lb (450g) boneless, skinless chicken thighs or breasts, cut into bite-size pieces
- 1/2 cup (65g) all-purpose flour (or gluten-free flour blend)
- 1/2 cup (65g) cornstarch
- 2 large eggs, beaten (room temperature)
- Salt and pepper, to taste
- Vegetable oil or canola oil, for shallow frying
- 1/2 cup (120ml) pineapple juice (fresh or canned)
- 1/4 cup (60ml) rice vinegar or white vinegar
- 1/3 cup (67g) granulated sugar (adjust to taste)
- 3 tbsp ketchup
- 1 tbsp soy sauce (or gluten-free tamari)
- 2 tsp cornstarch mixed with 2 tbsp cold water (for thickening)
- 1 small red bell pepper, cut into chunks (optional)
- 1 small green bell pepper, cut into chunks (optional)
- 1/2 cup (75g) pineapple chunks (fresh or canned, optional)
- 2 green onions, sliced (for garnish, optional)
Instructions
- Rinse and pat dry the chicken pieces with paper towels. Season lightly with salt and pepper.
- In one bowl, mix the flour and cornstarch. In another bowl, beat the eggs.
- Dip each chicken piece first into the beaten eggs, then dredge thoroughly in the flour-cornstarch mixture. Place coated pieces on a plate or tray without overcrowding.
- Pour 1-2 inches of oil into a deep skillet or wok and heat over medium-high heat to about 350°F (175°C).
- Fry the chicken pieces in batches for 3-4 minutes until lightly golden but not fully cooked. Remove and drain on paper towels or a wire rack.
- In a small saucepan, combine pineapple juice, vinegar, sugar, ketchup, and soy sauce. Bring to a simmer over medium heat, stirring until sugar dissolves.
- Stir the cornstarch slurry and slowly add to the simmering sauce. Stir until the sauce thickens to a glossy consistency, about 2 minutes.
- Return the chicken to the hot oil for a second fry of about 2 minutes until deep golden and crispy. Drain again on paper towels.
- In a large bowl or wok, gently toss the crispy chicken with bell peppers, pineapple chunks, and the sweet and sour sauce without breaking the crispiness.
- Garnish with sliced green onions and serve immediately with steamed rice or noodles.
Notes
Double frying is key to achieving a crispy coating that stays crunchy after adding the sauce. Maintain oil temperature at 350°F (175°C) to avoid soggy or burnt chicken. Toss chicken with sauce just before serving to keep crispiness. Sauce thickness can be adjusted with water or pineapple juice. For gluten-free, use almond flour or gluten-free blend and tamari instead of soy sauce. Avoid microwaving leftovers to maintain texture; reheat in oven at 350°F for 8-10 minutes.
Nutrition
- Serving Size: 1 serving (about 1/4
- Calories: 425
- Sugar: 20
- Sodium: 600
- Fat: 15
- Saturated Fat: 3
- Carbohydrates: 35
- Fiber: 2
- Protein: 30
Keywords: sweet and sour chicken, crispy chicken, quick dinner, easy recipe, double-fried chicken, family meal, tangy sauce