Let me tell you, the smell of melted cheese mingling with spicy jalapeños and smoky chipotle seasoning is enough to make anyone’s mouth water. There’s just something about a build your own nacho bar that turns a simple snack into a full-on celebration. The first time I set up one of these bars for a casual get-together, I was instantly hooked — the kind of moment where you pause, take a deep breath, and just smile because you know you’re onto something truly special.
Years ago, when I was knee-high to a grasshopper, nachos were just a quick snack after school. But discovering the magic of a customizable nacho bar changed everything for me. It was during a rainy weekend gathering when I cobbled together ingredients from my pantry and fridge, aiming to please a crowd with varied tastes. Honestly, I wish I’d stumbled upon this idea way sooner! My family couldn’t stop sneaking those loaded nachos off the table (and I can’t really blame them).
Let’s face it, build your own nacho bar recipes are dangerously easy and offer pure, nostalgic comfort that works for any party—from casual weeknight hangouts to festive celebrations. Whether you’re looking to brighten up your Pinterest party board or need a sweet treat for your kids’ next playdate, this approach has you covered. After testing this recipe multiple times in the name of research, of course, it’s become a staple for family gatherings and gifting. Trust me, this flavorful build your own nacho bar recipe is going to feel like a warm hug on a plate—and you’re going to want to bookmark this one.
Why You’ll Love This Recipe
From my many trials and tweaks, here’s why this build your own nacho bar recipe stands out:
- Quick & Easy: Comes together in under 30 minutes, perfect for busy weeknights or last-minute cravings.
- Simple Ingredients: No fancy grocery runs needed; you probably have most of these staples already.
- Perfect for Any Occasion: Great for game days, potlucks, casual dinners, or birthday parties.
- Crowd-Pleaser: Kids and adults alike rave about the flavor combos and endless customization.
- Unbelievably Delicious: The crunchy chips paired with melty cheese and fresh, zesty toppings create next-level comfort food.
What makes this recipe truly different? It’s all about the layering. I like to prepare a rich, smoky chipotle seasoned meat or plant-based protein, a homemade cheese sauce that’s silky smooth, and a colorful array of fresh toppings. The balance between spicy, creamy, and crunchy textures is the secret sauce here. You know that moment when you close your eyes after the first bite because the flavors just hit right? Yeah, that’s exactly what this nacho bar delivers.
Plus, it’s comfort food reimagined — healthier options, faster prep, but with all the soul-soothing satisfaction intact. Whether you’re aiming to impress guests without stress or just want a simple meal that turns into a memorable feast, this recipe has got your back.
What Ingredients You Will Need
This build your own nacho bar recipe uses simple, wholesome ingredients to deliver bold flavor and satisfying texture without the fuss. Most are pantry staples, and substitutions are easy if you want to tweak things.
- For the Base:
- Blue corn tortilla chips (for extra crunch and color)
- Regular yellow or white corn tortilla chips (classic choice)
- Protein Options:
- Ground beef, seasoned with taco spices (cumin, chili powder, smoked paprika)
- Shredded rotisserie chicken tossed in chipotle sauce
- Black beans, rinsed and drained (great for vegetarians)
- Textured vegetable protein or seasoned crumbled tofu for a vegan twist
- Cheese Sauce:
- Sharp cheddar cheese, shredded (I recommend Cabot for best melt)
- Monterey Jack cheese, shredded (adds creaminess)
- Whole milk or plant-based milk (unsweetened almond works well)
- Butter and all-purpose flour (for roux base)
- Fresh Toppings:
- Ripe avocados, diced (adds creaminess)
- Fresh tomatoes, chopped
- Green onions, thinly sliced
- Jalapeño slices (optional, for heat)
- Fresh cilantro leaves
- Shredded lettuce or cabbage (for crunch)
- Additional Flavor Boosters:
- Sour cream or Greek yogurt (plain, for dolloping)
- Fresh lime wedges (brightens flavors)
- Pickled jalapeños or onions (adds tang)
- Hot sauce or salsa roja
- Seasonings:
- Ground cumin, chili powder, smoked paprika (for seasoning proteins)
- Salt and freshly ground black pepper
If you want to keep it gluten-free, just double-check your chips and flour choices, or swap regular flour in cheese sauce for cornstarch. For dairy-free options, use vegan cheese shreds and plant-based milk. You can also swap black beans for pinto beans or add corn kernels for a sweet crunch. The possibilities are wide open!
Equipment Needed
Setting up a build your own nacho bar doesn’t require fancy gear, which is part of the charm. Here’s what you’ll want on hand:
- A large baking sheet or shallow trays for warming chips and toppings
- Medium saucepan to make the cheese sauce (non-stick helps prevent burning)
- Mixing bowls for holding different toppings and proteins
- Serving spoons and tongs (to keep things tidy and easy for guests)
- Optional: slow cooker or warming tray if you want to keep proteins warm for longer periods
Personally, I’ve found a cast iron skillet handy for cooking the seasoned meat—it holds heat evenly and adds a nice sear. But a regular non-stick pan works just fine. If you don’t have a warming tray, placing trays on a heating pad or using chafing dishes can keep items piping hot. Budget-friendly tip: affordable serving bowls from the dollar store work wonders for organizing toppings!
Preparation Method
- Prepare the Protein: In a medium skillet over medium heat, add 1 tablespoon of oil. Brown 1 pound (450 g) of ground beef until fully cooked, breaking it apart with a spatula. Stir in 1 teaspoon ground cumin, 1 teaspoon chili powder, ½ teaspoon smoked paprika, and salt to taste. Cook for another 2 minutes until fragrant. Remove from heat and set aside. (Tip: For shredded chicken, toss cooked rotisserie chicken with ½ cup chipotle sauce.)
- Make the Cheese Sauce: In a saucepan, melt 2 tablespoons (28 g) of unsalted butter over medium heat. Whisk in 2 tablespoons (16 g) all-purpose flour and cook for 1-2 minutes to form a roux. Slowly pour in 1 ½ cups (360 ml) milk, whisking constantly until smooth. Bring to a gentle simmer — the sauce will thicken. Reduce heat to low, stir in 1 cup (100 g) shredded sharp cheddar and ½ cup (56 g) Monterey Jack cheese until melted and smooth. Season with salt and pepper. (Note: Avoid overheating to prevent curdling.)
- Prep Fresh Toppings: While the cheese sauce simmers, dice 2 ripe avocados, chop 2 medium tomatoes, slice 3 green onions, and thinly slice 1 jalapeño (optional). Rinse and drain 1 can (15 oz/425 g) black beans. Wash and roughly chop a handful of fresh cilantro leaves.
- Warm the Chips: Preheat oven to 350°F (175°C). Spread tortilla chips on a baking sheet in a single layer. Warm for about 5-7 minutes to get them crispy and slightly toasted. Watch carefully so they don’t burn.
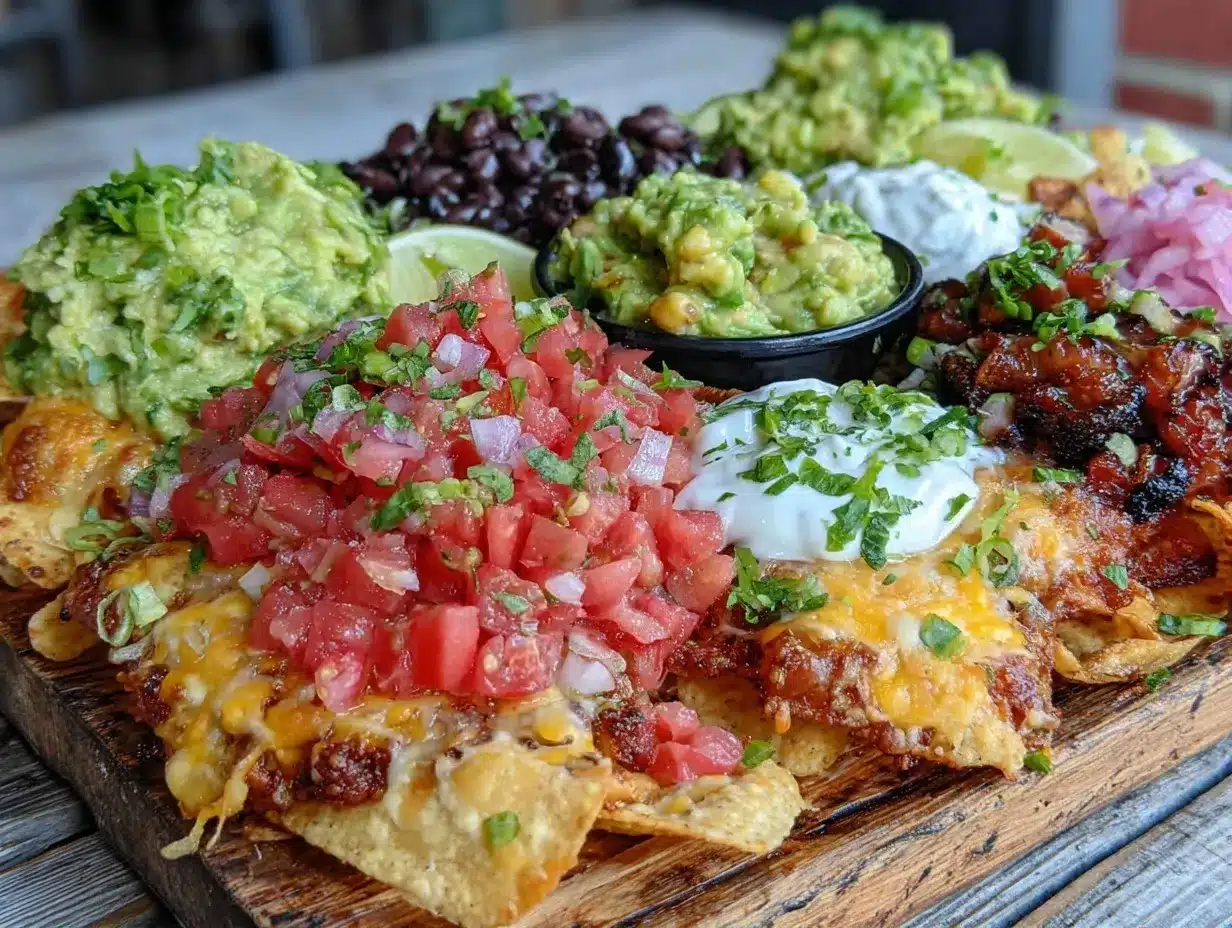
- Set Up the Bar: Arrange warmed chips on a large platter or individual plates. Place bowls of protein, cheese sauce, black beans, and fresh toppings on the table. Add small bowls for sour cream, lime wedges, hot sauce, and pickled jalapeños.
- Assemble and Enjoy: Encourage guests to build nachos to their liking—layer chips with meat, cheese sauce, beans, then fresh veggies and a dollop of sour cream. Squeeze a little lime for brightness. (Pro tip: layering keeps chips crisp longer.)
Each step should take about 5-10 minutes, so the whole prep time hovers around 30 minutes. If you want to speed things up, prep toppings the day before and store in airtight containers. Also, I learned the hard way that rushing the cheese sauce can cause lumps, so take your time whisking!
Cooking Tips & Techniques
To get your build your own nacho bar just right, here are a few tricks I picked up along the way:
- Season Proteins Well: Don’t skimp on spices. Toasting cumin and chili powder briefly before adding meat boosts flavor incredibly.
- Make Cheese Sauce Smooth: Whisk constantly when adding milk to the roux, and keep heat moderate to avoid curdling or separation.
- Layer Toppings Smartly: Start with a chip base, add cheese sauce and protein, then beans, and finish with fresh veggies and herbs. This layering keeps chips from getting soggy too fast.
- Multitask Efficiently: While the protein cooks, prep toppings to save time. Use a food processor for chopping if you’re in a hurry.
- Avoid Overcrowding: Spread chips out when warming and serving to keep them crispy and easy to grab.
- Don’t Forget Texture: Crunchy, creamy, spicy, fresh—balancing these elements makes your nachos irresistible.
Honestly, I once dumped cheese sauce on too many chips at once, and the whole tray turned soggy. Lesson learned: drizzle in batches, folks! Also, timing is key when hosting—start warming chips last minute so they retain their crunch. These little details make a big difference.
Variations & Adaptations
One of the best things about a build your own nacho bar is how customizable it is. Here are a few variations I’ve tried that you might want to consider:
- Dietary Swaps: Use gluten-free tortilla chips and cornstarch instead of flour in the cheese sauce for gluten sensitivity. Swap dairy cheeses for vegan cheese shreds and coconut or almond milk to keep it dairy-free.
- Seasonal Twists: In summer, add fresh grilled corn kernels or diced mango for a sweet contrast. In colder months, roast some sweet potatoes seasoned with smoked paprika as a hearty topping.
- Flavor Boosts: Add chorizo or spicy sausage for a smoky kick, or marinate tofu cubes in taco seasoning for a vegan protein punch. Try swapping sour cream for a cilantro-lime crema for a tangy twist.
Personally, I once made a Mediterranean-inspired nacho bar with feta, olives, and tzatziki sauce—surprisingly delicious and perfect for a change of pace. Feel free to experiment with your favorite flavors; that’s the beauty of this recipe!
Serving & Storage Suggestions
This build your own nacho bar is best served warm so that cheese sauce is melty and toppings fresh. I like to keep the protein and cheese sauce warm in a slow cooker or insulated container if serving over a longer period.
Pair the nachos with a crisp margarita, iced tea, or even a light lager to complement the spicy, cheesy goodness. Fresh pico de gallo or a simple guacamole also make excellent sides.
If you have leftovers (rare, but it happens!), store chips separately from toppings in airtight containers. Keep cheese sauce and cooked protein refrigerated and reheat gently on the stove or microwave, stirring often. To revive chips, pop them in a 350°F (175°C) oven for 3-5 minutes to crisp back up.
Flavors often meld nicely overnight, especially the seasoned proteins and salsas—making for a tasty next-day snack or casual lunch.
Nutritional Information & Benefits
Estimated per serving (based on 1/6th of recipe): approximately 450 calories, 25g fat, 35g carbohydrates, and 20g protein.
Key ingredients like black beans provide fiber and plant-based protein, while avocados deliver heart-healthy fats. Using homemade cheese sauce avoids additives found in pre-packaged versions, and fresh toppings add vitamins and antioxidants.
This recipe can be adapted for gluten-free, vegetarian, or vegan diets easily, making it accessible for many dietary needs. Just keep an eye on potential allergens like dairy or corn if serving to sensitive guests.
Personally, I appreciate how this recipe balances indulgence with wholesome ingredients, letting me enjoy comfort food guilt-free.
Conclusion
So, there you have it—a flavorful build your own nacho bar recipe that’s perfect for any gathering, any time. This setup lets everyone customize their plate to their liking, which honestly makes parties way more fun and stress-free. I love how this recipe brings people together, sparks creativity, and satisfies every craving under one roof.
Don’t hesitate to make it your own by swapping in your favorite proteins, cheeses, and toppings. Trust me, once you try this, it’s going to become your go-to for casual entertaining and family nights alike.
If you give it a whirl, drop a comment below with your favorite combinations or any tweaks you tried. Sharing is caring, after all! Happy nacho-building, friends—may your gatherings be tasty and full of laughter!
FAQs
What chips work best for a build your own nacho bar?
Sturdy corn tortilla chips are ideal because they hold up well under toppings. Blue corn adds a nice color contrast, but classic yellow or white corn chips work perfectly too.
Can I make the cheese sauce ahead of time?
Yes! Cheese sauce can be made up to two days in advance and reheated gently on the stove, whisking to restore smoothness.
How do I keep chips from getting soggy?
Serve chips separately from wet toppings and cheese sauce. Encourage layering chips with cheese and protein first, then fresh toppings last to maintain crunch.
Is this recipe suitable for vegans?
Absolutely! Use plant-based cheese shreds, dairy-free milk, and vegan protein like seasoned tofu or textured vegetable protein to keep it vegan-friendly.
What are some easy protein options for this nacho bar?
Ground beef, shredded chicken, black beans, or seasoned tofu all work well. You can also add chorizo or sausage for a meatier option.
Pin This Recipe!
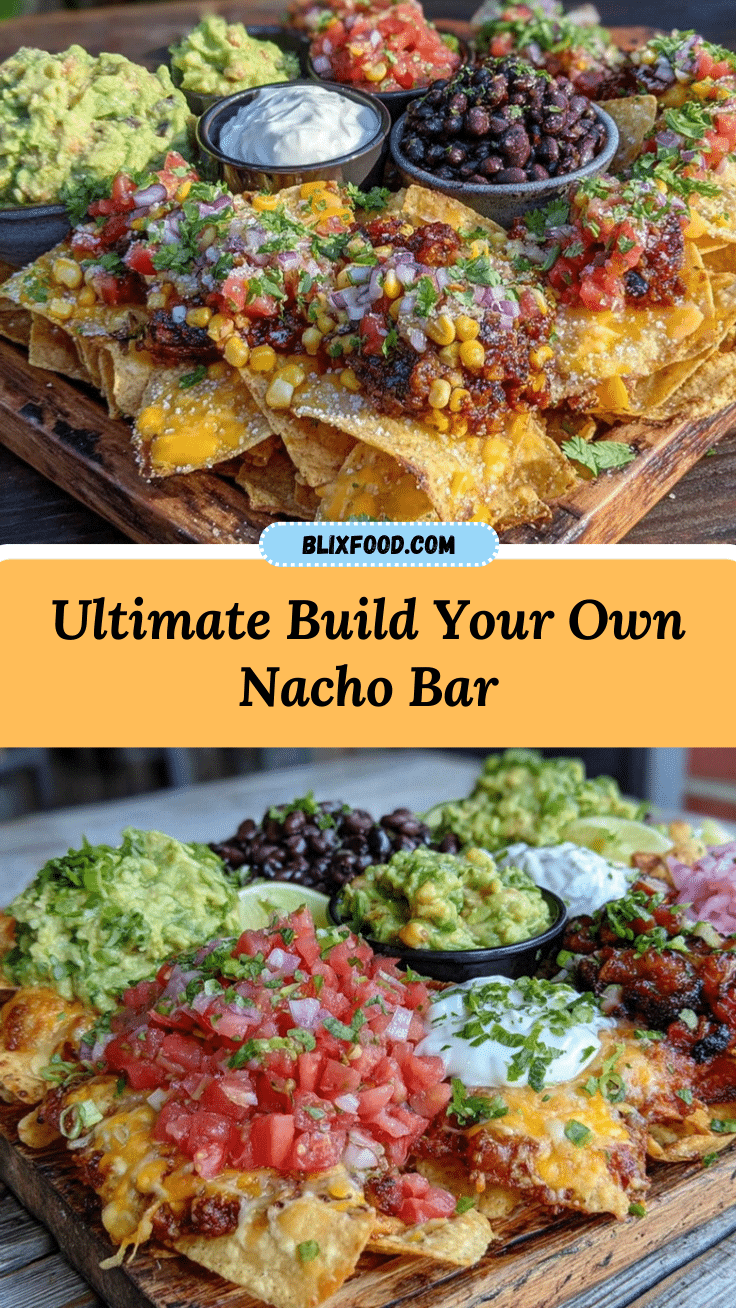
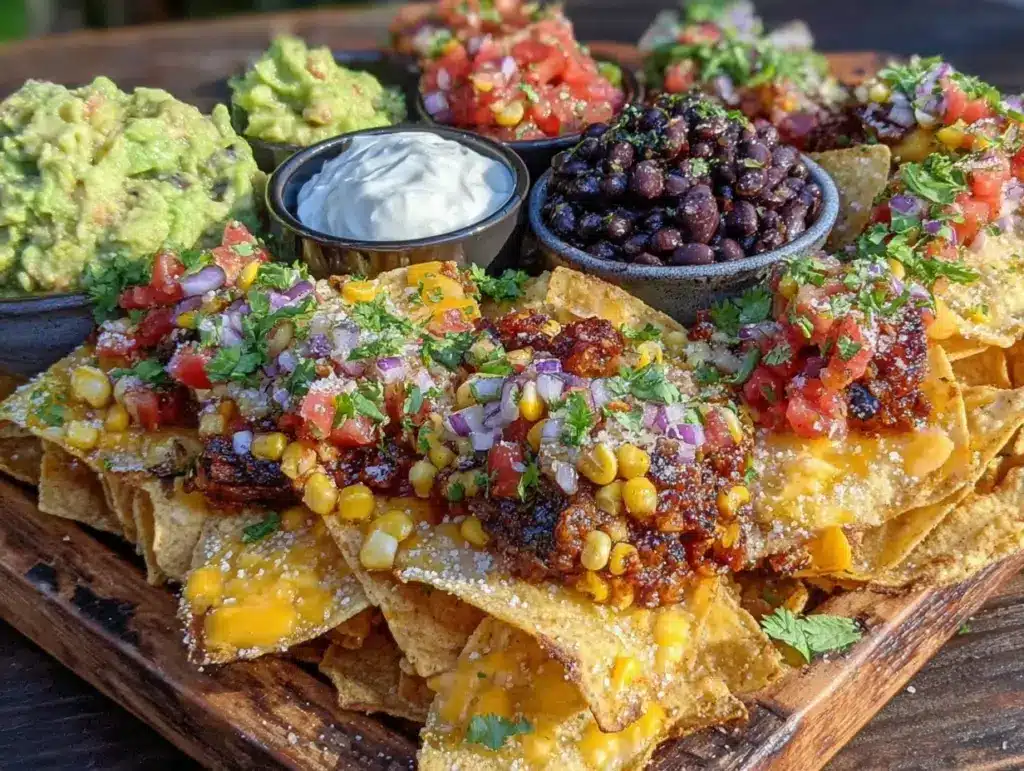
Build Your Own Nacho Bar Recipe Easy Flavorful Ideas for Parties

A customizable nacho bar recipe perfect for parties and gatherings, featuring seasoned proteins, homemade cheese sauce, and fresh toppings for a flavorful and crowd-pleasing snack.
- Prep Time: 20 minutes
- Cook Time: 10 minutes
- Total Time: 30 minutes
- Yield: 6 servings 1x
- Category: Main Course
- Cuisine: Mexican
Ingredients
- Blue corn tortilla chips
- Regular yellow or white corn tortilla chips
- 1 lb ground beef, seasoned with 1 tsp cumin, 1 tsp chili powder, 1/2 tsp smoked paprika, salt to taste
- Shredded rotisserie chicken tossed in 1/2 cup chipotle sauce
- 1 can (15 oz) black beans, rinsed and drained
- Textured vegetable protein or seasoned crumbled tofu (for vegan option)
- 2 cups shredded sharp cheddar cheese
- 1 cup shredded Monterey Jack cheese
- 1 1/2 cups whole milk or unsweetened almond milk
- 2 tbsp unsalted butter
- 2 tbsp all-purpose flour (or cornstarch for gluten-free)
- 2 ripe avocados, diced
- 2 medium tomatoes, chopped
- 3 green onions, thinly sliced
- 1 jalapeño, thinly sliced (optional)
- Handful fresh cilantro leaves, chopped
- Shredded lettuce or cabbage
- Sour cream or Greek yogurt (for dolloping)
- Fresh lime wedges
- Pickled jalapeños or onions
- Hot sauce or salsa roja
- Salt and freshly ground black pepper
Instructions
- Prepare the Protein: In a medium skillet over medium heat, add 1 tablespoon of oil. Brown 1 pound of ground beef until fully cooked, breaking it apart with a spatula. Stir in 1 teaspoon ground cumin, 1 teaspoon chili powder, 1/2 teaspoon smoked paprika, and salt to taste. Cook for another 2 minutes until fragrant. Remove from heat and set aside. For shredded chicken, toss cooked rotisserie chicken with 1/2 cup chipotle sauce.
- Make the Cheese Sauce: In a saucepan, melt 2 tablespoons of unsalted butter over medium heat. Whisk in 2 tablespoons all-purpose flour and cook for 1-2 minutes to form a roux. Slowly pour in 1 1/2 cups milk, whisking constantly until smooth. Bring to a gentle simmer until sauce thickens. Reduce heat to low, stir in 2 cups shredded sharp cheddar and 1 cup Monterey Jack cheese until melted and smooth. Season with salt and pepper. Avoid overheating to prevent curdling.
- Prep Fresh Toppings: Dice 2 ripe avocados, chop 2 medium tomatoes, slice 3 green onions, and thinly slice 1 jalapeño (optional). Rinse and drain 1 can black beans. Wash and roughly chop a handful of fresh cilantro leaves.
- Warm the Chips: Preheat oven to 350°F (175°C). Spread tortilla chips on a baking sheet in a single layer. Warm for about 5-7 minutes to get them crispy and slightly toasted. Watch carefully to avoid burning.
- Set Up the Bar: Arrange warmed chips on a large platter or individual plates. Place bowls of protein, cheese sauce, black beans, and fresh toppings on the table. Add small bowls for sour cream, lime wedges, hot sauce, and pickled jalapeños.
- Assemble and Enjoy: Encourage guests to build nachos to their liking—layer chips with meat, cheese sauce, beans, then fresh veggies and a dollop of sour cream. Squeeze a little lime for brightness. Layering keeps chips crisp longer.
Notes
For gluten-free, use gluten-free tortilla chips and cornstarch instead of flour in cheese sauce. For dairy-free, use vegan cheese shreds and plant-based milk. Prep toppings a day ahead to save time. Avoid overheating cheese sauce to prevent curdling. Serve chips separately from wet toppings to keep them crispy.
Nutrition
- Serving Size: Approximately 1/6th
- Calories: 450
- Fat: 25
- Carbohydrates: 35
- Protein: 20
Keywords: nacho bar, build your own nachos, party food, easy nachos, cheese sauce, customizable nachos, crowd-pleaser, Mexican snack