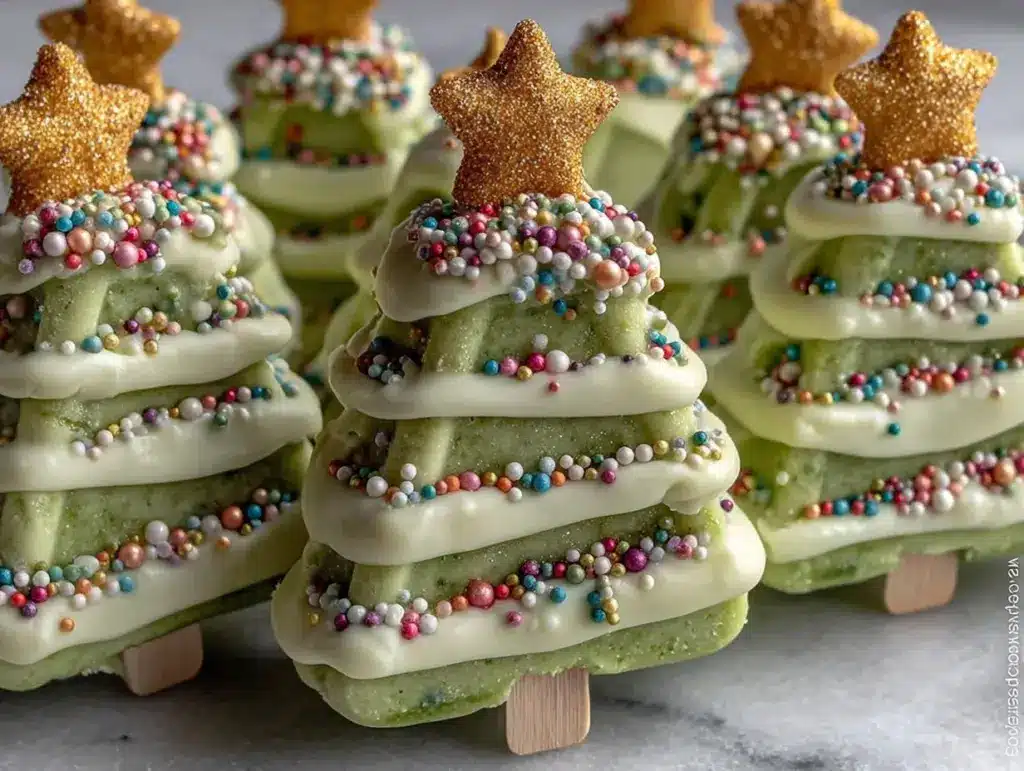
Let me paint you a picture—the sweet scent of silky chocolate swirling with creamy vanilla, all mingling together as they set in the fridge on a snowy December afternoon. I still remember the first time I made these Christmas Tree Fudge Pops. The kitchen was buzzing, holiday music playing, and my youngest kept peeking over the counter, eyes wide with excitement. The moment I unmolded those tiny trees, decked out in colorful sprinkles and glimmering sugar pearls, I paused (really, I had to!)—that magical kind of moment where you breathe in, grin, and know you’ve made something that screams “festive fun.”
Honestly, I wish I’d stumbled on this easy fudge pop idea years ago, back when my grandma and I spent afternoons baking her famous sugar cookies and trying not to eat half the dough. These fudge pops bring that same nostalgic comfort but with a playful twist—no oven required, and way less cleanup. Let’s face it, when you’re knee-high to a grasshopper (or even just overwhelmed with holiday to-dos), you crave treats that are dangerously easy and always deliver that wow factor.
Every year, these Christmas Tree Fudge Pops become the star of our holiday table. My family can’t stop sneaking them off the tray (I catch them, but I can’t really blame them). They’re just too cute, and the creamy texture is so satisfying. I’ve brought them to potlucks, gifted them to neighbors, and even used them to brighten up our Pinterest cookie board—people always ask for the recipe. I’ve tested and tweaked the process more times than I care to admit, all in the name of “research,” of course. Now, they’re a staple for family gatherings, gift baskets, and those cozy nights with mugs of cocoa. Trust me, this one feels like a warm hug in every bite, and you’re going to want to bookmark it for every holiday season to come.
Why You’ll Love This Recipe
After years of holiday recipe testing and countless fudge disasters (I’ll admit it!), I’ve finally nailed the perfect Christmas Tree Fudge Pops. Here’s why you’ll fall head over heels for this fuss-free treat:
- Quick & Easy: Ready in under 30 minutes, plus a little chill time—so you can whip these up even on a hectic holiday morning.
- Simple Ingredients: No fancy-pants ingredients here. Chances are, you have everything you need in your pantry and fridge.
- Perfect for Festive Gatherings: From Christmas brunch to classroom parties, these fudge pops are the ultimate crowd-pleaser.
- Crowd-Pleaser: Kids, teens, and grown-ups alike can’t resist the creamy, chocolatey goodness and adorable tree shape.
- Unbelievably Delicious: Rich chocolate fudge, creamy vanilla, and a hint of salt—that perfect combo that makes you close your eyes and just savor the moment.
What makes these Christmas Tree Fudge Pops stand out? It’s the little details—like using sweetened condensed milk for that luscious texture and melting good-quality chocolate chips for deeper flavor. I’ve tested everything from microwave shortcuts to stovetop stirring, and honestly, this version delivers the best results every time. The pops set firm but stay creamy, never grainy or dry (which is a real win in my book!).
This isn’t just another holiday treat—it’s your ticket to creating sweet memories without the stress. Whether you’re impressing guests with a Pinterest-worthy dessert table or just making something fun for your kids, these fudge pops are the kind that people remember. Comfort food, reimagined for the holidays. So, if you’re looking for a festive recipe that’s as fun to make as it is to eat, you’ve found it!
What Ingredients You Will Need
This recipe uses simple, wholesome ingredients to deliver bold chocolate flavor and creamy texture—no fancy supermarket runs required. Most are pantry staples, and you can easily swap a few to fit your needs.
- For the fudge base:
- 2 cups (340g) semi-sweet chocolate chips (I love using Ghirardelli for a rich finish)
- 1 can (14 oz/396g) sweetened condensed milk (Eagle Brand is my go-to)
- 2 tbsp (28g) unsalted butter (softened for easier melting)
- 1/4 tsp sea salt (balances the sweetness and deepens the chocolate flavor)
- 1 tsp pure vanilla extract (adds warmth and depth)
- For decorating:
- Green candy melts or white chocolate chips + green food coloring (for the tree color—Wilton works well)
- Assorted holiday sprinkles (stars, pearls, nonpareils—go wild!)
- Mini pretzel sticks or popsicle sticks (for trunks)
- Edible gold dust or shimmer sugar (optional, but adds that “magical” touch)
- Optional swaps:
- Milk chocolate chips for a sweeter pop
- Dark chocolate chips for an intense, grown-up flavor
- Dairy-free chocolate and coconut condensed milk for vegan fudge pops
- Chopped nuts (pecans, walnuts) for crunch—just sprinkle into the fudge base before setting
If you can’t find green candy melts, white chocolate and gel food coloring work in a pinch. For gluten-free pops, skip the pretzel sticks and use wooden stirrers. In summer, swap the sprinkles for colorful dried fruit. The ingredients are forgiving—just don’t skimp on the vanilla, it really brings everything together. And if you want to get extra Pinterest-worthy, pick up some snowflake sprinkles or edible glitter. Trust me, your Christmas Tree Fudge Pops will look (and taste) like a million bucks.
Equipment Needed
You don’t need a pro kitchen to make these fudge pops—just a handful of basic tools. Here’s what I use (and a few budget-friendly swaps):
- Microwave-safe bowl (for melting chocolate—Pyrex works great, but any thick glass bowl is fine)
- Silicone Christmas tree molds (these make the fun shape—if you don’t have them, use a lined mini muffin pan and cut into triangles)
- Small spatula or spoon (for mixing and filling molds—an offset spatula helps with smoothing)
- Popsicle sticks or mini pretzel rods (for the trunks—wooden stirrers work too)
- Baking sheet (for stability while chilling)
- Zip-top bag or piping bag (for drizzling the green “tree” layer—optional but makes decorating easier)
If you’re missing a silicone mold, don’t sweat it. I’ve used parchment-lined loaf pans and just sliced the fudge into tree shapes with a knife. Cleanup is a breeze with silicone, but if you use metal pans, a quick spritz of nonstick spray helps. For decorating, you can always use a spoon if you don’t have piping bags. And if you’re on a budget, dollar store molds work surprisingly well (just keep them out of the oven!). Hand-wash molds to keep them in shape—it makes them last for years.
Preparation Method

-
Prepare the fudge base:
In a microwave-safe bowl, combine 2 cups (340g) semi-sweet chocolate chips, 1 can (14 oz/396g) sweetened condensed milk, and 2 tbsp (28g) unsalted butter. Microwave in 30-second bursts, stirring after each, until smooth and fully melted (about 2–3 minutes total). If using stovetop, melt everything over low heat, stirring constantly. The mixture should look glossy and thick—if it’s grainy, keep stirring gently. -
Flavor it up:
Add 1/4 tsp sea salt and 1 tsp vanilla extract to the warm fudge base. Stir until fully combined. Taste a little (carefully—it’s hot!) and adjust salt or vanilla as needed. The base should be creamy, sweet, and a touch salty. -
Fill the molds:
Spoon the fudge mixture into your silicone Christmas tree molds, filling each cavity about 3/4 full. Tap the mold on the counter to level and remove air bubbles. If you’re using a mini muffin pan, spoon evenly and smooth the tops. -
Add trunks:
Insert a popsicle stick or pretzel rod into the base of each tree. Press gently so it’s anchored in the fudge but not poking through the top. If using stirrers, cut them to size first. -
Make the green “tree” layer:
Melt 1/2 cup (85g) green candy melts (or white chocolate chips + green food coloring) in a microwave-safe bowl, stirring until smooth. Transfer to a zip-top bag, snip the corner, and drizzle over each fudge pop to create branches and garland effects. If you don’t have a bag, use a spoon to swirl. -
Decorate:
While the green layer is still soft, sprinkle with holiday sprinkles, edible pearls, and gold dust. Get creative! Press a star-shaped sprinkle at the top of each tree for “ornaments.” Kids love helping here (and eating the extras). -
Chill and set:
Place the filled molds on a baking sheet and refrigerate for 2–3 hours, or until firm. If you’re in a rush, pop them in the freezer for 30–40 minutes. The fudge should be solid but creamy when bitten. -
Unmold and serve:
Gently pop each fudge tree out of the mold. If using a pan, lift out with parchment and slice carefully into triangle shapes. Wipe off any extra sprinkles or chocolate drips for a neat finish.
Troubleshooting: If the fudge sticks, run a warm butter knife around the edges. If the chocolate seizes, add a teaspoon of butter and re-melt gently. Don’t rush the chilling—if the pops are too soft, they won’t hold their shape.
Efficiency tip: Make the fudge base while the molds are being prepped by little helpers. Lay out sprinkles in advance to keep decorating fun and stress-free. And if you’re making a big batch, double the recipe—these disappear fast!
Cooking Tips & Techniques
After more than a few seasonal messes, I’ve learned a handful of fudge pop tricks that make all the difference:
- Use high-quality chocolate chips: Cheap chips can taste waxy and won’t melt as smoothly. Ghirardelli or Guittard give a creamier result.
- Don’t overheat the chocolate: If the chocolate gets too hot, it can seize and turn grainy. Short microwave bursts and gentle stirring work best.
- Let the fudge cool slightly before filling molds: Too-hot fudge can melt your green layer or warp silicone shapes.
- Decorate while the tree layer is soft: Sprinkles stick better and colors don’t bleed if you work quickly.
- Don’t skip the salt: It’s the secret to balancing the ultra-sweet fudge and making the chocolate flavor pop.
I learned the hard way that rushing the chilling step leads to sticky, misshapen pops. One year, I ended up with a batch that looked more like Christmas blobs than trees (my kids still laughed about it). Now, I always set a timer and let the fridge do its magic. If you’re multitasking, prep the decorations while the fudge sets. For super-smooth pops, use an offset spatula to level the tops before chilling. And if you want to make ahead, these freeze beautifully—just wrap tightly in plastic to avoid freezer burn.
Variations & Adaptations
Christmas Tree Fudge Pops are super versatile, and you can tweak them for just about everyone:
- Dairy-free/vegan: Use dairy-free chocolate chips and coconut condensed milk. Swap butter for plant-based margarine.
- Nutty Crunch: Stir in 1/2 cup (60g) chopped pecans, walnuts, or pistachios to the fudge base before setting. Adds texture and a festive flair.
- Flavor twist: Add 1/2 tsp peppermint extract for minty fudge pops, or a dash of cinnamon for a cozy touch.
- Cooking method adaptations: If you don’t have a microwave, melt everything gently on the stovetop—just keep stirring so nothing burns.
- Allergen swaps: For gluten-free, use wooden sticks instead of pretzels. Skip nuts for allergy-friendly pops and load up on sprinkles.
I once tried a batch with orange zest and dark chocolate—so good, especially for grown-ups. You can also swap the tree molds for star shapes or snowflakes if you want a winter wonderland theme. These fudge pops are like a blank canvas—make them your own and share your favorite combos!
Serving & Storage Suggestions
These fudge pops are best served chilled, straight from the fridge. Arrange them on a festive platter lined with parchment or tissue paper for a holiday wow factor. They pair perfectly with mugs of hot chocolate, spiced cider, or even a scoop of vanilla ice cream for extra indulgence.
If you’re gifting, wrap each pop in cellophane and tie with a ribbon—they look adorable in treat bags or holiday baskets. For parties, set out on a tiered stand with extra sprinkles nearby (kids love adding their own!).
Storage is easy: keep fudge pops in an airtight container in the fridge for up to 7 days. For longer storage, freeze individually wrapped pops for up to 2 months. Thaw in the fridge overnight before serving. If flavors deepen over time, you’ll notice the chocolate gets even richer after a day or two—just don’t let them sit at room temp for long, or they’ll get soft.
To reheat (if you want a gooey treat), zap in the microwave for 10 seconds—just enough to soften. But honestly, these are best enjoyed cold, with all the festive crunch and creamy fudge goodness intact.
Nutritional Information & Benefits
Each Christmas Tree Fudge Pop is a sweet treat, with estimated values per pop (based on 12 pops per batch):
- Calories: ~180
- Fat: 9g
- Carbohydrates: 24g
- Protein: 2g
- Sugar: 19g
Chocolate chips provide antioxidants, and the small dose of sea salt helps balance electrolytes. If you go for dark chocolate, you’ll get even more heart-healthy benefits. The recipe is gluten-free if you skip pretzel sticks and nuts are optional for those with allergies. Just a heads up: contains dairy and possible nuts (if added), so check your ingredient labels if you’re making these for a crowd.
Personally, I love that these fudge pops deliver pure joy and comfort with every bite. They’re a special occasion treat, but I always feel better knowing what goes into them—no artificial flavors, just real chocolate and love.
Conclusion
If you’re searching for a holiday dessert that’s equal parts whimsical and delicious, these Christmas Tree Fudge Pops are worth every minute. They’re festive, adorable, and dangerously easy—plus, you can customize them to fit any party or family tradition. I love how they bring everyone together, from decorating with the kids to sharing at gatherings. There’s just something magical about watching people’s faces light up when they see (and taste!) these cute little trees.
Feel free to tweak the recipe and make it your own—try new flavors, swap decorations, or experiment with different molds. That’s the fun of holiday baking! If you give these a whirl, I’d love to hear how they turned out. Drop a comment below, share a photo, or let me know your favorite variation. Wishing you sweet, cheerful celebrations and plenty of fudge pop smiles this season!
FAQs
Can I make Christmas Tree Fudge Pops ahead of time?
Absolutely! Make them up to a week in advance and store in the fridge. They freeze well for longer storage—just thaw before serving.
What if I don’t have a Christmas tree mold?
No worries—use a mini muffin pan and cut the fudge into triangles once set, or try other festive shapes like stars or snowflakes.
Are these fudge pops gluten-free?
Yes, if you skip the pretzel sticks and use gluten-free sprinkles. Always check ingredient labels to be sure.
Can I use different types of chocolate?
For sure! Milk, dark, or white chocolate chips all work. Just adjust the sweetness to your taste (white chocolate is sweeter, dark is richer).
How do I keep fudge pops from sticking to the mold?
Use silicone molds for easiest release. If using metal pans, line with parchment or lightly grease before filling. Let them chill fully before unmolding for best results.
Pin This Recipe!
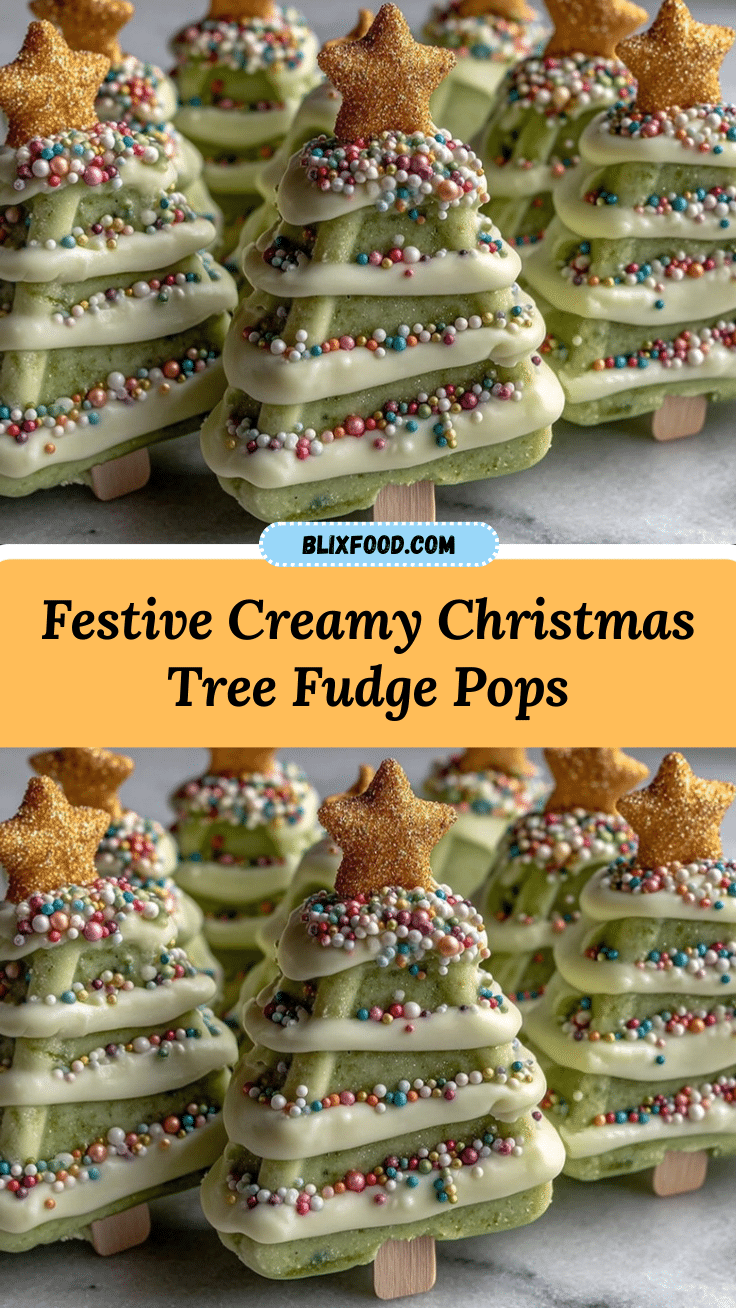
Christmas Tree Fudge Pops

Festive, creamy chocolate fudge pops shaped like Christmas trees and decorated with colorful sprinkles—perfect for holiday parties, gifting, and family fun. No baking required and ready in under 30 minutes plus chill time.
- Prep Time: 15 minutes
- Cook Time: 5 minutes
- Total Time: 2 hours 20 minutes
- Yield: 12 pops 1x
- Category: Dessert
- Cuisine: American
Ingredients
- 2 cups (12 oz) semi-sweet chocolate chips
- 1 can (14 oz) sweetened condensed milk
- 2 tbsp unsalted butter, softened
- 1/4 tsp sea salt
- 1 tsp pure vanilla extract
- 1/2 cup green candy melts OR white chocolate chips + green food coloring
- Assorted holiday sprinkles (stars, pearls, nonpareils)
- Mini pretzel sticks or popsicle sticks
- Edible gold dust or shimmer sugar (optional)
Instructions
- In a microwave-safe bowl, combine chocolate chips, sweetened condensed milk, and butter. Microwave in 30-second bursts, stirring after each, until smooth and melted (about 2–3 minutes). Alternatively, melt on the stovetop over low heat, stirring constantly.
- Add sea salt and vanilla extract to the warm fudge base. Stir until fully combined and taste to adjust salt or vanilla if needed.
- Spoon the fudge mixture into silicone Christmas tree molds, filling each cavity about 3/4 full. Tap the mold to level and remove air bubbles.
- Insert a popsicle stick or pretzel rod into the base of each tree, anchoring it in the fudge.
- Melt green candy melts (or white chocolate chips with green food coloring) in a microwave-safe bowl. Transfer to a zip-top bag, snip the corner, and drizzle over each fudge pop to create tree branches and garland effects.
- While the green layer is soft, decorate with holiday sprinkles, edible pearls, and gold dust. Press a star-shaped sprinkle at the top of each tree.
- Place the filled molds on a baking sheet and refrigerate for 2–3 hours, or until firm. For faster setting, freeze for 30–40 minutes.
- Gently unmold each fudge tree. If using a pan, lift out with parchment and slice into triangle shapes. Wipe off any extra sprinkles or chocolate drips for a neat finish.
Notes
Use high-quality chocolate chips for best texture. Don’t overheat chocolate to avoid graininess. Chill fully before unmolding for clean shapes. For vegan pops, use dairy-free chocolate and coconut condensed milk. Pops freeze well for up to 2 months. Decorate quickly while the green layer is soft for best sprinkle adhesion.
Nutrition
- Serving Size: 1 fudge pop
- Calories: 180
- Sugar: 19
- Sodium: 60
- Fat: 9
- Saturated Fat: 5
- Carbohydrates: 24
- Fiber: 1
- Protein: 2
Keywords: Christmas, fudge pops, holiday dessert, chocolate, festive treats, kid-friendly, no bake, party food, edible gifts


