Let me tell you, the scent of tangy cream cheese mingling with sweet vanilla and a hint of buttery crust wafting from my oven is enough to make anyone’s mouth water, especially during the holiday season. The first time I baked these creamy mini cheesecakes was years ago, on a chilly December afternoon. I was instantly hooked—the kind of moment where you pause, take a deep breath, and just smile because you know you’re onto something truly special. When I was knee-high to a grasshopper, my grandma’s kitchen always smelled like cinnamon and baked treats, but these mini cheesecakes bring a fresh twist to those nostalgic holiday flavors I grew up loving.
Honestly, my family couldn’t stop sneaking them off the cooling rack (and I can’t really blame them). Whether it was my picky nephew or my dessert-loving dad, these cheesecakes disappeared faster than I could count. You know what makes them perfect? They’re dangerously easy to make and provide pure, nostalgic comfort with every bite. Perfect for Christmas dessert tables, holiday parties, or just a sweet treat for yourself after a long day of gift wrapping. I’ve tested this recipe multiple times in the name of research, of course, and it has become a staple for family gatherings and festive gifting. You’re going to want to bookmark this one!
Why You’ll Love This Recipe
With years of baking experience and a few kitchen mishaps under my belt, I can say these creamy mini cheesecakes have truly stood the test of time. Here’s what makes this recipe a go-to:
- Quick & Easy: Comes together in under 45 minutes, perfect for those busy holiday prep days or last-minute dessert needs.
- Simple Ingredients: No fancy grocery trips needed; you likely already have everything in your pantry and fridge.
- Perfect for Christmas: These mini cheesecakes bring a festive flair to any holiday dessert spread, making your table shine.
- Crowd-Pleaser: Always gets rave reviews from kids and adults alike—trust me, you’ll get requests for seconds.
- Unbelievably Delicious: The texture is silky smooth, with a rich creamy flavor balanced by a buttery crust that melts in your mouth.
What sets this recipe apart? It’s the simple technique of blending the cream cheese until ultra-smooth (no lumps here!) and the perfectly balanced vanilla and lemon zest combo that gives it a fresh holiday twist. This isn’t just another cheesecake recipe—it’s the best version you’ll find for mini treats. Honestly, the first bite makes you want to close your eyes and savor every second. It’s comfort food reimagined—faster, easier, but with that same soul-soothing satisfaction. Whether you’re impressing guests without stress or treating yourself to something special, these mini cheesecakes fit the bill.
What Ingredients You Will Need
This recipe uses simple, wholesome ingredients to deliver bold flavor and satisfying texture without the fuss. Most are pantry staples, and a few fresh ingredients bring it all together beautifully.
- For the crust:
- 1 cup (100g) graham cracker crumbs (or digestive biscuits, finely crushed)
- 3 tablespoons (43g) unsalted butter, melted (I like using Land O Lakes for that rich flavor)
- 2 tablespoons (25g) granulated sugar (adds a touch of sweetness and crunch)
- For the filling:
- 16 oz (450g) cream cheese, softened (Philadelphia brand works best for smooth texture)
- 2/3 cup (135g) granulated sugar
- 2 large eggs, room temperature
- 1 teaspoon pure vanilla extract
- 1 tablespoon fresh lemon juice (brightens up the rich filling)
- 1 teaspoon lemon zest (optional, but highly recommended for that extra zing)
- 1/2 cup (120ml) sour cream or Greek yogurt (adds creaminess and slight tang)
- For topping (optional):
- Fresh berries (strawberries, blueberries, or raspberries)
- Powdered sugar for dusting
- Chocolate shavings or caramel drizzle for extra indulgence
If you need a gluten-free option, swap the graham crackers for gluten-free cookies or almond flour crust. For a dairy-free version, use vegan cream cheese and coconut yogurt, but note the texture will slightly differ. In winter, I love adding a pinch of cinnamon or nutmeg to the crust for a warm holiday feel.
Equipment Needed
- Mini muffin tin or silicone mini cheesecake molds (12-cup capacity) – silicone molds make removal a breeze!
- Mixing bowls – one big and one medium-sized
- Electric mixer or stand mixer (hand mixers work fine, but a stand mixer saves your wrists)
- Spatula (for scraping down the bowl)
- Measuring cups and spoons – accuracy here makes all the difference
- Cooling rack – to let your cheesecakes rest without getting soggy
- Optional: food processor or rolling pin to crush the graham crackers if you don’t buy pre-crumbled
I used to struggle with getting mini cheesecakes out cleanly until I switched to silicone molds—total game-changer. If you don’t have a mini muffin tin, regular muffin tins work, but baking time may vary slightly. For budget-friendly options, thrift stores often have great deals on muffin tins and mixing bowls.
Preparation Method
- Prep the crust: Preheat your oven to 325°F (163°C). In a medium bowl, mix the graham cracker crumbs, melted butter, and sugar until the mixture resembles wet sand. This usually takes about 2 minutes of stirring. Press about 1 tablespoon of the crumb mixture firmly into the bottom of each cup in your mini muffin tin. Use the bottom of a small glass or your fingers to compact the crust evenly. Bake the crusts for 5 minutes, then remove from oven and let cool while you prepare the filling.
- Make the filling: In a large mixing bowl, beat the softened cream cheese with an electric mixer on medium speed until completely smooth and creamy—this takes about 3 minutes. Scrape down the sides of the bowl to avoid lumps. Gradually add the sugar and continue beating until fully incorporated.
- Add eggs and flavorings: Add the eggs one at a time, beating on low speed after each addition just until combined (overbeating can cause cracks). Stir in vanilla extract, lemon juice, and lemon zest. Finally, fold in the sour cream or Greek yogurt with a spatula until the mixture is silky smooth. This should take about 2 minutes total to combine everything well.
- Fill and bake: Pour or spoon the filling evenly over the prebaked crusts, filling each cup nearly to the top but leaving a small gap. Tap the pan gently on the counter a couple of times to release any air bubbles. Bake at 325°F (163°C) for 18-20 minutes, or until the edges are set but the centers still jiggle slightly when you gently shake the pan. This jiggle means creamy perfection!
- Cool and chill: Remove the cheesecakes from the oven and let them cool in the pan for about 1 hour on a wire rack. Then, transfer the pan to the refrigerator and chill for at least 4 hours, preferably overnight. This step is key for that luscious, creamy texture and clean slice. When ready to serve, run a knife around the edges of each mini cheesecake and gently pop them out of the tin or mold.
Pro tip: If you notice cracks forming on your cheesecakes, don’t panic! It usually means they baked a bit too long or the oven temperature was too high. Cover with toppings like fresh berries or whipped cream to hide those imperfections while still tasting amazing.
Cooking Tips & Techniques
One trick I learned the hard way is to always use room temperature cream cheese and eggs. Cold ingredients don’t blend well, leaving you with lumps and a less creamy texture. Patience here pays off! Also, beating the cream cheese thoroughly before adding other ingredients is crucial for ultra-smooth filling.
Don’t overmix after adding eggs—mix just until combined to prevent too much air from getting in, which can cause cracking during baking. If you want a perfectly smooth crust, use a food processor for the crumbs or crush them finely with a rolling pin.
Baking at a lower temperature and watching the jiggle is your best way to avoid dry or cracked cheesecakes. If you have the time, a water bath can add extra moisture and prevent cracks, but honestly, I’ve skipped it many times with great results.
Multitasking tip: While your crust bakes, prep your filling and clean up as you go. It makes the whole process feel way less hectic, especially during busy holiday baking sessions.
Variations & Adaptations
- Chocolate Swirl Mini Cheesecakes: Before baking, drop small spoonfuls of melted dark chocolate into the filling and swirl gently with a toothpick for a festive marbled effect.
- Berry-Topped Vegan Cheesecakes: Use dairy-free cream cheese and coconut yogurt, and top with a vibrant berry compote. A great allergen-friendly holiday option.
- Spiced Pumpkin Mini Cheesecakes: Add 1/2 cup (120g) pumpkin puree and 1 teaspoon pumpkin pie spice to the filling for a seasonal twist perfect for Christmas and Thanksgiving.
For a no-bake version, prepare the crust as usual but chill it firmly in the fridge, then mix the filling with gelatin and refrigerate until set. It’s a handy shortcut when you’re short on oven time.
Personally, I’ve played with swapping sour cream for mascarpone in the filling for an extra creamy texture. It’s a little richer but definitely worth trying at least once!
Serving & Storage Suggestions
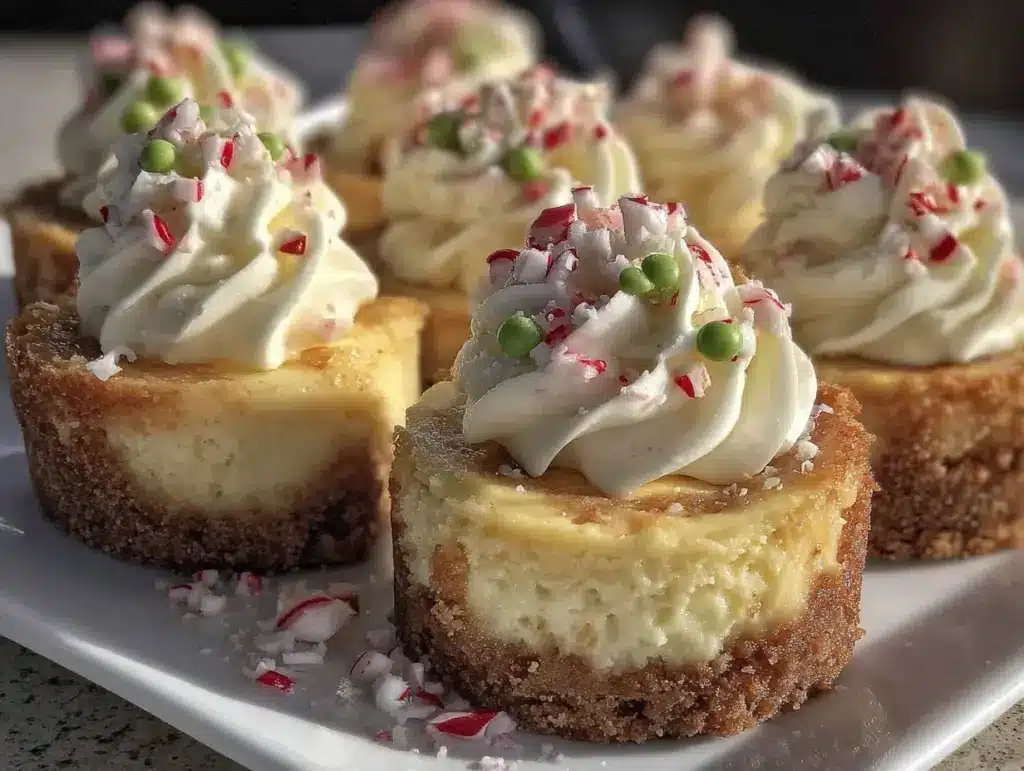
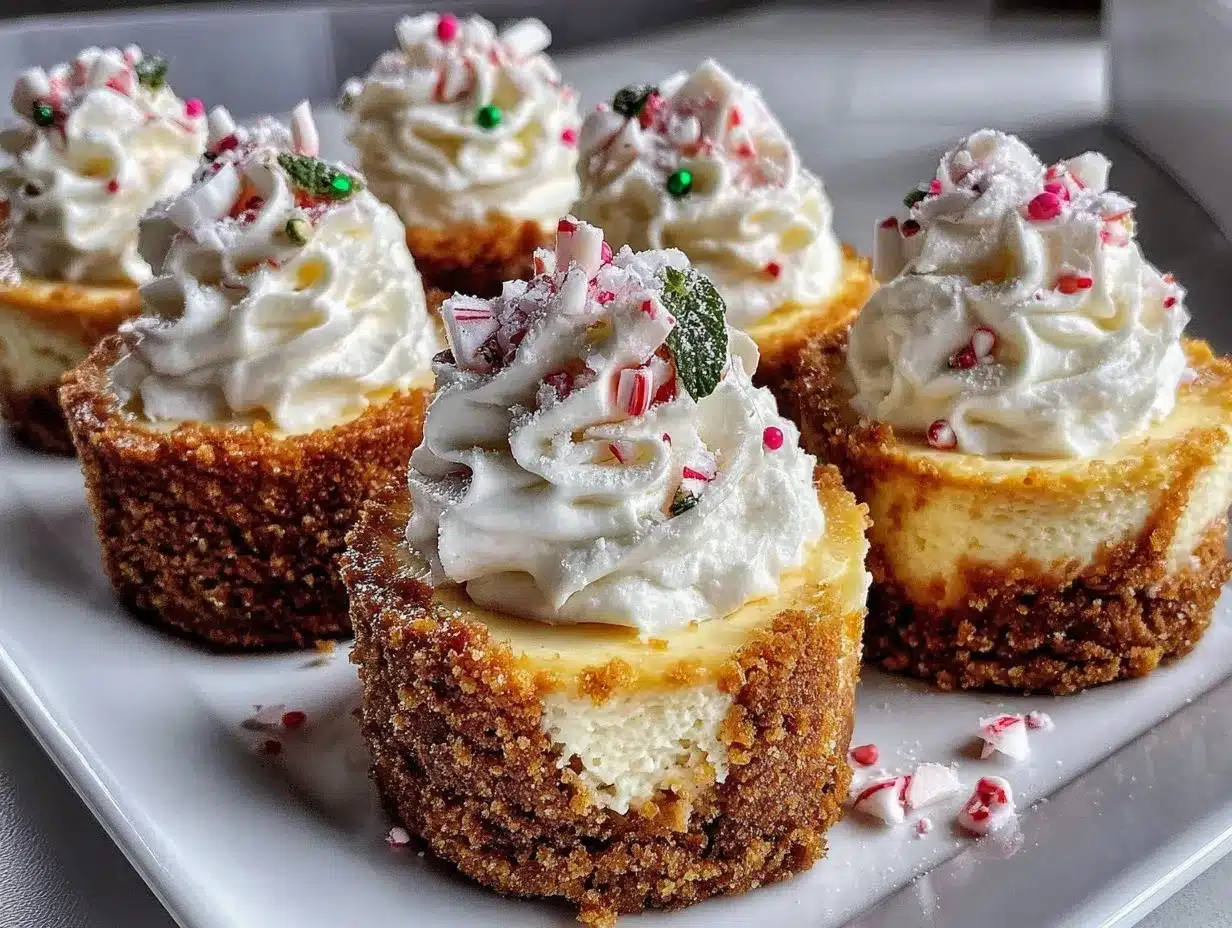
Serve these creamy mini cheesecakes chilled or at room temperature for the best flavor and texture. They look stunning dusted with powdered sugar and topped with fresh berries or a drizzle of caramel sauce. Pair them with a cup of hot cocoa or a festive spiced tea to complete your Christmas dessert spread.
Store leftovers in an airtight container in the refrigerator for up to 5 days. For longer storage, freeze the mini cheesecakes in a single layer on a baking sheet, then transfer to a freezer-safe container for up to 2 months. Thaw overnight in the fridge before serving.
Reheating is generally not recommended since these cheesecakes are best enjoyed cold, but if you want a softer texture, let them sit out at room temperature for 15-20 minutes before eating. Flavors actually deepen after chilling, so leftovers taste even better the next day!
Nutritional Information & Benefits
Each mini cheesecake (based on 12 servings) contains approximately:
| Nutrient | Amount per Serving |
|---|---|
| Calories | 220 kcal |
| Fat | 15g |
| Carbohydrates | 18g |
| Protein | 4g |
Cream cheese provides calcium and protein, while the lemon juice adds a touch of vitamin C. Using Greek yogurt or sour cream boosts the creaminess and adds probiotics if you choose a live culture variety. This recipe is gluten-free if you swap the crust for gluten-free cookies, and dairy-free versions are also possible for those with allergies.
I appreciate that these mini cheesecakes strike a balance between indulgence and portion control, making them a satisfying treat during the busy holiday season without going overboard.
Conclusion
These creamy mini cheesecakes are totally worth trying if you want a delicious, festive dessert that’s easy to make and guaranteed to impress. The balance of smooth filling and buttery crust with that fresh hint of lemon makes them a holiday favorite in my kitchen. Feel free to customize toppings or mix-ins based on what you love—this recipe is forgiving and flexible.
Honestly, I love how these mini cheesecakes feel like a warm hug on a chilly winter night, and I hope you enjoy making (and eating) them as much as I do. Please share your own twists or questions in the comments below—I’d love to hear how you make this recipe your own!
Happy baking and Merry Christmas!
FAQs About Creamy Mini Cheesecakes
Can I make these mini cheesecakes ahead of time?
Absolutely! They actually taste better after chilling overnight, so make them a day ahead and keep refrigerated until serving.
What if I don’t have graham crackers for the crust?
You can use digestive biscuits, vanilla wafers, or even crushed pretzels for a salty-sweet twist.
How do I prevent cracks on my cheesecakes?
Use room temperature ingredients, avoid overmixing after adding eggs, and bake at a lower temperature. Also, don’t overbake—look for a slight jiggle in the center.
Can I freeze these mini cheesecakes?
Yes, freeze them on a baking sheet first, then transfer to a container. Thaw in the fridge overnight before serving.
Is there a dairy-free version of this recipe?
Yes! Use vegan cream cheese and coconut yogurt for the filling, and gluten-free or dairy-free cookies for the crust. The texture will be slightly different but still delicious.
Pin This Recipe!

Creamy Mini Cheesecakes

These creamy mini cheesecakes are easy to make, perfect for Christmas desserts, and feature a silky smooth filling with a buttery crust and a fresh hint of lemon.
- Prep Time: 15 minutes
- Cook Time: 25 minutes
- Total Time: 4 hours 40 minutes
- Yield: 12 servings 1x
- Category: Dessert
- Cuisine: American
Ingredients
- 1 cup (100g) graham cracker crumbs or digestive biscuits, finely crushed
- 3 tablespoons (43g) unsalted butter, melted
- 2 tablespoons (25g) granulated sugar (for crust)
- 16 oz (450g) cream cheese, softened
- 2/3 cup (135g) granulated sugar (for filling)
- 2 large eggs, room temperature
- 1 teaspoon pure vanilla extract
- 1 tablespoon fresh lemon juice
- 1 teaspoon lemon zest (optional)
- 1/2 cup (120ml) sour cream or Greek yogurt
- Optional toppings: fresh berries (strawberries, blueberries, raspberries), powdered sugar, chocolate shavings, caramel drizzle
Instructions
- Preheat oven to 325°F (163°C). In a medium bowl, mix graham cracker crumbs, melted butter, and sugar until mixture resembles wet sand.
- Press about 1 tablespoon of crumb mixture firmly into the bottom of each cup in a 12-cup mini muffin tin. Compact evenly and bake crusts for 5 minutes. Remove and let cool.
- In a large bowl, beat softened cream cheese with an electric mixer on medium speed until smooth (about 3 minutes). Scrape sides to avoid lumps.
- Gradually add sugar and beat until incorporated. Add eggs one at a time, beating on low speed just until combined after each addition.
- Stir in vanilla extract, lemon juice, and lemon zest. Fold in sour cream or Greek yogurt until silky smooth.
- Pour filling evenly over prebaked crusts, filling nearly to the top but leaving a small gap. Tap pan gently to release air bubbles.
- Bake at 325°F (163°C) for 18-20 minutes until edges are set but centers jiggle slightly.
- Cool cheesecakes in pan on wire rack for 1 hour, then chill in refrigerator for at least 4 hours or overnight.
- Run a knife around edges and gently pop mini cheesecakes out of the tin or mold before serving.
- Optional: Top with fresh berries, powdered sugar, chocolate shavings, or caramel drizzle.
Notes
Use room temperature cream cheese and eggs for smooth filling. Avoid overmixing after adding eggs to prevent cracks. Baking at a lower temperature and watching for a slight jiggle ensures creamy texture. Silicone molds help with easy removal. For gluten-free, swap crust with gluten-free cookies or almond flour. For dairy-free, use vegan cream cheese and coconut yogurt.
Nutrition
- Serving Size: 1 mini cheesecake
- Calories: 220
- Fat: 15
- Carbohydrates: 18
- Protein: 4
Keywords: mini cheesecakes, creamy cheesecake, Christmas dessert, holiday dessert, easy cheesecake, mini desserts, festive treats


