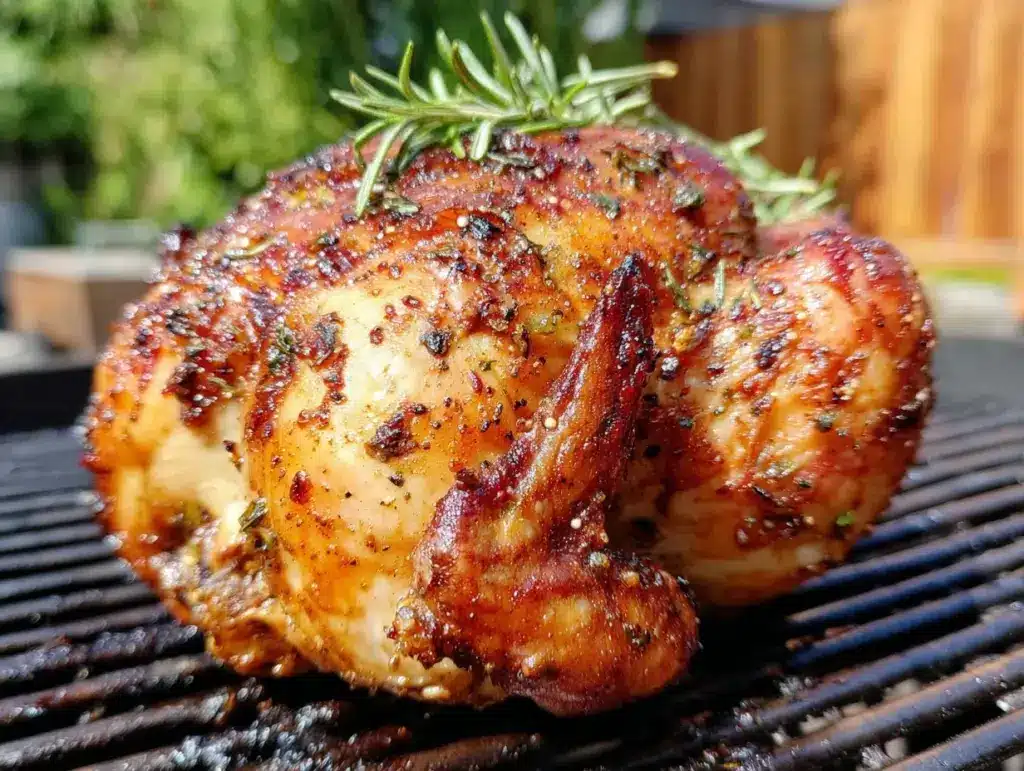
Let me paint you a picture: the sun’s shining, the grill’s fired up, and that unmistakable aroma of smoky, herby chicken is drifting through the backyard—so good, even the neighbors are poking their heads over the fence. The first time I slid a whole chicken onto a half-full can of beer and set it over the hot grates, I was skeptical (and maybe a little amused) but oh wow, the results? I was instantly hooked. The skin turned out shatteringly crisp, with juices literally dripping as I carved. Honestly, it was one of those moments you pause, take a deep breath, and just grin because you know you’ve stumbled onto something truly special.
This crispy beer can chicken recipe is tied to some of my favorite memories. Back when I was knee-high to a grasshopper, summer weekends meant my dad firing up his old, slightly rusty grill and letting us pick out the “secret” beer for the chicken. It’s the kind of family tradition that turned into a staple for every backyard get-together. I only wish I’d started making this myself years earlier—it’s dangerously easy and delivers pure, nostalgic comfort.
Let’s face it, my family can’t resist sneaking crispy bits straight from the platter, and I can hardly blame them. Whether it’s a casual Sunday, a big cookout, or just a craving for something a little over the top, this recipe has become my go-to for impressing friends without breaking a sweat. It’s perfect for potlucks, game day feasts, or just brightening up your Pinterest boards with golden, juicy perfection.
I’ve tested and tweaked this method more times than I can count (all in the name of research, of course), and it’s now my secret weapon for gatherings, meal prep, or even gifting to neighbors. If you’re after a recipe that feels like a warm hug, full of flavor and crunch, you’re going to want to bookmark this one. Let’s get grilling!
Why You’ll Love This Crispy Beer Can Chicken Recipe
After years of grilling, roasting, and chasing the elusive “juiciest chicken ever,” I can honestly say this crispy beer can chicken recipe is the one I trust every single time. It’s been the star at family reunions, camping trips, and backyard parties—always drawing rave reviews from even the pickiest eaters. Here’s why you, your friends, and your Pinterest followers will be obsessed:
- Quick & Easy: You’re looking at just 10 minutes of prep and about an hour of hands-off grilling. Perfect for busy weekends, or those moments you realize you need something special for dinner but don’t want to fuss over the stove.
- Simple Ingredients: There’s a good chance you already have everything you need—just a chicken, a can of beer, and a handful of pantry spices. No wild goose chases at the store required.
- Perfect for Gatherings: This recipe shines for cookouts, Father’s Day, or anytime you want a showstopper main dish with minimal hassle. The presentation alone is worth it (hello, golden crispy skin!).
- Crowd-Pleaser: Kids and adults alike gobble this up. The chicken is so juicy and flavorful, you’ll find yourself making it again and again—trust me, leftovers rarely survive the night.
- Unbelievably Delicious: The magic is in that steamy beer bath inside the chicken, which keeps the meat tender and moist, while the high heat of the grill gives you that restaurant-quality crispy skin every time.
What really sets this recipe apart? It’s the combination of high-heat grilling with a carefully balanced dry rub—think paprika, garlic, and just enough brown sugar for caramelized flavor. And the beer? It keeps things moist without making the skin soggy. You don’t need fancy tools or a chef’s degree, just this easy method that’s been tested in countless backyards (and a few rainy-day kitchens). I’ve tried other versions—oven-baked, different liquids, even ciders—and always come back to this for consistent, juicy, crispy chicken.
This isn’t just another grilled chicken. It’s that rare recipe that brings people together, makes you close your eyes with the first bite, and leaves you feeling like you’ve pulled off something amazing. It’s comfort food with a twist—faster and healthier, but with all the soul-satisfying flavor. Get ready to impress guests, treat yourself, and probably spark a few “Can I get your recipe?” requests, too.
What Ingredients You Will Need
This crispy beer can chicken recipe uses simple, wholesome ingredients—nothing fancy, just flavor-packed basics that work together for juicy, golden results. Most are likely in your pantry already, and you can swap out a few things if you need to. Here’s what you’ll want to gather:
- Whole Chicken (about 4-5 lbs/1.8-2.3 kg): Look for a fresh, plump bird. Organic or local chickens have the best flavor, but any will do in a pinch.
- Beer (12 oz/355 ml can): Any lager or pale ale works great. Don’t worry—the alcohol cooks off. I’ve also used root beer and lemon-lime soda for kid-friendly versions.
For the Dry Rub:
- Kosher Salt (1 1/2 tbsp/23 g): Don’t skip this! It seasons the meat all the way through.
- Brown Sugar (2 tbsp/25 g): Adds a hint of caramelization—light or dark both work.
- Paprika (1 tbsp/7 g): Smoked or sweet, your choice. I prefer smoked for that BBQ vibe.
- Black Pepper (1 tsp/2 g): Freshly cracked if possible for a gentle kick.
- Garlic Powder (1 tsp/3 g): For that savory backbone.
- Onion Powder (1 tsp/3 g): Rounds out the flavor. I sometimes double this for extra oomph.
- Dried Thyme (1/2 tsp/0.5 g): Or swap for dried oregano if you prefer.
- Cayenne Pepper (1/4 tsp/0.5 g): Optional, if you like a little heat.
For Prepping the Chicken:
- Olive Oil (2 tbsp/30 ml): Helps the rub stick and crisps the skin. Can sub with melted butter.
- Lemon (1, halved): Rub inside and out for freshness and a hint of zing (totally optional, but I love it).
Optional Extras:
- Fresh Herbs (thyme, rosemary, or parsley): Tuck a few sprigs inside for extra aroma.
- Vegetables (potatoes, carrots, onions): Scatter under the chicken for a built-in side dish. The drippings are magic on veggies!
Ingredient Tips: For the juiciest results, use a chicken that’s not pre-brined. If you’re avoiding beer, swap for chicken broth, ginger ale, or even apple juice. Gluten-free? Choose a gluten-free beer (brands like Omission are great). For a smoky twist, add a teaspoon of chipotle powder to the rub. And if you’re out of brown sugar, white sugar with a drop of molasses works just fine.
Equipment Needed
- Kettle Grill or Gas Grill: Any grill with a lid works. I’ve even used a charcoal Weber and a basic two-burner gas grill, both with great results.
- Grill Thermometer: Super helpful for keeping the heat steady. If you don’t have one built in, a simple oven thermometer works in a pinch.
- Beer Can Chicken Rack (optional): Designed to steady the chicken. If you don’t have one, the can itself does the trick—just be careful when moving it.
- Aluminum Foil or Sheet Pan: For catching drips and making cleanup easier. I usually place foil under the chicken to save scrubbing time.
- Long Tongs & Grill Mitts: Safety first! The bird gets hot and wobbly, so sturdy tongs and heat-resistant gloves are a must.
- Sharp Carving Knife: For slicing up that juicy chicken at the end. A good chef’s knife or even a serrated bread knife works if you’re in a pinch.
- Kitchen Shears (optional): Handy for trimming excess fat or skin before grilling.
Personal Tip: If you’re grilling at the park or a friend’s house, I’ve found that a sturdy disposable foil roasting pan is a lifesaver. And don’t stress about fancy racks—my first few chickens balanced right on the can, and it worked just fine. For maintenance, scrub those grill grates well (a little oil on a paper towel helps prevent sticking), and always double-check the can for dents or sharp edges before using.
Preparation Method
-
Prep Your Grill:
Preheat your grill to medium-high heat (about 375°F/190°C). For a charcoal grill, bank the coals to one side for indirect cooking. For gas, light one side and leave the other off. This indirect heat helps get the skin crispy without burning. -
Mix the Dry Rub:
In a small bowl, combine 1 1/2 tbsp (23 g) kosher salt, 2 tbsp (25 g) brown sugar, 1 tbsp (7 g) paprika, 1 tsp (2 g) black pepper, 1 tsp (3 g) garlic powder, 1 tsp (3 g) onion powder, 1/2 tsp (0.5 g) dried thyme, and 1/4 tsp (0.5 g) cayenne if using. Stir well. -
Prep the Chicken:
Remove the chicken from packaging. Pat it dry with paper towels, including inside the cavity (drier skin = crispier results!). Trim excess fat or neck skin with kitchen shears if needed. -
Season:
Rub the chicken all over with the cut lemon halves, squeezing as you go. Drizzle with 2 tbsp (30 ml) olive oil and massage to coat. Sprinkle the dry rub generously over the entire bird, making sure to get under the legs and wings and inside the cavity for max flavor. -
Prepare the Beer Can:
Open the 12 oz (355 ml) can of beer and pour out (or drink!) about 1/4, leaving the can 3/4 full. Use a can opener to poke two extra holes in the top for more steam. If using herbs, drop a few sprigs inside for fragrance. -
Mount the Chicken:
With the chicken’s cavity facing down, carefully lower it onto the beer can so the can sits inside the cavity and the chicken stands upright. The legs form a tripod with the can. -
Grill:
Place a sheet of foil or a pan under the chicken (on the cool side of the grill) to catch drips. Stand the chicken upright on the indirect heat side, close the lid, and grill for 60–75 minutes, rotating occasionally if your grill has hot spots. The goal is golden brown, crispy skin and a thermometer inserted in the thickest part of the thigh reads 165°F/74°C.- If skin is browning too quickly, tent loosely with foil.
- If your grill runs hot, check at 50 minutes. Undercooked? Give it another 10–15 minutes.
-
Rest:
Using tongs and mitts, carefully remove the chicken (with can) from the grill. Let rest upright for 10–15 minutes—this keeps it juicy and finishes the cooking. -
Carve & Serve:
Gently wiggle the chicken off the can (watch for hot steam!). Carve with a sharp knife or shears—the skin should be crisp, juices clear, and meat super moist. Serve immediately (with grilled veggies if you made them).
Notes: If you see pink near the bones, don’t panic—sometimes the smoke creates a pink ring in poultry. Check the temp with a digital thermometer to be safe. For super-crisp skin, dry the chicken uncovered in the fridge for a few hours before grilling. And if you’re short on time, premixed BBQ rubs work in a pinch, but homemade is always best.
Cooking Tips & Techniques
Getting that perfect crispy beer can chicken takes a little know-how, but with these tips (and a few lessons learned the hard way), you’ll be grilling like a pro:
- Keep It Dry: Moisture is the enemy of crispy skin. Always pat your chicken dry, and if you have time, let it air-chill in the fridge for an hour (or overnight) before seasoning.
- Indirect Heat Is Key: Placing the chicken over indirect heat (not right above the flame or coals) means gentle roasting, preventing burnt skin and undercooked meat. I’ve had a few blackened birds from impatient direct grilling—don’t rush it!
- Don’t Oversaturate the Can: Fill your beer can only 3/4 full. Too much liquid and you risk spillage (trust me, it’s not fun to clean up a grill full of beer).
- Rotate for Even Cooking: If your grill has hot spots, give the chicken a quarter turn every 20 minutes. This keeps browning even all over.
- Check Temperature, Not Just Time: Every grill is different. Invest in a good digital thermometer and check the thigh and breast for 165°F/74°C. I once served a bird that looked perfect but was still pink at the bone—not my finest hour!
- Rest Before Carving: Giving your chicken a rest lets the juices settle. If you carve right away, you’ll lose all that moisture.
- Use a Beer Can Holder (If Nervous): Balancing the chicken on a regular can works, but the rack makes it steadier, especially when moving off the grill.
- Don’t Skip the Rub: The dry rub is what builds the flavor and helps the skin crisp. If you’re in a hurry, even just salt, pepper, and paprika will do wonders.
Lesson Learned: The first time I tried this, I used a dark stout (thinking it’d be fancy), but it overpowered the chicken. Stick to lighter beers for the best balance. If you see flare-ups, close the lid to smother them or move the chicken farther from the flames. And above all, have fun—grilling is as much about enjoying the process as the results.
Variations & Adaptations
One of the best things about crispy beer can chicken is how easy it is to tweak for different tastes, seasons, or dietary needs. Here are some of my favorite ways to mix things up:
- Gluten-Free: Swap the beer for a gluten-free version, hard cider, or even ginger ale. The method works just the same and still gives you that juicy, flavorful finish.
- Herb-Lemon Chicken: Instead of the classic dry rub, try a blend of chopped fresh rosemary, thyme, lemon zest, and garlic powder. Tuck extra herbs and lemon slices inside the chicken and use a lemon-lime soda or sparkling water in place of beer.
- Spicy Cajun Twist: Add 1 tsp Cajun seasoning and a pinch of cayenne to the rub. For extra kick, use a spicy lager or add sliced jalapeños inside the cavity.
- Vegetarian Adaptation: Okay, you can’t grill a “beer can chicken” without the chicken, but you can use the same rub and technique on large portobello mushrooms or jackfruit for a fun, plant-based BBQ centerpiece.
- Oven Method: No grill? No problem. Place your seasoned, beer-can-mounted chicken on a foil-lined baking sheet in a 425°F (220°C) oven and roast for 60–70 minutes. The skin won’t get quite as smoky, but it’ll still be crisp and delicious.
- Allergen Adjustments: Can’t do garlic or onions? Omit the powders and bump up the herbs and lemon for flavor. Watching sugar? Skip the brown sugar and double the paprika for deep color.
Personal Favorite: In the fall, I swap the beer for apple cider and use a maple-brown sugar rub. It’s cozy, slightly sweet, and perfect for chilly evenings. Don’t be afraid to experiment—this method is pretty forgiving, and you might just discover a new family classic.
Serving & Storage Suggestions
This crispy beer can chicken is best served hot off the grill, when the skin is at its crispiest and the juices are running (seriously, get your plates ready!). Here’s how to make the most of your masterpiece:
- Serving Temperature: Serve immediately after resting and carving. If you’re waiting on guests, tent loosely with foil to keep warm (but don’t seal tightly—steam softens the skin).
- Presentation Tips: Carve the chicken at the table for a dramatic effect—those golden, crispy pieces make for an epic main dish. Garnish with fresh herbs and lemon wedges for a pop of color.
- Side Ideas: Pairs perfectly with grilled corn, potato salad, coleslaw, or a crisp garden salad. For drinks, stick with something cold and refreshing—lager, lemonade, or iced tea.
- Storage: Leftover chicken (if you have any!) should be cooled, then stored in an airtight container in the fridge for up to 3 days.
- Freezing: The meat freezes well—just shred and pack in zip-top bags for up to 2 months. Reheat gently so it doesn’t dry out.
- Reheating: For best results, reheat pieces in a 350°F (175°C) oven for 10–15 minutes, uncovered, to re-crisp the skin. Microwave works for speed, but the skin won’t stay crispy.
- Flavor Notes: The seasoning develops overnight, so leftovers are amazing in sandwiches, wraps, or tossed into salads. I love tossing cold pieces with a little hot sauce for a quick lunch.
Trust me, this crispy beer can chicken rarely lasts long enough for leftovers, but if it does, you’ve got options for easy, delicious meals all week long.
Nutritional Information & Benefits
Here’s the scoop on what you’re really eating with this crispy beer can chicken recipe (all values are approximate per serving, based on a 4 lb chicken split into 6 servings):
- Calories: 320
- Protein: 38g
- Fat: 16g (mostly healthy monounsaturated from olive oil)
- Carbs: 3g (from the rub)
- Sodium: 780mg (adjustable by reducing salt in the rub)
Health Benefits: Chicken is a great source of lean protein, vitamins B6 and B12, and essential minerals like zinc and selenium. Grilling lets fat drip away, so you get flavor without excess calories. The spice rub means you can skip heavy sauces and still get tons of taste.
This recipe is naturally gluten-free if you use gluten-free beer, and dairy-free as written. Allergens to watch for are the beer (gluten) and any spice sensitivities. Personally, I love knowing exactly what goes into my food—homemade spice blends keep it clean, and grilling keeps things light and satisfying. Enjoy with confidence!
Conclusion
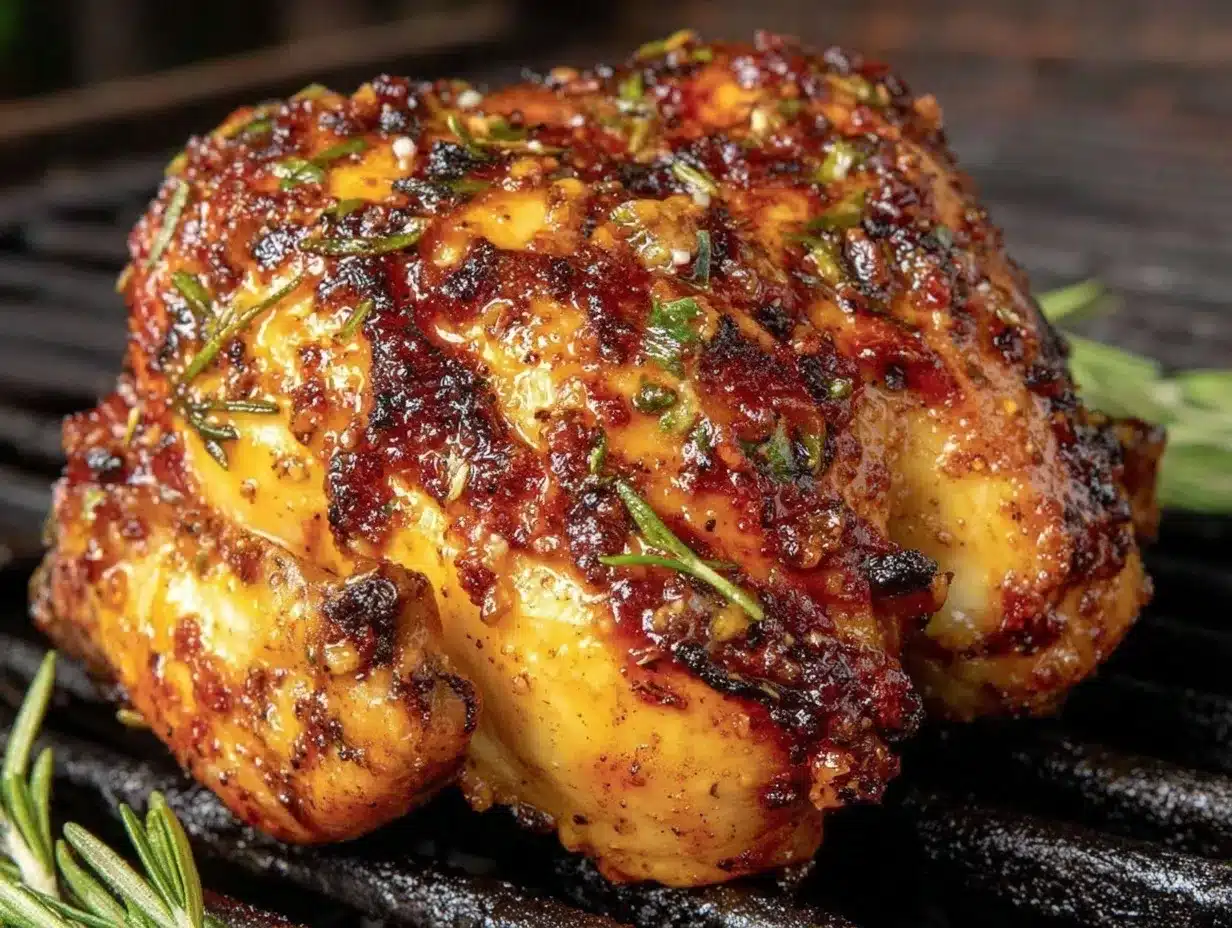
If you’re looking for a “wow” factor dish that’s secretly simple, this crispy beer can chicken recipe is your new best friend. It’s earned a permanent spot in my grilling rotation for its juicy, flavorful results and that irresistible, golden-crisp skin. Even after dozens of batches, it still feels a little magical lifting the lid and seeing that chicken standing tall, perfectly roasted, and ready for carving.
Don’t be afraid to play around with spices, swap the beer for your favorite beverage, or toss in some veggies for a one-pan meal. The beauty of this recipe is its flexibility—it’s easy enough for a weeknight and impressive enough for a party.
From my grill to yours, I hope you love this recipe as much as I do. If you try it, let me know in the comments—share your variations, grilling tips, or just brag about your crispy results! Pin it, print it, and pass it along. There’s nothing better than sharing good food and great moments. Happy grilling!
Frequently Asked Questions about Crispy Beer Can Chicken
Can I use something other than beer for this recipe?
Absolutely! You can swap the beer for chicken broth, apple cider, ginger ale, or even lemon-lime soda. Just make sure the can is about 3/4 full so you still get that steamy, juicy effect.
Is it safe to cook with a beer can inside the chicken?
Yes, it’s safe as long as you use a standard, clean aluminum can. Remove any labels or glue to prevent burning. The can won’t leach harmful chemicals at grilling temperatures. I’ve made this dozens of times with no issues.
What if I don’t have a grill? Can I make this in the oven?
Totally! Stand the chicken (on the beer can) on a foil-lined baking sheet and roast at 425°F (220°C) for about 60–70 minutes, just like you would on the grill. You’ll get less smoky flavor, but the skin will still crisp up beautifully.
How do I know when my beer can chicken is done?
Use a digital thermometer and check the thickest part of the thigh—it should read 165°F (74°C). The juices should run clear, and the skin will be golden and crisp. If in doubt, give it an extra 5–10 minutes, and don’t forget to let it rest before carving.
Can I use other meats with the beer can method?
While whole chicken works best, you can try it with smaller birds like Cornish hens (use small cans or ramekins). The method doesn’t translate well to turkey—too large and unwieldy for most grills—but the dry rub is delicious on any grilled poultry.
Pin This Recipe!
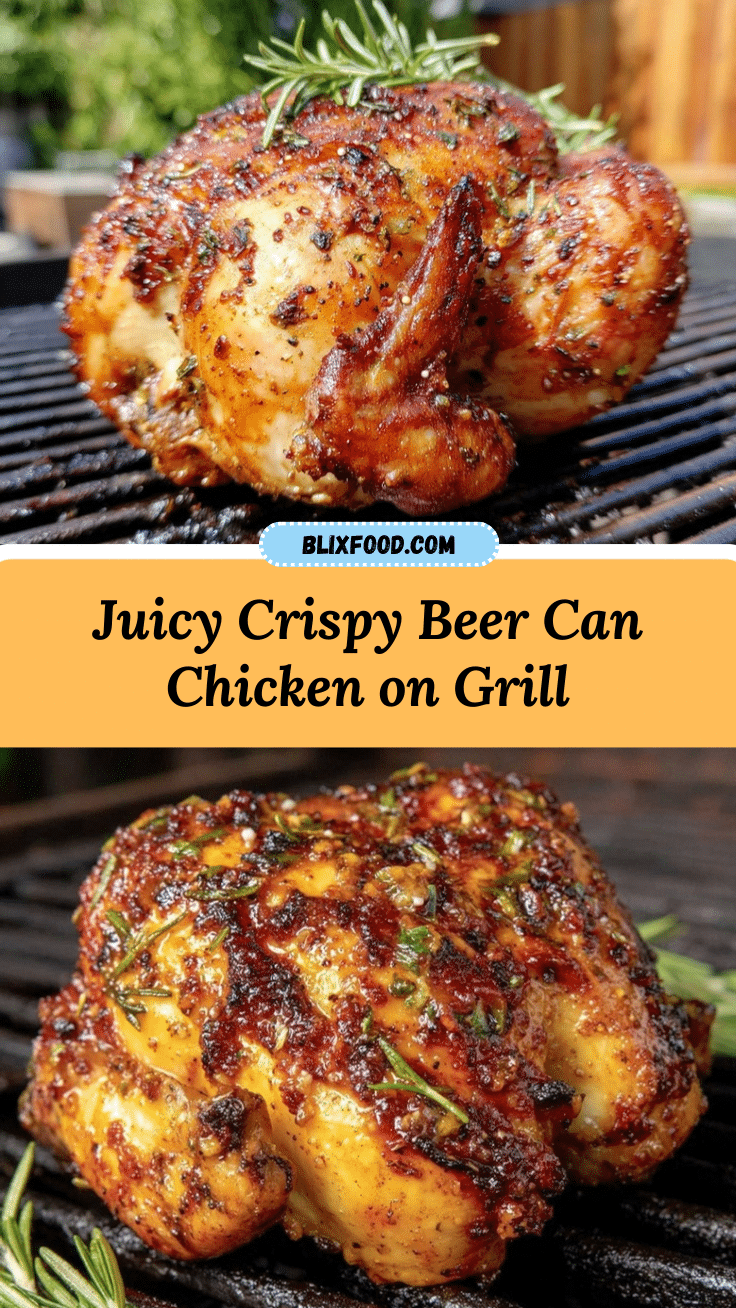
Crispy Beer Can Chicken Recipe: Easy Grilled Juicy Perfection

This crispy beer can chicken delivers shatteringly crisp skin and juicy, flavorful meat with minimal prep. It’s a crowd-pleasing, nostalgic grilling favorite perfect for gatherings, cookouts, or a special family dinner.
- Prep Time: 10 minutes
- Cook Time: 60-75 minutes
- Total Time: 70-85 minutes
- Yield: 6 servings 1x
- Category: Main Course
- Cuisine: American
Ingredients
- 1 whole chicken (about 4–5 lbs)
- 1 (12 oz) can lager or pale ale beer (or root beer, lemon-lime soda, chicken broth, ginger ale, or apple juice for variations)
- 1 1/2 tbsp kosher salt
- 2 tbsp brown sugar
- 1 tbsp paprika (smoked or sweet)
- 1 tsp black pepper
- 1 tsp garlic powder
- 1 tsp onion powder
- 1/2 tsp dried thyme (or dried oregano)
- 1/4 tsp cayenne pepper (optional)
- 2 tbsp olive oil (or melted butter)
- 1 lemon, halved
- Fresh herbs (thyme, rosemary, or parsley, optional)
- Vegetables (potatoes, carrots, onions, optional for roasting under chicken)
Instructions
- Preheat your grill to medium-high heat (about 375°F). For charcoal, bank coals to one side for indirect cooking; for gas, light one side and leave the other off.
- Mix the dry rub: In a small bowl, combine kosher salt, brown sugar, paprika, black pepper, garlic powder, onion powder, dried thyme, and cayenne (if using). Stir well.
- Remove chicken from packaging and pat dry with paper towels, including inside the cavity. Trim excess fat or neck skin if needed.
- Rub chicken all over with cut lemon halves, squeezing as you go. Drizzle with olive oil and massage to coat. Sprinkle dry rub generously over the entire bird, including under legs, wings, and inside the cavity.
- Open the beer can and pour out about 1/4, leaving it 3/4 full. Use a can opener to poke two extra holes in the top for more steam. Drop in fresh herbs if desired.
- With the chicken’s cavity facing down, carefully lower it onto the beer can so the can sits inside and the chicken stands upright.
- Place a sheet of foil or pan under the chicken on the cool side of the grill to catch drips. Stand chicken upright on indirect heat side, close lid, and grill for 60–75 minutes, rotating occasionally. Cook until skin is golden brown and a thermometer in the thickest thigh reads 165°F.
- If skin browns too quickly, tent loosely with foil. If grill runs hot, check at 50 minutes and add time as needed.
- Using tongs and mitts, carefully remove chicken (with can) from grill. Let rest upright for 10–15 minutes.
- Gently wiggle chicken off the can (watch for hot steam). Carve with a sharp knife or shears and serve immediately, with grilled veggies if desired.
Notes
For extra crispy skin, let chicken air-chill uncovered in the fridge for an hour or overnight before seasoning. Use indirect heat for best results. If you don’t have a grill, roast in a 425°F oven for 60–70 minutes. Swap beer for gluten-free beer, cider, or soda for dietary needs. Dry rub is key for flavor and crispiness. Leftovers are great in sandwiches or salads.
Nutrition
- Serving Size: Approximately 5-6 oz
- Calories: 320
- Sugar: 2
- Sodium: 780
- Fat: 16
- Saturated Fat: 4
- Carbohydrates: 3
- Protein: 38
Keywords: beer can chicken, grilled chicken, crispy chicken, summer grilling, BBQ, easy chicken recipe, backyard cookout, juicy chicken, family recipe, gluten-free option


