“You’ve got to try this,” Dad said, holding the cast iron skillet like a trophy as he carried it to the table. It was one of those evenings when the house felt cold, and the old wood stove was barely keeping up. Honestly, I wasn’t expecting much—just some quick fix dessert after a long day of yard work. But the moment the warm cinnamon-scented air hit my nose, I knew something was different.
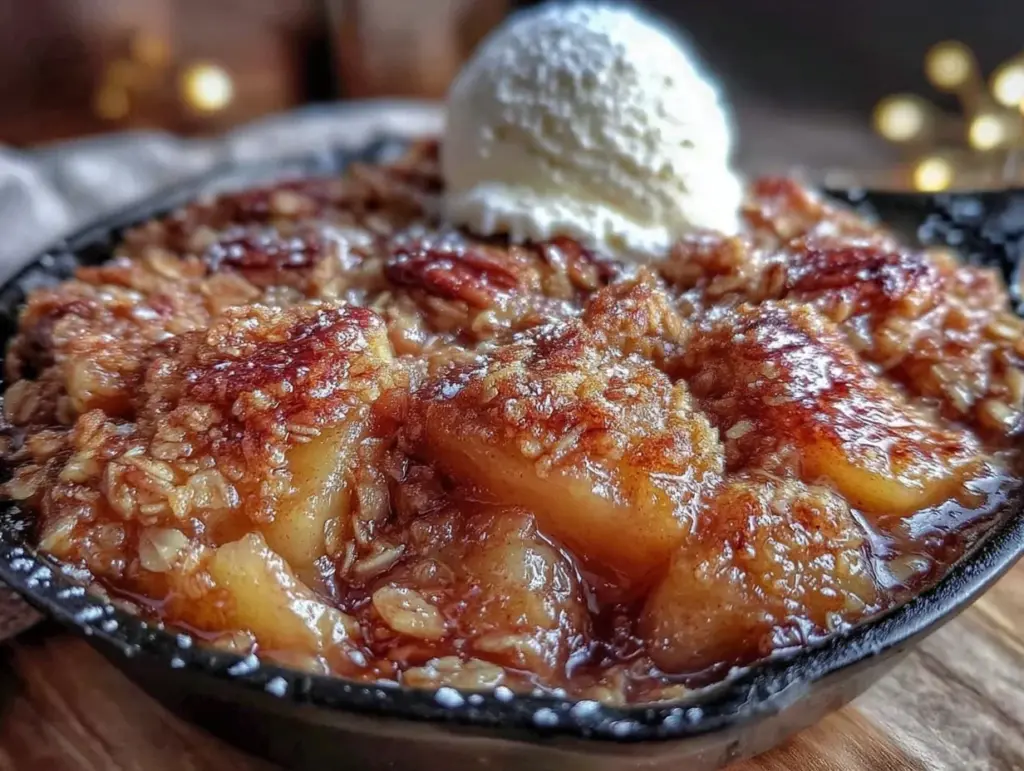
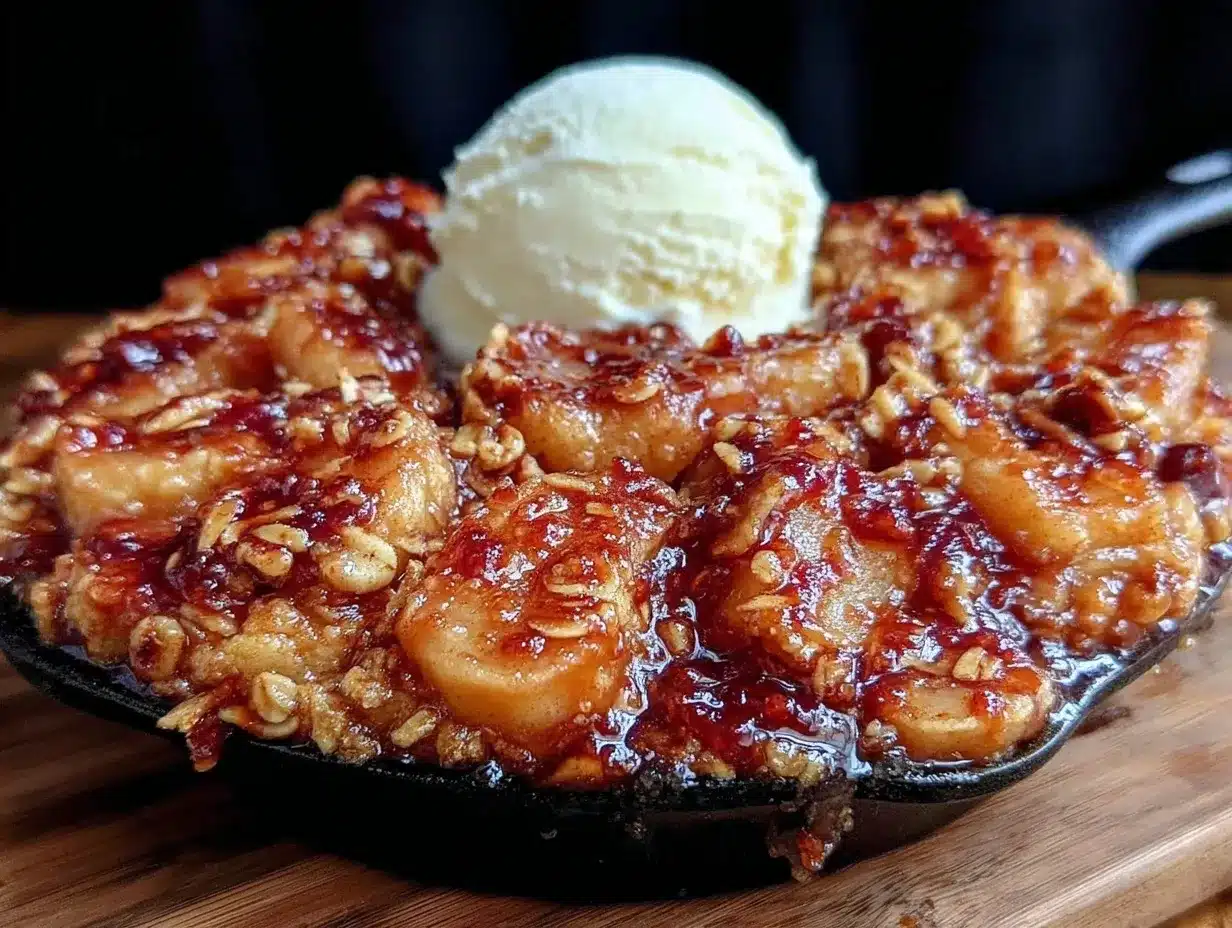
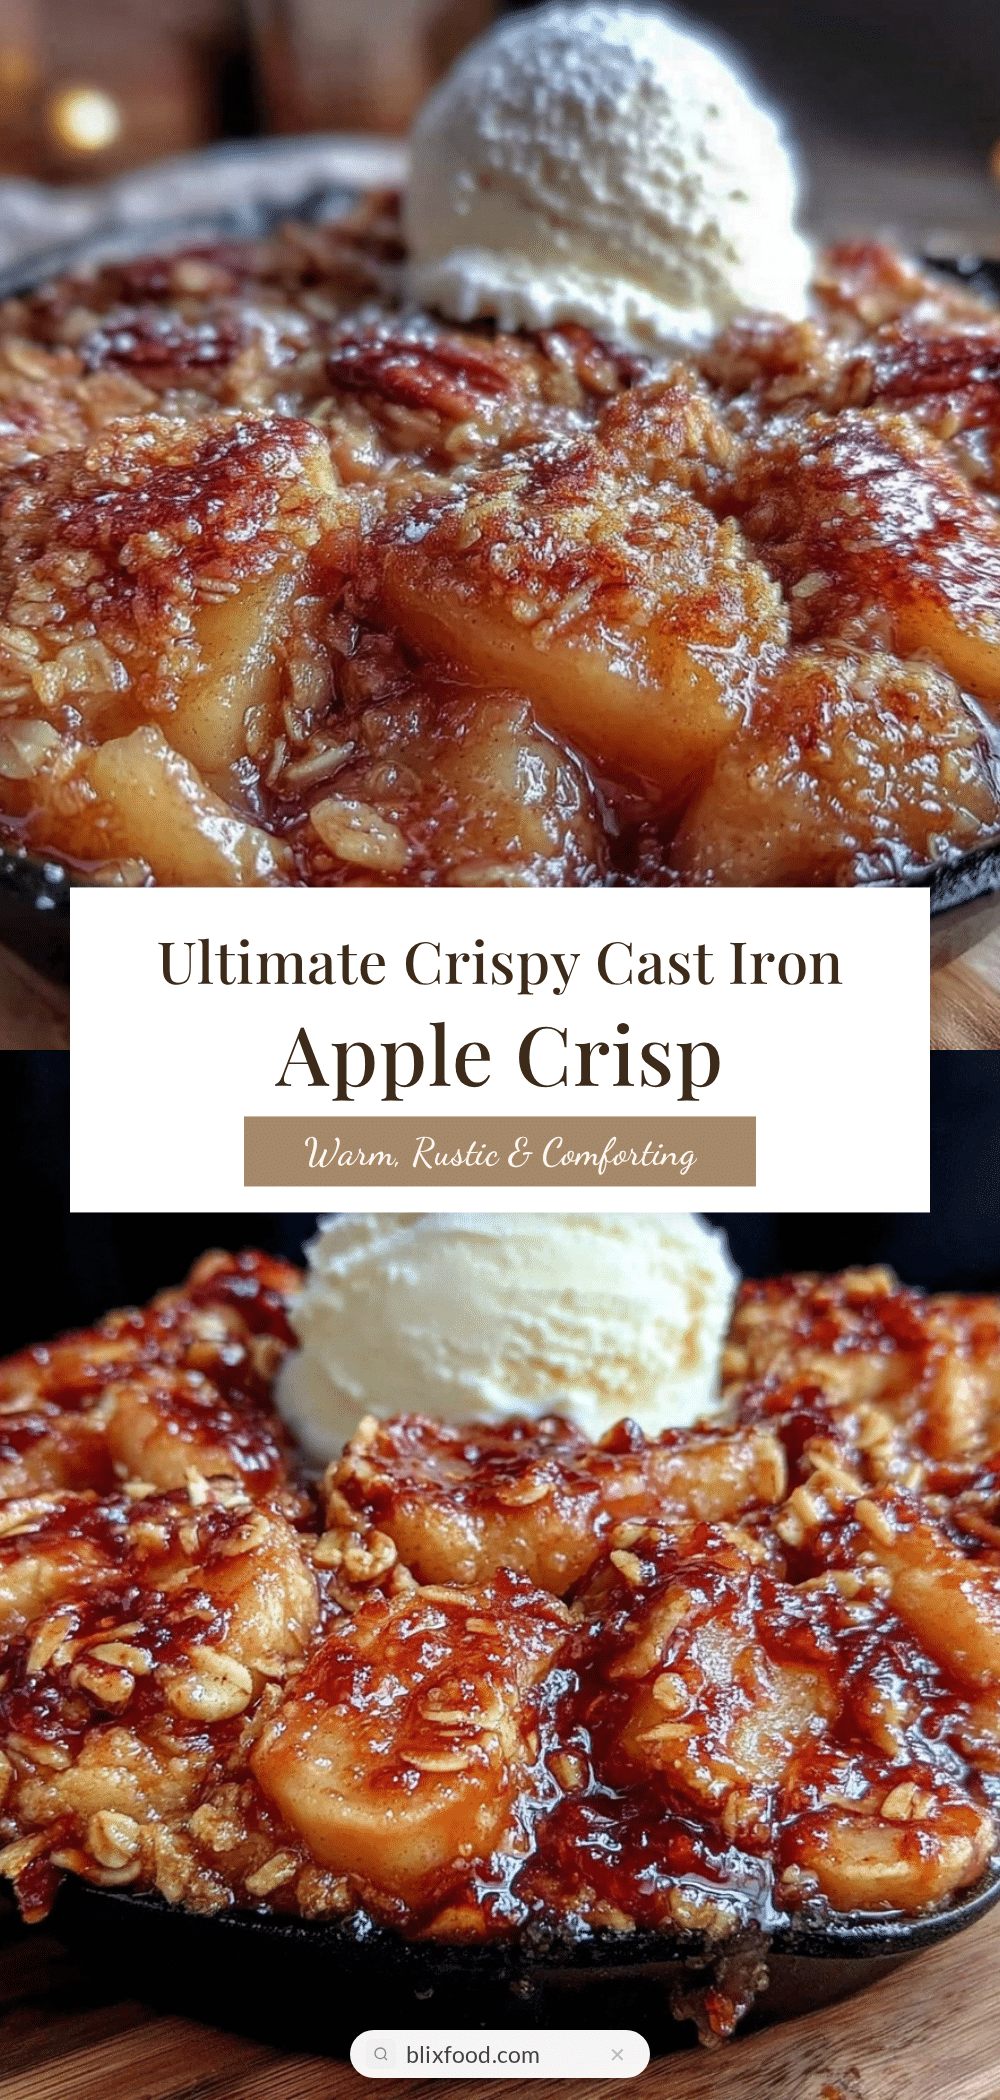
Dad’s crispy cast iron apple crisp had this golden, crackly top that shattered perfectly with each spoonful, revealing soft, tender apples underneath that tasted like fall itself. The edges caramelized just right against the skillet, and I’m pretty sure I heard him mutter, “Best one yet,” as he took the first bite. He’s made apple crisp before, sure, but this recipe had that extra bit of magic that made it a go-to comfort for chilly nights or whenever he needed a reset.
What stuck with me, beyond the taste, was the quiet way this simple dessert brought us together—no fuss, just a warm skillet and a shared love of cozy flavors. It’s not fancy, but it feels like a hug in dessert form. I’ve made it a few times myself (okay, more than a few), and it’s funny how a dish like this can become the unexpected star of the evening. If you’ve ever wondered how to get that perfect crisp top and tender apples in one go, this recipe might just be your new favorite too.
It’s the kind of dessert that invites you to slow down, savor, and maybe even sneak a second helping before anyone notices. That’s why I’m sharing Dad’s crispy cast iron apple crisp—it’s simple, soulful, and exactly what you want when you’re craving something cozy.
Why You’ll Love This Recipe
After testing this crispy cast iron apple crisp a dozen times (yes, I counted!), I’m confident it hits all the right notes for a cozy dessert that’s easy to pull off without fuss. Here’s why it’s become a staple in our kitchen:
- Quick & Easy: Ready in under 45 minutes, it’s perfect for those evenings when you want something warm and comforting but don’t want to spend hours in the kitchen.
- Simple Ingredients: You probably have everything on hand—apples, brown sugar, oats, butter, and a few warm spices. No specialty trips necessary!
- Perfect for Cozy Nights: Whether it’s a quiet evening with family or a last-minute dessert for guests, it’s the kind of dish that feels like home.
- Crowd-Pleaser: Kids love the sweet, crunchy topping, and adults appreciate the balance of tart apples and buttery crispiness.
- Unbelievably Delicious: The cast iron skillet does something special here, creating that perfectly caramelized edge and a crispy topping that you just can’t get in a regular baking dish.
What sets this apple crisp apart from the rest? It’s the technique—Dad swears by letting the topping get that extra few minutes in the skillet to deepen the flavor and texture. Plus, I like to toss in a pinch of nutmeg and a splash of vanilla extract to round out the warmth. This isn’t just any apple crisp; it’s the one you’ll want to make again and again because it’s honest, satisfying, and downright comforting.
If you enjoy simple desserts with a little rustic charm, you might appreciate how this recipe echoes the spirit of our festive cranberry cream cheese spread—both bring that perfect blend of homey flavors without the fuss.
What Ingredients You Will Need
This recipe uses straightforward ingredients to create bold flavor and that satisfying texture you expect from a classic apple crisp. Most are pantry staples, and the fresh apples bring in that seasonal touch. Feel free to swap or adjust based on what you have on hand.
- Apples: 6 large apples (about 2 pounds / 900g), peeled, cored, and sliced thin. I prefer Granny Smith for tartness or Fuji for sweetness, but a mix works well.
- Lemon juice: 1 tablespoon (freshly squeezed), to prevent browning and add brightness.
- Granulated sugar: 1/4 cup (50g), helps balance the tartness.
- Ground cinnamon: 1 1/2 teaspoons, the warm spice that makes apple crisp feel like fall.
- Nutmeg: 1/4 teaspoon, optional but adds depth.
- All-purpose flour: 3/4 cup (95g), for the crisp topping base.
- Old-fashioned rolled oats: 3/4 cup (65g), adds that crunchy texture everyone loves.
- Brown sugar: 1/2 cup packed (110g), for richness and caramel notes.
- Unsalted butter: 1/2 cup (115g), cold and cut into small cubes, essential for that crispy topping.
- Vanilla extract: 1 teaspoon, to enhance flavor (optional but recommended).
- Salt: A pinch, to balance sweetness.
If you want to tweak this for a gluten-free version, swap the all-purpose flour for almond flour or a gluten-free blend. For a dairy-free option, use coconut oil or a plant-based butter substitute. When it comes to brands, I like using Land O’Lakes unsalted butter for its creamy texture and Bob’s Red Mill oats for consistent quality.
Equipment Needed
- Cast iron skillet: An 8- to 10-inch (20-25 cm) skillet works best for even cooking and that signature crispy edge. If you don’t have one, a heavy-duty ovenproof skillet or baking dish can work, but it won’t crisp up quite the same.
- Mixing bowls: At least two—one for the apple mixture and one for the topping.
- Measuring cups and spoons: For accuracy, especially with sugar and spices.
- Sharp knife and cutting board: To slice the apples thinly and evenly.
- Pastry cutter or fork: For cutting butter into the topping. If you don’t have one, your fingers work just fine, but keep the butter cold!
- Oven mitts: Because cast iron gets hot and stays hot.
Personally, I’ve tried this recipe with different skillets, and the cast iron definitely wins for crispiness. If you’re investing in one, a Lodge cast iron skillet is budget-friendly and lasts forever with proper seasoning. Just remember to hand wash and dry immediately to keep it in great shape.
Preparation Method
- Preheat your oven to 350°F (175°C). This gives your apples time to soften without burning the topping.
- Prepare the apples: Peel, core, and slice 6 large apples into about 1/4-inch (0.6 cm) thick slices. Toss them in a large bowl with 1 tablespoon fresh lemon juice to keep them from browning and add brightness.
- Mix in sugar and spices: Add 1/4 cup (50g) granulated sugar, 1 1/2 teaspoons cinnamon, and 1/4 teaspoon nutmeg to the apples. Stir gently to coat evenly.
- Transfer the apple mixture into your cast iron skillet: Spread them out evenly, making sure the apples are well distributed but not packed too tight.
- Make the crisp topping: In a separate bowl, combine 3/4 cup (95g) all-purpose flour, 3/4 cup (65g) rolled oats, 1/2 cup (110g) packed brown sugar, and a pinch of salt. Add 1/2 cup (115g) cold unsalted butter, cut into small cubes.
- Cut the butter into the dry ingredients: Use a pastry cutter, fork, or your fingertips to work the butter until the mixture resembles coarse crumbs with some pea-sized bits. This step is key for that crispy texture.
- Sprinkle the topping evenly over the apples: Try to cover all the fruit to get a nice crust all around.
- Add a splash of vanilla extract: (About 1 teaspoon) over the topping for a subtle flavor boost.
- Bake the apple crisp: Place the skillet in the oven and bake for 40-45 minutes until the topping is golden brown and crispy, and the apples are bubbling around the edges.
- Check doneness: The top should be crunchy and browned; the apples should be tender but not mushy. If the topping browns too quickly, loosely cover with foil and continue baking.
- Cool slightly: Let it sit for 10 minutes before serving to let the juices thicken up a bit.
Pro tip: If the apples release too much liquid, you can drain a little before adding the topping next time. Also, slicing apples uniformly helps bake everything evenly. Trust me, the first time I eyeballed it, the bottom was mushier than I liked!
Cooking Tips & Techniques
Getting that perfect crispy topping and tender apple filling can feel like an art, but a few tips make it manageable every time.
- Use the right apples: A mix of tart and sweet apples gives the best flavor and texture. Granny Smith and Honeycrisp are my favorites. Avoid super-soft varieties like McIntosh; they get mushy too fast.
- Keep butter cold: This helps create those little pockets of fat in the topping that crisp up nicely instead of melting away.
- Don’t overcrowd the skillet: If apples are too packed, they steam instead of bake, which means soggy topping. Spread them out and use a slightly larger skillet if needed.
- Watch the oven temperature: Oven temperatures vary—if your topping browns too fast, tent with foil to prevent burning while apples cook through.
- Let it rest: I know it’s tempting to dig in right away, but waiting 10 minutes helps the juices thicken and the crisp set up beautifully.
I remember the first time I tried making this apple crisp without a cast iron skillet—it just didn’t have the same charm. The skillet really does make a difference, especially with that caramelized edge. Also, multitasking while it bakes (cleaning up or prepping dinner) helps keep your kitchen running smoothly.
Variations & Adaptations
This apple crisp is flexible and can be adapted to suit dietary needs, seasonal ingredients, or personal taste.
- Gluten-free: Swap all-purpose flour for almond flour or a gluten-free flour blend. Use certified gluten-free oats to keep it safe.
- Dairy-free: Replace butter with coconut oil or a vegan butter alternative. This changes the flavor slightly but keeps the crisp texture.
- Nutty twist: Add 1/2 cup chopped pecans or walnuts to the topping for crunch and extra flavor.
- Seasonal fruit swap: In warmer months, try swapping apples for peaches or pears for a fresh twist.
- Spiced up: Add a pinch of ground ginger or allspice to the apple mixture for a deeper spice profile.
Personally, I’ve made a version with a handful of dried cranberries stirred into the apples — it gave a tart pop that reminded me of the flavors in the festive cranberry cream cheese spread we love at holiday gatherings.
Serving & Storage Suggestions
This apple crisp is best served warm, straight from the skillet, with a scoop of vanilla ice cream or a dollop of whipped cream for that extra indulgence. It pairs beautifully with a hot cup of cider or coffee on a chilly evening.
To store, cover leftovers tightly with plastic wrap or transfer to an airtight container. It keeps well in the refrigerator for up to 3 days. For longer storage, freeze portions wrapped well in foil and place in a freezer-safe bag for up to 3 months.
When reheating, warm in the oven at 325°F (165°C) for about 15 minutes to restore that crisp topping. Microwave reheating works in a pinch but tends to soften the crisp.
Flavors deepen after a day in the fridge, so leftovers can be even better the next day, if you can resist eating it all right away!
Nutritional Information & Benefits
One serving (about 1/6 of the skillet) provides roughly:
| Calories | 280 kcal |
|---|---|
| Carbohydrates | 45g |
| Protein | 2g |
| Fat | 8g |
| Fiber | 4g |
Apples bring a good dose of fiber and vitamin C, while oats add heart-healthy whole grains. The warm spices like cinnamon can help with blood sugar regulation and have antioxidant properties. This dessert fits well into an occasional treat balanced with whole foods.
Note that this recipe contains gluten and dairy unless substitutions are made. For those with allergies, the adaptations mentioned earlier keep it inclusive without losing the essence.
Conclusion
Dad’s crispy cast iron apple crisp is an honest dessert that brings warmth and comfort in every bite. It’s a recipe that’s easy to make, hard to resist, and perfect for those quiet evenings when you want something sweet without the fuss.
Feel free to tweak the spices, swap in seasonal fruits, or add nuts to make this cozy dessert your own. Personally, it’s become my fallback when I want to impress with minimal effort—plus, it always sparks good conversation and satisfied smiles.
If you try it, I’d love to hear how you like to serve your apple crisp or what variations you come up with. There’s something special about recipes that bring people together, and this one definitely does that in our house.
FAQs
Can I use frozen apples for this apple crisp?
Fresh apples work best for texture, but if you use frozen, thaw and drain excess liquid before baking to avoid sogginess.
What if I don’t have a cast iron skillet?
You can use an ovenproof baking dish, but the crisp edges won’t be quite the same. A heavy skillet or ceramic dish will still yield good results.
How do I make this recipe dairy-free?
Simply substitute the butter with coconut oil or a plant-based butter alternative. It maintains crispiness with a slight flavor difference.
Can I prepare the apple mixture ahead of time?
Yes, toss the sliced apples with lemon juice and spices and refrigerate for up to 24 hours before assembling and baking.
What’s the best way to serve this apple crisp?
Warm with vanilla ice cream, whipped cream, or even a drizzle of caramel sauce. It’s also delicious on its own, especially right from the skillet.
Pin This Recipe!
Crispy Cast Iron Apple Crisp

A cozy, easy-to-make apple crisp with a golden, crackly topping and tender apples, perfect for chilly nights and comforting desserts.
- Prep Time: 15 minutes
- Cook Time: 40-45 minutes
- Total Time: 55-60 minutes
- Yield: 6 servings 1x
- Category: Dessert
- Cuisine: American
Ingredients
- 6 large apples (about 2 pounds / 900g), peeled, cored, and sliced thin
- 1 tablespoon fresh lemon juice
- 1/4 cup (50g) granulated sugar
- 1 1/2 teaspoons ground cinnamon
- 1/4 teaspoon nutmeg (optional)
- 3/4 cup (95g) all-purpose flour
- 3/4 cup (65g) old-fashioned rolled oats
- 1/2 cup packed (110g) brown sugar
- 1/2 cup (115g) cold unsalted butter, cut into small cubes
- 1 teaspoon vanilla extract (optional)
- A pinch of salt
Instructions
- Preheat your oven to 350°F (175°C).
- Peel, core, and slice 6 large apples into about 1/4-inch (0.6 cm) thick slices. Toss them in a large bowl with 1 tablespoon fresh lemon juice.
- Add 1/4 cup granulated sugar, 1 1/2 teaspoons cinnamon, and 1/4 teaspoon nutmeg to the apples. Stir gently to coat evenly.
- Transfer the apple mixture into your cast iron skillet, spreading evenly but not packed tightly.
- In a separate bowl, combine 3/4 cup all-purpose flour, 3/4 cup rolled oats, 1/2 cup packed brown sugar, and a pinch of salt.
- Add 1/2 cup cold unsalted butter cubes to the dry ingredients and cut in with a pastry cutter, fork, or fingertips until mixture resembles coarse crumbs with some pea-sized bits.
- Sprinkle the topping evenly over the apples.
- Add about 1 teaspoon vanilla extract over the topping.
- Bake the apple crisp in the oven for 40-45 minutes until the topping is golden brown and crispy and the apples are bubbling around the edges.
- If the topping browns too quickly, loosely cover with foil and continue baking.
- Let the apple crisp cool slightly for 10 minutes before serving to allow juices to thicken.
Notes
Use a mix of tart and sweet apples like Granny Smith and Fuji for best flavor and texture. Keep butter cold when cutting into topping for crispiness. If topping browns too fast, tent with foil. Let crisp rest 10 minutes before serving to thicken juices. For gluten-free, substitute flour with almond or gluten-free flour and use certified gluten-free oats. For dairy-free, replace butter with coconut oil or vegan butter.
Nutrition
- Serving Size: About 1/6 of the ski
- Calories: 280
- Fat: 8
- Carbohydrates: 45
- Fiber: 4
- Protein: 2
Keywords: apple crisp, cast iron skillet, cozy dessert, fall dessert, easy apple crisp, cinnamon apple dessert