Let me tell you, the smell of freshly baked pizza crust wafting through the kitchen—crispy, golden, and inviting—is enough to make anyone’s mouth water. The first time I made this crispy gluten-free pizza crust recipe, I was instantly hooked. It was one of those moments where you pause, take a deep breath, and just smile because you know you’ve stumbled upon something truly special. Years ago, when I was knee-high to a grasshopper, pizza nights meant doughy, chewy crusts loaded with gluten. Fast forward to today, and after countless tries, I’ve perfected this recipe that delivers that perfect crunch without a trace of gluten.
You know what’s funny? My family couldn’t stop sneaking slices right off the cooling rack (and honestly, I can’t really blame them). This crispy gluten-free pizza crust recipe has become a staple for our weekend dinners and even casual get-togethers. It’s dangerously easy to make, and it brings that pure, nostalgic comfort of a classic pizza night with none of the fuss. Whether you’re feeding kids, impressing friends at a potluck, or just craving a bright spot to your Pinterest cookie board, this recipe fits the bill perfectly. I’ve tested it multiple times in the name of research, of course, and it always comes out crispy, flavorful, and just right.
Why You’ll Love This Crispy Gluten-Free Pizza Crust Recipe
Honestly, this crispy gluten-free pizza crust recipe checks all the boxes for a hassle-free, tasty pizza base. I’ve spent enough time in the kitchen to know what works (and what doesn’t), and this recipe stands out because of these reasons:
- Quick & Easy: Comes together in under 30 minutes, perfect for busy weeknights or last-minute pizza cravings.
- Simple Ingredients: No fancy or hard-to-find stuff. You likely have everything in your kitchen pantry.
- Perfect for Any Occasion: Whether it’s casual family dinners, weekend get-togethers, or a fun cooking project with the kids, this crust delivers.
- Crowd-Pleaser: Even gluten lovers in my family give it thumbs up—no compromise on taste or texture here.
- Unbelievably Delicious: Crispy on the outside, tender on the inside, with a flavor that’s just right—not too bland, not too dense.
This isn’t your run-of-the-mill gluten-free crust. The secret is in the blend of gluten-free flours and a little baking trick I picked up from pros: a quick pre-bake that locks in crispiness. Plus, I add a pinch of xanthan gum to mimic that chewy bite you miss from regular dough. It’s comfort food reimagined—healthier, faster, but with the same soul-soothing satisfaction that makes you close your eyes after the first bite. I promise, this recipe will make you rethink gluten-free pizza forever.
What Ingredients You Will Need
This crispy gluten-free pizza crust recipe uses simple, wholesome ingredients to deliver bold flavor and that perfect satisfying crunch without any fuss. Most of these are pantry staples or easy to find in your local grocery store.
- Gluten-Free All-Purpose Flour Blend: 1 ¾ cups (210g) – I recommend Bob’s Red Mill gluten-free flour blend for best texture.
- Almond Flour: ½ cup (50g) – adds nuttiness and helps with crispness.
- Baking Powder: 1 teaspoon – for a little lift and fluffiness.
- Xanthan Gum: ½ teaspoon – this is key for binding and chewiness (skip if your flour blend already contains it).
- Salt: ½ teaspoon – to bring out flavor.
- Warm Water: ¾ cup (180ml) – not too hot, just warm enough to activate yeast-like effects and help with dough elasticity.
- Olive Oil: 2 tablespoons – adds moisture and richness (use extra virgin for best flavor).
- Honey or Maple Syrup: 1 teaspoon – balances the flavors with a touch of sweetness.
- Apple Cider Vinegar: 1 teaspoon – helps with dough rise and tenderness.
Optional toppings or additions:
- Dried Herbs: 1 teaspoon Italian seasoning or oregano for added flavor in the dough.
- Parmesan Cheese: 2 tablespoons grated (if you’re not dairy-free) mixed into the dough for a savory twist.
If you need to keep it nut-free, swap almond flour with extra gluten-free flour or oat flour (certified gluten-free). For a dairy-free option, just skip the cheese or use a plant-based alternative. This recipe is pretty forgiving and versatile!
Equipment Needed
- Mixing Bowls: One large bowl for mixing the dough ingredients.
- Measuring Cups and Spoons: Precision is key for gluten-free baking.
- Whisk and Spoon: For combining wet and dry ingredients smoothly.
- Silicone Spatula: Helps scrape the bowl clean and fold dough gently.
- Pizza Stone or Baking Sheet: A pizza stone is ideal for crispiness, but a heavy-duty baking sheet works just fine.
- Parchment Paper: Prevents sticking and makes transferring the crust easy.
- Rolling Pin or Hands: You can roll the dough thin with a pin or pat it out with your hands for a rustic look.
For budget-friendly cooks, a sturdy baking sheet and parchment paper are enough to get started. If you don’t have a pizza stone, preheat your baking sheet in the oven for 15 minutes before placing the dough—it helps mimic that stone effect. I also recommend keeping your tools clean and dry, especially the baking stone, since moisture can affect the bake.
Preparation Method

- Preheat your oven: Set it to 450°F (230°C). If using a pizza stone, place it in the oven while it heats up (about 30 minutes).
- Mix dry ingredients: In a large bowl, whisk together 1 ¾ cups gluten-free flour blend, ½ cup almond flour, 1 teaspoon baking powder, ½ teaspoon xanthan gum, and ½ teaspoon salt. Make sure everything is evenly combined.
- Combine wet ingredients: In a separate bowl, mix ¾ cup warm water, 2 tablespoons olive oil, 1 teaspoon honey or maple syrup, and 1 teaspoon apple cider vinegar. Stir until the honey dissolves.
- Form the dough: Gradually pour the wet mixture into the dry ingredients while stirring with a spoon or spatula. Keep mixing until the dough comes together but still feels slightly sticky. If it’s too dry, add a tablespoon of water at a time (no more than 2 tablespoons).
- Rest the dough: Let it sit for 5 minutes. This helps the flours absorb the moisture, making it easier to handle.
- Shape the crust: Lay a piece of parchment paper on your countertop, sprinkle with a little gluten-free flour, and transfer the dough onto it. Pat or roll the dough into a 12-inch (30 cm) circle, about ¼ inch (6 mm) thick. Don’t worry if it’s not perfectly round—rustic is charming!
- Pre-bake the crust: Carefully transfer the parchment paper with dough onto your preheated pizza stone or baking sheet. Bake for 10-12 minutes or until the edges turn light golden and the crust feels firm to the touch. This step locks in that crispy texture.
- Add toppings and bake again: Remove the crust from the oven, add your favorite sauce, cheese, and toppings. Return to the oven and bake for another 10-15 minutes until the cheese is bubbly and the crust is golden brown.
- Rest and serve: Let the pizza cool for 5 minutes before slicing. This helps the crust set and keeps it crispy.
Pro tip: If the crust starts browning too fast during the second bake, loosely cover the edges with foil. This prevents burning while the toppings finish cooking.
Cooking Tips & Techniques
When crafting a crispy gluten-free pizza crust, timing and technique are everything. Here’s what I’ve learned after more than a dozen trial runs:
- Don’t skip the pre-bake: This crucial step gives the crust structure and prevents sogginess. It’s like giving your pizza base a head start.
- Use warm—not hot—water: Too hot can kill the natural leavening effects and dry out the dough. Warm water wakes up the flours gently.
- Patience with resting: Letting the dough rest for 5 minutes hydrates the flours and makes shaping easier.
- Adjust thickness to preference: Thinner crusts will crisp more but can be fragile; thicker ones are chewier. I personally like about ¼ inch for the best balance.
- Use parchment paper: It’s a game-changer for transferring dough and cleanup.
- Don’t overload your pizza: Too many toppings weigh down the crust and kill crispiness.
- Invest in a pizza stone: It absorbs moisture and radiates heat evenly for that coveted crispy bottom.
- Watch your oven temp closely: Gluten-free crusts can burn faster. Keep an eye, especially during bake two.
One time, I tried skipping the xanthan gum (thinking I’d save a step). Let’s just say, the crust fell apart the moment I tried to lift a slice—lesson well learned! Also, trying to roll dough too thin without enough flour made a sticky, frustrating mess. I now swear by a light dusting and gentle hands.
Variations & Adaptations
This crispy gluten-free pizza crust recipe is a great base, but it’s also super flexible. Here are some ways I’ve played around with it:
- Cauliflower Crust: Replace half of the flour blend with finely grated, cooked cauliflower for a veggie boost and lower carb count.
- Herbed Crust: Mix 1 teaspoon dried rosemary or fresh basil into the dough for a fragrant twist that pairs beautifully with Mediterranean toppings.
- Cheesy Crust: Stir in ¼ cup shredded mozzarella or parmesan for extra flavor and a slightly crispy cheesy edge.
- Seasonal Flavors: In fall, add a teaspoon of pumpkin spice or smoked paprika for warmth and depth.
- Vegan Option: Swap honey with maple syrup and omit cheese—or use your favorite dairy-free cheese alternative.
I once tried adding finely chopped sun-dried tomatoes into the dough—surprisingly delicious and it added a sweet tang to the crust itself! Feel free to experiment with your favorite herbs and spices. This recipe adapts well to gluten-free flours like sorghum or teff, but results may vary slightly, so keep notes.
Serving & Storage Suggestions
This crispy gluten-free pizza crust is best served hot and fresh from the oven when the crust is at its peak crunchiness. I like to slice it up with a sharp pizza cutter and serve alongside a simple green salad or garlic-roasted veggies for a balanced meal.
Leftovers? No worries! Store cooled pizza slices in an airtight container in the refrigerator for up to 3 days. For longer storage, wrap slices tightly in foil and freeze for up to 2 months. When reheating, pop slices in a hot skillet over medium heat or bake in the oven at 375°F (190°C) for about 8-10 minutes to bring back the crisp texture. Microwaving tends to make the crust soggy, so I avoid that.
Flavors actually deepen after a day or two, so if you’re planning ahead, this crust holds up nicely for next-day pizza parties. Just reheat gently and add fresh toppings if you like.
Nutritional Information & Benefits
Per serving (based on 8 slices): Approximately 150 calories, 6g fat, 20g carbohydrates, 3g protein, and 3g fiber. This crust is naturally gluten-free, dairy-free (unless you add cheese), and low in sugar.
Key benefits include:
- Gluten-Free: Perfect for those with gluten sensitivities or celiac disease.
- Almond Flour: Adds healthy fats and protein, plus vitamin E and magnesium.
- Minimal Processed Ingredients: No weird additives or preservatives.
- Low Sugar: Just a touch of natural sweetener to balance flavors.
From a wellness perspective, this pizza crust delivers the comfort you crave without the gluten bloat or heaviness. It’s a recipe you can feel good about sharing with family and friends.
Conclusion
If you’re looking for a crispy gluten-free pizza crust recipe that’s easy, reliable, and seriously tasty, this one’s for you. It’s the kind of recipe you’ll want to bookmark and come back to again and again. What I love most is how adaptable it is—you can tweak it to suit your taste buds, dietary needs, and seasonal ingredients without losing that magic crispy texture.
Give it a try, and don’t be shy about making it your own. I’d love to hear what toppings you pair with it or any creative spins you put on the dough. Drop a comment below or share your pizza pics! Let’s keep the pizza love going strong. Happy baking and even happier eating!
FAQs About Crispy Gluten-Free Pizza Crust
Can I make this pizza crust ahead of time?
Absolutely! You can prepare the dough, shape it, and keep it covered in the fridge for up to 24 hours before baking. Just bring it to room temperature before pre-baking.
What if I don’t have xanthan gum?
If your gluten-free flour blend already contains xanthan gum, you can skip adding extra. Otherwise, it helps hold the dough together. You can try substituting with guar gum, but results may vary.
How do I get the crust extra crispy?
Preheating your pizza stone or baking sheet is key, and don’t skip the pre-bake step. Also, avoid piling on too many wet toppings which can make the crust soggy.
Can I freeze the dough?
Yes! Wrap the dough ball tightly in plastic wrap and freeze for up to 2 months. Thaw overnight in the fridge before shaping and baking.
Is this recipe suitable for vegans?
Definitely. Just swap the honey with maple syrup and skip any cheese or use a dairy-free alternative. The crust itself is naturally vegan-friendly.
Pin This Recipe!

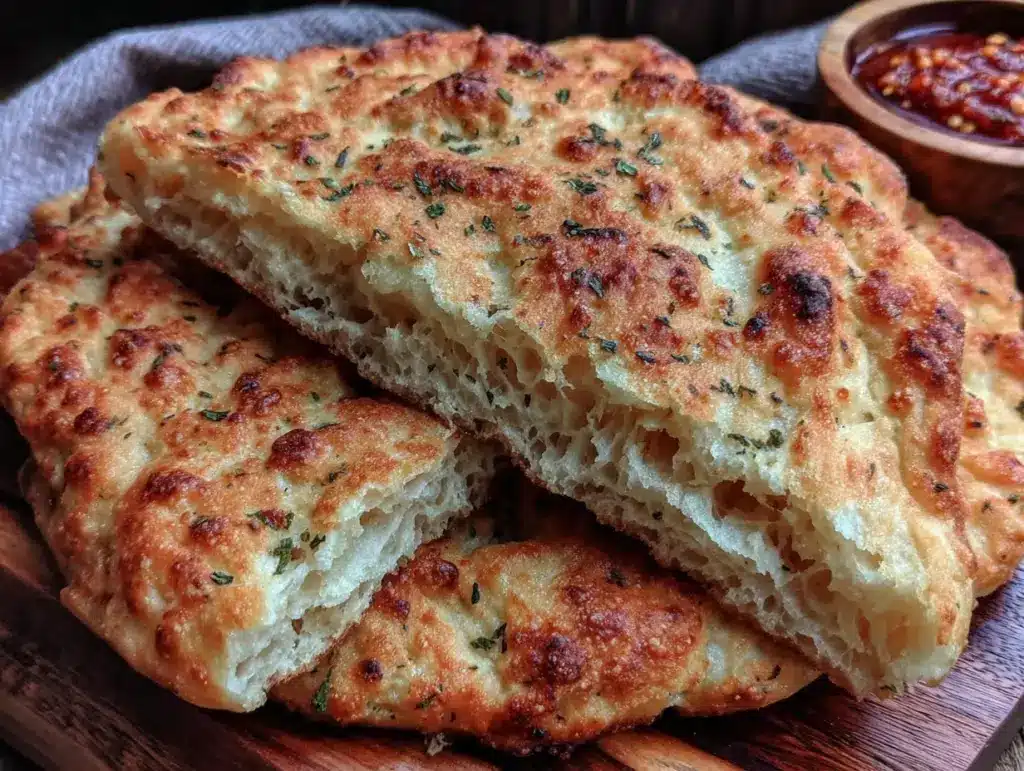
Crispy Gluten-Free Pizza Crust Recipe Easy Step-by-Step Guide

This crispy gluten-free pizza crust recipe delivers a perfect crunch without gluten, using simple ingredients and a quick pre-bake method. It’s easy, versatile, and perfect for any occasion.
- Prep Time: 10 minutes
- Cook Time: 25 minutes
- Total Time: 35 minutes
- Yield: 8 slices 1x
- Category: Main Course
- Cuisine: American
Ingredients
- 1 ¾ cups (210g) gluten-free all-purpose flour blend (e.g., Bob’s Red Mill)
- ½ cup (50g) almond flour
- 1 teaspoon baking powder
- ½ teaspoon xanthan gum (skip if your flour blend contains it)
- ½ teaspoon salt
- ¾ cup (180ml) warm water
- 2 tablespoons olive oil (extra virgin recommended)
- 1 teaspoon honey or maple syrup
- 1 teaspoon apple cider vinegar
- Optional: 1 teaspoon dried herbs (Italian seasoning or oregano)
- Optional: 2 tablespoons grated Parmesan cheese (omit for dairy-free)
Instructions
- Preheat your oven to 450°F (230°C). If using a pizza stone, place it in the oven while it heats up (about 30 minutes).
- In a large bowl, whisk together gluten-free flour blend, almond flour, baking powder, xanthan gum, and salt until evenly combined.
- In a separate bowl, mix warm water, olive oil, honey or maple syrup, and apple cider vinegar until the honey dissolves.
- Gradually pour the wet mixture into the dry ingredients while stirring with a spoon or spatula until the dough comes together but is slightly sticky. Add up to 2 tablespoons more water if too dry.
- Let the dough rest for 5 minutes to hydrate the flours and make shaping easier.
- Lay parchment paper on a countertop, sprinkle with gluten-free flour, and transfer the dough onto it. Pat or roll into a 12-inch (30 cm) circle about ¼ inch (6 mm) thick.
- Carefully transfer the parchment paper with dough onto the preheated pizza stone or baking sheet. Bake for 10-12 minutes until edges are light golden and crust feels firm.
- Remove crust from oven, add your favorite sauce, cheese, and toppings. Return to oven and bake for another 10-15 minutes until cheese is bubbly and crust is golden brown.
- Let the pizza cool for 5 minutes before slicing to help the crust set and stay crispy.
Notes
Pre-baking the crust is essential to lock in crispiness and prevent sogginess. Use warm, not hot, water to activate the flours gently. Avoid overloading toppings to maintain crispness. If crust browns too fast during second bake, cover edges with foil. Dough can be prepared ahead and refrigerated up to 24 hours or frozen up to 2 months.
Nutrition
- Serving Size: 1 slice (1/8 of pizz
- Calories: 150
- Fat: 6
- Carbohydrates: 20
- Fiber: 3
- Protein: 3
Keywords: gluten-free pizza crust, crispy pizza crust, gluten-free baking, easy pizza dough, dairy-free pizza crust, vegan pizza crust


