“You really just toss it all together and wait,” my friend Maria said over the phone, sounding a bit skeptical but intrigued. I’d been raving about this Easy Crispy Dutch Oven No Knead Bread Recipe for weeks, and she finally agreed to try it. Honestly, I get it—bread baking feels like a high-maintenance hobby reserved for the patient or the pros. But this recipe? It flipped that idea on its head.
One evening, after a particularly long day juggling work emails, dinner prep, and an unexpected call from my cousin, I was craving fresh bread but had zero energy for fuss. I remembered a tip from an old baking book about no-knead bread, but I’d never dared try it until that night. I pulled out my trusty Dutch oven (which I almost never use), mixed a few pantry staples, and let it rest overnight.
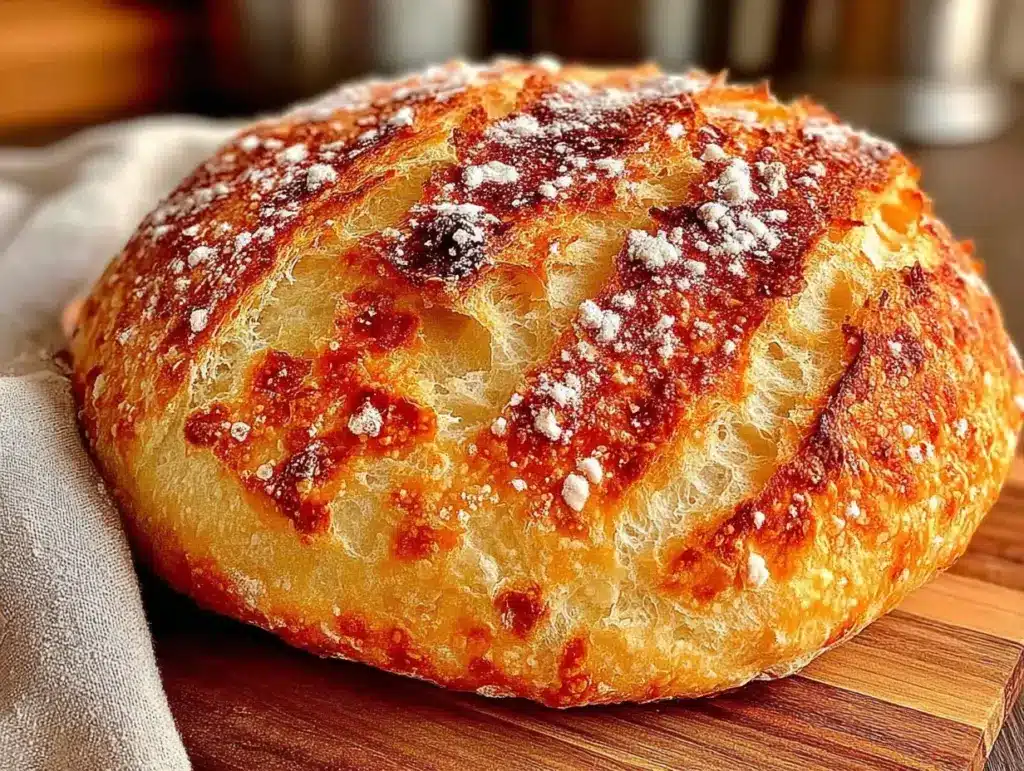
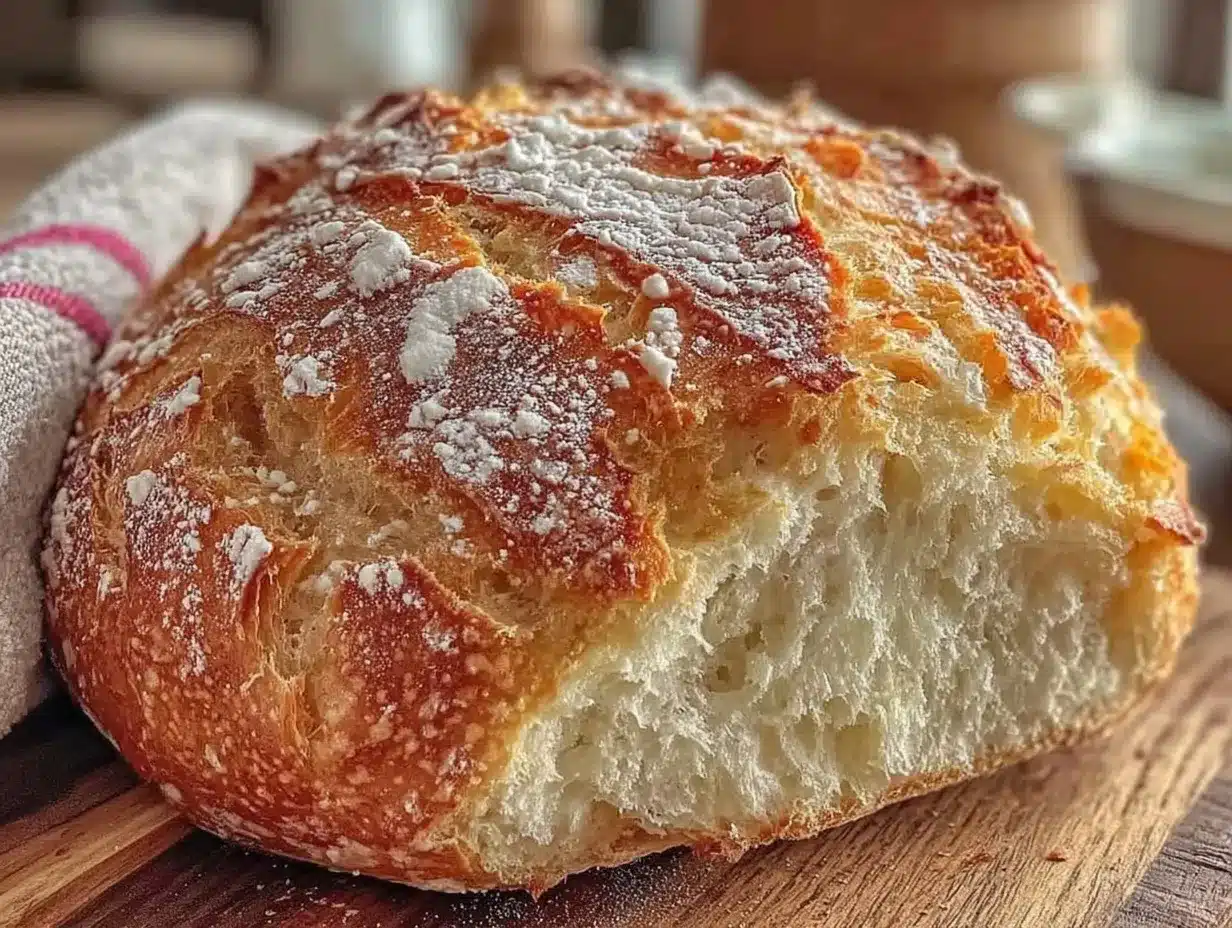
The next morning, the kitchen smelled like a cozy bakery. The crust was crackly and golden, the inside soft and airy — honestly, it felt a little like magic. I realized this wasn’t just a shortcut; it was a kind of bread that made you slow down and appreciate simplicity. The crust cracked as I sliced, and the crumb was just the right balance of chewy and tender. Maria texted me the next day—she was hooked too, already thinking about adding rosemary or garlic next time.
That’s the thing about this recipe. It’s not just about making bread. It’s about rediscovering joy in something simple, no stress, no fancy gear, just good ingredients and a little patience. It’s become my go-to for gifts, weekend breakfasts, and even casual picnics. And honestly, if you’ve ever been intimidated by bread baking, this is the one that’ll quietly convince you otherwise.
Why You’ll Love This Recipe
After baking this Easy Crispy Dutch Oven No Knead Bread Recipe multiple times a week, here’s why it’s become a staple in my kitchen—and why it might become yours too:
- Quick & Easy: The hands-on time is just about 10 minutes. Then the dough does all the work while resting for hours, making it perfect for busy mornings or slow afternoons.
- Simple Ingredients: You only need four basic pantry staples (flour, water, salt, yeast). No fancy add-ons or special flours required—though you can tweak it if you want.
- Perfect for Any Occasion: Whether it’s for breakfast, a cozy dinner, or paired with dips like my creamy salmon dip, this bread always impresses without the stress.
- Crowd-Pleaser: Friends and family always ask for seconds. The crispy crust and tender crumb hit that comforting spot everyone loves.
- Unbelievably Delicious: The secret lies in the slow fermentation and the Dutch oven’s sealed environment, which traps steam and creates a crackling crust.
- Unique Technique: No kneading means less mess and less worry—just mix, rest, shape, and bake. It’s perfect for beginners who want artisan bread results without the fuss.
This recipe isn’t just another no-knead bread—it’s the one I trust when I want fresh homemade bread that feels special but is shockingly simple. Honestly, it’s the kind of bread that makes you close your eyes after the first bite and savor that crispy-crust goodness.
What Ingredients You Will Need
This Easy Crispy Dutch Oven No Knead Bread Recipe relies on straightforward, wholesome ingredients that come together to create a bold flavor and satisfying texture without any extra fuss.
- All-purpose flour – 3 cups (360 g), the backbone of the dough. I prefer King Arthur Flour for consistent results.
- Active dry yeast – 1/4 teaspoon, just enough to get the slow fermentation going without overwhelming the flavor.
- Salt – 1 1/4 teaspoons, essential for flavor balance and crust development. Use fine sea salt or kosher salt.
- Lukewarm water – 1 1/2 cups (355 ml), around 75°F (24°C) to activate the yeast gently.
Optional tweaks and substitutions:
- Whole wheat flour: Swap up to half the all-purpose flour for a nuttier, earthier bread.
- Gluten-free option: Use a gluten-free all-purpose blend and add a teaspoon of xanthan gum for structure.
- Herbs or garlic: Fold in fresh rosemary or minced garlic before the final rest for a fragrant, savory twist.
- Olive oil: A tablespoon added to the dough softens the crumb slightly and adds richness.
Each ingredient plays a clear role: flour gives structure, yeast provides the rise, salt enhances flavor, and water brings it all together. No complicated add-ons—just pure, honest bread-making magic.
Equipment Needed
- Dutch oven with lid (about 5 to 6 quarts) – This is key for creating the steam environment that crisps the crust. I use a cast-iron one, but an enameled Dutch oven works just as well.
- Mixing bowl – Large enough to hold the dough comfortably while it rises.
- Wooden spoon or spatula – For mixing the dough without kneading.
- Kitchen towel or plastic wrap – To cover the dough while it rests.
- Kitchen scale (optional) – For precise measurement, though cups work fine for casual baking.
- Parchment paper – Helpful for transferring the dough into the Dutch oven without sticking.
If you don’t have a Dutch oven, a heavy pot with a tight-fitting lid can work, but make sure it’s oven-safe at 450°F (230°C). I remember trying this in a regular pot once and the crust wasn’t as crispy—definitely worth investing in a Dutch oven if you bake bread often. Plus, it’s great for crispy snacks and braising dishes too.
Preparation Method
- Combine dry ingredients: In a large mixing bowl, stir together 3 cups (360 g) of all-purpose flour, 1/4 teaspoon active dry yeast, and 1 1/4 teaspoons salt until evenly distributed. This takes about 2 minutes.
- Add water: Pour in 1 1/2 cups (355 ml) of lukewarm water (around 75°F/24°C). Stir with a wooden spoon or spatula until a shaggy, sticky dough forms. It will look rough and somewhat loose—this is perfect. Mixing should take 2 to 3 minutes. Avoid overmixing; no kneading needed here.
- First rise: Cover the bowl with plastic wrap or a clean kitchen towel. Let the dough rest at room temperature for 12 to 18 hours (overnight works great). You’ll notice bubbles forming—this means the yeast is alive and well. The dough should nearly double in size and be dotted with air pockets.
- Preheat oven and Dutch oven: About 30 minutes before baking, place your empty Dutch oven with its lid inside the oven and preheat to 450°F (230°C). This step is crucial for that crispy crust.
- Shape the dough: Lightly flour a clean surface. Scrape the dough from the bowl onto it. Using floured hands, gently fold the dough over itself once or twice to shape it into a ball. Avoid deflating all the air bubbles. This step takes about 2-3 minutes.
- Prepare for baking: Place the dough seam side down on a piece of parchment paper. Using oven mitts, carefully remove the hot Dutch oven from the oven. Lift the dough with the parchment paper and place it inside the Dutch oven. Cover with the lid.
- Bake covered: Bake for 30 minutes with the lid on. This traps steam, helping the crust develop.
- Bake uncovered: Remove the lid and bake for an additional 15 to 20 minutes. The bread should be a deep golden brown and sound hollow when tapped on the bottom.
- Cool: Transfer the bread to a wire rack and let it cool for at least 1 hour before slicing. This resting period allows the crumb to set perfectly.
Quick tips: If your oven tends to run hot, check the bread a few minutes earlier to avoid burning. Also, be very careful handling the Dutch oven—it’s extremely hot! I learned the hard way to always use thick oven mitts.
Cooking Tips & Techniques
Here’s what I’ve learned over the many times I’ve made this bread (and sometimes messed it up):
- Don’t rush the first rise: The long fermentation is what gives the bread flavor and texture. Even if you’re impatient, resist checking too soon. It’s okay if it looks a bit slack—that means it’s fermenting well.
- Temperature matters: The water should be lukewarm, not hot. Too warm and you risk killing the yeast; too cold and it might not activate properly.
- Use a well-heated Dutch oven: This is the secret to the crackly crust. If you skip preheating, the crust won’t develop that signature crispness.
- Handle the dough gently: Since this is a no-knead recipe, you want to keep as many air bubbles intact as possible during shaping. It keeps the crumb light and airy.
- Don’t skip the cooling time: I’ve sliced bread too soon before and ended up with a gummy crumb. Waiting at least an hour is worth it for perfect texture.
- Multitasking tip: Mix your dough before bed and bake the next morning for fresh bread without any morning prep stress.
One time, I forgot to cover the dough for the first rise and it dried out a bit on the edges. The bread still turned out edible but nowhere near as soft inside. Lesson learned: cover the bowl well!
Variations & Adaptations
This recipe is a fantastic base, easy to customize depending on your mood or dietary needs. Here are some of my favorite twists:
- Herbed No Knead Bread: Stir in 1 tablespoon of chopped fresh herbs like rosemary, thyme, or oregano right before the first rise for a fragrant loaf. Garlic lovers can add 2 cloves of minced garlic too.
- Whole Wheat Blend: Substitute up to 50% of the all-purpose flour with whole wheat for a heartier, nuttier bread. You might need to add a splash more water since whole wheat absorbs more.
- Gluten-Free Version: Use a gluten-free flour blend and add 1 teaspoon xanthan gum. The texture will be different but still delicious.
- Cheese-Stuffed Bread: After shaping, press in cubes of sharp cheddar or mozzarella before baking. The melted cheese pockets create a delightful surprise.
For baking method alternatives, if you don’t have a Dutch oven, you can bake this dough on a preheated baking stone with a tray of hot water underneath to mimic steam. It won’t be quite as crisp but still tasty. Personally, I prefer the Dutch oven method for the best crust.
A personal favorite variation I tried recently included folding in caramelized onions and cracked black pepper—perfect for pairing with a savory bacon jam for a cozy snack.
Serving & Storage Suggestions
This bread is best enjoyed fresh and warm, sliced thick with a pat of butter or your favorite spread. It pairs beautifully with soft cheeses, soups, or hearty stews. For a casual appetizer, try it alongside the festive cranberry cream cheese spread—the contrast of flavors is amazing.
To store, wrap the cooled bread in a clean kitchen towel and keep at room temperature for up to 2 days. For longer storage, slice and freeze in airtight bags for up to 3 months. Toast slices straight from the freezer for a quick fresh-baked taste.
If you need to reheat, place slices in a 350°F (175°C) oven for about 10 minutes or toast until warmed through. The crust crisps back up nicely.
Flavors tend to deepen after a day, so if you can wait, letting the bread rest overnight wrapped in a towel can make it even tastier the next day.
Nutritional Information & Benefits
Estimated per slice (1/12 of loaf): approximately 150 calories, 4 g protein, 1 g fat, 30 g carbohydrates, 2 g fiber.
This bread is a simple, wholesome option without added sugars or preservatives. Using all-purpose flour provides energy-sustaining carbs, and the slow fermentation makes it easier to digest for many people.
Since it’s naturally free from dairy and eggs, it’s suitable for vegans and those with common allergies. For gluten-free needs, the adapted version fits well.
From a wellness standpoint, fresh homemade bread like this can replace processed store-bought loaves, cutting down on additives and excess salt.
Conclusion
This Easy Crispy Dutch Oven No Knead Bread Recipe is proof that great bread doesn’t have to be complicated. It’s approachable, requires minimal effort, and delivers that irresistible crackly crust with a soft, airy crumb inside. Whether you’re a complete beginner or a seasoned home baker looking for a fuss-free option, this recipe has something special to offer.
Feel free to make it your own—add your favorite herbs, try different flours, or pair it with delicious spreads like the creamy cheese-stuffed cherry tomatoes or zesty garlic marinated mushrooms from the site. It’s flexible, forgiving, and endlessly satisfying.
Give it a try, and I’d love to hear how your loaf turns out or what twists you add. Happy baking and here’s to crunchy, cozy bread moments!
Frequently Asked Questions
Can I use instant yeast instead of active dry yeast?
Yes! Use the same amount of instant yeast. It can be mixed directly with the flour without proofing in water first.
Do I have to use a Dutch oven? Can I bake this on a baking sheet?
You can bake on a preheated baking stone or heavy baking sheet, but the crust won’t be as crisp without the steam trapped by the Dutch oven. Adding a tray of hot water in the oven helps mimic steam.
How long can I store the bread after baking?
Keep it wrapped at room temperature for up to 2 days. For longer storage, slice and freeze for up to 3 months.
What if my dough is too sticky to handle?
A slightly sticky dough is normal. Lightly flour your hands and work surface to shape. Avoid adding too much flour, which can dry out the bread.
Can I add seeds or nuts to the dough?
Absolutely! Toasted seeds like sunflower or sesame add great texture and flavor. Fold them in gently just before the first rise.
Pin This Recipe!

Easy Crispy Dutch Oven No Knead Bread Recipe Perfect for Beginners

A simple no-knead bread recipe using a Dutch oven that yields a crispy crust and soft, airy crumb. Perfect for beginners and requires minimal hands-on time.
- Prep Time: 10 minutes
- Cook Time: 45 minutes
- Total Time: 13 hours 55 minutes
- Yield: 1 loaf (about 12 slices) 1x
- Category: Bread
- Cuisine: American
Ingredients
- 3 cups (360 g) all-purpose flour
- 1/4 teaspoon active dry yeast
- 1 1/4 teaspoons salt
- 1 1/2 cups (355 ml) lukewarm water (around 75°F/24°C)
Instructions
- Combine 3 cups all-purpose flour, 1/4 teaspoon active dry yeast, and 1 1/4 teaspoons salt in a large mixing bowl until evenly distributed.
- Pour in 1 1/2 cups lukewarm water and stir with a wooden spoon or spatula until a shaggy, sticky dough forms. Mix for 2 to 3 minutes without overmixing.
- Cover the bowl with plastic wrap or a kitchen towel and let the dough rest at room temperature for 12 to 18 hours until nearly doubled in size and dotted with air pockets.
- About 30 minutes before baking, preheat the oven to 450°F (230°C) with the empty Dutch oven and lid inside.
- Lightly flour a clean surface and scrape the dough onto it. Gently fold the dough over itself once or twice to shape into a ball, keeping air bubbles intact.
- Place the dough seam side down on parchment paper. Carefully remove the hot Dutch oven from the oven, lift the dough with parchment paper, and place it inside the Dutch oven. Cover with the lid.
- Bake covered for 30 minutes to trap steam and develop crust.
- Remove the lid and bake uncovered for an additional 15 to 20 minutes until deep golden brown and hollow sounding when tapped.
- Transfer the bread to a wire rack and cool for at least 1 hour before slicing.
Notes
Do not rush the first rise; the long fermentation develops flavor and texture. Use lukewarm water to activate yeast gently. Preheat the Dutch oven to ensure a crispy crust. Handle dough gently to preserve air bubbles. Cool bread at least 1 hour before slicing to avoid gummy crumb. If no Dutch oven, bake on a preheated baking stone with a tray of hot water to mimic steam.
Nutrition
- Serving Size: 1 slice (1/12 of loa
- Calories: 150
- Fat: 1
- Carbohydrates: 30
- Fiber: 2
- Protein: 4
Keywords: no knead bread, Dutch oven bread, easy bread recipe, crispy crust bread, beginner bread recipe, artisan bread, homemade bread