
“You won’t believe how this simple party dip came to be,” my neighbor chuckled, sliding a bowl across the counter. It was a random Thursday evening, and I was helping her chop veggies for a casual get-together. Honestly, I wasn’t expecting much—just another dip, right? But the moment I scooped up that first bite of this flavorful seven layer dip, I was hooked. The layers weren’t just pretty; they told a story on my tongue—creamy, zesty, fresh, and a little bit spicy. It reminded me of those nights when the power cut out, and we gathered around the kitchen with whatever we had, making magic out of chaos. Maybe you’ve been there too: rushing to throw something tasty together that everyone will love, without the stress.
That cracked ceramic bowl, a slightly too-thick guacamole layer, and a burst of laughter from across the room made this recipe stick with me. I’ve since refined it, but the heart of the dish—the way it brings people close and turns simple ingredients into a crowd-pleaser—never changed. Let me tell you, this isn’t your average dip. It’s the kind of recipe that makes you close your eyes after the first bite and think, “Yeah, this is exactly what I needed tonight.”
Why You’ll Love This Recipe
This flavorful seven layer dip recipe is honestly a lifesaver for any kind of gathering, whether it’s a last-minute game night or a planned party platter centerpiece. Coming from years of testing dips that were either too bland or way too complicated, I’ve landed on this version that nails the balance every time.
- Quick & Easy: You can whip this up in under 20 minutes—perfect for busy evenings or unexpected guests.
- Simple Ingredients: Nothing fancy needed; you probably have most of these in your pantry and fridge already.
- Perfect for Parties: It’s a guaranteed hit at potlucks, BBQs, or casual get-togethers.
- Crowd-Pleaser: Kids, adults, picky eaters—everyone keeps coming back for more.
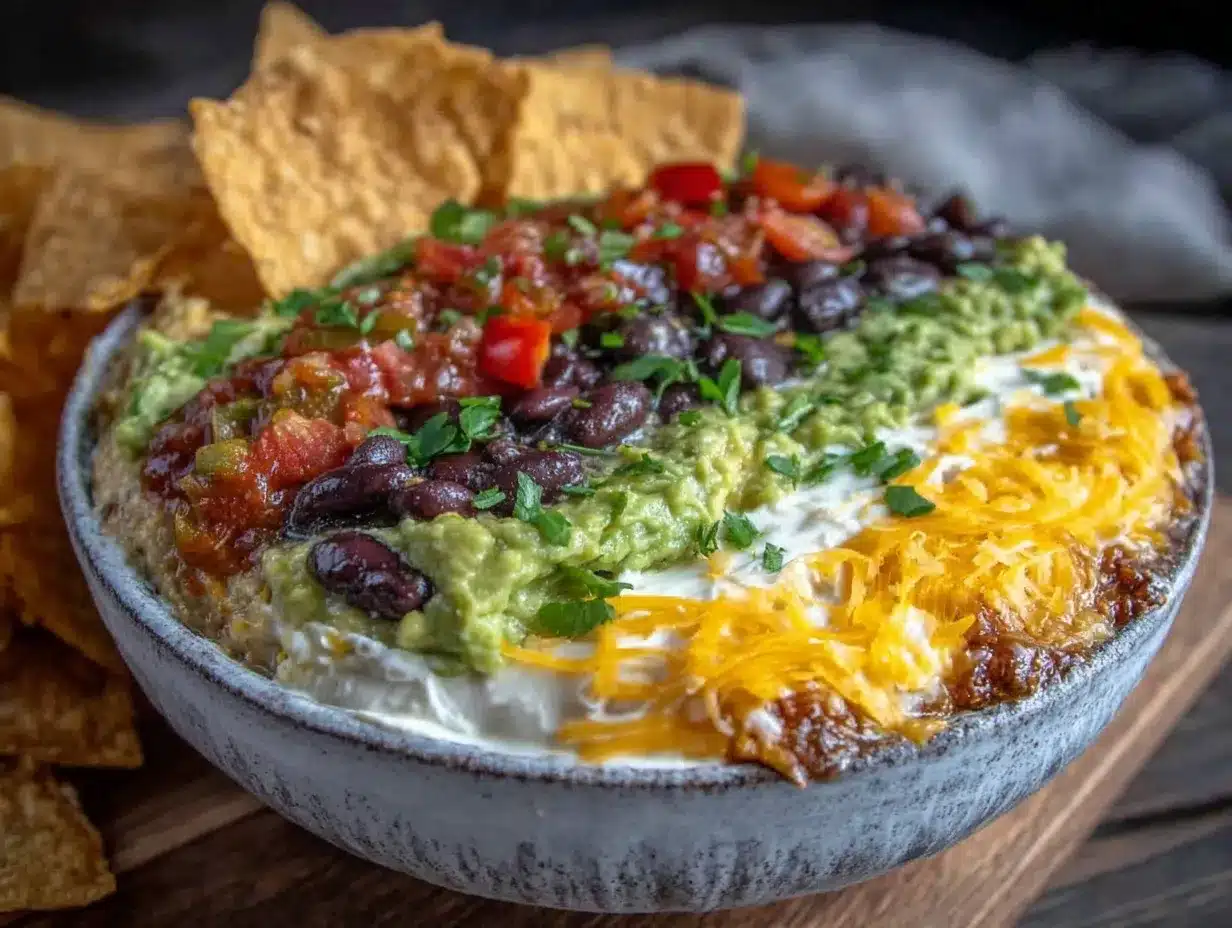
- Unbelievably Delicious: The creamy beans, tangy salsa, crunchy veggies, and melty cheese combine for layers of addictive flavor.
This dip stands apart because of the way each layer is carefully balanced—not too heavy with sour cream, not too spicy, and with just the right amount of zest from fresh lime and herbs. Plus, blending the refried beans with a touch of seasoning makes the base ultra-smooth and flavorful. I’ve found that little twist really pulls it together. So if you’ve been stuck with boring dips, this one will feel like a fresh breeze at your next party.
What Ingredients You Will Need
This recipe uses simple, wholesome ingredients to deliver bold flavor and satisfying texture without the fuss. Most are pantry staples or fresh produce you can find year-round. Here’s what you’ll want to have on hand:
- Refried Beans: 1 (16-ounce / 450 g) can, preferably vegetarian for a cleaner flavor
- Sour Cream: 1 cup (240 ml), full-fat for creaminess (I like Daisy brand for its fresh taste)
- Guacamole: 1 cup (about 240 g), homemade or store-bought—homemade adds freshness
- Salsa: 1 cup (240 ml), chunky and medium-spicy (Pace or your favorite brand works great)
- Shredded Cheese: 1 ½ cups (150 g), a blend of cheddar and Monterey Jack for melty goodness
- Chopped Tomatoes: 1 cup (150 g), fresh and ripe, seeds removed to avoid watery layers
- Sliced Black Olives: ½ cup (75 g), rinsed and drained
- Green Onions: ¼ cup (25 g), thinly sliced for a sharp, fresh bite
- Fresh Cilantro: 2 tablespoons, chopped, optional but highly recommended for brightness
- Lime Juice: 1 tablespoon, fresh squeezed to brighten flavors
- Ground Cumin: 1 teaspoon, adds earthy warmth to beans
- Chili Powder: ½ teaspoon, for a subtle kick
- Salt and Pepper: to taste, balancing all the flavors
For substitutions, you can swap sour cream with Greek yogurt for a tangier and lower-fat option. If you need it dairy-free, try coconut yogurt or a cashew cream. For a gluten-free version, just double-check your salsa and refried beans labels. In summer, fresh pico de gallo can replace salsa for a more vibrant, garden-fresh taste. I’ve also played with adding a layer of corn or black beans for extra texture—totally optional but tasty.
Equipment Needed
- Serving Dish: A shallow glass or ceramic platter, about 9×13 inches (23×33 cm) works perfectly to show off the layers.
- Mixing Bowls: Two medium bowls—one for beans, one for mixing sour cream and seasonings.
- Spatula or Spoon: For smoothing layers evenly.
- Knife and Cutting Board: To chop tomatoes, green onions, and cilantro.
- Citrus Juicer: Handy for squeezing fresh lime, but you can also use your hand.
- Measuring Cups and Spoons: For accurate seasoning and layering.
If you don’t have a shallow platter, a wide bowl or even a pie dish can work, though the layers won’t be as visible. I’ve tried both, and the clear glass platter really makes it shine visually. Plus, it’s easier to serve from without making a mess. Also, if you’re like me and sometimes forget to sharpen knives (guilty!), make sure your knife is sharp enough for clean cuts on tomatoes—that prevents squishing and watery layers.
Preparation Method
- Prepare the Bean Layer (10 minutes): In a medium bowl, combine the refried beans with ground cumin, chili powder, salt, and pepper. Stir until smooth and well-seasoned. Taste and adjust seasoning as needed. This step is key for adding depth, so don’t skip seasoning. Set aside.
- Mix the Sour Cream Layer (5 minutes): In another bowl, combine sour cream with lime juice, a pinch of salt, and half of the chopped cilantro. Stir well to blend flavors. This layer adds a cool tang that balances the spiciness.
- Layer the Beans (2 minutes): Spread the seasoned refried beans evenly on the bottom of your serving dish. Use the back of a spoon or spatula to smooth it out so it’s flat and even.
- Add the Sour Cream (2 minutes): Carefully spread the sour cream mixture over the bean layer. Take your time here to avoid mixing layers. I usually chill the beans for a few minutes before adding sour cream to help keep them separate.
- Spread the Guacamole (3 minutes): Next, add a thick, even layer of guacamole over the sour cream. Use a spoon to fill in gaps, but don’t press down too hard.
- Spoon the Salsa (3 minutes): Carefully spread the salsa over the guacamole layer. If your salsa is watery, drain excess liquid first to avoid soggy dip.
- Add Cheese (2 minutes): Sprinkle the shredded cheese evenly over the salsa. You want coverage without clumps.
- Top with Fresh Veggies and Herbs (5 minutes): Scatter the chopped tomatoes, sliced olives, green onions, and remaining cilantro evenly on top. This adds fresh color and texture, making the dip inviting.
- Chill Before Serving (at least 30 minutes): Cover the platter with plastic wrap and refrigerate. Chilling helps the layers set and flavors meld. If you’re in a hurry, 15 minutes works, but the flavors really come together after half an hour.
One time, I forgot to chill the dip and served it immediately—let’s just say the layers mixed a bit, and it wasn’t quite as pretty. Lesson learned! Also, if your refried beans are thick, warming them slightly makes spreading easier, but don’t overheat or they’ll separate.
Cooking Tips & Techniques
When making this seven layer dip, a few tips from my kitchen mishaps can save you headaches. First, always taste your bean layer before spreading—that’s where the flavor foundation lies. A bland bean layer equals a bland dip, and nobody wants that.
Layering slowly and carefully is key. Use a spatula and gentle motions to keep layers neat. If you try to rush, you’ll mix them together, and that classic seven-layer look disappears. Also, draining salsa prevents watery messes that can sog the bottom layers. I learned this the hard way after several soggy dips.
For the cheese, shredding your own from a block gives better melt and flavor than pre-shredded bags, which can be coated in anti-caking agents. It’s a small step that pays off.
Lastly, chilling the dip for at least 30 minutes before serving is a game-changer. It lets flavors marry and layers firm up, making scooping cleaner and more satisfying. Trust me on this one.
Variations & Adaptations
- Vegetarian to Vegan: Swap sour cream with dairy-free yogurt and use vegan cheese. Make sure your refried beans are vegan-friendly (no lard).
- Spice Level: Add diced jalapeños or a dash of hot sauce to the salsa layer for extra heat. For milder versions, use a mild salsa or omit chili powder.
- Seasonal Twist: In summer, add fresh corn kernels to the top layer for sweetness and crunch. In winter, use canned roasted green chilies for a smoky touch.
- Protein Boost: Layer cooked, crumbled chorizo or seasoned ground beef between beans and sour cream for a heartier party platter.
- Personal Favorite: I once added a layer of black bean and corn salsa instead of regular salsa, which gave it a smoky, earthy vibe that guests loved.
Serving & Storage Suggestions
This seven layer dip shines best served chilled or just slightly chilled, so it’s cool but not cold. Serve it with sturdy tortilla chips or crisp veggie sticks—carrots, celery, and bell peppers work great for dipping.
For a party platter, garnish with extra cilantro sprigs or a few thin lime wedges on the side for guests to squeeze over. It adds a fresh pop of color and brightness.
Store leftovers covered tightly in the refrigerator for up to 3 days. The flavors actually deepen overnight, but the chips get soggy if left in the dip, so keep them separate.
When reheating, it’s best to serve cold or at room temperature. If you want melted cheese, you can broil the dip uncovered for 2-3 minutes—just watch closely so it doesn’t burn.
Nutritional Information & Benefits
Per serving (about ½ cup / 120 g), this dip offers approximately:
| Calories | 180-220 |
|---|---|
| Protein | 8-10 g |
| Fat | 12-15 g |
| Carbohydrates | 12-15 g |
| Fiber | 4-5 g |
Thanks to beans and fresh veggies, this dip provides fiber and plant-based protein, helping keep you full. The avocado in guacamole adds heart-healthy fats, while fresh lime juice boosts vitamin C. If you swap sour cream for Greek yogurt, you get a nice protein bump and probiotics. This recipe is naturally gluten-free if you serve with gluten-free chips or veggies.
Conclusion
This flavorful seven layer dip is more than just a recipe; it’s a go-to solution for any party or casual night in. It’s easy to make, uses ingredients you trust, and delivers on flavor and crowd appeal every time. I love how you can tweak it to suit your mood or dietary needs, making it truly your own. Honestly, it’s become my “secret weapon” for gatherings that need a little wow without the fuss.
Give it a try, and don’t be shy about adding your own twist. Maybe you’ll find a new favorite, just like I did that Thursday night. If you make it, I’d love to hear how it went—drop a comment, share your photos, or tell me your variation. Let’s keep the party going!
FAQs
Can I make the seven layer dip ahead of time?
Absolutely! Prepare and assemble the dip up to 24 hours before serving. Just cover it tightly and refrigerate. Flavors meld nicely, and it saves you stress on party day.
What can I use if I don’t have refried beans?
You can mash cooked pinto or black beans with a little seasoning as a substitute. They won’t be as smooth but still tasty.
How do I keep the layers from mixing together?
Use a spatula to spread each layer gently and chill the dip for at least 30 minutes before serving. Avoid stirring or scooping too aggressively.
Is this dip gluten-free?
Yes, if you use gluten-free chips or fresh veggies for dipping. Always check labels on canned ingredients to be sure.
Can I add meat to make it more filling?
Definitely! Cooked ground beef, chorizo, or shredded chicken can be layered between the beans and sour cream. Just make sure it’s well-seasoned.
Pin This Recipe!

Flavorful Seven Layer Dip

A quick and easy seven layer dip perfect for parties and casual get-togethers, featuring creamy beans, tangy salsa, fresh veggies, and melty cheese.
- Prep Time: 20 minutes
- Cook Time: 0 minutes
- Total Time: 50 minutes
- Yield: 8 servings 1x
- Category: Appetizer
- Cuisine: Mexican
Ingredients
- 1 (16-ounce / 450 g) can refried beans, preferably vegetarian
- 1 cup (240 ml) full-fat sour cream
- 1 cup (about 240 g) guacamole, homemade or store-bought
- 1 cup (240 ml) chunky medium-spicy salsa
- 1 ½ cups (150 g) shredded cheese blend of cheddar and Monterey Jack
- 1 cup (150 g) chopped tomatoes, seeds removed
- ½ cup (75 g) sliced black olives, rinsed and drained
- ¼ cup (25 g) green onions, thinly sliced
- 2 tablespoons fresh cilantro, chopped (optional)
- 1 tablespoon fresh lime juice
- 1 teaspoon ground cumin
- ½ teaspoon chili powder
- Salt and pepper to taste
Instructions
- In a medium bowl, combine refried beans with ground cumin, chili powder, salt, and pepper. Stir until smooth and well-seasoned. Taste and adjust seasoning as needed. Set aside.
- In another bowl, combine sour cream with lime juice, a pinch of salt, and half of the chopped cilantro. Stir well to blend flavors.
- Spread the seasoned refried beans evenly on the bottom of your serving dish. Smooth it out with the back of a spoon or spatula.
- Carefully spread the sour cream mixture over the bean layer without mixing layers. Chill beans for a few minutes before adding sour cream if desired.
- Add a thick, even layer of guacamole over the sour cream. Use a spoon to fill gaps but do not press down hard.
- Spread the salsa evenly over the guacamole layer. Drain excess liquid if salsa is watery.
- Sprinkle shredded cheese evenly over the salsa layer.
- Top with chopped tomatoes, sliced black olives, green onions, and remaining cilantro evenly.
- Cover the platter with plastic wrap and refrigerate for at least 30 minutes before serving to let layers set and flavors meld.
Notes
Chill the dip for at least 30 minutes before serving to help layers set and flavors meld. Drain excess liquid from salsa to avoid soggy layers. Use freshly shredded cheese for better melt and flavor. For vegan version, substitute sour cream with dairy-free yogurt and use vegan cheese. Refried beans should be checked for vegan and gluten-free status if needed. Serve with sturdy tortilla chips or fresh veggie sticks. Store leftovers covered in refrigerator up to 3 days; keep chips separate to avoid sogginess.
Nutrition
- Serving Size: About ½ cup (120 g)
- Calories: 180220
- Fat: 1215
- Carbohydrates: 1215
- Fiber: 45
- Protein: 810
Keywords: seven layer dip, party dip, easy dip recipe, layered dip, Mexican dip, party platter, crowd-pleaser


