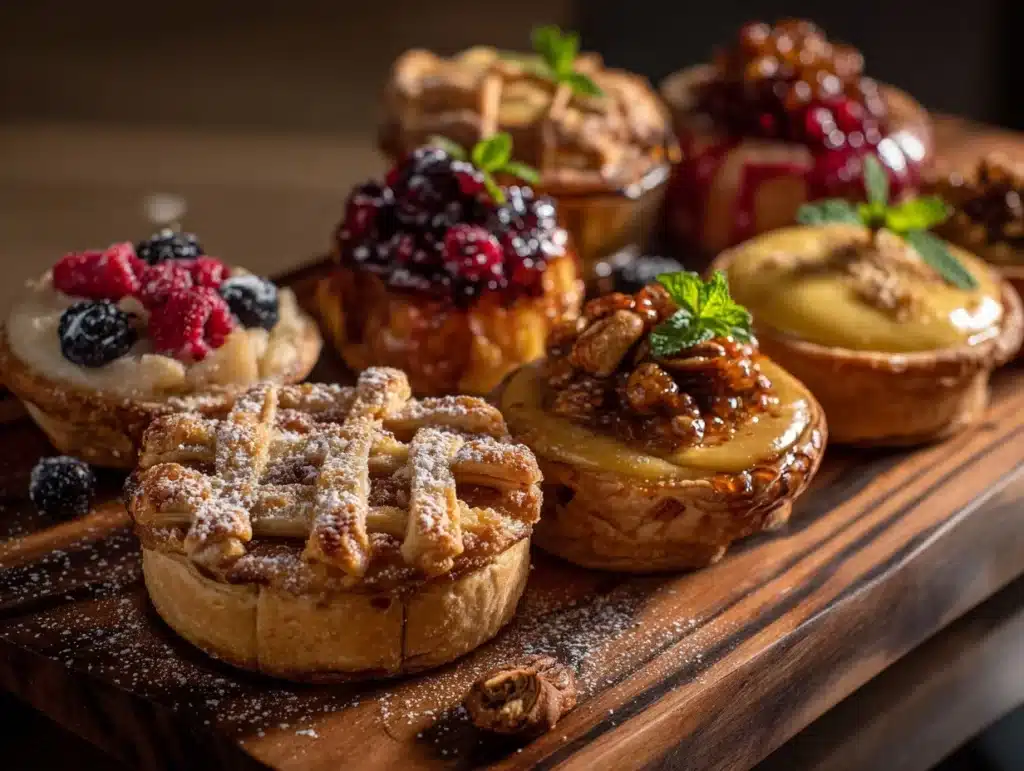
Picture this: a beautiful dessert spread that looks like it belongs at a fancy party, but you made it right in your kitchen. Mini pies and tarts, each one a bite-sized masterpiece, surrounded by colorful fruits, rich chocolates, and a variety of sweet treats. This irresistible dessert board is the ultimate crowd-pleaser! Whether you’re hosting a dinner party, throwing a baby shower, or just want to treat yourself and your family to something special, this dessert board is the perfect solution.
I remember the first time I created this dessert board—it was for a holiday gathering at my house. Everyone’s eyes lit up as they saw the assortment of mini pies and tarts beautifully arranged with fresh berries, whipped cream, and little bowls of caramel sauce. It was such a hit that I’ve been making it for every special occasion since! Trust me, once you try this, it’ll become your go-to dessert centerpiece for years to come.
Why You’ll Love This Recipe
- Easy to Assemble: You don’t need to spend hours baking! With a mix of homemade and store-bought mini pies and tarts, you can create a stunning dessert board in no time.
- Perfect for Any Occasion: Whether it’s a birthday, holiday, or casual gathering, this dessert board fits right in.
- Customizable: You can mix and match flavors, colors, and textures to suit your tastes or the theme of your event.
- Visually Stunning: A dessert board with mini pies and tarts is a feast for the eyes as much as for the taste buds. Your guests won’t be able to resist snapping photos before diving in.
- Great for Groups: Mini desserts are perfect for sharing, letting everyone try a variety without overindulging.
- Fun to Make: You can get creative with the arrangement and even involve kids in decorating the board.
What sets this dessert board apart is its balance of flavor, texture, and visual appeal. The mini pies and tarts create a focal point, surrounded by a variety of complementary treats. Plus, the ability to customize makes it feel personal and extra special. It’s not just dessert—it’s an experience that brings people together.
What Ingredients You Will Need
This recipe relies on a mix of homemade and store-bought items to keep things simple while ensuring every bite is delicious. Here’s what you’ll need:
- Mini pies: Choose your favorites like apple, pecan, or cherry pies. You can make them yourself or pick up pre-made ones from a bakery.
- Mini tarts: Lemon tarts, chocolate tarts, or fruit tarts are all great options. Again, homemade or store-bought works perfectly.
- Fresh fruits: Strawberries, raspberries, blueberries, blackberries, or sliced apples for a pop of color and freshness.
- Assorted candies: Include chocolates, truffles, and any bite-sized candies that match your theme.
- Whipped cream: Freshly whipped cream or store-bought for a quick fix.
- Dipping sauces: Caramel, chocolate ganache, or fruit preserves in small bowls.
- Decorative elements: Edible flowers, mint leaves, or powdered sugar for a finishing touch.
Feel free to make substitutions based on dietary needs or seasonal availability. For example, opt for gluten-free or vegan mini pies and tarts, or use dairy-free whipped topping.
Equipment Needed
- A large platter or board: Choose a wooden board, marble slab, or even a decorative tray as your base.
- Small bowls: For sauces, dips, or smaller treats like candies.
- Mini serving utensils: Small forks, spoons, or tongs for guests to serve themselves.
- Pastry bags or piping tips: Optional, but great for adding decorative whipped cream swirls.
If you don’t have a fancy board, don’t worry! A clean cutting board or even a baking sheet covered with parchment paper can work beautifully.
Preparation Method

- Choose your board: Start with a clean, flat surface, like a wooden cutting board or marble slab. Make sure it’s large enough to hold all your items.
- Arrange the mini pies and tarts: Place them in the center of the board, leaving space around them for other items. Try mixing flavors and colors for visual appeal.
- Add fresh fruits: Surround the pies and tarts with clusters of berries, apple slices, or any seasonal fruits. Use the natural colors to create a vibrant contrast.
- Include dipping sauces: Fill small bowls with caramel, chocolate ganache, or fruit preserves and place them strategically on the board.
- Add candies and chocolates: Scatter truffles, chocolate squares, or other bite-sized sweets around the board. Use different shapes and textures to make it interesting.
- Add decorative touches: Sprinkle powdered sugar over the pies and tarts, and place edible flowers or fresh mint leaves for a pop of color.
- Finish with utensils: Add small forks, spoons, or tongs to make serving easy.
The key is to play around with the arrangement until it looks balanced and inviting. Don’t stress about perfection—sometimes a slightly messy, overflowing board is the most appealing.
Cooking Tips & Techniques
- To make your dessert board extra special, consider baking a few of the mini pies and tarts from scratch. Homemade pastries add a personal touch and unbeatable flavor.
- If you’re short on time, focus on presentation. Neatly arrange store-bought items and use fresh garnishes like mint leaves or edible flowers.
- Layer textures to keep it visually interesting. Mix crispy tarts with soft pies, juicy fruits, and smooth sauces.
- Keep the board balanced by dividing colors evenly. For example, don’t place all the red fruits in one spot—spread them around for a cohesive look.
- Chill the whipped cream and sauces until just before serving to keep them fresh.
Remember, the goal of a dessert board is to make it look inviting and fun. Trust your instincts and don’t be afraid to experiment!
Variations & Adaptations
- Dietary options: Use gluten-free crusts for the pies and tarts, or opt for dairy-free whipped topping to accommodate dietary restrictions.
- Seasonal twists: In summer, focus on fresh berries and citrus-based tarts. For fall, add pumpkin pies and caramel-dipped apple slices.
- Flavor customization: Add a bowl of spiced nuts or sprinkle cinnamon sugar over the pies for a warm, cozy vibe.
- Cooking methods: If you’re baking your own pies and tarts, experiment with air fryer or mini tart pans for quicker results.
- Personal touch: I once added homemade chocolate bark with festive sprinkles to my dessert board—it was an instant hit!
Serving & Storage Suggestions
When serving, make sure the board is at room temperature to allow the pies, tarts, and sauces to be at their best. Serve with small plates and utensils for easy sharing.
Pair this dessert board with a hot coffee bar, sparkling cider, or even a glass of dessert wine for a complete experience.
For storage, cover any leftover pies and tarts with plastic wrap or place them in an airtight container. Refrigerate sauces and whipped cream separately. Most items will stay fresh for 2-3 days.
Nutritional Information & Benefits
While it’s hard to resist indulging, mini desserts are a great way to enjoy a variety of treats without going overboard. Smaller portions mean fewer calories per serving, and fresh fruits add natural vitamins and fiber.
Be mindful of allergens like nuts, dairy, or gluten when selecting items for your dessert board, and offer alternatives for guests with dietary restrictions.
Conclusion
If you’re looking for a show-stopping dessert idea, this irresistible dessert board with mini pies and tarts is the answer. It’s easy, customizable, and guaranteed to impress your guests. Every bite is a little piece of heaven, and the visual appeal makes it the star of any gathering.
Give this recipe a try and let your creativity shine! Whether you go all-out with homemade pastries or keep it simple with store-bought options, you’re sure to create something unforgettable. Don’t forget to share your version in the comments—I’d love to hear how you made it your own!
Now grab your favorite board and start creating your masterpiece. Your friends and family will thank you!
Frequently Asked Questions
Can I make the mini pies and tarts ahead of time?
Yes, you can make them a day or two in advance and store them in an airtight container at room temperature or in the fridge, depending on the type of filling.
What’s the best way to transport a dessert board?
Use a sturdy tray or board with raised edges to keep everything in place. Cover it with plastic wrap or foil to protect it during transport.
Can I include savory items on my dessert board?
Absolutely! Add a few cheese cubes, nuts, or crackers for a sweet and savory mix.
What’s a good alternative to whipped cream?
You can use a dollop of yogurt, coconut cream, or even mascarpone cheese as a topping instead of whipped cream.
How do I create a theme for my dessert board?
Choose a color scheme or seasonal theme (like fall or winter) and select items that fit within it. For example, use orange and brown tones for autumn or red and green for the holidays.
Pin This Recipe!

Irresistible Dessert Board Ideas with Mini Pies and Tarts

Create a stunning dessert board featuring mini pies and tarts, fresh fruits, chocolates, and sweet treats for any occasion.
- Prep Time: 30 minutes
- Cook Time: 0 minutes
- Total Time: 30 minutes
- Yield: 8 servings
- Category: Dessert
- Cuisine: American
Ingredients
- Mini pies (apple, pecan, cherry)
- Mini tarts (lemon, chocolate, fruit)
- Fresh fruits (strawberries, raspberries, blueberries, blackberries, sliced apples)
- Assorted candies (chocolates, truffles, bite-sized candies)
- Whipped cream (freshly whipped or store-bought)
- Dipping sauces (caramel, chocolate ganache, fruit preserves)
- Decorative elements (edible flowers, mint leaves, powdered sugar)
Instructions
- Choose your board: Start with a clean, flat surface like a wooden cutting board or marble slab.
- Arrange the mini pies and tarts in the center of the board, leaving space around them for other items.
- Add fresh fruits around the pies and tarts to create a vibrant contrast.
- Include dipping sauces in small bowls and place them strategically on the board.
- Scatter candies and chocolates around the board, using different shapes and textures.
- Add decorative touches like powdered sugar, edible flowers, or fresh mint leaves.
- Finish with small serving utensils like forks, spoons, or tongs for easy serving.
Notes
[‘Consider baking some mini pies and tarts from scratch for a personal touch.’, ‘Focus on presentation if using store-bought items.’, ‘Layer textures and colors for visual appeal.’, ‘Chill whipped cream and sauces until just before serving.’, ‘Balance colors and textures across the board for a cohesive look.’]
Nutrition
- Serving Size: 1 mini pie or tart w
- Calories: 200
- Sugar: 15
- Sodium: 100
- Fat: 10
- Saturated Fat: 5
- Carbohydrates: 25
- Fiber: 2
- Protein: 2
Keywords: dessert board, mini pies, mini tarts, party dessert, easy dessert, customizable dessert, holiday dessert


