
Let me tell you, the moment the scent of buttery shortbread mingled with rich caramel and melted milk chocolate filled my kitchen, I knew I was onto something dangerously delicious. The first time I baked these irresistible Twix-style cookies with caramel and milk chocolate, I was instantly hooked—the kind of moment where you pause, take a deep breath, and just smile because you know you’re about to make this a staple in your baking repertoire. Years ago, when I was knee-high to a grasshopper, my grandma used to make caramel treats, but nothing quite like this layered cookie that combines crunchy, chewy, and creamy textures all in one bite.
I stumbled upon this recipe on a rainy weekend, trying to recreate that perfect sweet treat that feels like a warm hug after a long day. Honestly, my family couldn’t stop sneaking them off the cooling rack (and I can’t really blame them). These Twix-style cookies are perfect for potlucks, a sweet surprise for your kids’ lunchboxes, or just brightening up your Pinterest cookie board with a treat that looks as good as it tastes. I’ve tested this recipe more times than I can count—in the name of research, of course—and it’s become my go-to for gifting, family gatherings, or whenever I want to impress without stress. You’re going to want to bookmark this one for sure.
Why You’ll Love This Recipe
Honestly, this Twix-style cookies recipe nails it where many fall short. It’s tested, family-approved, and, dare I say, addictively good. Here’s why you’ll love making these treats over and over:
- Quick & Easy: Comes together in under 45 minutes, perfect for busy weeknights or last-minute cravings.
- Simple Ingredients: No fancy grocery trips needed; you likely already have everything in your pantry and fridge.
- Perfect for Any Occasion: Great for holiday cookie swaps, casual get-togethers, or an indulgent snack anytime.
- Crowd-Pleaser: Kids and adults alike rave about the crunchy shortbread, gooey caramel, and smooth milk chocolate combo.
- Unbelievably Delicious: The texture contrast is next-level comfort food—you get that buttery crunch with a luscious caramel layer and silky chocolate finish.
This isn’t just another cookie recipe. The secret? I carefully bake the shortbread base to a golden perfection without overbaking, then spread homemade caramel that’s buttery and just a little sticky, topped with premium milk chocolate that melts beautifully. The balance of flavors and textures is spot on. After the first bite, you’ll close your eyes and savor every mouthful. It’s comfort food with soul, faster and simpler but every bit as satisfying as the candies you find in stores. Whether you want to impress guests or treat yourself, this recipe has you covered.
What Ingredients You Will Need
This recipe uses simple, wholesome ingredients to deliver bold flavor and satisfying texture without any fuss. Most of these are pantry staples, so you won’t have to hunt down anything exotic. Here’s what you’ll need:
- For the Shortbread Base:
- 1 cup (227g) unsalted butter, softened (adds richness and buttery flavor)
- 1/2 cup (100g) granulated sugar
- 2 cups (240g) all-purpose flour (I recommend King Arthur for best texture)
- 1/4 teaspoon salt
- 1 teaspoon vanilla extract (optional, but adds lovely depth)
- For the Caramel Layer:
- 1 cup (200g) granulated sugar
- 6 tablespoons (85g) unsalted butter, cut into pieces
- 1/2 cup (120ml) heavy cream, warmed
- 1/4 teaspoon sea salt (optional, for salted caramel)
- For the Milk Chocolate Topping:
- 8 ounces (225g) milk chocolate chips or bar, chopped (I use Ghirardelli for smooth melting)
- 1 teaspoon coconut oil or vegetable oil (helps chocolate melt glossy and smooth)
If you prefer, you can swap the all-purpose flour for almond flour for a gluten-free option, though the texture will be a bit different. For a dairy-free version, substitute coconut oil for butter in the shortbread and use coconut cream in place of heavy cream for the caramel. In summer, try adding a sprinkle of chopped toasted pecans on top before the chocolate sets for a nutty twist.
Equipment Needed
To make these Twix-style cookies with caramel and milk chocolate, you’ll need a few basic kitchen tools, most of which you probably already have:
- 9×13 inch (23×33 cm) baking pan – for forming the cookie layers evenly
- Mixing bowls – at least two, one for the cookie dough and one for the caramel
- Electric mixer or sturdy wooden spoon – to cream the butter and sugar smoothly
- Medium saucepan – for cooking the caramel
- Spatula – for spreading caramel and chocolate evenly
- Double boiler or microwave-safe bowl – for melting the chocolate gently
- Parchment paper – to line the baking pan for easy removal
If you don’t have a 9×13 inch pan, a similar-sized square or rectangular pan will work fine. I’ve even used an 8×8 inch pan (just adjust baking time slightly). For melting chocolate, a microwave works fine—just heat in 20-second bursts, stirring in between to avoid burning. Having a candy thermometer is handy but not mandatory; you can judge caramel doneness by color and smell if you’re confident. If you plan to make these often, investing in a good silicone spatula and a sturdy baking pan is worth it.
Preparation Method
- Prepare the Shortbread Base (15-20 minutes): Preheat your oven to 350°F (175°C). Line your 9×13 inch pan with parchment paper, leaving some overhang to lift the cookies out easily later. In a large bowl, cream together 1 cup softened unsalted butter and 1/2 cup granulated sugar until pale and fluffy—this usually takes about 3-4 minutes with an electric mixer. Add 1 teaspoon vanilla extract if using. Slowly mix in 2 cups all-purpose flour and 1/4 teaspoon salt until just combined. The dough will be crumbly but should hold together when pressed.
- Press and Bake the Base (20-25 minutes): Transfer the dough to the prepared pan. Using your hands or a spatula, press it evenly across the bottom. Bake for 20-25 minutes until the edges turn golden and the center is set but not browned. You want a firm, crisp base here. Let it cool completely in the pan on a wire rack (about 30 minutes). If you skip cooling, the caramel will melt right through the shortbread.
- Make the Caramel Layer (15 minutes): While the base cools, prepare the caramel. In a medium saucepan, heat 1 cup granulated sugar over medium heat, stirring constantly with a wooden spoon or heatproof spatula. The sugar will clump before melting; keep stirring until it turns a deep amber color (watch closely to avoid burning!). Remove from heat and quickly stir in 6 tablespoons butter, mixing until melted and smooth. Slowly add 1/2 cup warm heavy cream while stirring—be careful, it will bubble vigorously. Stir in 1/4 teaspoon sea salt if making salted caramel. Return to low heat and cook for another 2-3 minutes until thickened slightly. Remove from heat and let cool for 5-10 minutes.
- Spread the Caramel (5 minutes): Pour the caramel evenly over the cooled shortbread base, spreading gently with a spatula. The caramel should be thick but pourable—if it’s too runny, let it cool a bit more before pouring to avoid soaking into the base. Place the pan in the fridge to chill for at least 30 minutes, so the caramel firms up nicely.
- Prepare the Chocolate Topping (5-10 minutes): Melt 8 ounces milk chocolate with 1 teaspoon coconut oil in a double boiler or microwave (heat in 20-second bursts, stirring until smooth). Once melted, pour over the chilled caramel layer and spread evenly. Return to fridge for another 30 minutes to set completely.
- Cut and Serve: Once the chocolate is firm, use the parchment overhang to lift the entire slab out of the pan. Using a sharp knife, cut into bars or squares. For cleaner cuts, warm the knife blade slightly under hot water, then dry before slicing. Store in an airtight container at room temperature or in the fridge for longer freshness.
Cooking Tips & Techniques
Making these Twix-style cookies is honestly pretty straightforward, but a few tips will make your batch shine every time. First, when creaming your butter and sugar, don’t rush it—getting a light, fluffy base is key for that melt-in-your-mouth shortbread texture. I learned the hard way that under-creaming leads to denser, less tender cookies.
For the caramel, patience is your best friend. Sugar can go from perfect to burnt in seconds, so keep stirring and watch for that gorgeous amber color. If you miss it, just start over—trust me, I’ve burned more batches than I care to admit. Also, be cautious when adding cream; it bubbles fiercely, so use a long-handled spoon and add slowly.
When spreading caramel, make sure your shortbread is completely cooled. I once poured warm caramel on a hot base, and it soaked right through, ruining the texture. Chilling the caramel before adding the chocolate topping helps everything set cleanly. Lastly, warming your knife before cutting gives you those neat, professional-looking edges—trust me, it’s worth the few extra seconds!
Variations & Adaptations
This recipe is a fantastic canvas for your creativity. Here are a few ways to make it your own:
- Salted Caramel Twist: Add a sprinkle of flaky sea salt on top of the chocolate before chilling. The salty-sweet combo is irresistible.
- Nutty Upgrade: Mix chopped toasted pecans or almonds into the shortbread dough for extra crunch and flavor.
- Dairy-Free Version: Use coconut oil instead of butter in the base, and swap heavy cream for coconut cream in the caramel. Use dairy-free chocolate for topping.
- Chocolate Variations: Try dark chocolate for a richer flavor or white chocolate for a sweeter, creamier finish.
- Mini Cookie Bites: Instead of one slab, press dough into mini muffin tins, then add caramel and chocolate layers individually for bite-sized treats.
I personally love the salted caramel version, with just a pinch of Maldon sea salt on top of the chocolate. It adds that little burst of flavor that keeps you reaching for more. Feel free to experiment with your favorite nuts or chocolate types to suit your taste buds.
Serving & Storage Suggestions
These Twix-style cookies are best served slightly chilled or at room temperature, so the chocolate is firm but not too hard. They make a perfect afternoon snack with a glass of cold milk or a cup of coffee. For a fun twist, serve alongside fresh berries or a scoop of vanilla ice cream.
To store, keep them in an airtight container at room temperature for up to 3 days, or in the refrigerator for up to a week. If you want to keep them longer, they freeze beautifully—just wrap tightly in plastic wrap and place in a freezer-safe bag. Thaw at room temperature before enjoying.
When reheating, avoid microwaving as it can melt the layers unevenly. Instead, let the cookies come to room temp naturally or place them in a warm (not hot) oven for a few minutes. Over time, the flavors meld even more, making these treats taste even better the next day (if you don’t eat them all first!).
Nutritional Information & Benefits
Each serving of these Twix-style cookies offers a lovely balance of energy and indulgence. A typical bar contains approximately 250-300 calories, with a good portion coming from healthy fats in the butter and caramel. The milk chocolate adds a satisfying sweetness, while the shortbread provides a buttery base with moderate carbs.
Key ingredients like butter and milk chocolate deliver fat-soluble vitamins, and the caramel, made from real cream, offers a touch of calcium. If you swap to almond flour or dairy-free options, you can tailor this recipe to suit gluten-free or dairy-free diets. Just keep in mind the caramel layer contains sugar and cream, so it’s a treat best enjoyed in moderation.
Personally, I find baking these at home lets me control the quality of ingredients—no preservatives, just pure, nostalgic comfort. It feels good to know what’s going into your treats!
Conclusion
These irresistible Twix-style cookies with caramel and milk chocolate are a must-try if you love the perfect blend of crunchy, chewy, and creamy in one bite. They come together quickly, use simple ingredients, and deliver that homemade magic that store-bought treats just can’t match. I love how versatile they are—you can customize to your taste or dietary needs, and they always bring smiles around the table.
Give this recipe a whirl, and let me know how you customize it or what moments you enjoyed it most. Share your thoughts in the comments or tag your photos—I’d love to see your creations! Honestly, once you try these, they’re going to become your new favorite go-to cookie. Happy baking and sweet snacking!
FAQs
Can I use store-bought caramel instead of making it from scratch?
Yes, you can use pre-made caramel sauce for convenience, but homemade caramel gives you better texture and flavor control. If you do use store-bought, choose a thick, high-quality caramel and chill it well before spreading.
How do I prevent the caramel from soaking into the shortbread?
Make sure the shortbread is completely cooled before adding the caramel. Also, allow the caramel to cool slightly so it’s thick enough not to soak through. Chilling between layers helps everything set properly.
Can I make these cookies vegan?
You can adapt the recipe by using vegan butter, coconut cream for the caramel, and dairy-free chocolate. Just be aware the texture and flavor might differ slightly, but they’re still delicious!
What’s the best way to cut the cookies without cracking the chocolate?
Use a sharp knife warmed under hot water and dried before slicing. Cut gently in a single stroke rather than sawing back and forth to get clean edges without cracking.
How long do these cookies keep fresh?
Stored in an airtight container at room temperature, they last about 3 days. Refrigerated, they keep for up to a week. You can also freeze them wrapped tightly for up to 3 months.
Pin This Recipe!

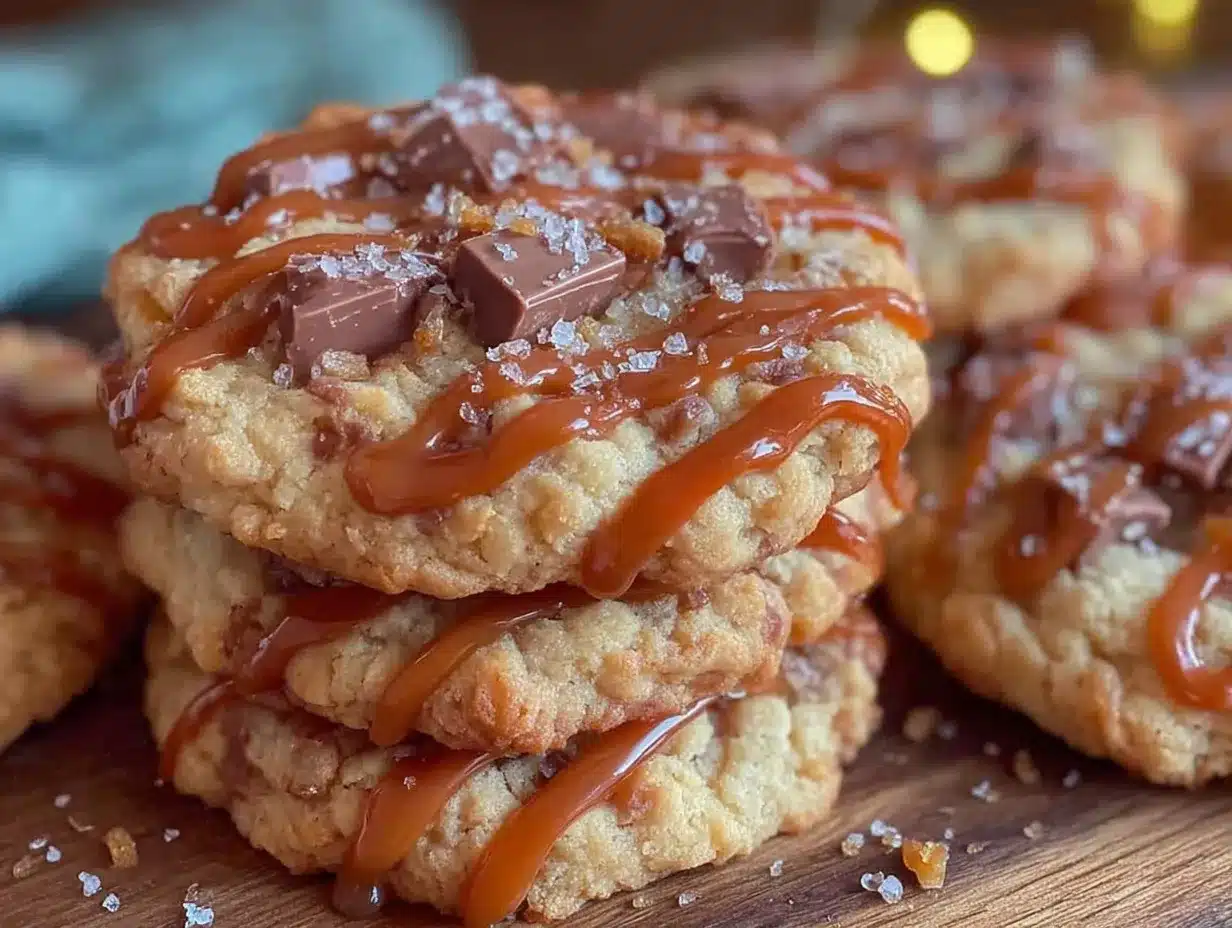
Irresistible Twix-Style Cookies Recipe Easy Homemade Caramel Milk Chocolate Treats

These Twix-style cookies combine a buttery shortbread base with a rich homemade caramel layer and a smooth milk chocolate topping, delivering a perfect blend of crunchy, chewy, and creamy textures in under 45 minutes.
- Prep Time: 15-20 minutes
- Cook Time: 20-25 minutes
- Total Time: 45-55 minutes
- Yield: 16 servings 1x
- Category: Dessert
- Cuisine: American
Ingredients
- 1 cup (227g) unsalted butter, softened
- 1/2 cup (100g) granulated sugar
- 2 cups (240g) all-purpose flour
- 1/4 teaspoon salt
- 1 teaspoon vanilla extract (optional)
- 1 cup (200g) granulated sugar (for caramel)
- 6 tablespoons (85g) unsalted butter, cut into pieces (for caramel)
- 1/2 cup (120ml) heavy cream, warmed (for caramel)
- 1/4 teaspoon sea salt (optional, for salted caramel)
- 8 ounces (225g) milk chocolate chips or bar, chopped
- 1 teaspoon coconut oil or vegetable oil
Instructions
- Preheat oven to 350°F (175°C). Line a 9×13 inch baking pan with parchment paper, leaving overhang.
- In a large bowl, cream together 1 cup softened unsalted butter and 1/2 cup granulated sugar until pale and fluffy (3-4 minutes). Add 1 teaspoon vanilla extract if using.
- Slowly mix in 2 cups all-purpose flour and 1/4 teaspoon salt until just combined. Dough will be crumbly but hold together when pressed.
- Press dough evenly into the prepared pan. Bake for 20-25 minutes until edges are golden and center is set but not browned.
- Cool completely in the pan on a wire rack (about 30 minutes).
- Prepare caramel: In a medium saucepan, heat 1 cup granulated sugar over medium heat, stirring constantly until sugar melts and turns deep amber.
- Remove from heat and quickly stir in 6 tablespoons butter until melted and smooth.
- Slowly add 1/2 cup warm heavy cream while stirring (careful of bubbling). Stir in 1/4 teaspoon sea salt if using.
- Return to low heat and cook 2-3 minutes until slightly thickened. Remove from heat and cool 5-10 minutes.
- Pour caramel evenly over cooled shortbread base and spread gently. Chill in fridge at least 30 minutes to firm caramel.
- Melt 8 ounces milk chocolate with 1 teaspoon coconut oil in double boiler or microwave (heat in 20-second bursts, stirring until smooth).
- Pour melted chocolate over chilled caramel layer and spread evenly. Chill in fridge another 30 minutes to set.
- Lift slab out using parchment overhang and cut into bars or squares with a sharp knife warmed under hot water and dried.
- Store in airtight container at room temperature up to 3 days or refrigerate up to 1 week. Freeze for longer storage.
Notes
Ensure the shortbread base is completely cooled before adding caramel to prevent soaking. Stir caramel constantly to avoid burning. Warm knife before cutting chocolate layer for clean edges. For gluten-free option, substitute all-purpose flour with almond flour. For dairy-free, use coconut oil instead of butter and coconut cream instead of heavy cream, plus dairy-free chocolate.
Nutrition
- Serving Size: 1 bar (approximate)
- Calories: 275
- Sugar: 20
- Sodium: 90
- Fat: 16
- Saturated Fat: 10
- Carbohydrates: 30
- Fiber: 1
- Protein: 3
Keywords: Twix-style cookies, caramel cookies, milk chocolate treats, shortbread cookies, homemade caramel, easy cookies, layered cookies, dessert bars


