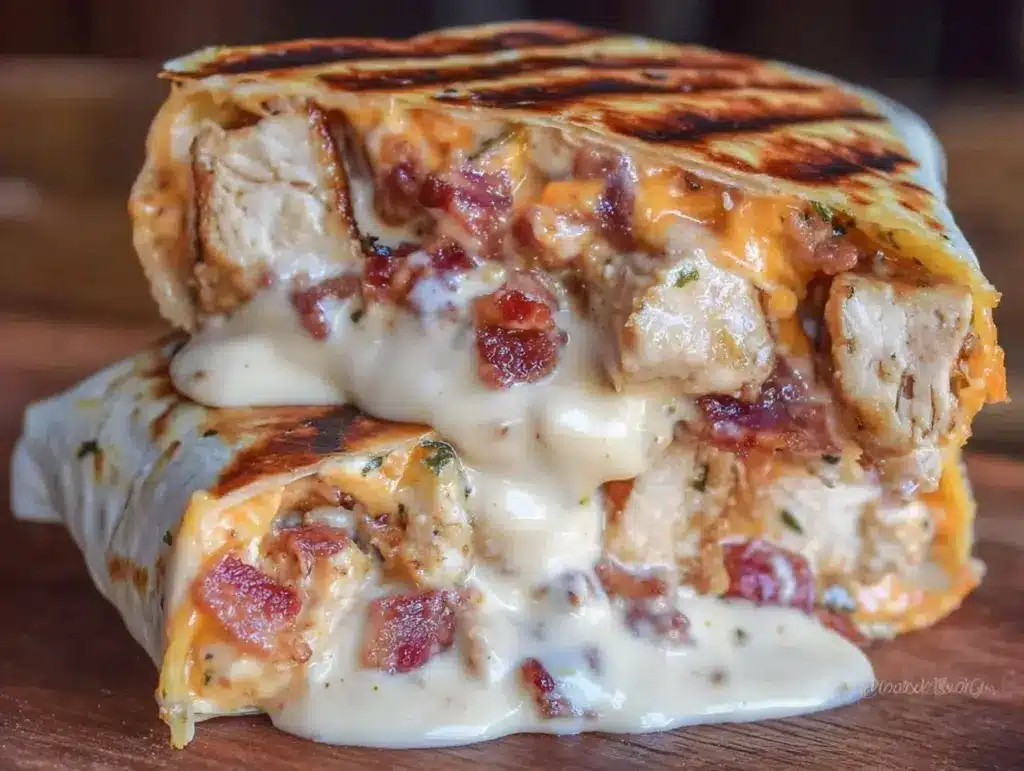
Let me set the scene: imagine the sizzle of crispy bacon mixing with the mouthwatering aroma of roasted garlic, all wrapped up in a warm tortilla bursting with juicy chicken and creamy ranch. That’s exactly what you get with these Melty Garlic Chicken Bacon Ranch Wraps packed with flavor—one whiff from the skillet and I swear, my whole family comes running. The melted cheese oozes out just a bit, the wrap itself turns golden and crisp, and the first bite honestly feels like pure comfort wrapped in a handheld snack. (I’ve made these so many times, I could probably assemble them in my sleep!)
The first time I whipped up these wraps, it was on a rainy Saturday afternoon when we were all craving something cozy but not heavy. I’d spotted a similar idea at a local food truck and couldn’t get it out of my mind. So, armed with leftover rotisserie chicken and a craving for garlic, I got creative in my kitchen. The result? One of those moments where you pause, take a deep breath, and just smile because you know you’re onto something truly special. My kids started snatching halves right off the cutting board, and my husband declared them “better than any restaurant wrap.” (You know it’s a keeper when the whole crew is fighting over the last piece!)
Honestly, Melty Garlic Chicken Bacon Ranch Wraps have become the star of our weeknight dinners and impromptu lunches. When I was knee-high to a grasshopper, my grandma used to say, “You can’t go wrong with chicken, bacon, and cheese.” She was right, but I wish I’d discovered this flavor-packed combination years ago! These wraps are dangerously easy, perfect for game day snacks, potluck spreads, or just when you want a meal that’s warm, satisfying, and packed with flavor. If you love anything with garlic, ranch, and melty cheese, you’re going to want to bookmark this one—it’s a staple for family gatherings, gifting, and honestly, just treating yourself. All in the name of research, of course!
Why You’ll Love This Recipe
There’s a reason Melty Garlic Chicken Bacon Ranch Wraps are such a hit in my house (and among my friends who’ve begged me for the recipe). I’ve tested different chicken types, ranch brands, and cheese combos to nail the perfect balance, and trust me, these wraps just work every single time. Here’s why you’ll love making—and eating—these:
- Quick & Easy: Ready in under 20 minutes, so you can whip these up even on your busiest days. I’ve made them for last-minute guests and weeknight dinners alike!
- Simple Ingredients: Nothing fancy or hard to find—most of these items are probably already sitting in your fridge or pantry.
- Perfect for Any Occasion: Great for lunchboxes, game days, casual dinners, or as a crowd-pleasing snack for movie night. They even work for brunch if you’re feeling adventurous.
- Crowd-Pleaser: My kids and their friends devour these, and adults always ask for seconds. There’s something about that ranch and garlic combo that hits the spot for everyone.
- Unbelievably Delicious: The wraps come out crispy on the outside, gooey on the inside, with just the right amount of ranch tang and garlic flavor. Every bite is next-level comfort food.
What really sets this recipe apart from other chicken wraps is the technique—mincing fresh garlic and blending it with ranch, then layering it with shredded chicken and smoky bacon. It’s not just another wrap; it’s a flavor-packed meal that feels gourmet without the fuss. I often swap cheeses or add a dash of hot sauce for a twist, but the base recipe is so good, it rarely needs changing.
These wraps aren’t just delicious—they’re the kind of meal that makes you close your eyes after the first bite and sigh happily. It’s comfort food with a kick, perfect for impressing guests without breaking a sweat, or for turning a regular day into something memorable. If you’re looking for a recipe that’s as satisfying as it is simple, Melty Garlic Chicken Bacon Ranch Wraps packed with flavor are your answer (and they’ll become your new obsession, promise!).
What Ingredients You Will Need
This recipe uses simple, wholesome ingredients to deliver bold flavor and a satisfying texture—no fancy shopping trips required. Most are pantry staples or easy to grab at any grocery store. Here’s the full rundown:
- For the filling:
- 2 cups cooked chicken, shredded (rotisserie chicken works great; I love using Kirkland’s for juicy texture)
- 6 slices bacon, cooked crisp and chopped (thick-cut bacon is my go-to for maximum crunch)
- 1 cup shredded cheese (cheddar, Monterey Jack, or a blend; I usually use Tillamook for meltiness)
- 2 cloves garlic, minced (fresh is best for big flavor, but pre-minced works if you’re in a rush)
- 1/2 cup ranch dressing (Hidden Valley or homemade—see my note below!)
- 1 tablespoon chopped fresh parsley (optional, but adds freshness)
- Salt and black pepper, to taste
- For the wrap:
- 4 large flour tortillas (10-inch; use gluten-free tortillas if needed)
- 1 tablespoon unsalted butter, melted (for brushing; olive oil works too)
- Optional add-ins:
- 1/4 cup sliced green onions (adds a little zing)
- 1/2 cup baby spinach or arugula (for a veggie boost)
- 1 tablespoon hot sauce or sriracha (if you want heat!)
- Swap chicken for turkey or tofu for a twist
Ingredient tips: For the ranch, homemade really does make a difference (just mix mayo, sour cream, buttermilk, garlic powder, onion powder, dill, salt, and pepper). If you’re short on time, store-bought works fine—choose one with real buttermilk for tang. Bacon is best cooked crisp so it holds up inside the wrap. For cheese, I’ve tried everything from pepper jack to mozzarella; cheddar gives the best classic flavor, but Monterey Jack melts beautifully.
Substitutions: Use almond flour tortillas for gluten-free. Dairy-free cheese and ranch swaps work well if you’re avoiding dairy. Turkey bacon is a lighter option, and rotisserie chicken saves tons of time. In summer, add fresh tomatoes or swap parsley for basil. You can even toss in roasted peppers for extra flavor.
Everything in this list is easy to find and keeps the prep simple. I love that most ingredients have some wiggle room for swaps—so don’t stress if you’re missing something. That’s the beauty of Melty Garlic Chicken Bacon Ranch Wraps packed with flavor: flexible, practical, and always tasty.
Equipment Needed
You don’t need a chef’s kitchen to whip up Melty Garlic Chicken Bacon Ranch Wraps packed with flavor—just a few basic tools will do the trick. Here’s what I use every time:
- Large nonstick skillet or frying pan (essential for crisping the wraps; cast iron works too if you want extra crunch)
- Spatula (I prefer silicone—it’s gentle on tortillas and makes flipping easier)
- Mixing bowl (for tossing chicken, bacon, ranch, and garlic together)
- Cutting board and sharp knife (for chopping bacon, garlic, and any add-ins)
- Small brush or spoon (for spreading melted butter on wraps)
- Measuring cups and spoons (for ranch, cheese, and seasonings—accuracy makes a difference!)
If you don’t have a skillet big enough for two wraps at once, just cook them one at a time. Sometimes I use a griddle for batch cooking (especially if feeding a crowd). And honestly, I’ve made these with a regular frying pan and even a sandwich press—both work! For budget-friendly options, any sturdy pan and a basic spatula will get you there. If you use a cast iron skillet, wipe it with a little oil first for easy cleanup.
A quick note: keep your skillet well-seasoned if you’re using cast iron—makes cleanup a breeze and keeps wraps from sticking. If your cutting board is wooden, give it a good scrub after chopping garlic (learned that the hard way!). These tools are all easy to care for and last ages if you treat them right.
Preparation Method
How do you make Melty Garlic Chicken Bacon Ranch Wraps packed with flavor?
- Prep the ingredients:
Start by cooking the bacon until it’s crisp (about 8 minutes on medium heat), then transfer to a paper towel to drain and chop into small pieces. Shred the chicken (use rotisserie or leftover grilled chicken—just make sure it’s cooled). Mince the garlic finely, so it blends smoothly into the ranch.
- Make the filling:
In a large mixing bowl, combine 2 cups (250g) shredded chicken, 6 slices (about 90g) chopped crisp bacon, 1 cup (115g) shredded cheese, 2 minced garlic cloves, and 1/2 cup (120ml) ranch dressing. Toss everything together until evenly coated. Stir in salt and pepper to taste, and add 1 tablespoon (4g) chopped parsley if desired. The mixture should be creamy but not soggy—if it seems too thick, add a splash more ranch.
- Assemble the wraps:
Lay out 4 large flour tortillas (about 25cm or 10-inch diameter). Spoon the chicken filling into the center of each tortilla, dividing evenly. Sprinkle any optional add-ins (green onions, spinach, hot sauce). Fold the bottom edge up over the filling, then fold in the sides, rolling tightly to form a wrap. Brush the outside lightly with 1 tablespoon melted butter (or olive oil).
- Crisp the wraps:
Heat your nonstick skillet over medium heat. Place the wraps seam-side down and cook for 2-3 minutes per side, pressing gently with a spatula. You’re looking for a golden-brown exterior and melted cheese inside. If the cheese isn’t melting fast enough, cover the skillet for 30 seconds. Don’t crank the heat too high—slow and steady gives the best crispy texture without burning.
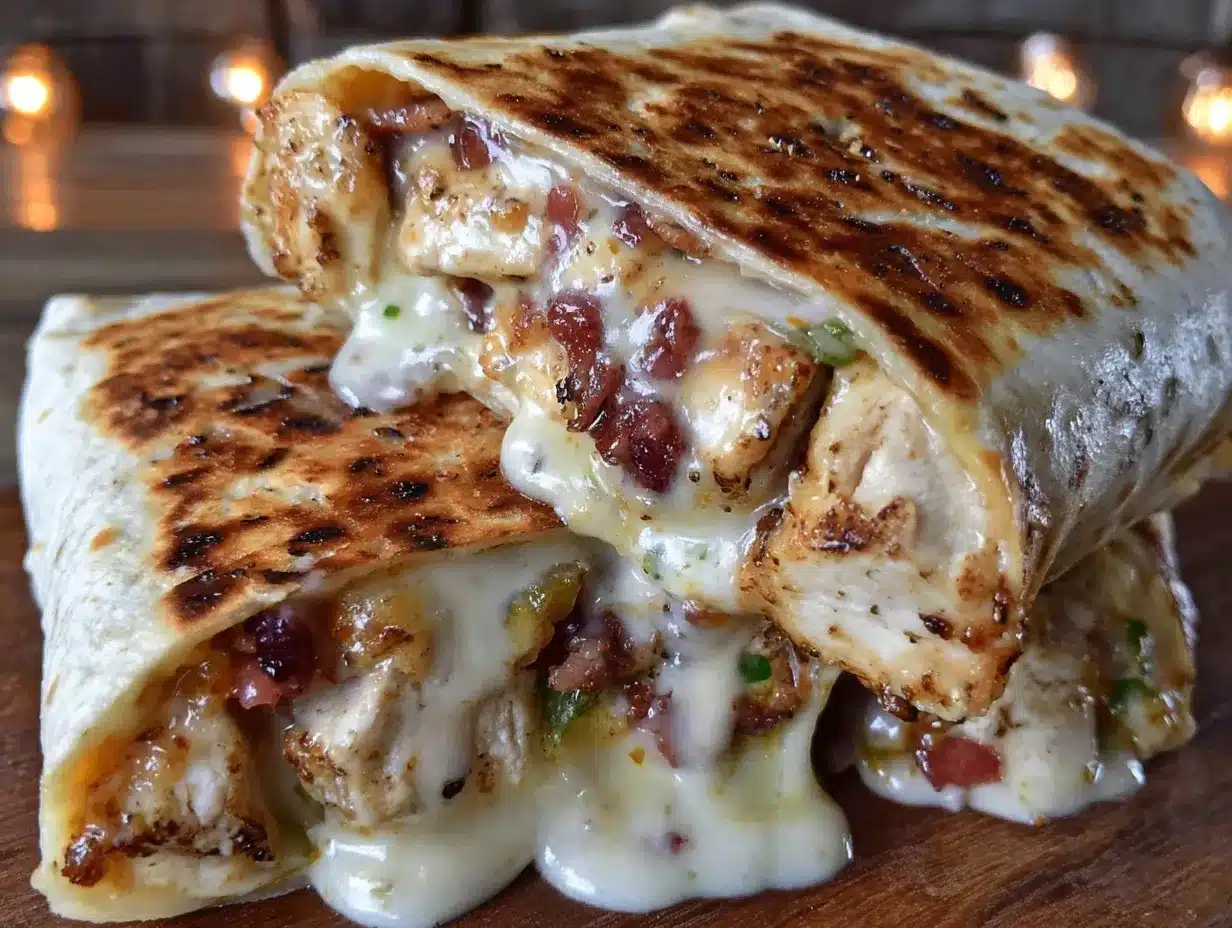
- Slice and serve:
Transfer the wraps to a cutting board and let them cool for 1 minute (this helps keep everything inside). Slice in half at a diagonal for that classic wrap look—plus it shows off the gooey, melty interior! Serve immediately while hot and melty.
Preparation notes: If you’re prepping ahead, you can mix the filling and store in the fridge for up to 2 days. Assembling and crisping the wraps right before serving keeps them from getting soggy. If you run into dry chicken, add a spoonful more ranch or a splash of milk. If your tortillas are stiff, warm them briefly in the microwave (10 seconds) to make folding easier. The garlic ranch combo gives a bold flavor—if you love garlic, add a third clove for extra punch.
Personal tip: For fastest assembly, precook bacon and store in a zip-top bag in the fridge. I like to prep double batches of filling and freeze half for future wraps. If you want to multitask, crisp bacon while you shred chicken, and mix the filling as soon as bacon is cooled. Efficiency and flavor, all in one go!
Cooking Tips & Techniques
What are the secrets to the best Melty Garlic Chicken Bacon Ranch Wraps?
Getting these wraps just right comes down to a few simple tricks I’ve learned over lots of trial and error (and a couple of kitchen fails!). Here are my top tips for Melty Garlic Chicken Bacon Ranch Wraps packed with flavor:
- Don’t Overstuff: If you pack too much filling, the wraps can burst or get soggy. Keep it to about 1/2 cup filling per tortilla for perfect results.
- Warm Tortillas: Microwave tortillas for 10 seconds to make them flexible—prevents cracking when rolling.
- Even Heating: Use medium heat and avoid rushing. High heat will burn the outside before the cheese melts inside (trust me, I’ve charred a few).
- Press Gently: Use your spatula to lightly press the wraps in the skillet. It helps the cheese melt evenly and gives that golden, crispy finish.
- Cheese Choices: For ultimate meltiness, use a blend of cheddar and Monterey Jack. If you want more stretch, toss in some mozzarella.
- Keep Filling Balanced: If the filling feels dry, add a spoonful more ranch. If it’s too wet, toss in extra cheese or chicken. You want a creamy, scoopable texture.
- Multitasking: Cook bacon first, then use the same pan for crisping wraps—adds extra flavor!
- Troubleshooting: If wraps open up in the pan, place seam-side down first and let them set for a minute before flipping. Don’t worry about a little filling escaping—it’s part of the charm!
I’ve learned that a little patience gives the best results. Don’t rush the crisping phase—let the tortillas get golden and the cheese fully melted. If you want extra garlic flavor, rub the inside of the tortilla with a cut garlic clove before filling. Finally, if you end up with leftover filling, toss it on a salad or pile it onto baked potatoes. Waste not, want not!
Variations & Adaptations
How can you customize Melty Garlic Chicken Bacon Ranch Wraps?
One of the best things about Melty Garlic Chicken Bacon Ranch Wraps packed with flavor is how easy they are to customize for any taste, dietary need, or season. Here are some fun twists I’ve tried (and loved):
- Low-Carb/Keto: Use low-carb tortillas and swap ranch for Greek yogurt ranch. Try turkey bacon for fewer calories and fat.
- Vegetarian: Swap chicken and bacon for sautéed mushrooms, roasted peppers, and a sprinkle of smoked paprika. Use dairy-free ranch if needed.
- Seasonal Twist: In summer, add sliced fresh tomatoes and basil for a Caprese-inspired wrap. In fall, toss in roasted sweet potatoes and a dash of chipotle powder.
- Spicy Variation: Add jalapeños or sriracha to the filling for a kick. Pepper jack cheese works great for spice lovers.
- Different Cooking Methods: Try baking the wraps in a preheated oven at 400°F (200°C) for 10 minutes if you need to make a big batch. For an air fryer version, set at 380°F (193°C) for 5-6 minutes.
- Allergen Substitutions: Gluten-free tortillas work well, and there are plenty of dairy-free ranch and cheese options now (Violife and Daiya are my favorites).
My favorite personal variation? Swapping the ranch for chipotle mayo and adding a handful of fresh cilantro—so good, especially with grilled chicken instead of rotisserie. These wraps are pretty forgiving, so experiment with what you have on hand (you might discover a new favorite combo!).
Serving & Storage Suggestions
How should you serve and store Melty Garlic Chicken Bacon Ranch Wraps?
These wraps are best served hot and fresh—right out of the skillet, with the cheese still gooey and the tortilla crisp. For a pretty presentation, slice each wrap on the diagonal and arrange on a platter with a drizzle of extra ranch and a sprinkle of fresh herbs.
- Serving temperature: Hot is best, but they’re still tasty at room temp. For parties, keep them warm in a low oven (200°F/93°C).
- Pairings: Serve with potato chips, a simple green salad, or fresh fruit. I love pairing these with homemade lemonade or iced tea—refreshing and classic!
- Storage: Wrap leftovers tightly in foil or plastic and refrigerate for up to 3 days. For longer storage, freeze assembled wraps (before crisping) in a zip-top bag for up to 2 months.
- Reheating: Reheat in a skillet over low heat until crispy, or microwave for 45 seconds (the skillet keeps them crispier). If frozen, thaw overnight in the fridge before reheating.
- Flavor notes: The garlic and ranch flavors deepen overnight, making leftovers surprisingly delicious. If you like extra crunch, re-crisp in the oven for 5 minutes.
Honestly, these wraps rarely last long enough to need storing, but it’s good to know you can make extra for meal prep or future cravings. The flavors only get better with a little time—so go ahead and stash a few in the freezer for busy days!
Nutritional Information & Benefits
Each Melty Garlic Chicken Bacon Ranch Wrap packed with flavor delivers a delicious mix of protein, carbs, and fats, with plenty of flavor to boot. Here’s an estimate per wrap:
| Calories | Protein | Carbs | Fat |
|---|---|---|---|
| 430 | 28g | 34g | 21g |
Key health benefits: Lean chicken delivers high-quality protein for muscle and satiety. Bacon adds flavor and crunch—just enough for satisfaction. Garlic is loaded with antioxidants and can help boost immunity. Fresh parsley and spinach (if you add them) offer vitamins and minerals.
Dietary notes: Easily adapted for gluten-free, low-carb, or dairy-free diets. Contains common allergens: wheat (in tortillas), egg and dairy (in ranch and cheese). If you’re watching sodium, choose low-sodium bacon and ranch.
From a personal wellness perspective, I love that you can pack extra veggies in these wraps, or swap ingredients to fit your needs. They keep you full and happy, with flavors that feel indulgent but balanced.
Conclusion
Melty Garlic Chicken Bacon Ranch Wraps packed with flavor are the kind of meal you’ll crave again and again. They’re quick, easy, and loaded with all the comforting tastes—garlic, ranch, chicken, bacon, and cheese—wrapped up in a crispy tortilla. Whether you’re feeding a crowd or just want a cozy lunch, these wraps are a surefire hit.
Don’t be afraid to customize—swap in your favorite cheese, add veggies, or punch up the spice. It’s a recipe that invites creativity and always delivers. I love this recipe for its simplicity, flexibility, and the smiles it brings to my family’s faces (even my pickiest eater asks for seconds!).
If you give these Melty Garlic Chicken Bacon Ranch Wraps packed with flavor a try, let me know in the comments! Share your variations or tag me with your gorgeous wrap photos. Bookmark this recipe—you’ll want it handy for those moments when only melty, garlicky comfort food will do. Happy cooking!
FAQs
Can I make Melty Garlic Chicken Bacon Ranch Wraps ahead of time?
Yes, you can prep the filling up to 2 days in advance and assemble the wraps when you’re ready to eat. For best results, crisp the wraps fresh before serving.
What’s the best way to reheat these wraps?
The skillet is your best friend—reheat over low to medium heat until crispy and hot. The microwave works too, but the wraps won’t be as crisp.
Can I use store-bought rotisserie chicken?
Absolutely! Rotisserie chicken is a huge time saver and adds great flavor. Just shred it and mix into the filling.
How do I make this recipe gluten-free?
Swap the flour tortillas for your favorite gluten-free wraps. All other ingredients are naturally gluten-free, just check your ranch brand.
Can I freeze Melty Garlic Chicken Bacon Ranch Wraps?
Yes! Assemble the wraps (don’t crisp) and freeze in a zip-top bag. Thaw overnight and crisp in the skillet when ready to serve.
Pin This Recipe!
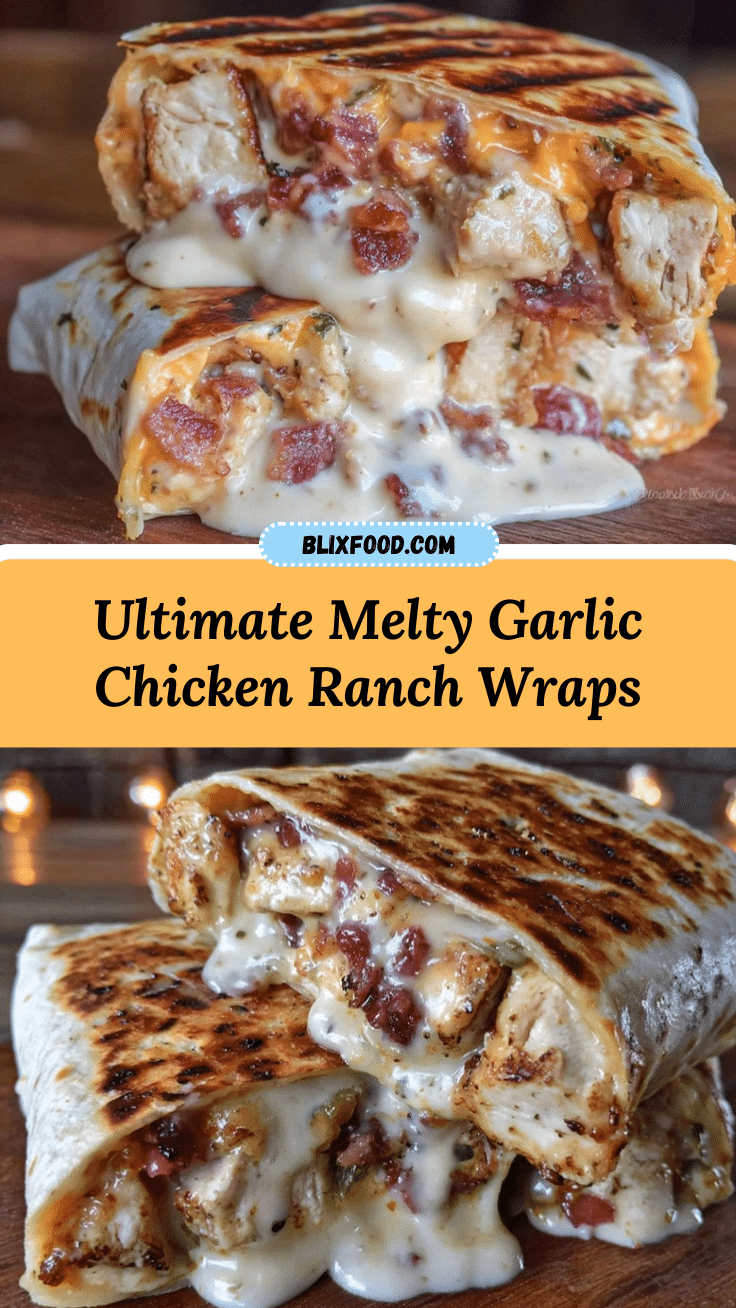
Melty Garlic Chicken Bacon Ranch Wraps

These easy 20-minute wraps are packed with juicy chicken, crispy bacon, roasted garlic, creamy ranch, and melty cheese, all wrapped in a golden, crisp tortilla. Perfect for weeknight dinners, game day snacks, or cozy lunches, they deliver bold flavor and comforting texture in every bite.
- Prep Time: 10 minutes
- Cook Time: 10 minutes
- Total Time: 20 minutes
- Yield: 4 servings 1x
- Category: Main Course
- Cuisine: American
Ingredients
- 2 cups cooked chicken, shredded (rotisserie chicken recommended)
- 6 slices bacon, cooked crisp and chopped
- 1 cup shredded cheese (cheddar, Monterey Jack, or blend)
- 2 cloves garlic, minced
- 1/2 cup ranch dressing
- 1 tablespoon chopped fresh parsley (optional)
- Salt and black pepper, to taste
- 4 large flour tortillas (10-inch; use gluten-free if needed)
- 1 tablespoon unsalted butter, melted (or olive oil)
- Optional: 1/4 cup sliced green onions
- Optional: 1/2 cup baby spinach or arugula
- Optional: 1 tablespoon hot sauce or sriracha
- Optional: Swap chicken for turkey or tofu
Instructions
- Cook bacon in a skillet over medium heat until crisp (about 8 minutes), drain on paper towels, and chop.
- Shred cooked chicken and mince garlic.
- In a large mixing bowl, combine shredded chicken, chopped bacon, shredded cheese, minced garlic, ranch dressing, salt, pepper, and parsley (if using). Toss until evenly coated.
- Lay out flour tortillas. Divide filling evenly among tortillas, placing in the center. Add any optional add-ins.
- Fold bottom edge of tortilla over filling, then fold in sides and roll tightly to form a wrap. Brush outside lightly with melted butter or olive oil.
- Heat a nonstick skillet over medium heat. Place wraps seam-side down and cook 2-3 minutes per side, pressing gently with a spatula, until golden and cheese is melted. Cover skillet for 30 seconds if cheese needs help melting.
- Transfer wraps to a cutting board, let cool 1 minute, then slice diagonally. Serve hot.
Notes
Warm tortillas before assembling for easier folding. Don’t overstuff wraps to prevent bursting. For gluten-free, use GF tortillas; for dairy-free, use DF cheese and ranch. Filling can be prepped ahead and stored up to 2 days. Freeze assembled (uncooked) wraps for up to 2 months. Reheat in skillet for best texture. Add extra garlic or hot sauce for more punch.
Nutrition
- Serving Size: 1 wrap
- Calories: 430
- Sugar: 3
- Sodium: 950
- Fat: 21
- Saturated Fat: 9
- Carbohydrates: 34
- Fiber: 2
- Protein: 28
Keywords: chicken wrap, bacon ranch, garlic wrap, easy dinner, quick lunch, comfort food, skillet wrap, melty cheese, family meal, game day snack


