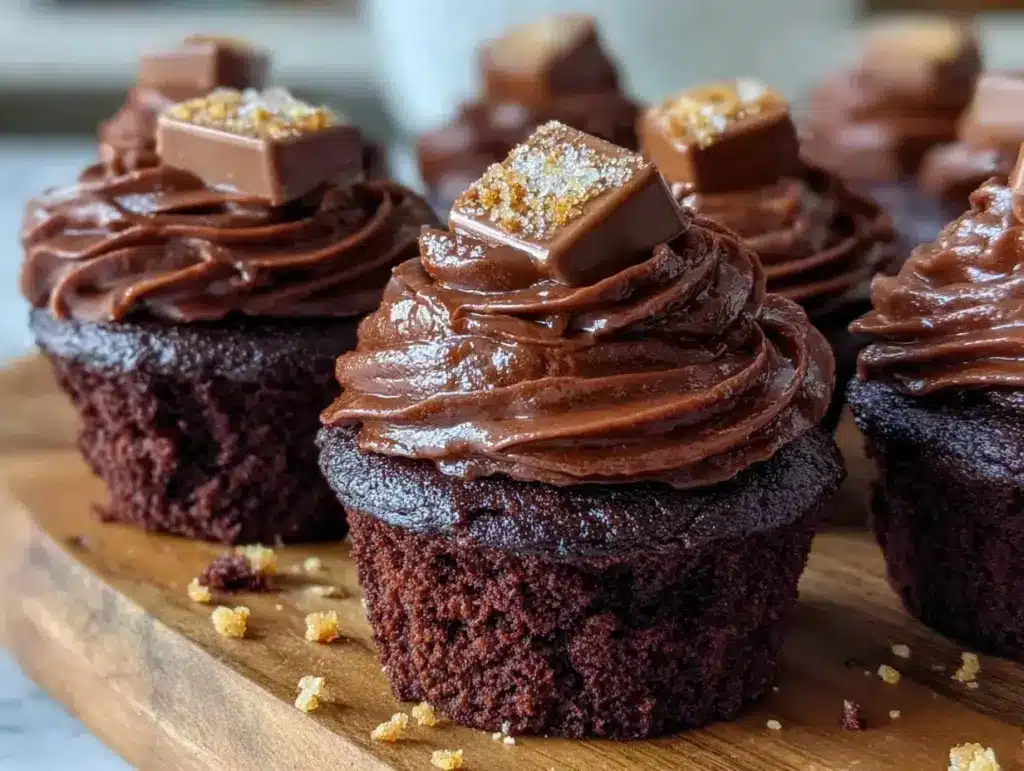
“I wasn’t expecting baking advice from my neighbor Mr. Jenkins, but there I was, standing in his kitchen on a Saturday morning, watching him expertly pipe frosting onto what looked like tiny, edible graduation caps. Honestly, I thought cupcakes were cupcakes—just sweet little cakes in paper cups. But these chocolate graduation cap cupcakes were something else entirely. The way the dark chocolate cake paired with the rich frosting was enough to make me forget the mess I’d made trying to recreate them at home last week (I ended up with a frosting disaster on the floor—don’t ask!).
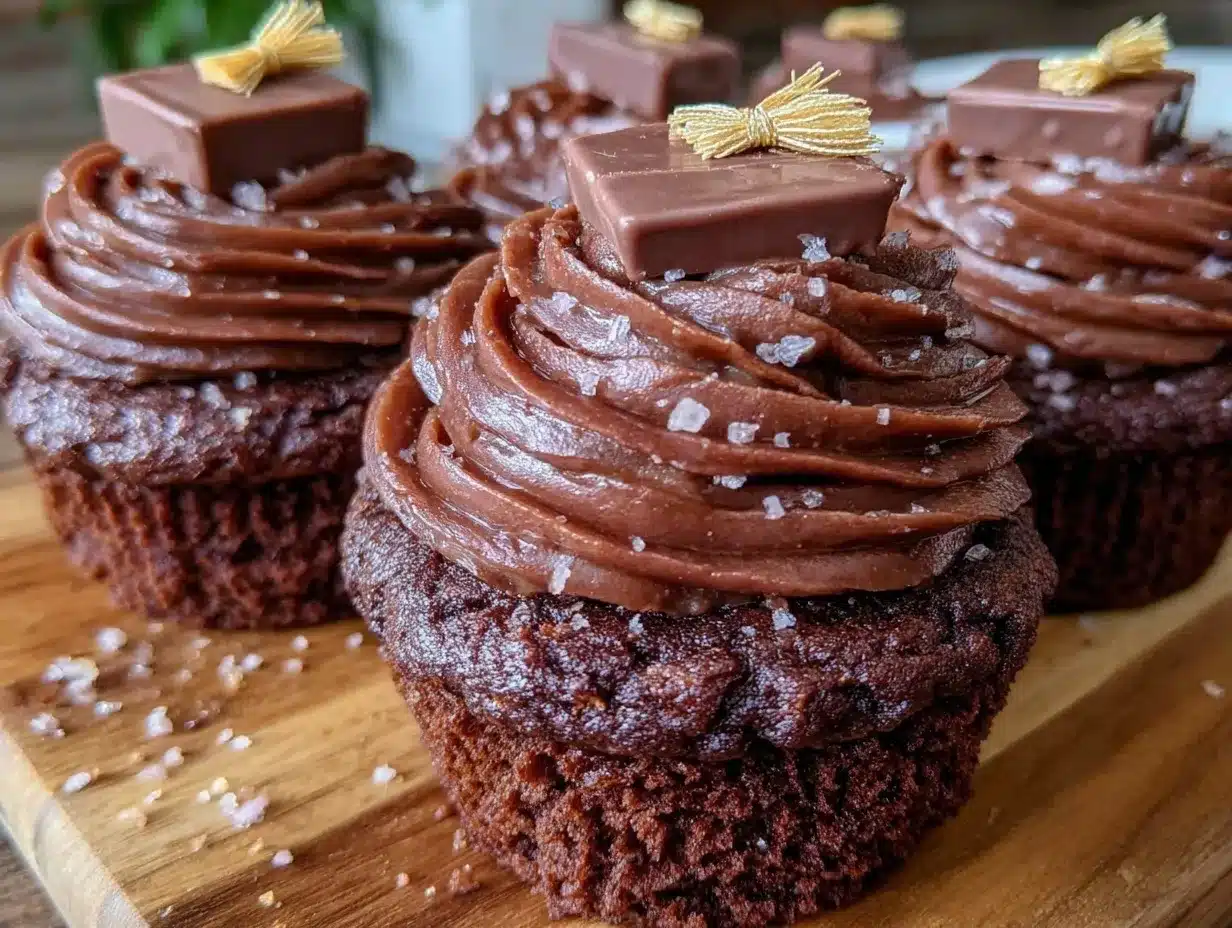
Maybe you’ve been there too, scrambling for the perfect celebration dessert that’s both impressive and fun. There’s something about these cupcakes that just screams “party!”—the sharp edges of the cap, the bright tassel, and that deep chocolate flavor that feels like a warm hug. It’s the kind of recipe that makes you want to pause, take a bite, and savor the moment, whether you’re celebrating a graduation or simply craving a sweet treat with a bit of flair.
So yeah, this recipe stuck with me. It’s not just about the look (though I’ll admit, they’re pretty eye-catching). It’s about the balance of flavors, the little quirks you pick up baking them, and the joy of sharing something homemade that feels special without being complicated. Let me tell you, once you make these chocolate graduation cap cupcakes, you’ll find yourself looking for any excuse to bake them again.
Why You’ll Love This Recipe
Honestly, these chocolate graduation cap cupcakes hit all the right notes when it comes to a celebration treat. Here’s why you might find yourself reaching for this recipe again and again:
- Quick & Easy: Whips up in under an hour—perfect for last-minute party plans or sudden cravings.
- Simple Ingredients: No need to hunt down exotic items; everything’s likely chilling in your pantry right now.
- Perfect for Celebrations: Whether it’s a graduation, a milestone, or just a reason to party, these cupcakes bring the fun.
- Crowd-Pleaser: Kids and adults alike can’t get enough—the chocolate flavor is universally adored.
- Unbelievably Delicious: Moist chocolate cake and creamy frosting make each bite feel like a mini celebration.
What sets this recipe apart? The special trick is in the frosting technique—using a slightly stiffer buttercream that holds its shape for the cap design without being stiff or dry. Plus, I’ve fine-tuned the cocoa blend to get that deep, rich chocolate flavor without any bitterness. It’s comfort food with a party hat on, if that makes sense!
And let me just say, the satisfaction you get from making those little tassels and seeing your cupcakes transform into graduation caps is priceless. It’s a recipe that’s as fun to make as it is to eat, and it never fails to bring smiles to the table.
What Ingredients You Will Need
This recipe uses simple, wholesome ingredients to deliver bold chocolate flavor and a playful presentation without fuss. Most are pantry staples, and substitutions are easy if you have dietary preferences.
- For the Chocolate Cupcakes:
- All-purpose flour – 1 ½ cups (190 g)
- Cocoa powder, unsweetened – ¾ cup (75 g) (I prefer Ghirardelli for rich flavor)
- Baking powder – 1 ½ teaspoons
- Baking soda – ½ teaspoon
- Salt – ¼ teaspoon
- Granulated sugar – 1 ¼ cups (250 g)
- Buttermilk – 1 cup (240 ml), room temperature (or use 1 cup milk + 1 tbsp vinegar as a quick substitute)
- Vegetable oil – ½ cup (120 ml)
- Large eggs – 2, room temperature
- Vanilla extract – 2 teaspoons
- Hot water – ½ cup (120 ml) (to bloom the cocoa for extra chocolatey depth)
- For the Buttercream Frosting:
- Unsalted butter – 1 cup (227 g), softened (I like Plugrá for smoothness)
- Powdered sugar – 3 to 4 cups (360 to 480 g), sifted
- Cocoa powder, unsweetened – ⅓ cup (30 g)
- Heavy cream – 3 to 4 tablespoons (45 to 60 ml)
- Vanilla extract – 1 teaspoon
- Pinch of salt
- For the Graduation Cap Decorations:
- Black fondant or black candy melts – about 8 ounces (225 g) (use candy melts for a quicker option)
- Edible gold or yellow decorating gel or yellow fondant – small amount for tassels
- Wooden toothpicks or small pretzel sticks – optional, for tassel stems
If you want a dairy-free version, swap the butter and cream for coconut oil and full-fat coconut milk. For gluten-free, a cup-for-cup gluten-free blend works well here, too. The key is to keep the texture moist and fluffy, so don’t skimp on the wet ingredients.
Equipment Needed
- Muffin tin: Standard 12-cup size works perfectly. I’ve tried jumbo tins, but the baking time changes significantly.
- Cupcake liners: Use sturdy paper liners to hold the shape.
- Mixing bowls: One large bowl for dry ingredients, one for wet, or a stand mixer bowl.
- Electric mixer or stand mixer: For smooth batter and fluffy buttercream. Hand mixers work but take more elbow grease.
- Spatula and whisk: For folding and mixing.
- Piping bags and round piping tip: Essential for creating the neat buttercream cap top.
- Rolling pin and small knife or fondant cutter: To shape the fondant or candy melts squares for caps.
- Cooling rack: To cool cupcakes evenly and avoid sogginess.
If you don’t have a stand mixer, no worries—just beat the butter longer by hand for the frosting. Also, a silicone mat can help roll out fondant easier. I’ve found that using a sharp knife to cut clean fondant squares works better than cookie cutters here.
Preparation Method
- Preheat your oven to 350°F (175°C). Line a 12-cup muffin tin with cupcake liners. This usually takes about 10 minutes including gathering ingredients.
- Mix dry ingredients: In a large bowl, sift together 1 ½ cups flour, ¾ cup cocoa powder, 1 ½ tsp baking powder, ½ tsp baking soda, and ¼ tsp salt. Whisk to combine evenly.
- Combine wet ingredients: In another bowl, whisk 1 ¼ cups sugar, ½ cup vegetable oil, 2 large eggs, 1 cup buttermilk, and 2 tsp vanilla extract until smooth and pale. This should take about 2-3 minutes.
- Bloom cocoa: Slowly add ½ cup hot water to the wet ingredients, stirring carefully. It’ll look thin but that’s perfect—it makes the chocolate flavor pop.
- Mix wet and dry: Gradually add the dry mix to the wet, folding gently until just combined. Don’t overmix—some lumps are fine. The batter will be thin but silky.
- Fill cupcake liners: Use a scoop to fill each liner about ⅔ full. This helps shape the cupcake nicely without overspilling.
- Bake for 18-22 minutes. Test doneness with a toothpick in the center; it should come out clean or with moist crumbs. Let cupcakes cool in the pan for 5 minutes, then transfer to a wire rack.
- Prepare buttercream frosting: Beat 1 cup softened butter until creamy (about 2 minutes). Add ⅓ cup cocoa powder and 3 cups powdered sugar gradually, alternating with 3 tbsp heavy cream and 1 tsp vanilla extract. Beat on medium-high until fluffy. Add more powdered sugar or cream to adjust consistency—stiffer is better for piping caps, but still smooth.
- Pipe the cap tops: Using a round tip, pipe a smooth, flat dome atop each cupcake, about 1 inch in diameter. This will be the base for the fondant cap.
- Form the graduation caps: Roll out black fondant or melt candy melts and spread into a thin layer on parchment. Cut into 1 1/4 inch squares. Place one square gently on each buttercream dome.
- Add tassels: Roll thin ropes of yellow fondant or pipe decorating gel to create tassels. Attach a small piece of pretzel stick or toothpick under the tassel for structure, then place on one corner of the fondant square.
- Final touches: Let the cupcakes set at room temperature for about 15 minutes so the fondant or candy melts firm up before serving.
Pro tip: If your frosting gets too soft while piping, pop the bowl in the fridge for 10 minutes. It’ll firm up and be easier to control. Also, don’t skip cooling the cupcakes fully before frosting—it keeps everything neat and prevents melting.
Cooking Tips & Techniques
Let me share some tricks I’ve picked up to keep your chocolate graduation cap cupcakes on point every time:
- Measure flour carefully: Scooping flour straight from the bag can lead to dense cupcakes. Use a spoon to fluff the flour, then lightly spoon it into your cup and level it off.
- Room temperature ingredients: Eggs, buttermilk, and butter at room temp mix better and create a smoother batter and frosting.
- Bloom your cocoa powder: Mixing cocoa with hot water intensifies the chocolate without extra sugar or fat.
- Don’t overbake: Cupcakes can dry out fast. Check them a few minutes before time, especially if your oven runs hot.
- Frosting consistency: You want it stiff enough to hold shape but soft enough to pipe smoothly. Adding cream tablespoon by tablespoon helps you find that balance.
- Fondant handling: Dust your surface with cornstarch to prevent sticking, and work quickly because fondant can dry out.
- Multitasking tip: Bake cupcakes while preparing frosting—cupcakes cool faster if you get started on the buttercream right away.
One time, I accidentally added too much cream to my frosting and it turned runny. Instead of starting over, I popped it in the fridge and it firmed up nicely. Honestly, sometimes mistakes lead to new tricks!
Variations & Adaptations
Feeling adventurous or need to tweak for diet? Here are some ways I’ve personalized this recipe:
- Flavor swap: Add a teaspoon of espresso powder to the batter—it really sharpens the chocolate flavor without tasting like coffee.
- Gluten-free: Replace all-purpose flour with a 1:1 gluten-free baking blend. I recommend Bob’s Red Mill for consistent results.
- Dairy-free option: Use coconut oil instead of butter and full-fat coconut milk for buttermilk substitute. The cupcakes stay moist and the frosting is still luscious.
- Decorative twist: Instead of fondant caps, use square-shaped cookies or brownies on top for a different texture.
- Seasonal adaptation: Swap the yellow tassel for school colors using colored fondant or edible paint for a personalized touch.
I tried a mint-chocolate version once by adding peppermint extract to the frosting and green tassels. It was surprisingly fresh and festive!
Serving & Storage Suggestions
Serve these cupcakes at room temperature for the best flavor and texture. They look great on a decorated platter, maybe with a few fresh flowers or confetti sprinkled around for a festive vibe.
Pair them with a cold glass of milk, a cup of coffee, or even sparkling lemonade for a fun contrast. They’re also perfect alongside a simple fruit salad if you want to balance the richness.
Store cupcakes in an airtight container at room temperature for up to 2 days. If your kitchen is warm, refrigerate them but bring to room temp before serving to soften the frosting.
For longer storage, freeze unfrosted cupcakes wrapped tightly for up to 3 months. Thaw completely before frosting and decorating. Frosted cupcakes can be frozen as well, but the fondant may soften slightly.
Interestingly, the flavors deepen if you let frosted cupcakes rest overnight in a cool place—just don’t forget to cover them to avoid drying out.
Nutritional Information & Benefits
Each chocolate graduation cap cupcake (without decorations) roughly contains:
| Calories | 280 |
|---|---|
| Fat | 14 g |
| Carbohydrates | 36 g |
| Protein | 3 g |
| Sugar | 28 g |
The recipe uses cocoa powder, which is rich in antioxidants and may boost mood thanks to its flavonoids. Using buttermilk adds a slight tang and tenderness while providing calcium and vitamin B12.
If you want a lighter treat, reducing sugar slightly or using a sugar substitute can help. The recipe is naturally nut-free and can be made gluten-free with simple swaps.
From a wellness perspective, these cupcakes remind me that celebrations are about joy and connection—sometimes a little indulgence is part of that balance.
Conclusion
These perfect chocolate graduation cap cupcakes are more than just dessert—they’re a little ceremony in themselves. The moist chocolate base paired with that playful, detailed frosting cap makes them a standout at any celebration. You can tweak and tailor them to your taste or dietary needs, and honestly, the process is as fun as the result.
I love this recipe because it’s approachable yet impressive, and it never fails to bring smiles—even if you forget the frosting tip once in a while (guilty!). So grab your mixing bowls, put on your favorite playlist, and get ready to create some sweet memories.
If you try these cupcakes, I’d love to hear how they turned out—any twists you made or little mishaps you laughed off. Share your thoughts and photos in the comments below, and happy baking!
FAQs
Can I make these cupcakes ahead of time?
Yes! You can bake the cupcakes up to two days in advance and store them in an airtight container. Frost them the day you plan to serve for the freshest look and taste.
What if I don’t have fondant for the graduation caps?
No worries! You can use melted black candy melts poured into a thin square on parchment or even square cookies as caps. Both work well and are easier for beginners.
How do I keep the buttercream frosting from melting?
Make sure your butter is softened but not too warm. If your kitchen is hot, chill the frosting a bit before piping and keep cupcakes in a cool place until serving.
Can I use a different frosting for these cupcakes?
Absolutely! Cream cheese frosting or whipped ganache can work, but buttercream holds the cap shape best. Just keep the frosting firm enough to support the decorations.
Is it possible to make these cupcakes vegan?
Yes, by using plant-based milk, vegan butter, and egg replacers, you can adapt this recipe. It may take a couple of tries to get the texture just right, but it’s doable!
Pin This Recipe!
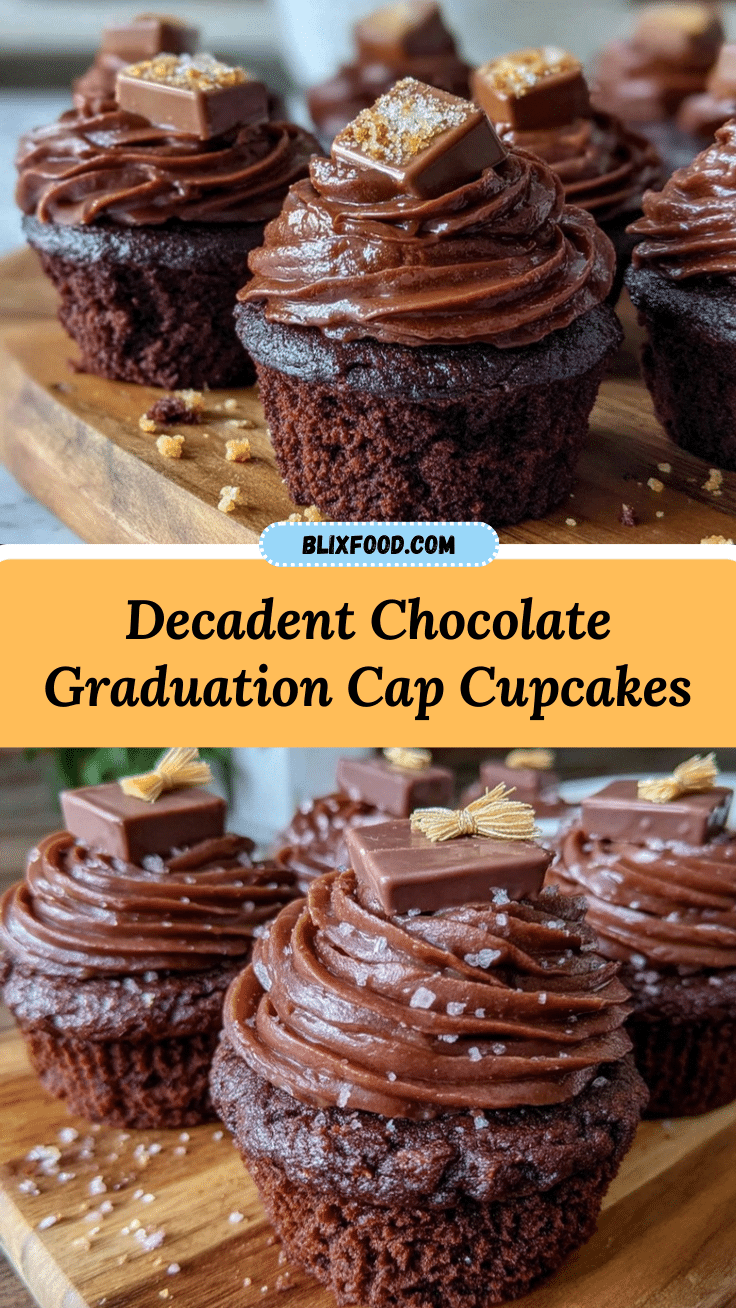
Perfect Chocolate Graduation Cap Cupcakes
These chocolate graduation cap cupcakes are moist, rich, and topped with a playful buttercream frosting and fondant caps, perfect for celebrations and easy to make with simple pantry ingredients.
- Prep Time: 15 minutes
- Cook Time: 22 minutes
- Total Time: 37 minutes
- Yield: 12 servings 1x
- Category: Dessert
- Cuisine: American
Ingredients
- 1 ½ cups (190 g) all-purpose flour
- ¾ cup (75 g) unsweetened cocoa powder
- 1 ½ teaspoons baking powder
- ½ teaspoon baking soda
- ¼ teaspoon salt
- 1 ¼ cups (250 g) granulated sugar
- 1 cup (240 ml) buttermilk, room temperature (or 1 cup milk + 1 tbsp vinegar as substitute)
- ½ cup (120 ml) vegetable oil
- 2 large eggs, room temperature
- 2 teaspoons vanilla extract
- ½ cup (120 ml) hot water
- 1 cup (227 g) unsalted butter, softened
- 3 to 4 cups (360 to 480 g) powdered sugar, sifted
- ⅓ cup (30 g) unsweetened cocoa powder
- 3 to 4 tablespoons (45 to 60 ml) heavy cream
- 1 teaspoon vanilla extract
- Pinch of salt
- About 8 ounces (225 g) black fondant or black candy melts
- Small amount of edible gold or yellow decorating gel or yellow fondant
- Wooden toothpicks or small pretzel sticks (optional)
Instructions
- Preheat oven to 350°F (175°C). Line a 12-cup muffin tin with cupcake liners.
- In a large bowl, sift together flour, cocoa powder, baking powder, baking soda, and salt. Whisk to combine.
- In another bowl, whisk sugar, vegetable oil, eggs, buttermilk, and vanilla extract until smooth and pale.
- Slowly add hot water to the wet ingredients, stirring carefully to bloom the cocoa.
- Gradually fold the dry ingredients into the wet until just combined; batter will be thin but silky.
- Fill cupcake liners about ⅔ full with batter.
- Bake for 18-22 minutes or until a toothpick inserted in the center comes out clean or with moist crumbs.
- Cool cupcakes in the pan for 5 minutes, then transfer to a wire rack to cool completely.
- For frosting, beat softened butter until creamy. Gradually add cocoa powder and powdered sugar alternately with heavy cream and vanilla extract. Beat until fluffy and adjust consistency as needed.
- Using a round piping tip, pipe a smooth, flat dome about 1 inch in diameter atop each cupcake.
- Roll out black fondant or melt candy melts and spread thinly on parchment. Cut into 1 1/4 inch squares and place one on each buttercream dome.
- Create tassels by rolling thin ropes of yellow fondant or piping decorating gel. Attach a small pretzel stick or toothpick under the tassel for support and place on one corner of each fondant square.
- Let cupcakes set at room temperature for about 15 minutes before serving.
Notes
If frosting becomes too soft while piping, chill in the fridge for 10 minutes. Cool cupcakes completely before frosting to prevent melting. Dust surface with cornstarch when working with fondant to prevent sticking. For dairy-free, substitute butter and cream with coconut oil and full-fat coconut milk. For gluten-free, use a 1:1 gluten-free baking blend.
Nutrition
- Serving Size: 1 cupcake
- Calories: 280
- Sugar: 28
- Fat: 14
- Carbohydrates: 36
- Protein: 3
Keywords: chocolate cupcakes, graduation cupcakes, celebration dessert, buttercream frosting, fondant decorations, easy cupcakes, party treats


