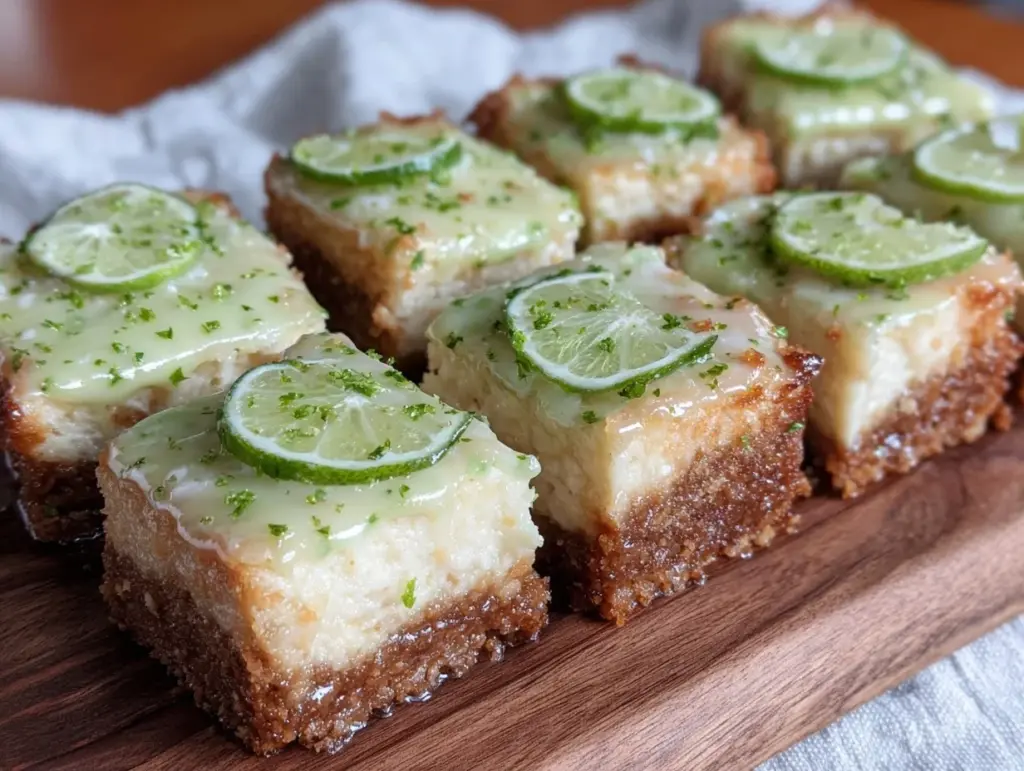
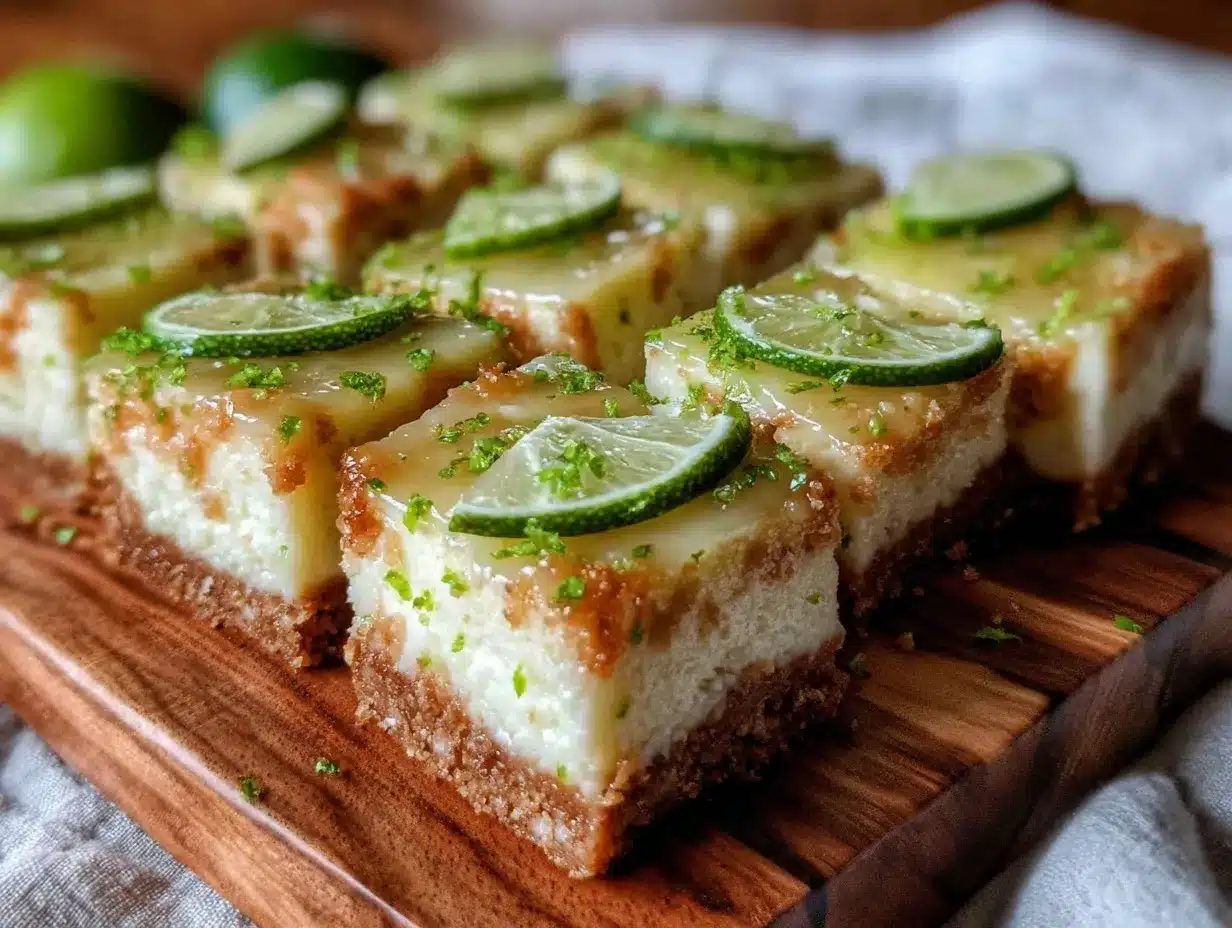
“You won’t believe where I first tasted these tangy creamy Key lime pie cheesecake bars,” my neighbor Tom chuckled as he handed me a plate. It was last summer, and I was helping him fix his fence on a sticky Tuesday afternoon. Midway through the job, Tom disappeared into his kitchen to fetch a surprise treat. Honestly, I wasn’t expecting much—he’s not exactly a dessert guy—but that first bite was a revelation. The zing of fresh key lime blended with the lush creaminess of cheesecake, all resting on a crumbly, buttery crust that just melted in my mouth. I remember juggling a hammer in one hand and that heavenly bar in the other, trying not to make a mess.
Maybe you’ve been there—that unexpected moment when a simple dessert steals the show and leaves you craving more. What made this recipe stick with me wasn’t just the flavor but how effortlessly it combined the bright tartness of key lime with the rich indulgence of cheesecake. The kind of dessert you can whip up without fuss but still feels like a special occasion.
It took a couple of tries to get the balance just right—the first batch was a bit too sour, the second too dense. But by the third, I had this perfect blend of tangy and creamy that I’ve been making ever since. The crust is buttery and crisp, the filling silky with that subtle citrus punch, and the whole thing holds together beautifully in bar form, making it super easy to serve and share. Honestly, it’s become one of those recipes I reach for when I want to impress without stress.
Why You’ll Love This Tangy Creamy Key Lime Pie Cheesecake Bars Recipe
What’s great about this recipe is that it’s been tested and tweaked in my kitchen enough times to know it works every time. Whether you’re a seasoned baker or just someone who likes to try new desserts, these bars hit the spot with minimal hassle.
- Quick & Easy: Comes together in about 45 minutes, perfect for last-minute cravings or casual get-togethers.
- Simple Ingredients: No exotic items here—just pantry staples and fresh key limes (or bottled juice if you’re in a pinch).
- Perfect for Any Occasion: Whether it’s a summer barbecue, a potluck, or just a cozy night in, these bars fit right in.
- Crowd-Pleaser: Friends and family always ask for seconds—kids love the creamy texture, adults rave about the tangy kick.
- Unbelievably Delicious: The smooth cheesecake filling with just the right amount of tartness is, honestly, next-level comfort food.
This isn’t just any cheesecake bar. The trick is blending the cream cheese with sweetened condensed milk and fresh key lime juice to get that ultra-smooth texture and vibrant zing. And the crust? Made with graham crackers and just enough butter to hold everything together without being greasy.
It’s the kind of dessert that makes you close your eyes after the first bite, savoring that creamy-tart combo. If you’re someone who loves classic key lime pie but wants an easier way to enjoy it, this recipe is your go-to. Plus, it’s easy to slice into bars, making serving a breeze.
What Ingredients You Will Need
This recipe uses simple, wholesome ingredients to deliver bold flavor and satisfying texture without the fuss. Most are pantry staples, and the fresh key lime juice is the star that makes these bars sing.
- For the Crust:
- 1 1/2 cups graham cracker crumbs (about 12 full sheets) – I like using Honey Maid for best texture
- 1/4 cup granulated sugar (adds sweetness and crunch)
- 6 tablespoons unsalted butter, melted (room temperature for easy mixing)
- Pinch of salt (balances the sweetness)
- For the Filling:
- 16 oz (450g) cream cheese, softened (full fat for creaminess)
- 1 can (14 oz / 396g) sweetened condensed milk (makes the filling luxuriously smooth)
- 3 large eggs, room temperature (helps with structure)
- 1/2 cup fresh key lime juice (about 6-8 limes) – freshly squeezed for the best tang
- Zest of 2 key limes (adds extra citrus punch)
- 1 teaspoon vanilla extract (rounds out the flavors)
- Pinch of salt (keeps sweetness in check)
- Optional Topping:
- Whipped cream or lightly sweetened whipped topping
- Thin lime slices or zest for garnish
If you can’t find fresh key limes, bottled key lime juice works in a pinch—just make sure it’s pure juice, no added sugar. For a dairy-free option, swap cream cheese with a plant-based alternative and use coconut condensed milk.
Equipment Needed
- 9×9 inch (23×23 cm) baking pan – I prefer glass pans for even baking, but metal works fine too.
- Mixing bowls – one large for crust, one for filling.
- Electric mixer or stand mixer – helps achieve a smooth, lump-free filling.
- Measuring cups and spoons – for precise ingredient amounts.
- Zester or fine grater – to get zest from your key limes.
- Citrus juicer or reamer – makes juicing the limes easier (handheld or electric).
- Spatula and whisk – for folding and scraping down bowls.
- Parchment paper – optional, but makes lifting bars out easier.
If you don’t have a mixer, a sturdy whisk and some elbow grease will do, but expect a bit more effort to get that silky texture. For budget-friendly options, a hand mixer often suffices and takes up less space.
Preparation Method
- Prepare the Crust: Preheat your oven to 350°F (175°C). In a medium bowl, combine 1 1/2 cups graham cracker crumbs, 1/4 cup granulated sugar, and a pinch of salt. Pour in 6 tablespoons melted unsalted butter and stir until the mixture resembles wet sand. Press this evenly into the bottom of your 9×9 inch baking pan, making sure to compact it well—this helps it hold together after baking. Bake for 8-10 minutes until the edges start to turn golden. Remove from oven and set aside to cool slightly.
- Make the Filling: In a large mixing bowl, beat 16 oz softened cream cheese with an electric mixer on medium speed until creamy and smooth—no lumps! This step is crucial; if your cream cheese isn’t softened enough, you’ll get unwanted lumps. Gradually add the 14 oz sweetened condensed milk, mixing until fully incorporated. Then, add 3 large eggs one at a time, beating well after each addition.
- Add Flavor: Stir in 1/2 cup fresh key lime juice, zest of 2 key limes, 1 teaspoon vanilla extract, and a pinch of salt. Mix gently on low speed just to combine. The mixture should be smooth and slightly thick but pourable. Avoid overmixing, or you might incorporate too much air, leading to cracks.
- Assemble and Bake: Pour the filling over the cooled crust, smoothing the top with a spatula. Tap the pan lightly on the counter to release any air bubbles. Bake for 20-25 minutes at 350°F (175°C) until the edges are set but the center still jiggles slightly. Avoid overbaking to keep the creamy texture.
- Cool and Chill: Let the bars cool to room temperature on a wire rack for about an hour. Then cover and refrigerate for at least 4 hours, preferably overnight; this helps the bars firm up and flavors meld beautifully.
- Serve: Once chilled, use a sharp knife to cut into 12 bars. For cleaner slices, dip your knife in hot water and wipe dry between cuts. Top with whipped cream and garnish with lime slices if desired.
If you notice the crust isn’t holding together well, try adding a tablespoon more melted butter next time. And if the filling cracks, it usually means it baked too long or cooled too quickly—slow cooling in the fridge helps prevent that.
Cooking Tips & Techniques
The secret to these tangy creamy Key lime pie cheesecake bars lies in gentle handling and temperature control. Let me share a few things I learned the hard way:
- Softening the Cream Cheese: Don’t rush this. Take it out of the fridge about an hour before starting, or microwave in short bursts (10 seconds max) to avoid melting.
- Mixing at Medium Speed: Beat cream cheese alone first, then add other ingredients gradually. Overbeating once eggs are added can introduce air bubbles, causing cracks.
- Fresh Key Lime Juice: It’s worth the effort. The bottled stuff is fine but fresh juice gives a brighter, more complex flavor.
- Baking Time: Watch the bars closely near the end. The jiggle test is your friend—the center should wobble slightly but not be liquid.
- Cooling & Chilling: Don’t rush cooling. Sudden temperature changes can cause cracks or soggy crust. Let the bars cool gradually before refrigerating.
- Cutting Bars: Use a hot, clean knife for smooth edges and wipe it between cuts to avoid crumbs sticking.
I remember one time I forgot to soften the cream cheese properly and ended up with lumpy filling—lesson learned! Also, multitasking by prepping the crust while the oven preheats saves precious minutes.
Variations & Adaptations
You can easily tweak this recipe to suit different tastes or dietary needs:
- Gluten-Free: Swap graham cracker crumbs for gluten-free graham-style crumbs or crushed gluten-free cookies.
- Dairy-Free: Use dairy-free cream cheese and coconut condensed milk; swap butter with coconut oil.
- Flavor Twist: Add a teaspoon of coconut extract or swap half the key lime juice with lemon juice for a citrus blend.
- Chocolate Layer: Spread a thin layer of melted white chocolate on the cooled crust before adding the filling for a sweet surprise.
- Personal Favorite: I tried adding a graham cracker crumb topping mixed with a bit of brown sugar and cinnamon before baking once—totally worth the extra crunch.
For a no-bake version, you can chill the crust and filling mixture overnight, but honestly, the baked version has better texture and flavor depth. Feel free to customize the sweetness by adjusting sugar slightly, depending on your lime juice tartness.
Serving & Storage Suggestions
These bars are best served chilled straight from the fridge—cool and refreshing, especially on warm days. I like to garnish with a dollop of whipped cream and a thin slice of lime for that extra pop of color and flavor.
They pair beautifully with a cup of iced tea, a light white wine like Sauvignon Blanc, or even a sparkling water with a splash of lime. For a little party, add fresh berries on the side for a splash of sweetness.
Store leftover bars in an airtight container in the refrigerator for up to 4 days. They keep well, and flavors develop even more over time. If you want to freeze them, wrap tightly in plastic wrap and place in a freezer bag—freeze for up to 3 months. Thaw overnight in the fridge before serving.
When reheating, just bring to room temperature or enjoy cold—these bars are pretty flexible.
Nutritional Information & Benefits
Each bar (assuming 12 servings) roughly contains:
| Calories | 280 kcal |
|---|---|
| Fat | 16g |
| Carbohydrates | 28g |
| Protein | 5g |
| Sugar | 22g |
The key lime juice provides a good dose of vitamin C, which supports immunity. Cream cheese adds protein and calcium, though it’s best enjoyed in moderation due to saturated fat. Using fresh ingredients means fewer preservatives and better flavor. For gluten-sensitive folks, swapping the crust is easy, making this dessert accessible. Just note the sweetened condensed milk contains dairy and sugar, so it’s not suitable for low-sugar or dairy-free diets unless modified.
Conclusion
To wrap it up, these tangy creamy Key lime pie cheesecake bars are a delightful mix of bright citrus and rich cheesecake goodness that’s both simple and rewarding to make. Honestly, they’ve become one of my favorite ways to impress guests without breaking a sweat or turning the kitchen upside down. Whether you’re a dessert novice or a seasoned baker, the balance of flavors and textures here is hard to beat.
Feel free to tweak the recipe to match your taste buds, whether adding a chocolate twist or making it dairy-free. I love how this recipe brings a bit of sunshine to any table, and I hope it does the same for you. If you try it out, I’d love to hear how it goes—drop a comment below or share your own spin on it!
Happy baking and enjoy every tangy, creamy bite!
Frequently Asked Questions (FAQs)
Can I use regular lime juice instead of key lime juice?
Yes, regular lime juice works fine, though key limes have a slightly sweeter, more floral flavor that’s traditional for this dessert.
How do I store leftover cheesecake bars?
Store them in an airtight container in the fridge for up to 4 days. You can also freeze them for up to 3 months, just thaw overnight before serving.
Can I make these bars ahead of time?
Absolutely. They taste even better after chilling overnight, which helps the flavors meld and the texture firm up nicely.
What if my filling cracks after baking?
That usually means it baked too long or cooled too quickly. Try reducing baking time slightly and cool the bars gradually at room temperature before refrigerating.
Is there a vegan version of this recipe?
You can try using dairy-free cream cheese, coconut condensed milk, and plant-based butter alternatives, but the texture and flavor may vary slightly.
Pin This Recipe!
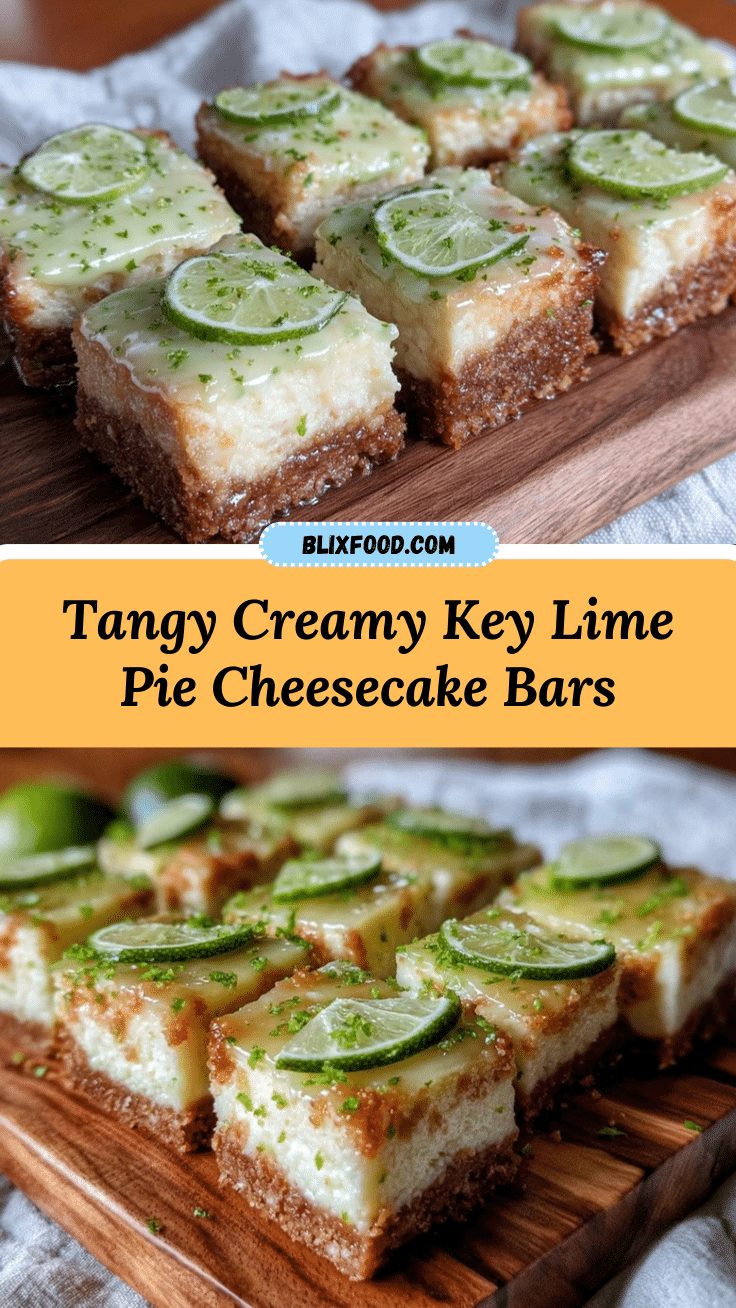
Tangy Creamy Key Lime Pie Cheesecake Bars
These tangy creamy Key lime pie cheesecake bars combine the bright tartness of fresh key lime with the rich indulgence of cheesecake on a buttery graham cracker crust, perfect for any occasion.
- Prep Time: 15 minutes
- Cook Time: 30 minutes
- Total Time: 4 hours 45 minutes
- Yield: 12 bars 1x
- Category: Dessert
- Cuisine: American
Ingredients
- 1 1/2 cups graham cracker crumbs (about 12 full sheets)
- 1/4 cup granulated sugar
- 6 tablespoons unsalted butter, melted
- Pinch of salt
- 16 oz (450g) cream cheese, softened
- 1 can (14 oz / 396g) sweetened condensed milk
- 3 large eggs, room temperature
- 1/2 cup fresh key lime juice (about 6–8 limes)
- Zest of 2 key limes
- 1 teaspoon vanilla extract
- Pinch of salt
- Optional Topping: whipped cream or lightly sweetened whipped topping
- Optional Topping: thin lime slices or zest for garnish
Instructions
- Preheat oven to 350°F (175°C). In a medium bowl, combine graham cracker crumbs, granulated sugar, and a pinch of salt. Pour in melted butter and stir until mixture resembles wet sand. Press evenly into bottom of 9×9 inch baking pan. Bake for 8-10 minutes until edges turn golden. Remove and cool slightly.
- In a large mixing bowl, beat softened cream cheese with an electric mixer on medium speed until smooth and creamy. Gradually add sweetened condensed milk, mixing until fully incorporated. Add eggs one at a time, beating well after each addition.
- Stir in fresh key lime juice, zest of key limes, vanilla extract, and a pinch of salt. Mix gently on low speed just to combine, avoiding overmixing.
- Pour filling over cooled crust, smoothing top with spatula. Tap pan lightly to release air bubbles. Bake for 20-25 minutes at 350°F (175°C) until edges are set but center jiggles slightly.
- Let bars cool to room temperature on wire rack for about an hour. Cover and refrigerate for at least 4 hours or overnight.
- Cut into 12 bars using a sharp knife dipped in hot water and wiped dry between cuts. Top with whipped cream and garnish with lime slices if desired.
Notes
Soften cream cheese well before mixing to avoid lumps. Avoid overmixing after adding eggs to prevent cracks. Use fresh key lime juice for best flavor. Use the jiggle test to avoid overbaking. Cool bars gradually before refrigerating to prevent cracks. Dip knife in hot water and wipe between cuts for clean slices. For gluten-free, swap graham crackers with gluten-free crumbs. For dairy-free, use plant-based cream cheese and coconut condensed milk.
Nutrition
- Serving Size: 1 bar
- Calories: 280
- Sugar: 22
- Fat: 16
- Carbohydrates: 28
- Protein: 5
Keywords: key lime pie, cheesecake bars, tangy dessert, creamy dessert, easy homemade dessert, summer dessert, no-fuss dessert


