
Let me tell you, the smell of buttery, cinnamon-spiced dough mingling with melted chocolate and toasted nuts drifting through the kitchen is enough to make anyone’s mouth water during the holidays. The first time I baked these Ultimate Chewy Kitchen Sink Christmas Cookies, I was instantly hooked—the kind of moment where you pause, take a deep breath, and just smile because you know you’re onto something truly special. When I was knee-high to a grasshopper, my grandma’s holiday cookie tins were the stuff of legend, but these cookies? They bring all those nostalgic vibes into one dangerously easy, chewy bite.
Years ago, on a chilly December afternoon, I stumbled upon this recipe while trying to recreate a cookie that captured every festive flavor I loved. My family couldn’t stop sneaking them off the cooling rack (and I can’t really blame them). Honestly, these cookies are pure, nostalgic comfort wrapped up in a chewy, colorful package. Perfect for potlucks, a sweet treat for your kids, or to brighten up your Pinterest cookie board, these kitchen sink cookies pack every holiday favorite in one bite.
I’ve tested this recipe more times than I can count—in the name of research, of course—and it’s become a staple for family gatherings, gifting, and cozy winter nights. Trust me, this is the holiday cookie you’re going to want to bookmark and make again and again.
Why You’ll Love This Recipe
After countless batches and holiday seasons, here’s why these Ultimate Chewy Kitchen Sink Christmas Cookies have earned their spot in my recipe box:
- Quick & Easy: Comes together in under 30 minutes, perfect for busy holiday baking sessions or last-minute cookie cravings.
- Simple Ingredients: No fancy grocery runs needed; you likely already have everything in your pantry and fridge.
- Perfect for Holiday Gatherings: Great for cookie exchanges, Christmas parties, or just brightening up your winter afternoons.
- Crowd-Pleaser: Kids and adults alike rave about the chewy texture combined with the melty chocolate and festive bits.
- Unbelievably Delicious: The blend of spices, mix-ins, and that chewy center make for a truly soul-soothing treat.
What makes this recipe different? Well, it’s the little things—the balanced cinnamon and nutmeg hit, the way the brown sugar keeps every bite chewy, and the “kitchen sink” approach of tossing in all your favorite holiday goodies. It’s not just another cookie; it’s your best holiday cookie yet. Honestly, this recipe makes you close your eyes after the first bite and savor the magic. It’s comfort food, holiday-style, without any fuss but all the warmth.
What Ingredients You Will Need
This recipe uses simple, wholesome ingredients to deliver bold flavor and that satisfying chewy texture without any fuss. Most are pantry staples, and if you’re missing a few, substitutions are easy.
- All-purpose flour (2 ½ cups / 315g) – the base for our cookie dough.
- Baking soda (1 teaspoon) – helps the cookies rise just right.
- Ground cinnamon (1 teaspoon) and ground nutmeg (½ teaspoon) – bring that classic holiday warmth.
- Salt (½ teaspoon) – balances the sweetness perfectly.
- Unsalted butter, softened (1 cup / 225g) – I always use Land O’Lakes for best creamy texture.
- Brown sugar, packed (1 cup / 200g) – the secret to chewiness and rich flavor.
- Granulated sugar (½ cup / 100g) – adds just the right amount of sweetness.
- Large eggs (2, room temperature) – for structure and moisture.
- Pure vanilla extract (2 teaspoons) – because vanilla makes everything better.
- Kitchen sink mix-ins:
- Mini chocolate chips (1 cup / 170g) – melty chocolate magic.
- Chopped walnuts or pecans (½ cup / 60g) – adds crunch and nuttiness.
- Red and green sprinkles (½ cup / 80g) – for that festive pop of color.
- Dried cranberries or raisins (½ cup / 75g) – tartness to balance the sweetness.
If you want to switch things up, almond flour works great for a gluten-free twist (just expect a slightly different texture). For dairy-free needs, swap butter with coconut oil and use dairy-free chocolate chips. In summer, I love swapping red and green sprinkles for fresh berries or chopped dried apricots for a seasonal spin.
Equipment Needed
- Mixing bowls: Large ones for combining wet and dry ingredients separately. I prefer glass or stainless steel for easy cleanup.
- Electric mixer or stand mixer: To cream the butter and sugar until light and fluffy. A hand mixer works just fine if you don’t have a stand mixer.
- Measuring cups and spoons: Accurate measurements are key to chewy perfection.
- Baking sheets: Non-stick or lined with parchment paper to prevent sticking and ensure even baking.
- Cooling rack: Essential for letting cookies cool properly without getting soggy.
- Spoon or cookie scoop: For uniform cookie sizes, I use a medium cookie scoop—makes life so much easier.
If you don’t have a cookie scoop, a tablespoon works well too. Keeping your baking sheets cool between batches also helps prevent spreading (trust me, I learned this the hard way!).
Preparation Method
- Preheat your oven to 350°F (175°C). Line two baking sheets with parchment paper or silicone mats. This prevents sticking and helps cookies bake evenly. (Time: 10 minutes)
- Mix dry ingredients: In a medium bowl, whisk together 2 ½ cups (315g) all-purpose flour, 1 teaspoon baking soda, 1 teaspoon ground cinnamon, ½ teaspoon ground nutmeg, and ½ teaspoon salt. Set aside.
- Cream butter and sugars: In a large bowl, use an electric mixer to beat 1 cup (225g) softened unsalted butter with 1 cup (200g) packed brown sugar and ½ cup (100g) granulated sugar until light and fluffy, about 3-4 minutes. This step is crucial for that chewy texture.
- Add eggs and vanilla: Beat in 2 large room-temperature eggs, one at a time, then stir in 2 teaspoons pure vanilla extract. The batter will look smooth and glossy.
- Combine wet and dry: Gradually add the dry ingredients to the wet mixture, mixing on low speed until just combined. Don’t overmix here—you want tender cookies, not tough ones.
- Fold in mix-ins: Using a sturdy spatula, fold in 1 cup mini chocolate chips, ½ cup chopped walnuts or pecans, ½ cup red and green sprinkles, and ½ cup dried cranberries or raisins. This “kitchen sink” mix makes every bite exciting!
- Portion dough: Use a cookie scoop or tablespoon to drop dough balls 2 inches apart on prepared baking sheets. This spacing prevents cookies from merging as they bake.
- Bake: Place baking sheets in the oven and bake for 10-12 minutes, or until edges are golden but centers still look slightly soft. The cookies will firm up as they cool.
- Cool: Let cookies rest on the baking sheet for 5 minutes before transferring to a wire rack to cool completely. This prevents breakage and helps achieve that perfect chewy texture.
If your kitchen is warm, refrigerate the dough for 30 minutes before baking to reduce spreading. You’ll know they’re done when the edges are golden and you can gently press the center without it collapsing.
Cooking Tips & Techniques
Here’s what I’ve learned from many holiday baking sessions that’ll help you get these Ultimate Chewy Kitchen Sink Christmas Cookies just right:
- Room temperature ingredients: Butter and eggs straight from the fridge can cause uneven mixing. Let them sit out for about 30 minutes before starting.
- Don’t overmix the dough: Once you add flour, mix just until combined. Overworking the dough develops gluten and makes cookies dense.
- Brown sugar is your chewy secret: It adds moisture and depth. Don’t skimp!
- Use parchment paper or silicone mats: They help cookies bake evenly and prevent sticking.
- Watch the baking time closely: Baking just a bit too long will dry them out. Pull them out when edges are set but centers still look soft.
- Cool on the pan first: Cookies keep cooking a bit after coming out of the oven, so let them rest before moving to racks.
- Multitask by prepping dough in advance: You can mix the dough the night before and bake fresh the next day for ultimate freshness and flavor.
One time, I ignored the “don’t overmix” rule and ended up with hockey puck cookies—lesson learned! These tips save you from that fate.
Variations & Adaptations
You know, the beauty of these kitchen sink cookies is how adaptable they are. Here are a few ways to make them your own:
- Dietary swaps: Try almond or oat flour for gluten-free options (expect a slightly softer texture). Use dairy-free butter substitutes and vegan chocolate chips for a vegan-friendly batch.
- Seasonal flavors: Swap out sprinkles for chopped dried apricots or add orange zest for a bright, festive twist. In summer, fresh berries work surprisingly well too.
- Flavor boosts: Add a teaspoon of espresso powder to deepen the chocolate flavor, or toss in some chopped toffee bits for extra crunch.
- Different cooking methods: For a fun change, you can flatten dough balls slightly and cook them as skillet cookies on medium heat for a chewy, caramelized crust.
- Personal variation: I once added a handful of toasted coconut flakes and swapped walnuts for macadamia nuts—total crowd-pleaser!
Serving & Storage Suggestions
These Ultimate Chewy Kitchen Sink Christmas Cookies are best served at room temperature, fresh from the cooling rack or after a few hours when the flavors have melded nicely. Pair them with a cold glass of milk, a steaming cup of cocoa, or your favorite holiday blend coffee for the ultimate cozy treat.
Store leftover cookies in an airtight container at room temperature for up to 5 days. If you want to hold onto them longer, freeze the baked cookies in a zip-top bag for up to 3 months. To reheat, pop them in a 300°F (150°C) oven for 5 minutes or microwave for 15 seconds to bring back that chewy warmth.
Fun fact: the flavors actually deepen after a day or two, so if you can wait, that’s when these cookies really hit their stride. Just don’t wait too long, or they’ll mysteriously disappear!
Nutritional Information & Benefits
Each cookie (based on 24 cookies per batch) has approximately 180-200 calories, 8 grams fat, 25 grams carbohydrates, and 2 grams protein. While these aren’t health food, the inclusion of nuts adds heart-healthy fats and some protein, and dried cranberries bring a touch of antioxidants.
You can tweak this recipe for special diets by swapping flours or using sugar substitutes, making it accessible for gluten-free or lower-sugar needs. Just keep in mind the allergen potential from nuts and eggs, which are key for texture and flavor.
From my wellness perspective, these cookies are a festive treat to savor mindfully—perfect for sharing and celebrating without the stress of complicated ingredients or techniques.
Conclusion
The Ultimate Chewy Kitchen Sink Christmas Cookies are the kind of recipe that makes holiday baking joyful and rewarding. They capture everything you want in a festive cookie: chewy texture, burst of flavors, and that irresistible kitchen sink mix of goodies. Honestly, I love how customizable they are—you can tweak the ingredients to fit your pantry, taste buds, or dietary needs.
Give this recipe a try and make it your own! I’d love to hear how you personalize your batch or any fun mix-ins you add. Drop a comment, share your photos, or tell me about your baking adventures. These cookies feel like a warm hug in every bite, and I’m sure they’ll become a favorite in your holiday tradition too.
Happy baking, friends!
FAQs
Can I make these cookies ahead of time?
Absolutely! You can prepare the dough up to 2 days in advance and keep it refrigerated or freeze for longer storage. Bake fresh when ready for best results.
What can I use if I don’t have mini chocolate chips?
Regular chocolate chips or chunks chopped from a chocolate bar work perfectly. Just adjust the amount to your liking.
How do I keep my cookies chewy and prevent them from getting hard?
Don’t overbake them—pull them out when edges are set but centers still look slightly soft. Store in an airtight container once cooled.
Can I freeze the unbaked cookie dough?
Yes! Scoop dough balls onto a baking sheet, freeze until solid, then transfer to a freezer bag. Bake from frozen, adding a couple extra minutes to baking time.
What’s the best way to avoid cookies spreading too much?
Make sure your butter isn’t too soft or melted, chill the dough for 30 minutes before baking, and space dough balls well apart on the baking sheet.
Pin This Recipe!

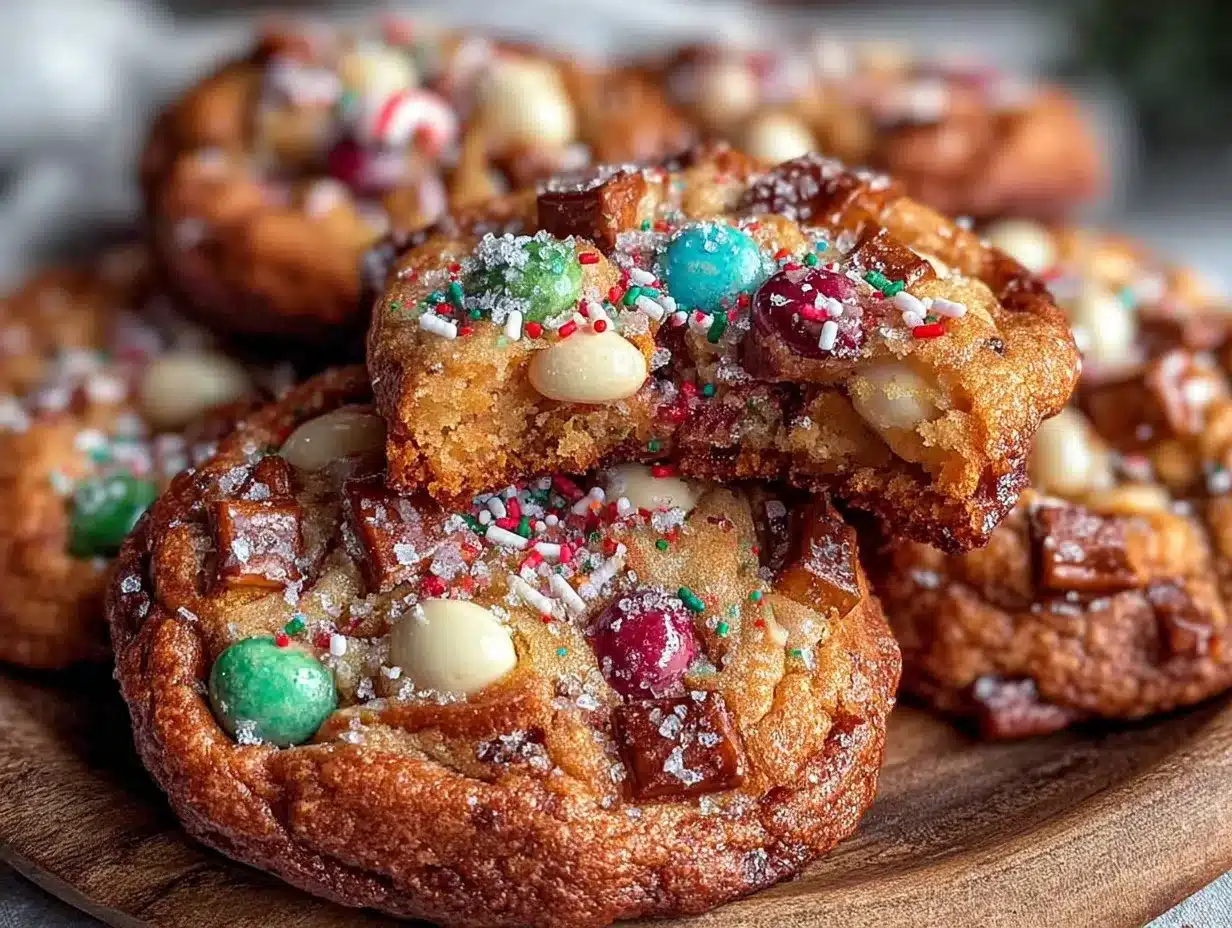
Ultimate Chewy Kitchen Sink Christmas Cookies

These chewy holiday cookies combine buttery, cinnamon-spiced dough with melted chocolate, toasted nuts, and festive mix-ins for a nostalgic and crowd-pleasing treat perfect for holiday gatherings.
- Prep Time: 20 minutes
- Cook Time: 12 minutes
- Total Time: 32 minutes
- Yield: 24 cookies 1x
- Category: Dessert
- Cuisine: American
Ingredients
- 2 ½ cups (315g) all-purpose flour
- 1 teaspoon baking soda
- 1 teaspoon ground cinnamon
- ½ teaspoon ground nutmeg
- ½ teaspoon salt
- 1 cup (225g) unsalted butter, softened
- 1 cup (200g) packed brown sugar
- ½ cup (100g) granulated sugar
- 2 large eggs, room temperature
- 2 teaspoons pure vanilla extract
- 1 cup (170g) mini chocolate chips
- ½ cup (60g) chopped walnuts or pecans
- ½ cup (80g) red and green sprinkles
- ½ cup (75g) dried cranberries or raisins
Instructions
- Preheat your oven to 350°F (175°C). Line two baking sheets with parchment paper or silicone mats.
- In a medium bowl, whisk together the flour, baking soda, cinnamon, nutmeg, and salt. Set aside.
- In a large bowl, use an electric mixer to beat the softened butter with brown sugar and granulated sugar until light and fluffy, about 3-4 minutes.
- Beat in the eggs one at a time, then stir in the vanilla extract until the batter is smooth and glossy.
- Gradually add the dry ingredients to the wet mixture, mixing on low speed until just combined. Do not overmix.
- Fold in the mini chocolate chips, chopped nuts, sprinkles, and dried cranberries or raisins using a spatula.
- Use a cookie scoop or tablespoon to drop dough balls 2 inches apart on the prepared baking sheets.
- Bake for 10-12 minutes, or until edges are golden but centers still look slightly soft.
- Let cookies rest on the baking sheet for 5 minutes before transferring to a wire rack to cool completely.
Notes
Use room temperature butter and eggs for even mixing. Do not overmix the dough after adding flour to keep cookies tender. Chill dough for 30 minutes before baking to reduce spreading. Baking sheets should be cool between batches. Cookies are done when edges are golden but centers still look soft. Let cookies cool on the pan before transferring to a rack.
Nutrition
- Serving Size: 1 cookie
- Calories: 190
- Sugar: 15
- Sodium: 120
- Fat: 8
- Saturated Fat: 5
- Carbohydrates: 25
- Fiber: 1
- Protein: 2
Keywords: holiday cookies, chewy cookies, Christmas cookies, kitchen sink cookies, easy holiday baking, festive cookies, chocolate chip cookies, nut cookies


