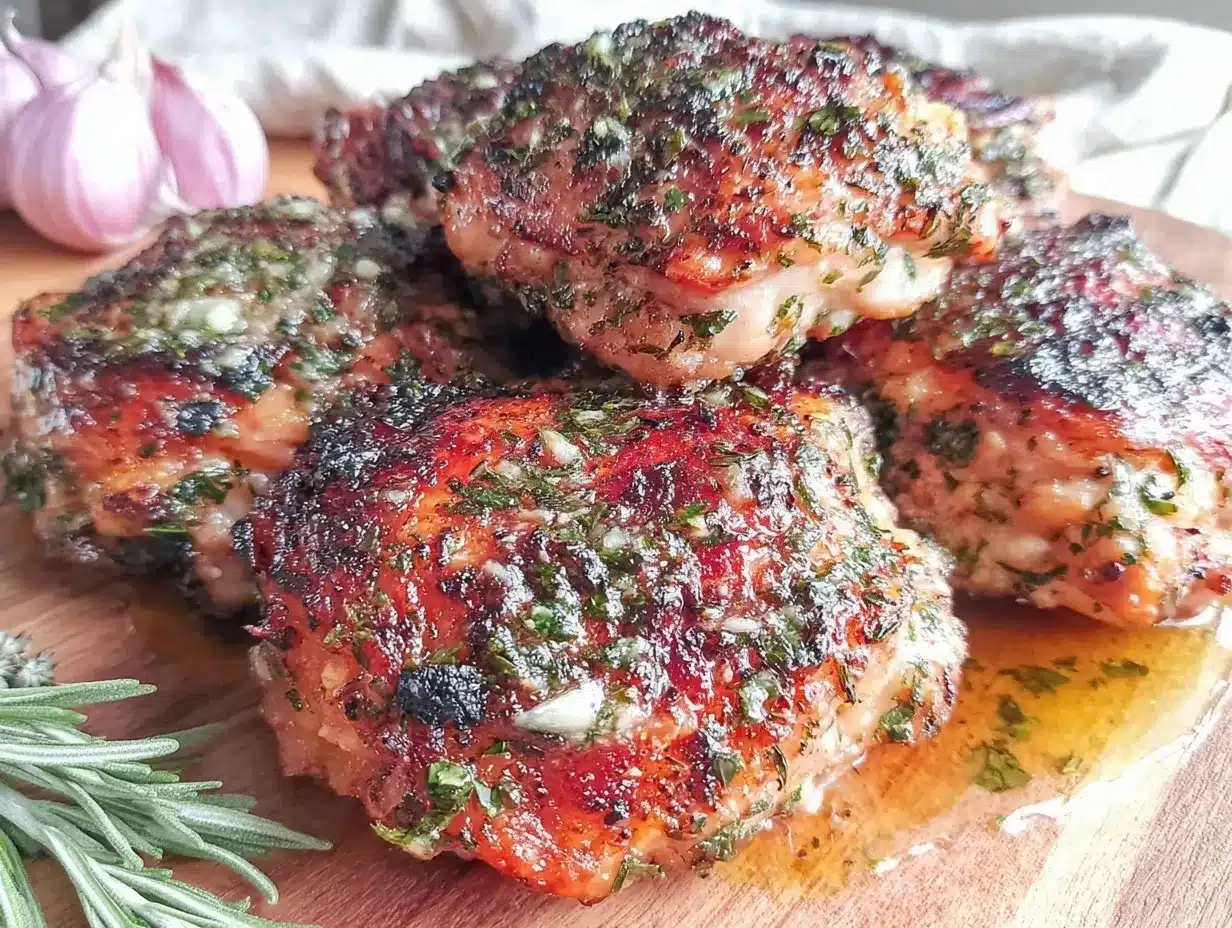
For a while, I just accepted that crispy boneless skinless chicken thighs cooked in an air fryer wouldn’t quite hit that golden, crunchy note I craved. Sure, they’d cook fast and stay juicy, but something was always missing—whether it was the texture or that punchy garlic herb flavor that makes you want to go back for another bite. I remember one evening, juggling dinner prep and emails, tossing chicken thighs into the air fryer hoping for a quick fix. But when I bit into that first piece, I realized the crispness was barely there, and the seasoning lacked depth. It wasn’t a disaster, just… not quite right.
Over time, by tweaking the dry rub, the cooking times, and then adding a dollop of garlic herb butter right after cooking, I found a way to get that satisfying crunch on the outside paired with rich, buttery garlic notes that stick with you. The herbs add a freshness that balances the boldness of the garlic, and the butter melts into the chicken, sealing in moisture while giving it a silky finish. Honestly, it’s not flashy or complicated, but it’s the kind of recipe that’s quietly dependable. It’s perfect for those nights when you want something simple but still crave a little kitchen magic.
This recipe stuck because it gave me exactly what I was missing before: crispy air fryer boneless skinless chicken thighs with that unmistakable garlic herb butter flavor that feels both comforting and a bit special. It’s the kind of meal I trust to come together easily, taste great, and satisfy without fuss. And sometimes, that’s exactly what dinner needs to be.
Why You’ll Love This Recipe
After trying countless variations, this crispy air fryer boneless skinless chicken thighs recipe with garlic herb butter stands out for good reasons. It’s not just another chicken thigh recipe—it’s one I rely on for quick dinners and also for impressing friends with minimal effort. Here’s why it’s worth keeping in your recipe box:
- Quick & Easy: Ready in under 30 minutes, making it a lifesaver for busy weeknights or those unexpected last-minute cravings.
- Simple Ingredients: Uses everyday pantry staples—no need to hunt down exotic herbs or specialty oils.
- Perfect for Any Occasion: From casual dinners to casual gatherings, this recipe fits right in. It pairs especially well with simple sides or even some of the fresh shrimp salad appetizers I enjoy making for guests.
- Crowd-Pleaser: Kids and adults alike rave about the crispy skin-like texture and the buttery garlic punch.
- Unbelievably Delicious: The crisp exterior contrasts perfectly with juicy, tender meat inside, while the garlic herb butter adds a layer of richness that feels indulgent but not heavy.
This recipe isn’t just a rehash of air fryer chicken thighs. The secret lies in the garlic herb butter applied right after cooking, which seeps into the crispy crust, giving it that irresistible flavor and shine. It’s comfort food with a touch of elegance, without the hassle. Honestly, this is the kind of dish that makes you want to close your eyes and savor every bite—no fancy techniques, just good food that feels right.
What Ingredients You Will Need
This recipe uses simple, wholesome ingredients to deliver bold flavor and satisfying texture without the fuss. Most are pantry staples, and the fresh herbs and garlic make a big difference. Here’s what you’ll need:
- Boneless skinless chicken thighs (about 6 pieces, roughly 1.5 pounds / 680 grams) – I prefer thighs for their juiciness and flavor
- Olive oil (2 tablespoons) – helps crisp the exterior; extra virgin is fine, but regular olive oil works well
- Garlic powder (1 teaspoon) – adds a subtle savory depth to the chicken
- Onion powder (1 teaspoon) – balances the garlic with mild sweetness
- Paprika (1 teaspoon) – for a little smoky color and warmth
- Salt and freshly ground black pepper (to taste) – essential for seasoning
- Butter (4 tablespoons, unsalted, softened) – forms the base of the garlic herb butter
- Fresh garlic (2 cloves, minced) – for that punchy garlic flavor in the butter
- Fresh parsley (1 tablespoon, finely chopped) – adds freshness and color to the butter
- Fresh thyme (1 teaspoon, finely chopped) – for a subtle herbaceous note
- Fresh rosemary (1 teaspoon, finely chopped) – optional but recommended for aroma
For best results, I recommend using fresh herbs from your garden or a good-quality grocery source. If you don’t have fresh herbs handy, dried ones will work in a pinch—just reduce the quantity by half as they’re more concentrated. If you want a dairy-free option, swapping butter for a plant-based spread works, but the flavor will be a bit different. For a gluten-free meal, this recipe is naturally safe as it contains no wheat or gluten ingredients.
Equipment Needed
The great thing about this recipe is it doesn’t require fancy gear. Here’s what you’ll want on hand:
- Air fryer: Obviously, key for the crispy finish. I use a 5-quart basket-style model, but any air fryer with good airflow will do.
- Mixing bowls: One medium bowl for seasoning the chicken, and a small bowl for mixing the garlic herb butter.
- Measuring spoons: For precise seasoning.
- Sharp knife and cutting board: For mincing garlic and chopping herbs.
- Spatula or tongs: To flip the chicken halfway through cooking without tearing the crust.
If you don’t have an air fryer, a convection oven or a high-temperature broiler can be alternatives, but you’ll need to watch the cooking closely to avoid drying out the thighs. Maintenance-wise, it’s best to clean your air fryer basket with warm soapy water after each use to keep it crisping like new. Budget air fryers work fine, but investing in one with good airflow and a reliable timer makes a difference in the texture.
Preparation Method
- Pat the chicken thighs dry: Use paper towels to remove any excess moisture. This helps the skin get crispier in the air fryer. (About 2 minutes)
- Season the chicken: In a medium bowl, drizzle the chicken thighs with olive oil and sprinkle garlic powder, onion powder, paprika, salt, and pepper. Toss well to coat evenly. (3-5 minutes)
- Preheat the air fryer: Set to 400°F (200°C) and let it heat up for about 5 minutes. Preheating ensures the chicken starts crisping immediately.
- Arrange chicken in the air fryer basket: Place thighs skin-side up (or where the skin used to be) in a single layer, making sure they don’t overlap. Overcrowding can lead to soggy spots. (1-2 minutes)
- Cook the chicken: Air fry at 400°F (200°C) for 10 minutes. Then flip the thighs and cook for an additional 8-10 minutes until the internal temperature reaches 165°F (74°C) and the exterior is golden and crispy. The exact time may vary depending on your air fryer model, so use a meat thermometer if possible.
- Prepare the garlic herb butter: While the chicken cooks, mix softened butter with minced garlic, chopped parsley, thyme, and rosemary in a small bowl. Stir until well combined.
- Brush the chicken with garlic herb butter: Once the chicken is out of the air fryer, immediately brush the thighs generously with the garlic herb butter. The warmth will melt the butter and infuse the chicken with flavor. (2-3 minutes)
- Rest and serve: Let the chicken rest for 5 minutes before serving to allow juices to redistribute and flavors to meld.
Pro tip: If you want to amp up the garlic flavor, add a pinch of garlic flakes to the seasoning mix. Also, be careful flipping the chicken so you don’t tear the crispy crust—using tongs gently works best. If the chicken isn’t quite crispy enough after the first cook, a quick 2-3 minute extra blast in the air fryer can do the trick.
Cooking Tips & Techniques
Cooking crispy air fryer boneless skinless chicken thighs is all about balancing heat and moisture, and there are a few tricks I learned the hard way.
- Dry the chicken thoroughly: It might sound obvious, but moisture is the enemy of crispness. Patting the thighs dry before seasoning really makes a difference.
- Don’t overcrowd the basket: Air needs to circulate to crisp the chicken evenly. Cook in batches if necessary.
- Use a meat thermometer: Overcooking dries out thighs, undercooking is unsafe. I aim for 165°F (74°C) internal temp for safety and juiciness.
- Butter timing matters: Adding the garlic herb butter right after cooking—not before—keeps the butter from burning and preserves its fresh flavor.
- Let it rest: Resting allows the juices to redistribute, so the chicken stays moist instead of leaking out when cut.
- Experiment with herbs: Sometimes I swap rosemary for oregano or add a touch of lemon zest to the butter for a bright twist.
One time, I rushed and added the garlic butter before cooking and ended up with burnt butter flavor. Lesson learned! Also, multitasking by prepping the herb butter while the chicken cooks saves valuable time. If you find your air fryer doesn’t crisp as much, try increasing the temperature slightly for the last few minutes but watch closely.
Variations & Adaptations
This recipe is a great base for customization depending on your preferences or dietary needs:
- Spicy kick: Add ½ teaspoon smoked paprika and a pinch of cayenne pepper to the seasoning for some heat.
- Herb swap: Use fresh basil and oregano instead of thyme and rosemary for a Mediterranean vibe.
- Dairy-free: Replace butter with vegan margarine or coconut oil and omit fresh herbs if unavailable.
- Air fryer alternative: If you don’t have an air fryer, bake thighs on a wire rack set over a baking sheet at 425°F (220°C) for about 25-30 minutes, then brush with garlic herb butter.
- Extra crunch: Lightly dust the thighs with a mixture of almond flour and parmesan before air frying for an added crispy crust.
I personally love adding a squeeze of lemon juice over the finished chicken sometimes, which brightens the rich butter flavors beautifully. And if you want to turn this into a full meal, pairing with roasted veggies or a simple salad like the fresh shrimp salad appetizer is a no-brainer.
Serving & Storage Suggestions
These crispy air fryer boneless skinless chicken thighs are best served hot right after brushing with the garlic herb butter. A quick rest after cooking helps keep them juicy and tender. Serve them alongside simple sides like steamed green beans, roasted potatoes, or a fresh salad for a balanced meal.
For leftovers, store the chicken in an airtight container in the refrigerator for up to 3 days. To reheat, pop the thighs back into the air fryer at 350°F (175°C) for 5-7 minutes to revive the crispiness rather than microwaving, which can make the crust soggy. The garlic herb butter flavor actually deepens after a day in the fridge, so sometimes I find the leftovers taste even better.
If you want to prepare ahead for a party, these chicken thighs pair nicely with other easy-to-make dishes like the crispy garlic butter shrimp bites, making your spread both flavorful and effortless.
Nutritional Information & Benefits
Each serving of these crispy chicken thighs (around 2 thighs) contains approximately:
| Calories | 320 |
|---|---|
| Protein | 28g |
| Fat | 22g |
| Carbohydrates | 1g |
Chicken thighs are a great source of protein and provide essential nutrients like iron and zinc. Using skinless cuts reduces saturated fat, and the garlic herb butter adds antioxidants from fresh herbs and garlic, which have known immune-supporting properties. This recipe fits well into low-carb and gluten-free diets, making it accessible for many eating preferences.
Conclusion
This crispy air fryer boneless skinless chicken thighs with garlic herb butter recipe is a straightforward, reliable way to get perfectly cooked, juicy chicken every time. It’s not complicated or overdone, but the garlic herb butter finish makes it feel a little special—just enough to make dinner feel like something worth savoring. More than anything, it’s a recipe I keep coming back to because it delivers exactly what I want: crispy, flavorful chicken with minimal effort.
Don’t hesitate to tweak the herbs or spices to suit your mood or pantry, and remember that the magic really happens when you add that warm garlic herb butter right at the end. I hope you find this recipe as quietly satisfying as I do. If you give it a try, I’d love to hear how it turned out or what variations you made!
Happy cooking!
FAQs
Can I use bone-in chicken thighs instead of boneless?
Yes, but bone-in thighs will take longer to cook—usually about 5-8 minutes more. Use a meat thermometer to check for 165°F (74°C) internal temperature for safety.
How do I make the chicken extra crispy in the air fryer?
Pat the chicken very dry before seasoning, don’t overcrowd the basket, and make sure to preheat the air fryer. You can also increase the cooking temperature slightly at the end for a couple minutes to get extra crispness.
Can I prepare the garlic herb butter ahead of time?
Absolutely! You can make it a day in advance and store it in the fridge. Bring it to room temperature before brushing on hot chicken for best flavor and texture.
What can I serve with these crispy chicken thighs?
Simple sides like roasted vegetables, mashed potatoes, or a fresh salad work well. For something light, try pairing with the fresh shrimp salad appetizer.
Is this recipe suitable for meal prep?
Yes! These chicken thighs reheat well in the air fryer and maintain good texture. Store in an airtight container in the fridge for up to 3 days, making them convenient for quick lunches or dinners.
Pin This Recipe!

Crispy Air Fryer Boneless Skinless Chicken Thighs Easy Garlic Herb Butter Recipe

This recipe delivers crispy boneless skinless chicken thighs cooked in an air fryer, finished with a rich garlic herb butter for a juicy, flavorful meal that’s quick and easy to prepare.
- Prep Time: 10 minutes
- Cook Time: 20 minutes
- Total Time: 30 minutes
- Yield: 3 servings 1x
- Category: Main Course
- Cuisine: American
Ingredients
- 6 boneless skinless chicken thighs (about 1.5 pounds / 680 grams)
- 2 tablespoons olive oil
- 1 teaspoon garlic powder
- 1 teaspoon onion powder
- 1 teaspoon paprika
- Salt and freshly ground black pepper to taste
- 4 tablespoons unsalted butter, softened
- 2 cloves fresh garlic, minced
- 1 tablespoon fresh parsley, finely chopped
- 1 teaspoon fresh thyme, finely chopped
- 1 teaspoon fresh rosemary, finely chopped (optional)
Instructions
- Pat the chicken thighs dry with paper towels to remove excess moisture.
- In a medium bowl, drizzle the chicken thighs with olive oil and sprinkle garlic powder, onion powder, paprika, salt, and pepper. Toss well to coat evenly.
- Preheat the air fryer to 400°F (200°C) for about 5 minutes.
- Arrange the chicken thighs in a single layer in the air fryer basket, skin-side up, ensuring they do not overlap.
- Air fry at 400°F (200°C) for 10 minutes. Flip the thighs and cook for an additional 8-10 minutes until the internal temperature reaches 165°F (74°C) and the exterior is golden and crispy.
- While the chicken cooks, mix softened butter with minced garlic, chopped parsley, thyme, and rosemary in a small bowl until well combined.
- Once the chicken is out of the air fryer, immediately brush the thighs generously with the garlic herb butter.
- Let the chicken rest for 5 minutes before serving to allow juices to redistribute.
Notes
Pat chicken dry before seasoning to ensure crispiness. Do not overcrowd the air fryer basket. Use a meat thermometer to check for 165°F internal temperature. Brush garlic herb butter after cooking to avoid burning the butter. Rest chicken before serving. For extra crispness, add 2-3 minutes of cooking at the end if needed.
Nutrition
- Serving Size: Approximately 2 chic
- Calories: 320
- Sodium: 300
- Fat: 22
- Saturated Fat: 9
- Carbohydrates: 1
- Protein: 28
Keywords: air fryer chicken thighs, crispy chicken, garlic herb butter, boneless skinless chicken, quick dinner, easy chicken recipe