The lunchbox was empty by mid-morning — my coworker was already asking if I could share the recipe again. Third time this month. Honestly, I didn’t expect the Easy Build-Ahead Deli Roll-Up Lunchbox to get such a warm reception. I mean, it’s just a simple deli roll-up, right? But seeing those satisfied nods and hearing the “Where did you get these?!” texts reminded me how sometimes the easiest ideas turn out to be the most loved.
It all started on a hectic Monday when I realized my usual sandwich routine was more of a scramble than a relaxing midday break. I needed something quick to prepare, portable, and yes — tasty enough to make people forget it was just a weekday lunch. Rolling up deli meats, cheese, and a few fresh veggies into neat wraps felt like a no-brainer. But the magic happened when I discovered that prepping these the night before meant I could grab and go without the usual morning chaos.
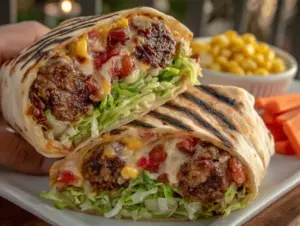
The crunch of fresh lettuce, the creamy spread melding with savory ham, and the soft tortilla shell made these roll-ups a small weekday celebration. Plus, they held up surprisingly well in the fridge — no sogginess, no wilting. It’s funny how a simple deli roll-up lunchbox became my go-to for busy weekdays, quietly making packed lunches something to look forward to rather than rush through.
Looking back, I think it stuck with me (and my coworkers) because it’s just straightforward — no fuss, no weird ingredients, just genuinely satisfying bites that remind you a quick homemade lunch can beat takeout any day. I trust you’ll find the same comfort here.
Why You’ll Love This Recipe
After testing this recipe multiple times, I can say it’s a weekday lifesaver with a few standout perks:
- Quick & Easy: You can assemble these deli roll-ups in under 15 minutes, perfect when mornings are rushed or you’re prepping for the week ahead.
- Simple Ingredients: No need for specialty stores. Most of the items are pantry staples or deli favorites you probably already have.
- Perfect for Busy Weekdays: These roll-ups fit neatly into lunchboxes and keep well overnight or even a couple of days, making them ideal for meal prep.
- Crowd-Pleaser: I’ve served these at casual office lunches and family picnics alike — they always disappear fast.
- Unbelievably Delicious: The balance of creamy spreads, savory meats, and fresh crunch hits just the right note every time.
What sets this recipe apart is the little technique I use to keep the wraps from getting soggy — layering a thin spread of cream cheese or mustard before piling on the fillings. It acts like a moisture barrier, keeping everything fresh and flavorful. Also, I recommend using high-quality deli meats (I usually go for Boar’s Head or Hormel) because it makes a noticeable difference in taste without extra effort.
Honestly, this isn’t just another sandwich — it’s the kind of lunch that makes you pause and enjoy the break, even on the busiest days. It’s straightforward, no-nonsense comfort food that fits your schedule and tastes like a treat.
What Ingredients You Will Need
This recipe uses simple, wholesome ingredients to deliver bold flavor and satisfying texture without the fuss. Most are easy to find, and you can substitute as needed depending on your preferences or dietary needs.
- For the Roll-Ups:
- Large flour tortillas (10-inch/25 cm) – soft and flexible for easy rolling
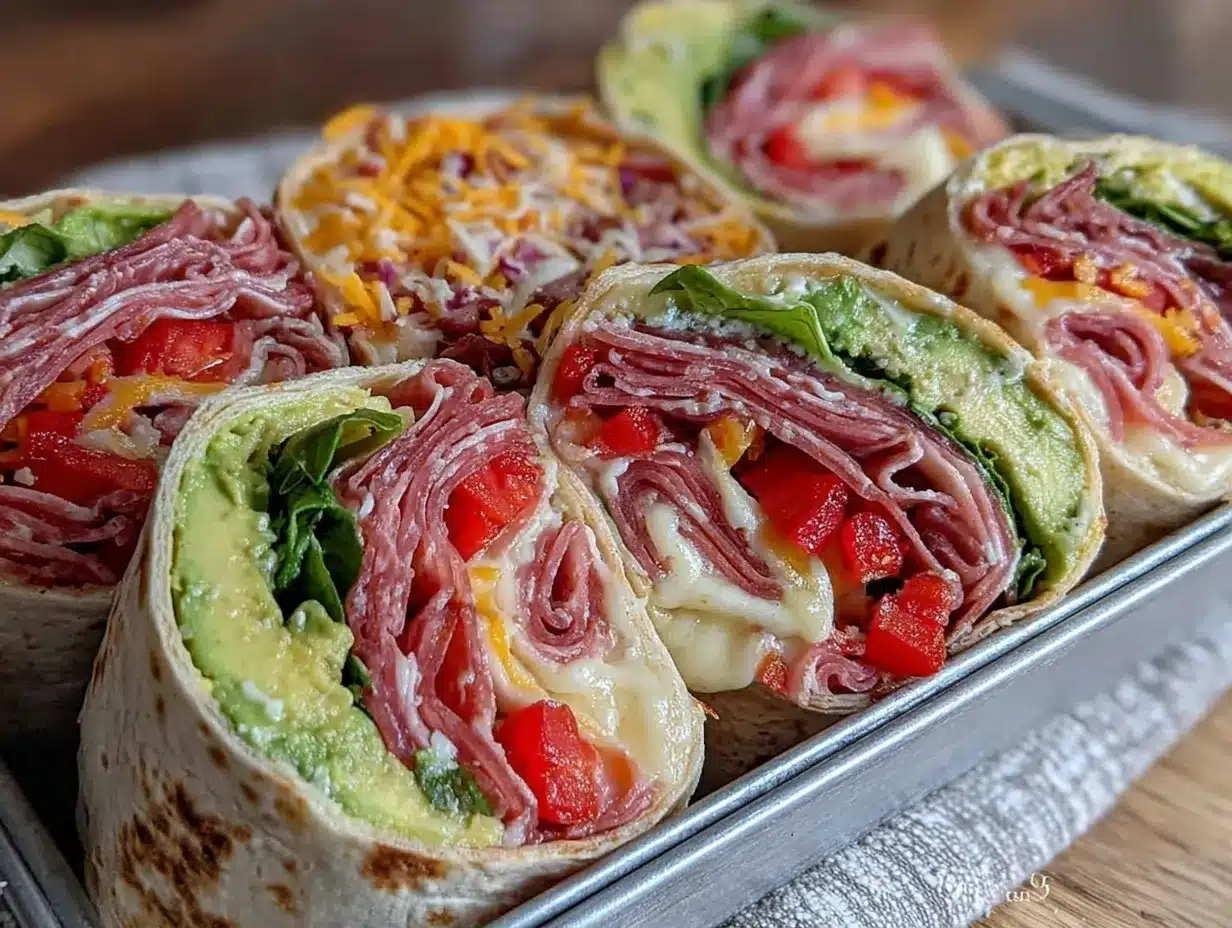
- Thinly sliced deli meats (turkey, ham, or roast beef) – about 4-5 slices per wrap
- Sliced cheese (Swiss, cheddar, or provolone) – 2 slices per wrap
- Leafy greens (lettuce or baby spinach) – washed and dried
- Thinly sliced cucumber or bell peppers – adds crunch and freshness
- For the Spread:
- Cream cheese, softened (about 2 tbsp per wrap) – acts as a moisture barrier and adds creaminess
- Dijon mustard or honey mustard (optional, for a touch of tang)
- Extras (Optional):
- Pickles or banana peppers (for tangy zip)
- Fresh herbs like dill or parsley (for added flavor)
- Avocado slices (for creaminess and healthy fats)
Feel free to swap the flour tortillas for whole wheat or gluten-free wraps if preferred. When I’m feeling adventurous, I sometimes add a little cranberry cream cheese spread to mix up the flavor profile — it brings a subtle sweetness that pairs beautifully with turkey.
Equipment Needed
- Sharp knife – for slicing vegetables and trimming tortillas if needed
- Cutting board
- Spreading knife or small offset spatula – handy for evenly spreading cream cheese
- Plastic wrap or parchment paper – to wrap the roll-ups tightly for storage
- Lunchbox or airtight container – keeps your roll-ups fresh on the go
Nothing fancy required here. I usually use a serrated knife because it cleanly slices through the tortillas without squishing them. For wrapping, parchment paper works better than plastic wrap if you want to avoid sticking. Also, investing in a good set of airtight containers makes a big difference for keeping lunches fresh, especially if you pack these for several days.
Preparation Method
- Prepare your work surface: Lay a large piece of parchment paper or clean cutting board. This keeps things tidy and makes wrapping easier. (About 2 minutes)
- Spread the cream cheese: Using a spreading knife, apply a thin, even layer of softened cream cheese over the entire surface of each tortilla. This stops moisture from leaking through and keeps the roll-up intact. (3 minutes)
- Add mustard (optional): If you like a little tang, spread a thin line of Dijon or honey mustard over the cream cheese. Don’t overdo it, or the wrap can get soggy. (1 minute)
- Layer the deli meats: Arrange 4-5 slices of your chosen deli meat evenly over the tortilla, leaving about a 1-inch (2.5 cm) border on one side for rolling. (3 minutes)
- Place cheese slices: Lay 2 slices of cheese on top of the meat. I like Swiss for its mild flavor, but cheddar or provolone works great too. (1 minute)
- Add fresh veggies: Place a layer of leafy greens and your choice of thinly sliced cucumber or bell peppers. This adds crunch and freshness to every bite. (3 minutes)
- Roll it up tightly: Starting from the edge with the fillings, roll the tortilla firmly but gently to avoid tearing. Use the border without filling to seal the edge. (2 minutes)
- Wrap and chill: Wrap each roll-up tightly in plastic wrap or parchment paper. Store them in an airtight container in the fridge. They’ll keep fresh for up to 3 days. (2 minutes)
- Slice before serving (optional): If you prefer bite-sized pieces, slice the roll-ups into 1 to 1.5-inch (2.5 to 4 cm) pinwheels just before packing or serving. (2 minutes)
Tip: If your cream cheese is too cold, it’s harder to spread, so I usually leave it out for 10 minutes before starting. Also, avoid overfilling — too many fillings make rolling tricky and the wrap can burst open.
Cooking Tips & Techniques
Even though this is a no-cook recipe, a few techniques help keep your deli roll-ups just right:
- Use room temperature cream cheese: It spreads smoothly and helps seal the wrap better. I once tried cold cream cheese straight from the fridge, and it tore the tortilla — lesson learned!
- Layer strategically: Place moisture-heavy veggies like cucumbers between the cheese and meat layers to prevent sogginess.
- Choose fresh, firm greens: Soft or wet lettuce wilts quickly. Baby spinach or crisp romaine hearts work best.
- Wrap tightly but gently: If you roll too loosely, the wrap falls apart; too tight, and you risk tearing. Find that sweet spot by practicing a few times.
- Prepare in advance: These roll-ups actually taste better after a few hours chilling because the flavors meld nicely. I usually prep them the night before busy weekdays.
- Multitask smartly: While the cream cheese softens, slice your veggies and meats. This keeps your prep time under 15 minutes.
Variations & Adaptations
This deli roll-up recipe is a solid base for customization based on your tastes and dietary needs:
- Vegetarian option: Swap deli meats for grilled veggies like zucchini and bell peppers, or use hummus instead of cream cheese.
- Low-carb version: Use large iceberg or romaine lettuce leaves instead of tortillas for a lighter wrap.
- Flavor twist: Add a smear of pesto or swap the mustard for a spicy chipotle mayo for an extra kick.
- Seasonal swaps: Add sliced apples or pears and a sprinkle of walnuts in autumn for a sweet crunch.
- Gluten-free: Use gluten-free wraps, which are widely available now, or try collard green leaves as sturdy, nutritious alternatives.
Once, I tried making these roll-ups with smoked salmon and cream cheese, inspired by a creamy salmon dip recipe I love. The flavor combo was amazing and felt fancy enough for a weekend lunch but still super easy to prep.
Serving & Storage Suggestions
Serve these roll-ups chilled or at room temperature. They’re perfect straight from the fridge but let them sit out for 10 minutes if you prefer a softer mouthfeel.
Pair them with crunchy raw veggies or a side of fresh fruit for a balanced lunch. I also like adding a small container of mixed nuts or a handful of chips for variety.
Store any extras in an airtight container or individually wrapped in plastic wrap in the fridge. They keep well for up to 3 days, making them ideal for meal prep. I don’t recommend freezing them since the tortillas can get soggy after thawing.
To reheat (if you want warm wraps), unwrap and microwave for 20-30 seconds, but honestly, I prefer them cold or at room temp — the flavors hold up better that way.
Over time, the flavors in the roll-ups meld together nicely, so if you make a batch on Sunday night, by Tuesday lunchtime, they taste even better. Just remember to keep the wraps tightly sealed so the tortillas don’t dry out.
Nutritional Information & Benefits
Each deli roll-up contains roughly:
| Calories | 300-350 kcal |
|---|---|
| Protein | 18-22 grams (depending on meat choice) |
| Carbohydrates | 25-30 grams (from tortillas and veggies) |
| Fat | 12-15 grams (mostly from cheese and cream cheese) |
The recipe provides a good balance of protein and carbs, making it a filling midday meal without weighing you down. Using deli meats with lower sodium options can reduce salt content. The fresh veggies add fiber and vitamins, especially vitamin C and K.
If you swap in whole wheat or gluten-free tortillas, you can adjust carb intake or meet dietary needs easily. Cream cheese adds calcium and a bit of healthy fat, which helps keep you satisfied longer.
From a wellness perspective, this recipe fits well into busy lifestyles by providing nourishing, real-food ingredients that don’t compromise on flavor or convenience.
Conclusion
So, the Easy Build-Ahead Deli Roll-Up Lunchbox is more than just a quick fix — it’s a little weekday ritual that brings calm and flavor to busy days. It’s flexible enough to suit whatever you have on hand or crave, and it’s forgiving for all skill levels in the kitchen.
Make it your own by swapping fillings or spreads, and don’t be surprised if you find yourself looking forward to lunch a bit more. This recipe stuck with me because it solves the “what’s for lunch?” problem with minimal effort and maximum satisfaction.
If you try it, I’d love to hear how you customize your roll-ups or what sides you pair them with. Sharing those little tweaks always brings new ideas to the table and keeps the kitchen fun. Here’s to many stress-free, tasty lunches ahead!
FAQs
Can I make these deli roll-ups gluten-free?
Yes! Simply swap the flour tortillas for gluten-free wraps or use large lettuce leaves like romaine or iceberg for a naturally gluten-free option.
How long can I store the roll-ups in the fridge?
They keep well for up to 3 days when wrapped tightly and stored in an airtight container. Beyond that, the tortillas may start to dry out.
Can I freeze these roll-ups?
Freezing is not recommended because the tortillas tend to become soggy after thawing, which affects texture and taste.
What can I use instead of cream cheese?
You can substitute cream cheese with hummus, mashed avocado, or a thin layer of mayonnaise, depending on your taste and dietary needs.
How do I prevent the roll-ups from getting soggy?
The key is spreading a thin layer of cream cheese or mustard first, which acts as a moisture barrier. Also, place wetter veggies like cucumbers between the cheese and meat layers to reduce sogginess.
Pin This Recipe!
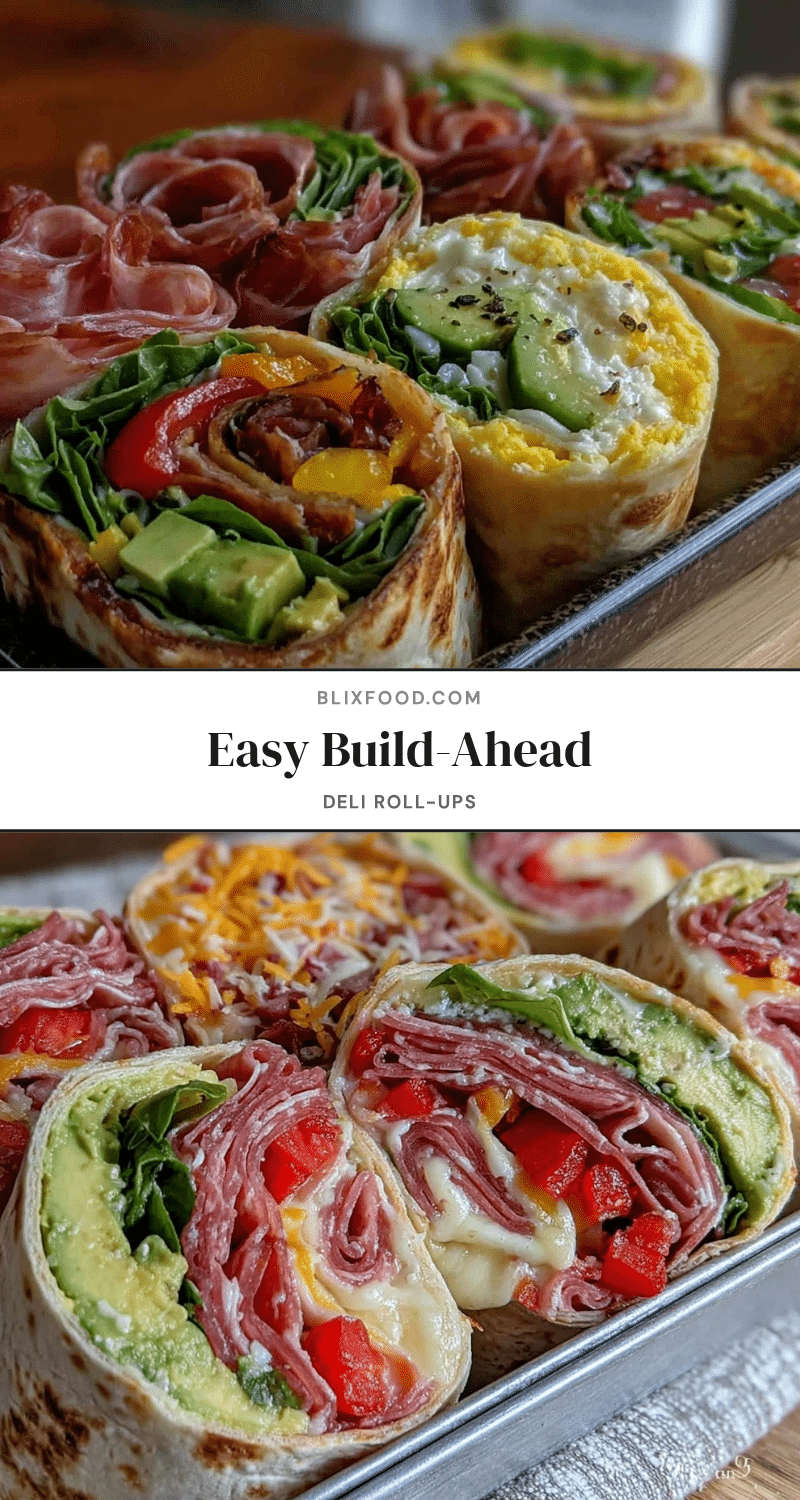
Easy Build-Ahead Deli Roll-Up Lunchbox Recipe for Busy Weekdays

A quick and easy deli roll-up recipe perfect for busy weekdays, featuring deli meats, cheese, fresh veggies, and a creamy spread to keep wraps fresh and flavorful.
- Prep Time: 10 minutes
- Cook Time: 0 minutes
- Total Time: 10 minutes
- Yield: 1 roll-up (adjust as needed)
- Category: Lunch
- Cuisine: American
Ingredients
- Large flour tortillas (10-inch/25 cm) – soft and flexible for easy rolling
- Thinly sliced deli meats (turkey, ham, or roast beef) – about 4-5 slices per wrap
- Sliced cheese (Swiss, cheddar, or provolone) – 2 slices per wrap
- Leafy greens (lettuce or baby spinach) – washed and dried
- Thinly sliced cucumber or bell peppers
- Cream cheese, softened (about 2 tbsp per wrap)
- Dijon mustard or honey mustard (optional)
- Pickles or banana peppers (optional)
- Fresh herbs like dill or parsley (optional)
- Avocado slices (optional)
Instructions
- Prepare your work surface by laying a large piece of parchment paper or clean cutting board.
- Spread a thin, even layer of softened cream cheese over the entire surface of each tortilla.
- If desired, spread a thin line of Dijon or honey mustard over the cream cheese.
- Arrange 4-5 slices of your chosen deli meat evenly over the tortilla, leaving about a 1-inch border on one side for rolling.
- Lay 2 slices of cheese on top of the meat.
- Place a layer of leafy greens and your choice of thinly sliced cucumber or bell peppers.
- Roll the tortilla tightly but gently starting from the edge with the fillings, sealing the edge with the border without filling.
- Wrap each roll-up tightly in plastic wrap or parchment paper and store in an airtight container in the fridge for up to 3 days.
- Optional: Slice the roll-ups into 1 to 1.5-inch pinwheels before serving.
Notes
Use room temperature cream cheese for easier spreading. Layer moisture-heavy veggies like cucumbers between cheese and meat to prevent sogginess. Wrap tightly but gently to avoid tearing. Prepare the night before for best flavor. Avoid freezing as tortillas get soggy after thawing.
Nutrition
- Serving Size: 1 roll-up
- Calories: 300350
- Sugar: 24
- Sodium: 600800
- Fat: 1215
- Saturated Fat: 57
- Carbohydrates: 2530
- Fiber: 23
- Protein: 1822
Keywords: deli roll-up, lunchbox recipe, easy lunch, meal prep, deli meats, cream cheese, quick lunch, weekday lunch, portable lunch