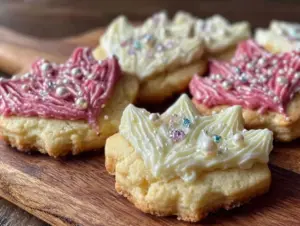
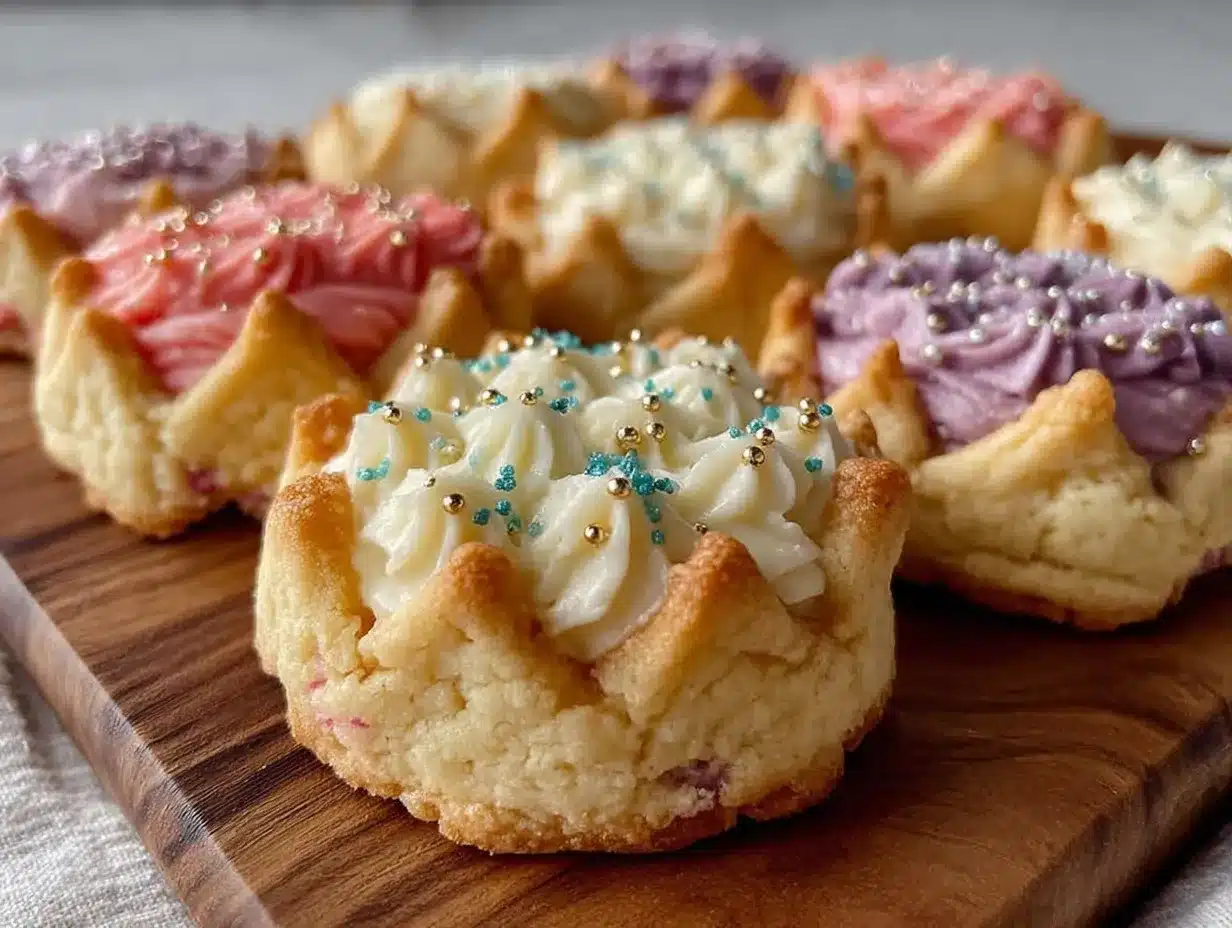
The last cookie was snatched up before I even had a chance to grab one for myself. Third time this week — a quiet text popped up from a friend asking for the recipe, a little surprised by how these perfect crown-shaped sugar cookies stole the show yet again. Honestly, I didn’t expect such a fuss when I first baked these. It started with a whim to make something festive and a bit regal for a small gathering, nothing fancy. But the crisp edges, buttery soft centers, and that glossy royal icing finish? They hit a sweet spot nobody expected.
There’s something about the way the icing sets just right—smooth, not too shiny, with delicate details that make each cookie look like a tiny edible crown. The scent of vanilla and sugar lingering in the kitchen that day is still vivid, and the smiles around the table told me the recipe had found its place. I guess I’m quietly proud (and honestly a little surprised) that these cookies have become a kind of signature treat. They’re simple, yet they carry a little magic that invites second helpings.
It stuck with me because these cookies aren’t just pretty—they’re reliable. Whether it’s a last-minute party or a weekend bake, they come together without drama and deliver that satisfying crunch and sweet, melt-in-your-mouth feeling. And the royal icing? It’s not intimidating, just a smooth, easy glaze that turns basic sugar cookies into a celebration. So here’s the recipe that’s been quietly winning hearts, one crown-shaped cookie at a time.
Why You’ll Love This Recipe
After testing dozens of sugar cookie recipes and royal icing techniques, this one stands out for more than just looks. It’s a real crowd-pleaser that balances flavor and texture with ease.
- Quick & Easy: You can mix, cut, bake, and decorate these cookies in about 90 minutes—perfect for busy bakers or last-minute celebrations.
- Simple Ingredients: No specialty flours or fancy extracts required. Most likely, you already have everything in your pantry and fridge.
- Perfect for Celebrations: These crown-shaped sugar cookies with royal icing are ideal for birthdays, baby showers, or any occasion that calls for a little regal fun.
- Crowd-Pleaser: Kids and adults go wild for these—there’s something about the crisp edges and sweet, smooth icing that keeps everyone coming back.
- Unbelievably Delicious: The buttery cookie base pairs beautifully with the subtle vanilla in the icing, giving you that perfect melt-on-your-tongue moment.
- Special Technique: The royal icing recipe here is just right—not too stiff, not too runny—letting you pipe clean lines and fill in details without frustration.
- Memorable Presentation: Each cookie looks like a tiny crown, making them feel special without needing expert decorating skills.
This isn’t just another sugar cookie recipe—you know the kind that ends up dry or bland. It’s the one that makes you close your eyes after the first bite and think, “Yeah, this is worth remembering.” Simple, elegant, and totally doable.
What Ingredients You Will Need
To make these perfect crown-shaped sugar cookies with royal icing, you’ll want to gather a handful of trusty staples. The ingredients come together to create a tender, flavorful cookie base, plus a smooth icing that’s ideal for decorating.
- For the Sugar Cookies:
- All-purpose flour – 3 cups (360 g), sifted for a light texture
- Baking powder – 1 tsp (4 g), to give a gentle lift
- Salt – ½ tsp (3 g), to balance the sweetness
- Unsalted butter – 1 cup (227 g), softened to room temperature (I usually use Land O’Lakes for a nice creamy flavor)
- Granulated sugar – 1 cup (200 g), for sweetness and crisp edges
- Large eggs – 2, at room temperature (helps the dough bind perfectly)
- Pure vanilla extract – 2 tsp (10 ml), adds that classic warm aroma
- For the Royal Icing:
- Powdered sugar – 4 cups (480 g), sifted to prevent lumps
- Pasteurized egg whites or meringue powder – 3 tbsp (45 ml meringue powder), for smooth, stable icing
- Fresh lemon juice – 1½ tsp (7 ml), brightens the icing flavor
- Water – 3-4 tbsp (45-60 ml), to reach the perfect consistency
- Optional: gel food coloring (yellow, gold, or any color you want your crowns!)
Most of these are pantry staples, so you won’t have to run to the store last minute. If you want to swap out the butter for a dairy-free option, plant-based margarine works okay, but the texture won’t be quite the same. For the royal icing, I recommend using meringue powder if you’re worried about raw egg whites—that’s what I use for parties to keep things safe and delicious.
If fresh seasonal flavors inspire you, try adding a hint of almond extract to the dough or swap lemon juice for orange juice in the icing to give your cookies a subtle citrus twist. For a gluten-free crowd, almond flour can replace half the all-purpose flour, but you’ll want to test how that affects the cookie shape and bake time.
Equipment Needed
Here’s what you’ll want to have on hand to make these crown-shaped sugar cookies with royal icing come to life:
- Mixing bowls: A large bowl for the dough and a smaller one for the icing.
- Electric mixer: A stand mixer or hand mixer makes creaming the butter and sugar a breeze.
- Rolling pin: Essential for rolling the cookie dough evenly to about ¼ inch thickness.
- Crown-shaped cookie cutter: The star of the show. If you don’t have a crown cutter, a small circle or star shape can work in a pinch.
- Baking sheets: Preferably non-stick or lined with parchment paper for easy cleanup.
- Cooling racks: To cool cookies completely before icing.
- Piping bags and small round tips: For decorating with royal icing. If you don’t have piping bags, resealable plastic bags with a corner snipped off work just fine.
- Sifter or fine mesh sieve: For sifting flour and powdered sugar to keep things lump-free.
Personally, I’ve tried using silicone baking mats versus parchment paper, and parchment tends to give a better crisp without sticking. For icing, investing in a few different piping tip sizes helped me go from messy blobs to clean lines. Don’t stress if you don’t have a fancy cutter though—freehand can be charming too!
Preparation Method
- Mix dry ingredients: In a bowl, whisk together the sifted all-purpose flour (360 g), baking powder (4 g), and salt (3 g). Set aside. This keeps the rising and seasoning even.
- Cream butter and sugar: Using an electric mixer, beat the softened unsalted butter (227 g) with granulated sugar (200 g) on medium speed until the mixture becomes pale and fluffy—about 3 to 4 minutes. This step is crucial for that tender crumb and slight crunch.
- Add eggs and vanilla: Crack in 2 eggs, one at a time, mixing well after each addition. Then pour 2 teaspoons of pure vanilla extract. Mix until fully combined but don’t overbeat.
- Combine wet and dry: Gradually add the dry flour mixture to the wet ingredients, mixing on low speed just until the dough comes together. Avoid overmixing or the cookies will turn tough.
- Chill the dough: Wrap the dough in plastic wrap and refrigerate for at least 1 hour. This firms up the dough, making it easier to roll without sticking or losing shape.
- Preheat oven and prepare baking sheets: Set your oven to 350°F (175°C). Line baking sheets with parchment paper or silicone mats.
- Roll and cut cookies: On a lightly floured surface, roll out the dough to about ¼ inch (6 mm) thickness. Use your crown-shaped cookie cutter to press out shapes. Transfer cookies carefully to the baking sheets, spaced about 1 inch (2.5 cm) apart.
- Bake: Bake in the preheated oven for 8-10 minutes, or until the edges just start to turn golden. Keep a close eye—overbaking will dry them out.
- Cool: Allow cookies to cool on the baking sheet for 5 minutes before transferring to wire racks to cool completely. Only ice when fully cool to prevent melting.
- Make royal icing: In a clean bowl, mix 4 cups (480 g) sifted powdered sugar with 3 tablespoons (45 ml) meringue powder. Add 1½ teaspoons (7 ml) fresh lemon juice and 3 tablespoons (45 ml) water. Beat on high speed until stiff peaks form, about 5-7 minutes. Adjust water if needed to get a pipeable but firm consistency.
- Decorate: Divide icing into small bowls if coloring. Use piping bags fitted with small round tips to outline each cookie crown first, then flood the inside with thinner icing if desired. Let the icing harden completely—usually 4-6 hours—before stacking or storing.
One tip I learned the hard way: don’t rush the cooling or icing steps. Icing on warm cookies will run and lose those crisp details that make these cookies look like tiny crowns. Patience pays off, I promise.
Cooking Tips & Techniques
Baking sugar cookies with royal icing can sound intimidating, but a few tricks can make the process smooth and enjoyable.
- Don’t overmix the dough: Too much mixing activates gluten, making cookies tough. Mix until just combined after adding flour.
- Chill the dough well: This helps prevent spreading during baking and keeps your crown shapes sharp.
- Use room temperature ingredients: Butter and eggs at room temp cream together better, giving you that lovely cookie texture.
- Practice your piping: If you’re new to royal icing, try piping on parchment paper first. It helps you get a feel for the pressure and flow.
- Adjust icing consistency: Use thicker icing for outlines and thinner “flood” icing to fill areas. You can thin icing by adding water a drop at a time.
- Keep icing covered: Royal icing dries fast—cover your piping bags with a damp towel between decorating to prevent crusting.
- Don’t skip sifting: Sift both flour and powdered sugar to avoid lumps that mess up your dough and icing texture.
- Multitask wisely: While cookies chill, prep your royal icing and clean up your workspace—this keeps things efficient without last-minute stress.
- Store cookies properly: Once iced and dried, store cookies in an airtight container layered with parchment paper to keep them fresh and prevent sticking.
One time I learned the hard way that rushing the icing drying time led to smudged designs. Since then, I plan a full afternoon to let them harden and it’s always worth the wait.
Variations & Adaptations
Want to switch things up or accommodate different tastes? Here are some fun ways to adapt this perfect crown-shaped sugar cookie recipe:
- Flavor swaps: Add lemon zest or almond extract to your dough for a fresh twist on the classic vanilla cookie.
- Gluten-free option: Replace half or all-purpose flour with almond or gluten-free flour blends. Expect a slightly different texture but still delicious.
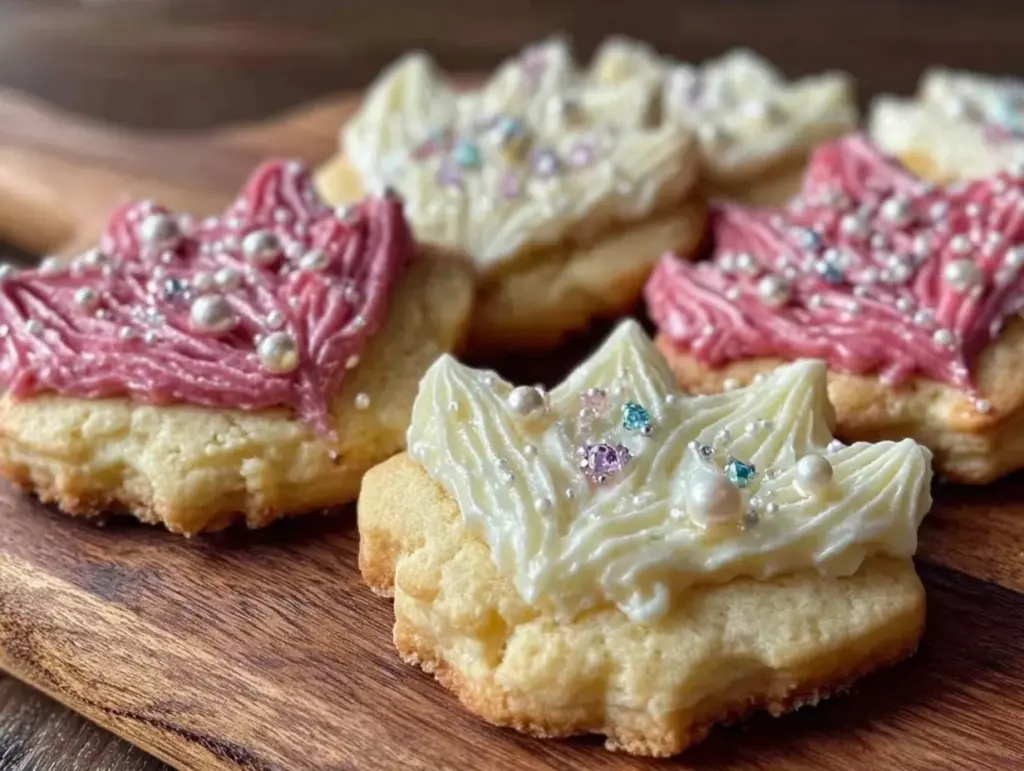
- Royal icing colors: Play with different gel food colors to match themes—gold, silver, pastel shades, or even metallic dust for a royal shimmer.
- Decorating styles: Instead of fully flooding with icing, try outlining the crown and adding edible pearls or sprinkles for a fancy touch.
- Alternative baking methods: If you have an air fryer or convection oven, reduce baking temperature by 25°F (about 15°C) and watch closely for doneness.
I once made a batch with lavender extract and pale purple icing for a baby shower — it was a hit, and guests loved the subtle floral note. If you want to keep it dairy-free, swap the butter with coconut oil, but chill the dough longer to keep it firm enough to cut shapes.
Serving & Storage Suggestions
These crown-shaped sugar cookies with royal icing are best served at room temperature. The icing sets to a firm finish but stays tender enough to bite through easily.
- Serve on a pretty platter or tiered stand to highlight their regal shape and decoration.
- Pair with tea, coffee, or a light sparkling beverage for an elegant treat.
- If you’re hosting a party, these cookies make a lovely addition alongside savory bites like fresh shrimp salad appetizers or creamy cheese stuffed cherry tomatoes.
- Store cooled, iced cookies in an airtight container layered with parchment paper at room temperature for up to 5 days.
- For longer storage, freeze uniced cookies in a sealed bag or container for up to 3 months. Thaw completely before icing.
- Reheat is not recommended because it softens the icing and changes texture, but letting frozen cookies thaw overnight at room temp works well.
- Flavors deepen slightly after a day or two, making leftovers even better if you can wait that long.
Nutritional Information & Benefits
Each cookie (based on 24 medium-sized cookies) contains approximately:
| Calories | 130 |
|---|---|
| Fat | 6 g |
| Carbohydrates | 18 g |
| Sugar | 11 g |
| Protein | 1.5 g |
The cookies provide a quick energy boost, thanks to simple carbs and sugar, making them a delightful treat rather than a health food. Using real butter adds some richness and essential fats, while the lemon juice in the icing offers a bit of vitamin C and a fresh zing.
For those with dietary restrictions, this recipe can be tailored to be gluten-free or dairy-free with substitutions as mentioned. Keep in mind the royal icing contains egg whites or meringue powder, so it’s not suitable for those with egg allergies unless you try alternative frosting options.
From a personal wellness perspective, I see these cookies as a joyful treat—perfect for savoring moments with friends and family rather than everyday snacking. They bring a little sweetness to celebrations without complicated ingredients or fuss.
Conclusion
These perfect crown-shaped sugar cookies with royal icing have quietly become a favorite for good reasons. They combine easy-to-find ingredients with a foolproof method to create cookies that look special and taste even better. Whether you’re baking for a party, a gift, or just because, they offer the kind of satisfaction that comes from simple, well-made treats.
Feel free to customize the flavorings, colors, and decorating styles to match your occasion or mood. I personally love how these cookies manage to feel festive without any stress, and I hope they find a spot in your baking repertoire too.
If you try them, I’d love to hear how your cookies turned out or any creative twists you added. Baking is better when shared, and these little crowns are waiting to make your day a bit sweeter.
FAQs about Perfect Crown-Shaped Sugar Cookies with Royal Icing
Can I make the cookie dough ahead of time?
Yes! The dough can be refrigerated for up to 3 days or frozen for up to 3 months. Just thaw before rolling and cutting.
How do I store decorated sugar cookies to keep the icing fresh?
Store them in an airtight container at room temperature, layered with parchment paper. Avoid stacking until the icing is fully hardened (about 6 hours).
Can I use powdered egg whites instead of fresh eggs in the dough?
Powdered egg whites are generally not recommended for cookie dough as they can affect texture. It’s best to use whole fresh eggs for the cookie dough.
What if my royal icing is too thick or too thin?
If too thick, add water a few drops at a time until it’s pipeable. If too thin, add more powdered sugar gradually until it holds shape.
Can I use other shapes besides crowns?
Absolutely! This recipe works well with stars, hearts, or any cookie cutter you like. Just adjust baking time slightly if shapes are thicker or thinner.
Pin This Recipe!
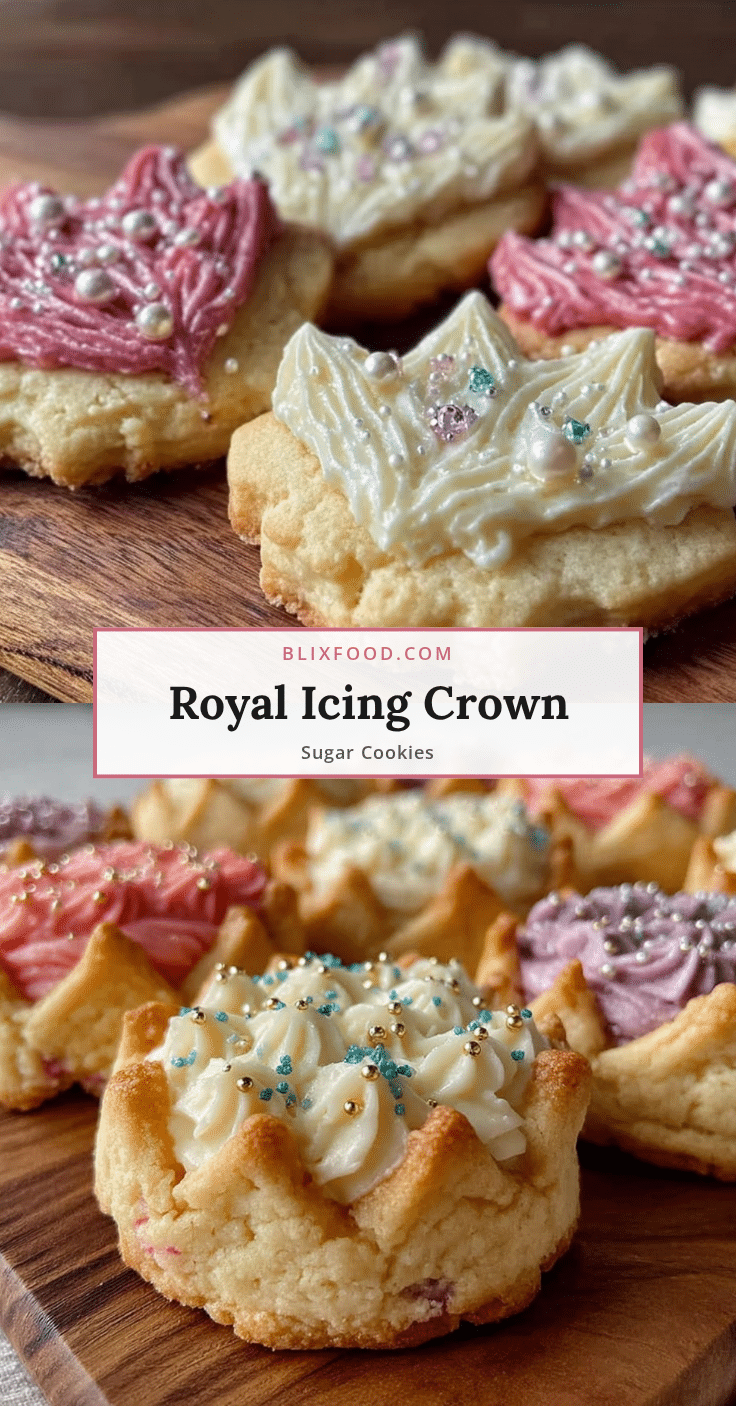
Perfect Crown-Shaped Sugar Cookies Recipe Easy Homemade Royal Icing Tutorial
These crown-shaped sugar cookies feature crisp edges, buttery soft centers, and a smooth royal icing finish, making them perfect for celebrations and crowd-pleasing treats.
- Prep Time: 20 minutes
- Cook Time: 10 minutes
- Total Time: 1 hour 30 minutes
- Yield: 24 medium-sized cookies 1x
- Category: Dessert
- Cuisine: American
Ingredients
- 3 cups all-purpose flour (360 g), sifted
- 1 tsp baking powder (4 g)
- ½ tsp salt (3 g)
- 1 cup unsalted butter (227 g), softened to room temperature
- 1 cup granulated sugar (200 g)
- 2 large eggs, at room temperature
- 2 tsp pure vanilla extract (10 ml)
- 4 cups powdered sugar (480 g), sifted
- 3 tbsp pasteurized egg whites or meringue powder (45 ml meringue powder)
- 1½ tsp fresh lemon juice (7 ml)
- 3–4 tbsp water (45–60 ml)
- Optional: gel food coloring (yellow, gold, or any desired color)
Instructions
- Mix dry ingredients: In a bowl, whisk together sifted all-purpose flour, baking powder, and salt. Set aside.
- Cream butter and sugar: Using an electric mixer, beat softened unsalted butter with granulated sugar on medium speed until pale and fluffy, about 3 to 4 minutes.
- Add eggs and vanilla: Crack in eggs one at a time, mixing well after each addition. Then add pure vanilla extract and mix until combined.
- Combine wet and dry: Gradually add dry flour mixture to wet ingredients, mixing on low speed just until dough comes together. Avoid overmixing.
- Chill the dough: Wrap dough in plastic wrap and refrigerate for at least 1 hour.
- Preheat oven to 350°F (175°C). Line baking sheets with parchment paper or silicone mats.
- Roll and cut cookies: On a lightly floured surface, roll dough to about ¼ inch (6 mm) thickness. Use crown-shaped cookie cutter to cut shapes. Transfer cookies to baking sheets spaced about 1 inch apart.
- Bake: Bake for 8-10 minutes or until edges start to turn golden. Avoid overbaking.
- Cool: Let cookies cool on baking sheet for 5 minutes, then transfer to wire racks to cool completely before icing.
- Make royal icing: In a clean bowl, mix powdered sugar with meringue powder. Add fresh lemon juice and water. Beat on high speed until stiff peaks form, about 5-7 minutes. Adjust water for pipeable but firm consistency.
- Decorate: Divide icing into bowls if coloring. Use piping bags with small round tips to outline each cookie crown, then flood inside with thinner icing if desired. Let icing harden completely (4-6 hours) before storing.
Notes
Do not overmix dough to avoid tough cookies. Chill dough well to prevent spreading and keep shapes sharp. Use room temperature ingredients for best texture. Practice piping on parchment paper before decorating cookies. Adjust icing consistency by adding water or powdered sugar as needed. Cover piping bags with damp towel to prevent icing crusting. Store iced cookies in airtight container layered with parchment paper. Let icing harden fully before stacking or storing.
Nutrition
- Serving Size: 1 medium-sized cooki
- Calories: 130
- Sugar: 11
- Fat: 6
- Carbohydrates: 18
- Protein: 1.5
Keywords: sugar cookies, crown-shaped cookies, royal icing, easy sugar cookies, holiday cookies, party cookies, homemade cookies, cookie decorating