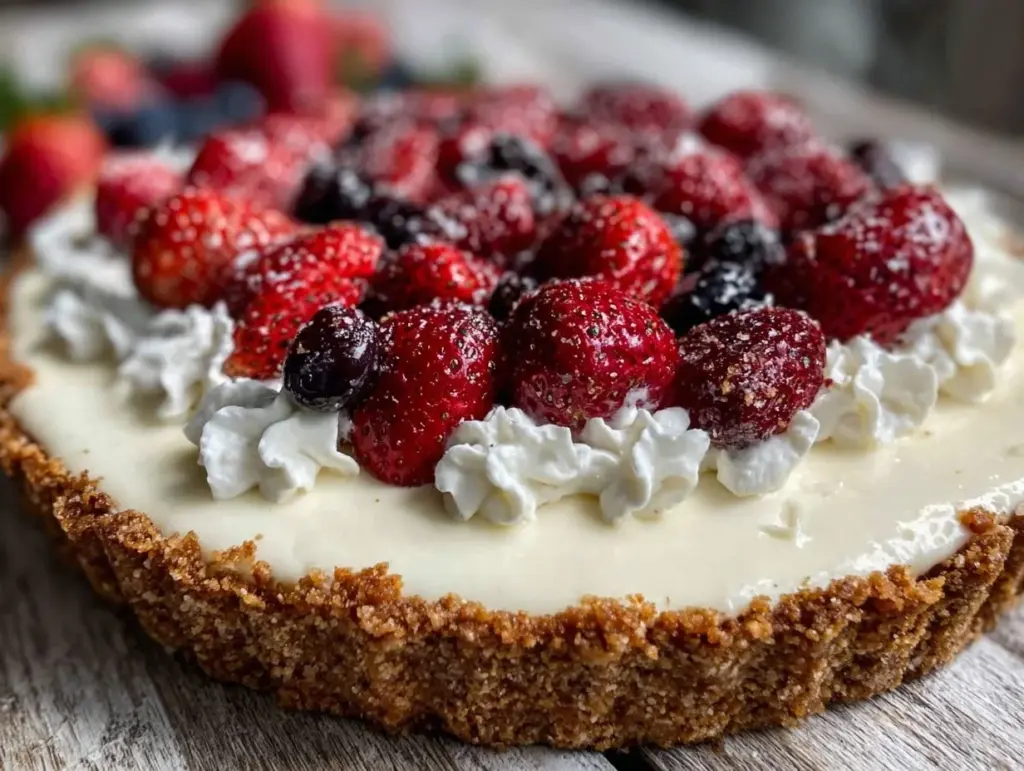
The tart was wiped clean before I even reached for a second slice. Third time that week, and honestly, I wasn’t expecting the quiet buzz it sparked among friends. The way those fresh berries sat proud and bright atop the creamy cheesecake filling somehow made it more than just dessert—it was a conversation starter, a little spark of summer on a plate. Someone texted the next day asking for the recipe, and that’s when I realized this Perfect No-Bake American Flag Berry Cheesecake Tart had quietly stolen the show.
It started, as many recipes do, with a last-minute decision. I had blueberries and strawberries in the fridge, and the Fourth of July was looming. I wanted something festive but fuss-free—no ovens, no stress. The result was this tart, a simple no-bake cheesecake nestled in a buttery graham cracker crust, topped with an American flag pattern of berries. The bright pop of color against the smooth, tangy filling was just the right kind of eye candy.
There’s a calm pride in watching something simple turn into a crowd-pleaser, especially when you didn’t expect it to. This tart has stuck with me—not just because it’s easy or pretty, but because it’s one of those recipes that invites you back to the kitchen, again and again, to make memories with friends and family. It’s a quiet reminder that the best desserts don’t always need to be complicated, just thoughtfully put together.
Why You’ll Love This Perfect No-Bake American Flag Berry Cheesecake Tart Recipe
Over the years, I’ve tried many cheesecake recipes, but this one keeps winning hearts—and empty plates. Here’s what makes it stand out in the sea of berry desserts:
- Quick & Easy: Comes together in under 30 minutes, perfect for busy summer afternoons or last-minute get-togethers.
- Simple Ingredients: No fancy or hard-to-find items here; most are pantry staples or fresh market finds.
- Perfect for Patriotic Celebrations: Whether it’s Independence Day, Memorial Day, or just a summer picnic, it’s a festive crowd-pleaser.
- Crowd-Pleaser: Kids love the sweet berries, and adults appreciate the creamy, tangy balance of the cheesecake filling.
- Unbelievably Delicious: The smooth, velvety texture of the cheesecake with a crisp, buttery crust and juicy berries makes every bite feel special.
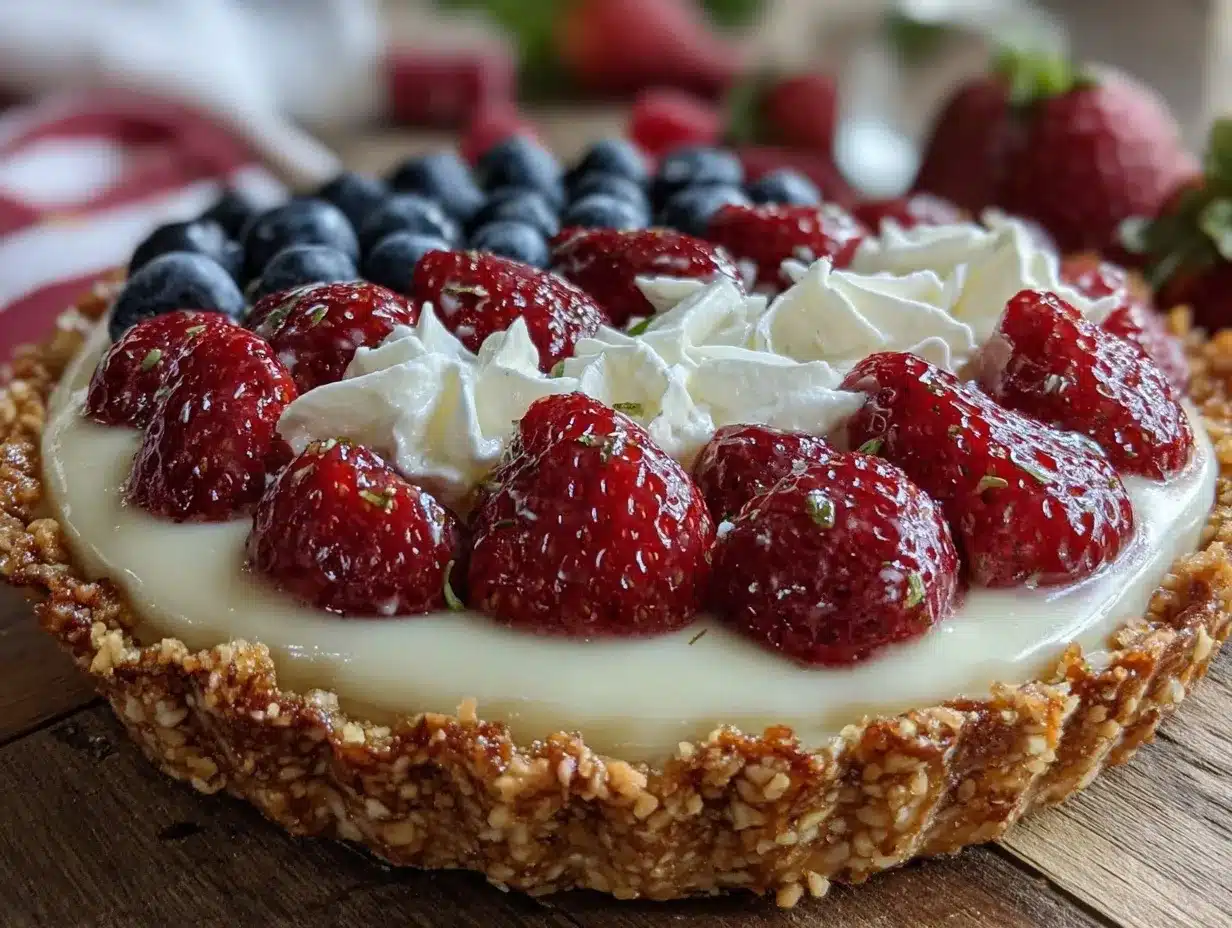
What really sets this recipe apart is the no-bake approach combined with a fun, patriotic design. I blend cream cheese and sour cream for a velvety texture, avoiding heavy whipping cream to keep it light but rich. Also, arranging the berries into a perfect flag pattern? Easy once you get the hang of it, and it really elevates the presentation without extra fuss. It’s the kind of dessert that looks like you spent hours on it, but you’ll honestly be done before your guests arrive.
For me, this tart is more than just a recipe; it’s a way to make holiday moments feel a little more special without the stress. It’s reliable, approachable, and delicious—all the reasons this recipe has stayed on my menu year after year.
What Ingredients You Will Need for the Perfect No-Bake American Flag Berry Cheesecake Tart
This recipe uses simple, wholesome ingredients to deliver bold flavor and a satisfying texture without the fuss. You’ll find most of these in your pantry or local market, and a few tips for picking the best berries and cream cheese are sprinkled in.
- For the crust:
- 1 ½ cups (150g) graham cracker crumbs (I prefer using Honey Maid for a perfect balance of sweetness and crunch)
- 6 tablespoons (85g) unsalted butter, melted
- 2 tablespoons granulated sugar (optional, adds a touch of sweetness)
- For the cheesecake filling:
- 16 ounces (450g) cream cheese, softened (Philadelphia brand works well for smoothness)
- ½ cup (120ml) sour cream (adds a subtle tang and lightness)
- ¾ cup (90g) powdered sugar, sifted
- 1 teaspoon pure vanilla extract
- 2 teaspoons fresh lemon juice (brightens the flavor)
- For the berry topping:
- 1 cup fresh blueberries (small, firm berries hold the shape best)
- 1 ½ cups fresh strawberries, hulled and sliced
- Optional: 1 tablespoon apricot jam or honey, warmed (for a glossy finish)
If you want to swap any ingredients: use almond flour instead of graham cracker crumbs for a gluten-free crust, or swap sour cream with plain Greek yogurt for a lighter tang. Fresh berries are best, but frozen can work if thawed and patted dry carefully. Seasonal berry swaps like raspberries or blackberries can add a unique twist depending on availability.
Equipment Needed
- 9-inch (23 cm) tart pan with removable bottom — makes it easier to release the tart without damage
- Mixing bowls — one medium for crust, one large for filling
- Electric mixer or stand mixer — to beat the cream cheese smooth
- Rubber spatula — for scraping the bowl and folding ingredients
- Measuring cups and spoons — accuracy helps, especially with powdered sugar
- Small offset spatula or butter knife — to smooth the cheesecake filling evenly
- Optional: pastry brush — handy if you want to add a shiny glaze with warmed jam
I’ve made this tart with handheld mixers and even by hand when needed, but trust me, an electric mixer makes the filling silky smooth quickly. For those who don’t own a tart pan, a springform pan can work, but the removable bottom is a game-changer for presentation. The pastry brush is a small luxury but makes the berry topping gleam just right.
Preparation Method for Perfect No-Bake American Flag Berry Cheesecake Tart
- Make the crust: Combine 1 ½ cups graham cracker crumbs, 6 tablespoons melted butter, and 2 tablespoons sugar in a medium bowl. Mix until the crumbs are evenly coated and resemble wet sand.
- Press crust into tart pan: Transfer the crumb mixture into the 9-inch tart pan. Press firmly and evenly into the bottom and up the sides (about 1 inch high). Use the bottom of a flat measuring cup for even packing. Refrigerate while you prepare the filling (about 15 minutes).
- Prepare the cheesecake filling: In a large bowl, beat 16 ounces softened cream cheese until smooth and creamy (about 2-3 minutes). Add ½ cup sour cream, ¾ cup powdered sugar, 1 teaspoon vanilla extract, and 2 teaspoons lemon juice. Beat again until fully combined and silky smooth.
- Fill the crust: Spoon the cheesecake filling into the chilled crust. Use an offset spatula or butter knife to spread it evenly and smooth the top. Place back in the fridge to chill for at least 2 hours or until firm.
- Prepare the berry topping: Rinse and dry blueberries and strawberries. Slice strawberries lengthwise into thin pieces for the stripes. Pat berries dry to avoid sogginess.
- Assemble the American flag pattern: Start by placing blueberries in the top left corner in a square shape (about 3 rows by 5 columns). Next, arrange sliced strawberries in horizontal stripes alternating with blank spaces for the white stripes created by the cheesecake filling underneath. Take your time here; the neatness makes a big difference.
- Optional glaze: Warm 1 tablespoon apricot jam or honey until runny. Using a pastry brush, gently coat the berries for a shiny, fresh look. This step also helps preserve the berries’ freshness.
- Final chill: Return the tart to the fridge for 30 minutes to set everything firmly before serving.
Tip: If the cream cheese gets lumpy, keep beating in short bursts—you want that filling as smooth as possible. The flag pattern looks best when berries are tightly packed but not squished, so handle them gently. I’ve found that preparing the crust the night before saves time on the day of serving.
Cooking Tips & Techniques for the Perfect No-Bake American Flag Berry Cheesecake Tart
Making this no-bake cheesecake tart is straightforward, but a few pro tips help keep you out of trouble:
- Softening cream cheese: Let it sit at room temperature at least 30 minutes before mixing. Cold cream cheese leads to lumps, and you’ll spend extra time beating it smooth.
- Pressing the crust evenly: Use a flat-bottomed object like a measuring cup to pack the graham cracker crust firmly. Loose crust means it won’t hold up when slicing.
- Chilling time: Don’t rush the refrigeration—two hours at minimum is key for the filling to set properly. Overnight is even better if you’re prepping ahead.
- Berry placement: Arrange berries carefully with clean hands or small tongs. It’s tempting to rush, but a neat pattern makes this tart special.
- Multitasking: While the crust chills, prep your berries and filling. This helps streamline the process and keeps your kitchen organized.
- Common mistake: Adding too much lemon juice can curdle the filling or make it overly tangy. Stick to 2 teaspoons for balance.
- Texture check: The filling should be creamy but thick enough to hold berries in place. If too soft, chill longer before topping.
Honestly, my first attempt had a cracked crust because I pressed it unevenly. Lesson learned: patience and even pressure go a long way. If you like a crunchier crust, you can toast the graham crumbs lightly before mixing with butter. For a smoother finish on the filling, scrape down the bowl frequently while mixing.
Variations & Adaptations for Your No-Bake Cheesecake Tart
This recipe is super flexible and welcomes your tweaks. Here are some ideas to make it your own:
- Dietary swaps: Use gluten-free graham crackers or almond flour for the crust to keep it gluten-free. Swap sour cream with coconut yogurt for a dairy-free twist.
- Seasonal berry mix: Try raspberries or blackberries instead of strawberries for a richer red hue. Blueberry replacement with black currants also adds a tangy edge.
- Flavor boost: Add a teaspoon of almond extract to the filling for a subtle nutty note, or fold in finely chopped fresh mint for a refreshing twist.
- Cooking method: This tart is no-bake, but if you want a firmer crust, you can bake the crust for 8 minutes at 350°F (175°C) before filling.
- Personal favorite: I once swapped half the strawberries with sliced kiwi to add a green stripe—unexpected but visually stunning.
For a fun variation, try layering in a thin strawberry jam between the crust and filling for a surprise burst of fruit flavor. If you want a lighter version, reduce the cream cheese by a quarter and increase the sour cream slightly.
Serving & Storage Suggestions
This tart is best served chilled, straight from the fridge. Let it sit at room temperature for 10 minutes before slicing for cleaner cuts and softer texture. Use a sharp knife dipped in warm water and wiped dry for perfect slices.
Pair it with a cold glass of lemonade or iced tea for a classic summer combo. It also makes a beautiful centerpiece alongside light appetizers like a fresh shrimp salad or a tart cheese spread.
Store leftovers tightly wrapped in the fridge for up to 3 days. The berries might release some juice, so place parchment paper between slices if stacking. This tart is freezer-friendly too—wrap tightly and freeze for up to 1 month. Thaw overnight in the fridge before serving.
Flavors tend to meld and deepen after a day, so sometimes I make it ahead of time just to enjoy that subtle flavor harmony. The crust might soften slightly over time but remains pleasantly crumbly.
Nutritional Information & Benefits
Per serving (based on 8 slices): approximately 320 calories, 20g fat, 28g carbohydrates, 5g protein.
The cream cheese and sour cream provide a good source of calcium and protein while keeping the dessert indulgently creamy. Fresh berries bring antioxidants, vitamin C, and fiber, making this a dessert that feels a little less guilty.
This recipe is naturally gluten-containing unless you swap the crust, and it contains dairy. For those watching carbs, the graham cracker crust is moderate—almond flour crust reduces carbs significantly.
I appreciate how this tart balances indulgence with fresh fruit, making it a go-to for summer gatherings where I want a treat that’s not just empty calories but a bit nourishing too.
Conclusion
This Perfect No-Bake American Flag Berry Cheesecake Tart isn’t just a pretty face—it’s a dependable favorite that turns any gathering into a celebration. I love how it manages to feel festive without fuss, making it a go-to recipe whenever I want to impress quietly but effectively.
Feel free to play with the berries, the crust, and even the filling to suit your taste and dietary needs. It’s flexible, forgiving, and honestly, kind of fun to assemble.
Next time you’re planning a picnic or holiday feast, this tart will quietly win over your guests like it did mine—no fancy tricks, just good ingredients and a bit of care. I’d love to hear how you make it your own or if you have any berry-tart stories to share!
FAQs About the Perfect No-Bake American Flag Berry Cheesecake Tart
Can I use frozen berries for the topping?
Yes, but thaw and drain them thoroughly to avoid excess moisture that can make the crust soggy. Pat them dry gently with paper towels.
How long does this tart keep in the fridge?
It stays fresh for up to 3 days when covered tightly. After that, the texture and flavor may start to decline.
Can I make this tart ahead of time?
Absolutely! It actually tastes better after chilling overnight as the flavors meld and the filling firms up.
Is there a way to make the crust gluten-free?
Swap the graham cracker crumbs for almond flour or gluten-free cookie crumbs. Just adjust the butter slightly if needed for binding.
What can I do if my cheesecake filling is too soft?
Chill it longer in the fridge to firm up. If it’s still too soft, adding a little more powdered sugar or sour cream can help stabilize it.
Pin This Recipe!
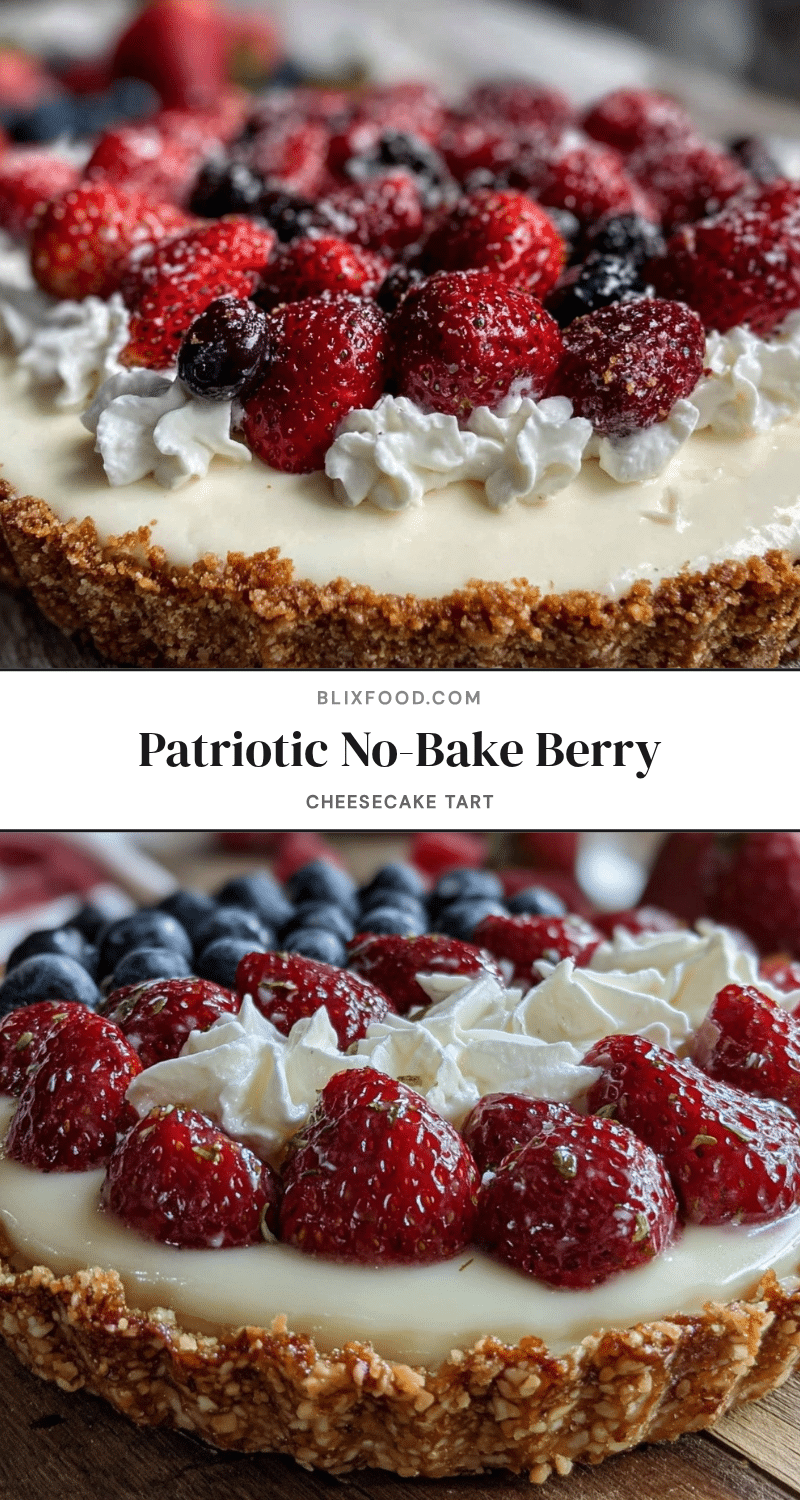
Perfect No-Bake American Flag Berry Cheesecake Tart
A quick and easy no-bake cheesecake tart with a buttery graham cracker crust, creamy filling, and a patriotic American flag pattern made from fresh berries. Perfect for summer celebrations and last-minute gatherings.
- Prep Time: 15 minutes
- Cook Time: 0 minutes
- Total Time: 2 hours 45 minutes
- Yield: 8 servings 1x
- Category: Dessert
- Cuisine: American
Ingredients
- 1 ½ cups (150g) graham cracker crumbs
- 6 tablespoons (85g) unsalted butter, melted
- 2 tablespoons granulated sugar (optional)
- 16 ounces (450g) cream cheese, softened
- ½ cup (120ml) sour cream
- ¾ cup (90g) powdered sugar, sifted
- 1 teaspoon pure vanilla extract
- 2 teaspoons fresh lemon juice
- 1 cup fresh blueberries
- 1 ½ cups fresh strawberries, hulled and sliced
- Optional: 1 tablespoon apricot jam or honey, warmed
Instructions
- Combine 1 ½ cups graham cracker crumbs, 6 tablespoons melted butter, and 2 tablespoons sugar in a medium bowl. Mix until the crumbs are evenly coated and resemble wet sand.
- Transfer the crumb mixture into the 9-inch tart pan. Press firmly and evenly into the bottom and up the sides (about 1 inch high). Use the bottom of a flat measuring cup for even packing. Refrigerate while you prepare the filling (about 15 minutes).
- In a large bowl, beat 16 ounces softened cream cheese until smooth and creamy (about 2-3 minutes). Add ½ cup sour cream, ¾ cup powdered sugar, 1 teaspoon vanilla extract, and 2 teaspoons lemon juice. Beat again until fully combined and silky smooth.
- Spoon the cheesecake filling into the chilled crust. Use an offset spatula or butter knife to spread it evenly and smooth the top. Place back in the fridge to chill for at least 2 hours or until firm.
- Rinse and dry blueberries and strawberries. Slice strawberries lengthwise into thin pieces for the stripes. Pat berries dry to avoid sogginess.
- Start by placing blueberries in the top left corner in a square shape (about 3 rows by 5 columns). Next, arrange sliced strawberries in horizontal stripes alternating with blank spaces for the white stripes created by the cheesecake filling underneath.
- Optional: Warm 1 tablespoon apricot jam or honey until runny. Using a pastry brush, gently coat the berries for a shiny, fresh look.
- Return the tart to the fridge for 30 minutes to set everything firmly before serving.
Notes
Let cream cheese soften at room temperature for at least 30 minutes before mixing to avoid lumps. Press crust evenly using a flat-bottomed object. Chill filling for at least 2 hours or overnight for best results. Handle berries gently to maintain neat flag pattern. Use warmed apricot jam or honey glaze for a shiny finish. For gluten-free crust, substitute graham cracker crumbs with almond flour. Frozen berries can be used if thawed and patted dry.
Nutrition
- Serving Size: 1 slice (1/8 of tart
- Calories: 320
- Fat: 20
- Carbohydrates: 28
- Protein: 5
Keywords: no-bake cheesecake, berry tart, patriotic dessert, American flag dessert, summer dessert, easy cheesecake, no oven dessert