Rummaging through the pantry when the clock’s ticking down and the lunchboxes are still empty—that’s when this recipe was born. Half a bag of marshmallows, a forgotten stick of butter that needed rescuing, and the last box of Rice Krispies staring at me like a challenge. Honestly, I wasn’t aiming for gourmet, just something to keep the hangry monsters at bay. But as the butter browned and filled the kitchen with that irresistible nutty aroma, I caught myself pausing mid-stir, thinking, “Wait, this might actually be something.”
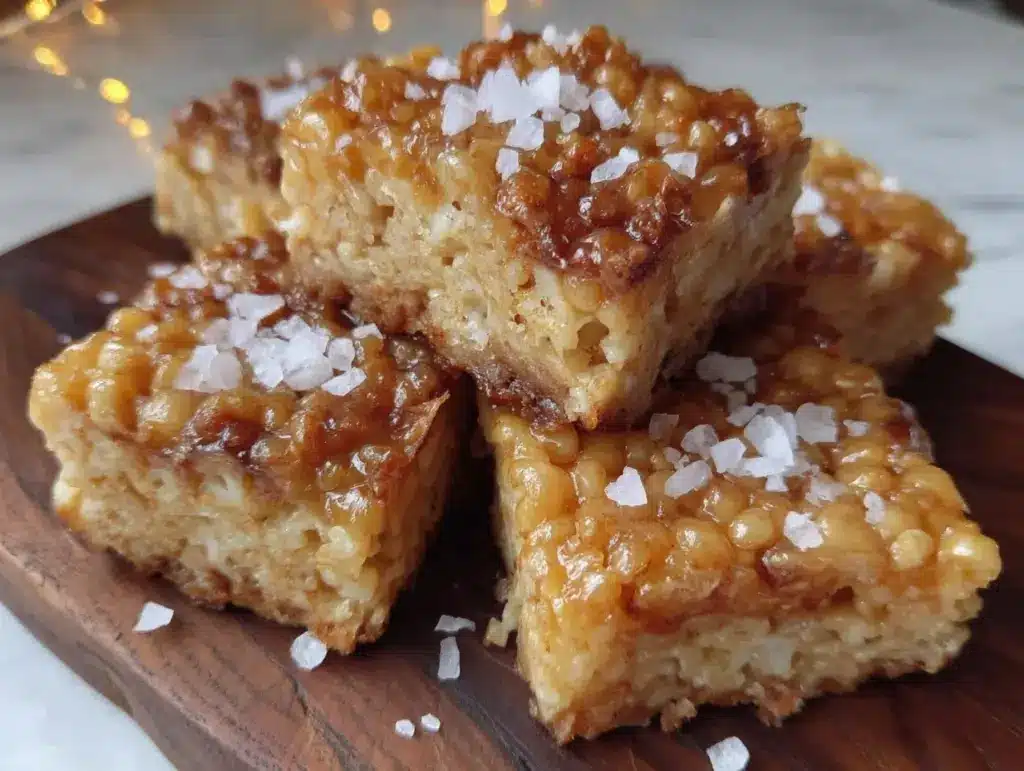
It’s funny how the simplest moments under pressure can gift you a new favorite. These savory brown butter Rice Krispie treat lunch box bars with sea salt came from that exact mix of chaos and curiosity. The sea salt flakes sprinkled on top give just the right punch to balance the sweet, and the brown butter adds this deep, toasty richness that takes it far beyond the usual childhood snack.
I remember sneaking a bite before boxing them up—crisp, chewy, salty, sweet, all at once. It’s not just a treat; it’s a little mid-day hug in bar form. These bars stuck around in my recipe rotation because they’re an easy way to offer something unexpected yet comforting. Plus, the kids actually ask for them, which is a win in my book.
So if you’re juggling too many things and need a snack that’s quick, satisfying, and a bit out of the ordinary, these bars might just become your new go-to. Let’s get into the nuts and bolts of making these savory brown butter rice krispie treat lunch box bars with sea salt.
Why You’ll Love This Recipe
Honestly, this recipe has quickly become a favorite in my kitchen for several reasons, and I bet it’ll win you over too. After testing multiple batches (yes, taste-testing is a serious job), I found the sweet spot between sweet and savory that keeps everyone happy. Here’s why these bars stand out:
- Quick & Easy: Ready in under 20 minutes, perfect for those last-minute lunchbox fillers or snack cravings.
- Simple Ingredients: No weird or hard-to-find stuff—just pantry staples you probably already have on hand.
- Perfect for Lunchboxes: These bars travel well, don’t get messy, and add a fun twist to the usual snack routine.
- Crowd-Pleaser: Kids, adults, picky eaters—everyone seems to love the salty-sweet combo.
- Unbelievably Delicious: The brown butter’s nutty, caramel-like flavor combined with the crunch and flakes of sea salt gives a depth you won’t find in regular Rice Krispie treats.
This isn’t just another sugary snack bar. The method of browning the butter before mixing gives a subtle complexity that makes these bars feel homemade and thoughtful, even if you’re pulling them together in a flash. I like to think of them as comfort food with a little grown-up twist—perfect alongside a fresh cucumber sandwich or a creamy dip like the creamy salmon dip I often whip up for gatherings.
What Ingredients You Will Need
This recipe uses simple, wholesome ingredients to deliver bold flavor and satisfying texture without the fuss. The magic is really in the brown butter and the finishing sea salt flakes, but every ingredient plays its part.
- Unsalted Butter, 1/2 cup (1 stick) – browned carefully to develop that deep nutty flavor
- Mini Marshmallows, 4 cups – they melt smoothly and bind everything together
- Rice Krispies Cereal, 6 cups – classic crispy texture; I recommend Kellogg’s for the best crunch
- Flaky Sea Salt, 1 teaspoon (plus extra for sprinkling) – the star seasoning that balances the sweetness perfectly
- Vanilla Extract, 1 teaspoon – adds warmth and a hint of sweetness
- Optional: Ground Black Pepper, a pinch – for a subtle savory kick if you want to experiment
If you want to swap things up, you can use gluten-free Rice Krispies (like the General Mills version) or substitute marshmallows with a vegan brand if needed. The sea salt can be kosher salt in a pinch, but flaky salt really gives that extra pop. For a fun twist, some folks like to add a handful of toasted nuts or seeds for crunch, but keep in mind that’s optional.
Equipment Needed
- Large nonstick skillet or heavy-bottomed saucepan – essential for browning butter without burning it
- Large mixing bowl – to combine the cereal and melted marshmallow mixture
- Rubber spatula or wooden spoon – for gentle folding and scraping
- 9×13-inch baking dish or pan – lined with parchment paper or lightly greased for easy bar removal
- Measuring cups and spoons – accuracy helps with the balance of sweet and salty flavors
- Optional: Candy thermometer – if you want to be precise about butter temperature, but I usually go by smell and color
If you don’t have a nonstick skillet, a heavy-bottomed pan will work, but keep a close eye on the butter as it browns. Using parchment paper in the baking dish is a game-changer for easy cleanup and bar removal. I’ve tried silicone mats too, which work fine but parchment is my personal favorite.
Preparation Method
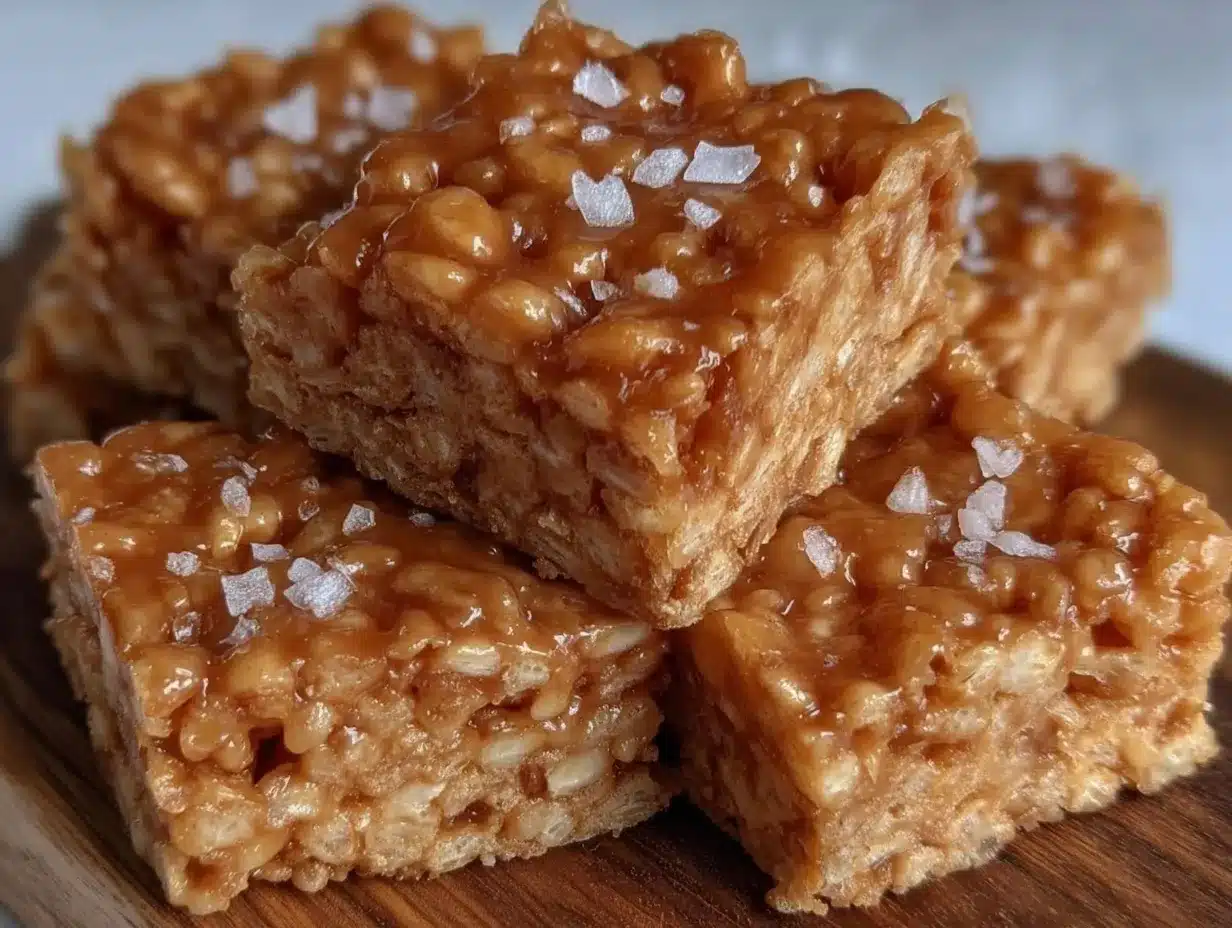
- Brown the Butter: Place 1/2 cup (113g) of unsalted butter in a large skillet over medium heat. Stir frequently with a rubber spatula. After about 5-7 minutes, you’ll see the butter foam, then the milk solids start to brown and smell nutty. The color should be a rich amber. Remove from heat immediately to prevent burning. (Watch carefully—this step can go from perfect to burnt in seconds.)
- Add the Marshmallows: Toss in 4 cups (about 240g) of mini marshmallows to the browned butter. Stir gently but thoroughly until melted and smooth. This should take about 2-3 minutes. Add 1 teaspoon of vanilla extract and a pinch of black pepper if using, stirring to combine.
- Mix in the Rice Krispies: Quickly pour 6 cups (around 180g) of Rice Krispies cereal into the marshmallow mixture. Use a spatula to fold everything together evenly without crushing the cereal too much. The mixture should be sticky and well coated.
- Transfer and Press: Pour the mixture into a parchment-lined 9×13-inch (23x33cm) pan. Using a piece of parchment paper or a buttered spatula, press the mixture down firmly and evenly. This helps the bars hold together and creates a nice flat top.
- Sprinkle Sea Salt: While the bars are still warm, sprinkle 1 teaspoon of flaky sea salt evenly over the surface. This step is key for that signature savory-sweet punch.
- Cool Completely: Let the bars cool at room temperature for at least 1 hour to set. You can speed it up by popping the pan in the fridge for 30 minutes if you’re impatient like me.
- Cut and Serve: Once set, lift the bars out using the parchment paper and cut into squares or rectangles. Store leftovers in an airtight container at room temperature for up to 3 days.
Sometimes, I find letting the bars sit overnight actually improves the texture and flavor. If the marshmallow mixture feels too sticky when pressing, lightly butter your spatula or hands to avoid sticking. Keep in mind, these bars can be a bit crumbly if pressed too hard or cut too soon.
Cooking Tips & Techniques
Brown butter is a delicate magic trick—it can make or break your bars. Always keep your eye (and nose) on the butter as it foams and darkens. The moment you smell that toasted, almost caramel aroma, it’s time to pull the pan off the heat. If it burns, the flavor will turn bitter real quick.
When melting marshmallows, patience is key. Stir slowly to avoid scorching or clumping. I learned this the hard way after rushing and ending up with gluey sticks on my spatula. Also, folding the cereal gently keeps the bars light and crispy rather than dense and soggy.
Sprinkling sea salt while the bars are still warm lets it stick better, and choosing flaky salt over fine salt gives bursts of flavor rather than a flat salty taste. I sometimes add a pinch of black pepper for a subtle heat that surprises people.
Timing-wise, these bars are fantastic because you can multitask while they cool. I often use that window to prep other snacks like cranberry cream cheese spread or slice veggies for the lunchbox. It’s a simple but effective way to make snack prep feel less hectic.
Variations & Adaptations
- Cheesy Twist: Add 1/2 cup of finely grated sharp cheddar cheese into the marshmallow mixture for a savory, melty surprise. It sounds wild but works brilliantly for cheese lovers.
- Nutty Crunch: Toss in 1/2 cup of toasted chopped pecans or almonds for extra texture and a rich nutty flavor. This pairs nicely with the brown butter notes.
- Spicy Kick: Sprinkle a pinch of smoked paprika or cayenne pepper along with sea salt for a smoky, spicy edge that wakes up the palate.
- Gluten-Free: Use certified gluten-free Rice Krispies or substitute with puffed quinoa or amaranth cereal for a grain-free option.
- Vegan Option: Replace butter with vegan butter and use vegan marshmallows to make these bars fully plant-based. The flavor will be just as comforting.
I once tried adding bits of crispy bacon to make a savory-sweet-salty bar that was a hit at a brunch party—kind of like a grown-up version of the classic. If you’re curious about savory snacks, you might also enjoy the zesty garlic marinated mushrooms I posted recently, which have a similar punch of flavor that complements the bars well.
Serving & Storage Suggestions
Serve these bars at room temperature for the best texture. They’re great as a quick snack on the go or tucked into lunchboxes alongside fresh fruit or a savory dip. If you want to create a snack platter, consider pairing them with creamy dips like the creamy spinach artichoke dip for a nice balance of flavors and textures.
Store leftover bars in an airtight container at room temperature for up to 3 days. If your kitchen is warm, refrigerate them to prevent melting but bring them back to room temperature before eating for best chewiness. You can freeze the bars wrapped tightly in plastic wrap and foil for up to 2 months; thaw overnight in the fridge.
Reheating isn’t usually necessary, but a few seconds in the microwave (about 10 seconds) can soften them if they’ve become too firm. The flavors tend to mellow and marry nicely after resting, so making them a day ahead is a plus when prepping snacks for a busy week.
Nutritional Information & Benefits
These savory brown butter Rice Krispie treat bars pack energy and flavor in a small package. A typical bar (about 2×2 inches) contains roughly:
| Calories | 180 kcal |
|---|---|
| Fat | 7g (mostly from butter) |
| Carbohydrates | 28g |
| Protein | 1.5g |
| Sugar | 16g |
The brown butter adds a dose of healthy fats and antioxidants from the browned milk solids, while the sea salt helps balance electrolytes. These bars are gluten-free when made with the right cereal, and can be adapted for vegan diets too. Just a heads up—marshmallows contain gelatin, so not suitable for strict vegetarians unless you use a vegan brand.
From a wellness perspective, these bars offer a quick energy boost and a satisfying flavor combo that helps curb cravings without feeling overly sugary or artificial.
Conclusion
These savory brown butter Rice Krispie treat lunch box bars with sea salt are a little bit nostalgic, a little bit unexpected, and totally addictive. They’re perfect for busy days when you want to throw together something quick but still special. The balance of buttery richness, crispy cereal, and flaky salt makes them a snack that’s both comforting and exciting.
Feel free to tweak the recipe to suit your taste—extra salt, a sprinkle of spice, or even a handful of nuts. I love how flexible they are, and they always earn a spot in my snack rotation alongside other favorites like my mini cheese balls.
Give them a try, and I’d love to hear how you customize your bars. Drop a comment or share your twist—snacking is better when it’s a little bit personal, don’t you think? Here’s to making snack time a little less ordinary, one bar at a time.
FAQs About Savory Brown Butter Rice Krispie Treat Bars
Can I use regular-sized marshmallows instead of mini ones?
Yes, you can! Just chop the regular marshmallows into smaller pieces so they melt evenly and quickly.
How do I prevent the brown butter from burning?
Keep the heat medium or medium-low and stir constantly. Once the butter foams and turns golden brown with a nutty aroma, remove it from heat immediately.
Can I make these bars ahead of time?
Absolutely. They store well at room temperature for a few days or can be frozen for up to two months.
What if I don’t have flaky sea salt?
Use kosher salt or coarse salt, but sprinkle less as they’re more intense. Flaky salt gives a better texture and milder bursts of saltiness.
Are these bars suitable for kids’ lunchboxes?
Definitely! They’re a tasty treat that’s not overly sweet, and the sea salt adds a nice flavor contrast that kids seem to enjoy.
Pin This Recipe!
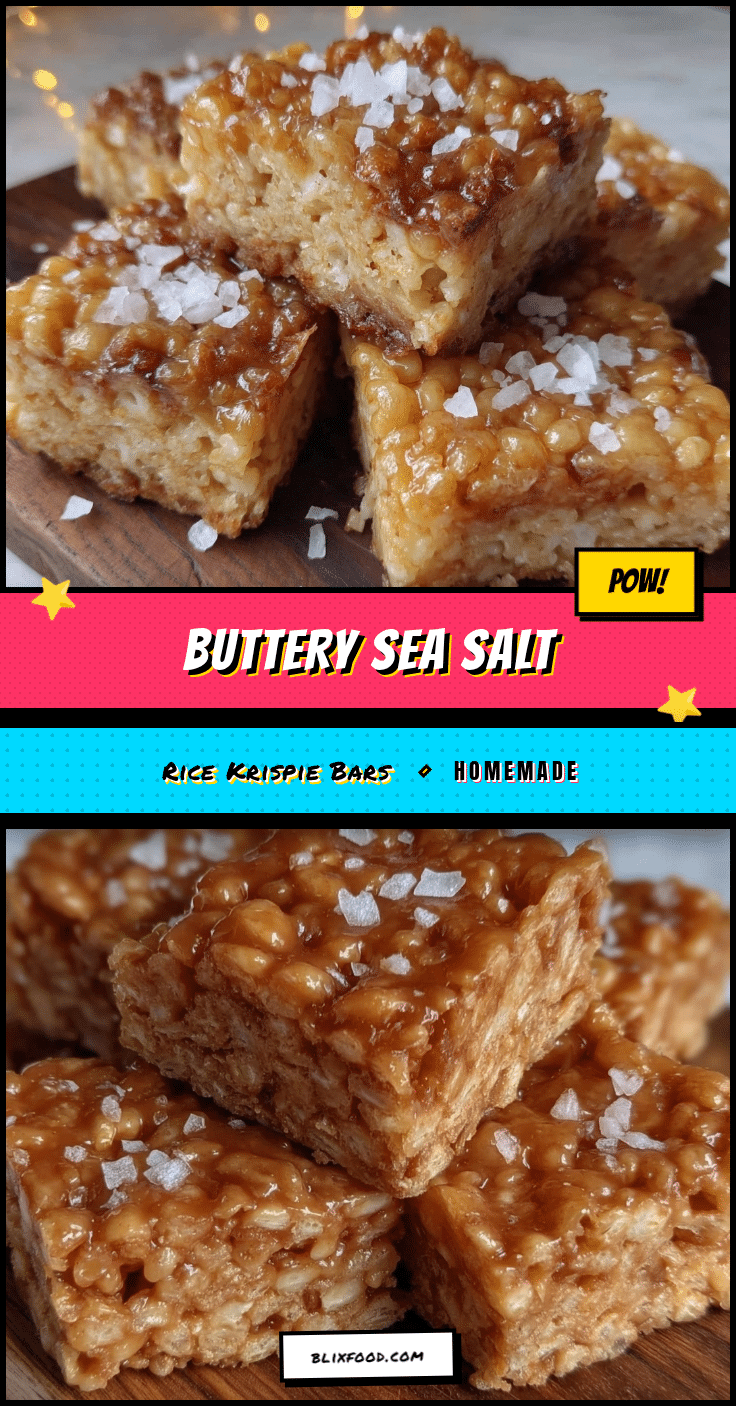
Savory Brown Butter Rice Krispie Treat Bars with Sea Salt

These savory brown butter Rice Krispie treat bars with sea salt combine a nutty, caramel-like flavor with a perfect salty-sweet balance, making them a quick, satisfying snack or lunchbox favorite.
- Prep Time: 10 minutes
- Cook Time: 10 minutes
- Total Time: 1 hour 20 minutes
- Yield: 12 servings 1x
- Category: Snack
- Cuisine: American
Ingredients
- 1/2 cup (1 stick) unsalted butter, browned
- 4 cups mini marshmallows
- 6 cups Rice Krispies cereal
- 1 teaspoon flaky sea salt, plus extra for sprinkling
- 1 teaspoon vanilla extract
- Pinch of ground black pepper (optional)
Instructions
- Brown the butter: Place 1/2 cup (113g) unsalted butter in a large skillet over medium heat. Stir frequently until the butter foams and milk solids brown to a rich amber color, about 5-7 minutes. Remove from heat immediately.
- Add the marshmallows: Toss in 4 cups mini marshmallows and stir gently until melted and smooth, about 2-3 minutes. Stir in 1 teaspoon vanilla extract and a pinch of black pepper if using.
- Mix in the Rice Krispies: Quickly pour 6 cups Rice Krispies cereal into the marshmallow mixture. Fold gently with a spatula until evenly coated.
- Transfer and press: Pour mixture into a parchment-lined 9×13-inch pan. Press down firmly and evenly using parchment paper or a buttered spatula.
- Sprinkle sea salt: While bars are still warm, sprinkle 1 teaspoon flaky sea salt evenly over the surface.
- Cool completely: Let bars cool at room temperature for at least 1 hour to set. Optionally refrigerate for 30 minutes to speed cooling.
- Cut and serve: Lift bars out using parchment paper and cut into squares or rectangles. Store leftovers in an airtight container at room temperature for up to 3 days.
Notes
Watch the butter carefully while browning to avoid burning. Use parchment paper for easy removal and cleanup. Press bars firmly but not too hard to avoid crumbliness. Sprinkling sea salt while bars are warm helps it stick better. Optional black pepper adds a subtle savory kick. Bars can be refrigerated or frozen for longer storage.
Nutrition
- Serving Size: 1 bar (about 2x2 inc
- Calories: 180
- Sugar: 16
- Fat: 7
- Carbohydrates: 28
- Protein: 1.5
Keywords: brown butter, Rice Krispie treats, sea salt, snack bars, lunchbox treats, quick snack, savory sweet