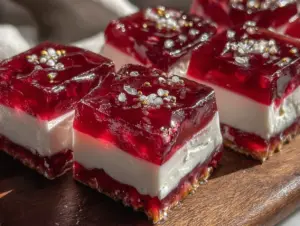
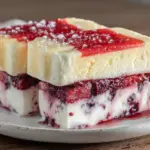
That’s what my niece blurted out last summer when I pulled this Easy Frozen Bomb Pop Popsicle Cake out of the freezer. Honestly, I wasn’t expecting much from a dessert that looks like a rainbow layered block of popsicles, but the burst of nostalgia combined with the cake’s creamy, icy texture won me over in seconds. The red, white, and blue colors weren’t just patriotic flair—they were pure childhood summer magic, packed into one fun, shareable cake.
It happened on a lazy Fourth of July afternoon while the sun was blazing, and the idea struck me when I found a box of bomb pop popsicles melting faster than anyone could eat them. I figured, why not turn those iconic frozen treats into something a little more festive for our backyard party? The result was this easy frozen bomb pop popsicle cake recipe that quickly became the star of the day.
What really got me was how simple it was to throw together—no fancy baking skills or tricky steps. Just layers of crushed popsicles, a light whipped cream mixture, and a sprinkle of nostalgia. And yes, it’s a bit of a showstopper with that vibrant red, white, and blue look that makes everyone pause mid-conversation to grab a slice.
Since that day, it’s been my go-to summer dessert when I want something cool but with a little twist on the usual popsicle. It’s also a crowd-pleaser for kids and adults alike because, let’s face it, who doesn’t love that cherry, lime, and blue raspberry combo? The best part? It’s a recipe I trust to come through every time, no surprises, just good old-fashioned fun.
That afternoon taught me sometimes the simplest ideas—like frozen popsicles turned into a cake—can bring the biggest smiles. And I think that’s why this popsicle cake stuck around in my recipe box. It’s not just a dessert; it’s a sweet little slice of summer to share.
Why You’ll Love This Easy Frozen Bomb Pop Popsicle Cake Recipe
Honestly, I’ve tried a few frozen treats that promise big but fizzle out, but this popsicle cake? It nails it every time. I’ve tested this recipe through multiple summer parties, and it’s consistently a hit because it blends simplicity with flavor and a dash of nostalgia.
- Quick & Easy: You can whip this up in under 20 minutes—not including freezing time—so it’s perfect for those spontaneous summer gatherings or last-minute dessert needs.
- Simple Ingredients: No need to hunt down weird or fancy items. Most of what you need is probably already in your freezer or pantry, which makes it a breeze to pull together.
- Perfect for Summer Parties: This cake screams summer with its bright colors and refreshing taste. It pairs wonderfully with other easy party appetizers like the Festive Cranberry Cream Cheese Spread or the Creamy Salmon Dip.
- Crowd-Pleaser: Kids love the fun colors and flavors, and adults appreciate the cool, creamy texture that’s not overly sweet.
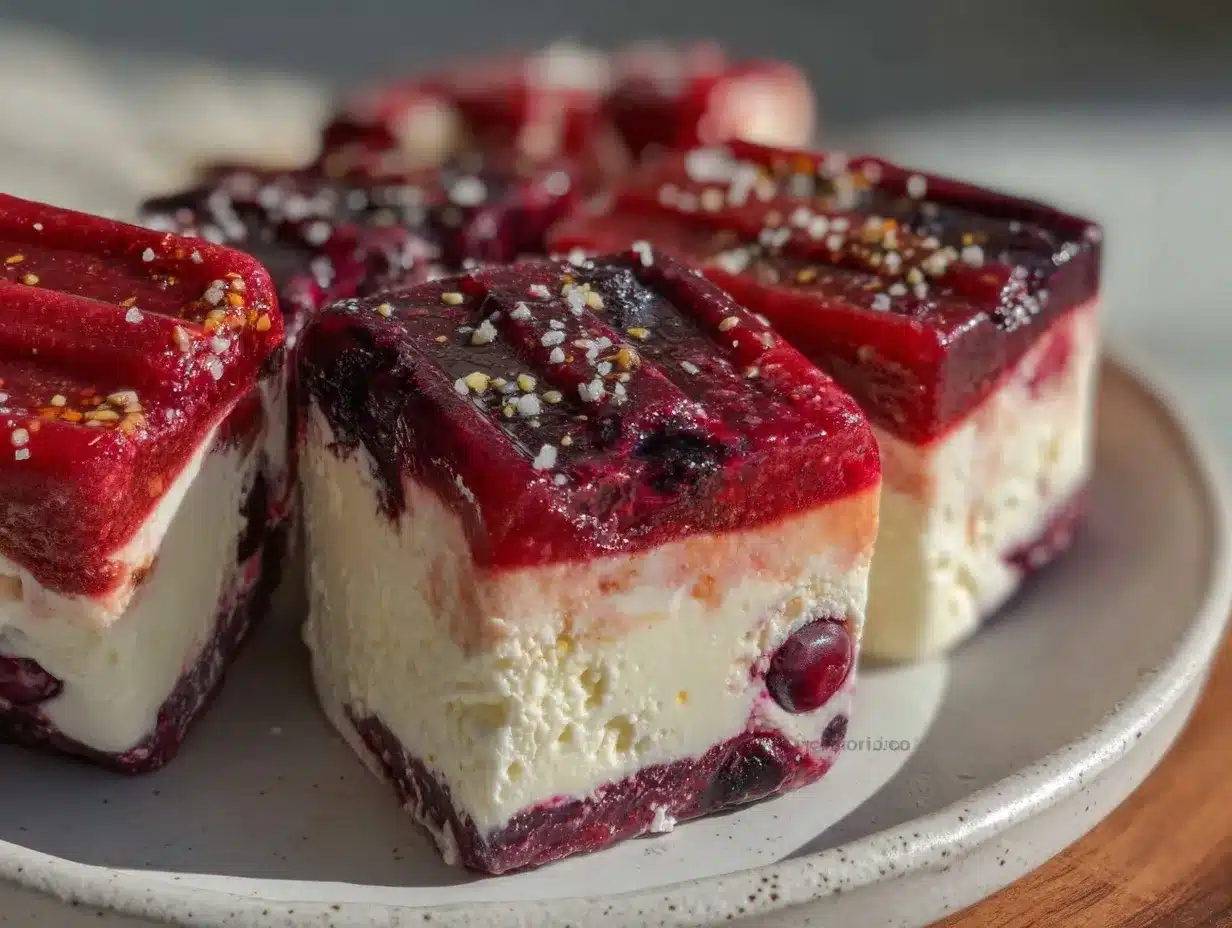
- Unbelievably Delicious: The layers of bomb pop flavor meld with a light creamy base that feels like a grown-up twist on a childhood favorite.
What sets this popsicle cake apart is the layering technique that keeps each flavor distinct but perfectly balanced. I tried blending cottage cheese once for a smoother texture, but the whipped cream base won out for that fluffy, melt-in-your-mouth feel. Plus, using crushed popsicles rather than just stacking them makes slicing and serving a cinch.
It’s dessert that doesn’t just taste good—it brings back memories and sparks smiles. I love that it’s a relaxed recipe that doesn’t demand perfection but delivers on fun and flavor every time. If you want to impress guests without sweating over the oven or complicated steps, this cake is your new best friend.
What Ingredients You Will Need for the Easy Frozen Bomb Pop Popsicle Cake
This recipe uses simple, wholesome ingredients to deliver bold flavor and satisfying texture without the fuss. Most are pantry staples or easy to find frozen treats, making this a practical dessert for any summer get-together.
- Bomb Pop Popsicles (about 8-10 popsicles, depending on size) – The star of the show. I prefer the classic triple-flavored ones for that iconic red, white, and blue combo.
- Whipping Cream (1 ½ cups / 355 ml, cold) – For whipping into fluffy, creamy layers. I use heavy cream for best richness.
- Powdered Sugar (¼ cup / 30 g) – Sweetens the whipped cream just right without graininess.
- Vanilla Extract (1 teaspoon / 5 ml) – Adds subtle depth to the cream layer.
- Graham Cracker Crumbs (1 cup / 100 g) – For the crunchy base layer. I like the slightly buttery kind for extra flavor.
- Unsalted Butter (4 tablespoons / 57 g, melted) – Binds the graham cracker crumbs for a sturdy crust.
- Optional Fresh Berries (1 cup / 150 g) – Strawberries, blueberries, or raspberries for garnish or an extra fruity layer.
Look for good-quality, firm popsicles that won’t be too watery when crushed. If you can’t find bomb pops, any triple-flavored red, white, and blue popsicles work just fine. For a dairy-free twist, swap heavy cream with coconut cream—just whip it well and chill before using.
Graham cracker crust is a classic choice for this kind of frozen cake, but crushed digestive biscuits or vanilla wafers are great substitutes if you want a different crunch or flavor profile.
Equipment Needed
- 9×9-inch (23×23 cm) square baking pan – I recommend using a metal pan for even freezing, but glass works too.
- Mixing bowls – One large bowl for whipping cream and another for mixing crust.
- Electric hand mixer or stand mixer – Whipping cream by hand is possible but takes some serious muscle.
- Spatula – For folding whipped cream and spreading layers evenly.
- Plastic wrap or parchment paper – To cover the cake before freezing and prevent freezer burn.
- Freezer-safe container – If you want to make smaller individual portions instead of a cake.
If you don’t have a mixer, a sturdy whisk and some patience will get the whipped cream done, but I’ve found the electric mixer cuts the prep time in half. Also, I like to use a silicone spatula for scraping bowls clean and smoothing layers perfectly—makes the whole process a bit easier.
Preparation Method
- Prepare the crust: In a medium bowl, combine 1 cup (100 g) graham cracker crumbs with 4 tablespoons (57 g) melted unsalted butter. Mix until the crumbs are evenly moistened.
- Press the crust: Firmly press the crumb mixture into the bottom of a 9×9-inch (23×23 cm) baking pan, creating an even layer. Set it in the freezer for about 10 minutes to firm up.
- Crush the popsicles: While the crust chills, unwrap 8-10 bomb pop popsicles and place them in a large bowl. Use a sturdy spatula or your hands (wear gloves if you want) to crush them into chunky pieces. You want a mix of small bits and some larger chunks for texture.
- Whip the cream: In a clean, chilled bowl, beat 1 ½ cups (355 ml) cold heavy whipping cream with ¼ cup (30 g) powdered sugar and 1 teaspoon (5 ml) vanilla extract. Whip on medium-high speed until soft peaks form. Don’t overbeat or it’ll turn to butter!
- Fold popsicle pieces: Gently fold half of the crushed popsicle pieces into the whipped cream, keeping some pieces chunky for bursts of flavor.
- Assemble the first layer: Spread the whipped cream and popsicle mixture evenly over the chilled graham cracker crust. Smooth the top with a spatula.
- Add more popsicles: Sprinkle the remaining crushed popsicles over the whipped cream layer. This adds extra pops of color and flavor.
- Freeze: Cover the pan tightly with plastic wrap or parchment paper and freeze for at least 4 hours, preferably overnight. This helps the layers set and the flavors meld.
- Serve: Remove from freezer 10-15 minutes before slicing to soften slightly for easier cutting. Use a sharp knife warmed in hot water for clean slices.
Watch out for melting popsicles when crushing—work quickly or keep them in the freezer until ready. Also, folding instead of stirring the popsicles into whipped cream keeps that light, airy texture intact without turning it soupy.
Cooking Tips & Techniques
Since this is a no-bake frozen dessert, the “cooking” part is really about mastering freezing and layering for the perfect texture and taste.
- Use cold ingredients: Make sure your whipping cream is chilled. This helps it whip up fluffy and hold shape longer.
- Don’t overbeat cream: Stop whipping at soft peaks for best folding and texture. Overbeating turns it grainy and buttery.
- Crush popsicles carefully: You want chunks, not puree. Too small and it melts into the cream, losing the popsicle effect.
- Freezing time: Give the cake at least 4 hours to freeze solid. I’ve had guests rush to slice too soon and the layers didn’t hold well.
- Cut with a warm knife: Run your knife under hot water and dry it before slicing. This prevents cracking and messy edges.
- Layer evenly: Smooth layers freeze better and look prettier. Use a spatula to gently press down and even out each layer.
I’ve learned the hard way that rushing the freezing step means a soggy cake. Patience here pays off big time. Also, keeping the cake covered tightly while freezing helps avoid ice crystals forming on top.
Variations & Adaptations
This frozen bomb pop cake is super flexible and easy to customize:
- Dietary twist: Swap heavy cream for coconut cream whipped with a little powdered sugar for a dairy-free, vegan-friendly version. Just chill the coconut cream overnight to get that whipped texture.
- Flavor variations: Use different popsicle flavors to match holidays or personal preferences—mango, strawberry lemonade, or even mixed berry popsicles work beautifully.
- Layered fruit: Add fresh berries or thin slices of kiwi between the layers for a fresh pop of flavor and color. I once added blueberries and mint leaves, which made the cake taste extra vibrant.
- Crust alternatives: Try crushed vanilla wafers or chocolate cookie crumbs for a different base flavor. A chocolate crust adds a nice contrast to the fruity popsicles.
- Individual servings: Make mini versions in silicone molds or muffin tins lined with cupcake liners for easy, grab-and-go popsicle cakes.
One version I recently tried had a splash of lemon zest in the whipped cream for a bright zing that cut through the sweetness perfectly. It was a hit at our summer picnic!
Serving & Storage Suggestions
This popsicle cake is best served straight from the freezer, with a few minutes to soften for easier slicing. I like to garnish with fresh berries or a sprig of mint for a little extra color and freshness.
It pairs well with light, summery drinks like iced tea or lemonade—and if you’re serving alongside savory bites, try pairing it with cool, creamy appetizers such as creamy spinach artichoke dip or the mini cheese balls recipe to balance the sweet and savory.
To store, keep the cake tightly covered in the freezer. It holds well for up to 5 days but is best enjoyed fresh for maximum popsicle flavor and texture. When reheating for serving, let it sit at room temperature 10-15 minutes to soften slightly.
Leftovers can also be scooped into bowls as a quick frozen treat. Over time, the flavors meld and deepen, making it even more delightful after a day or two.
Nutritional Information & Benefits
This Easy Frozen Bomb Pop Popsicle Cake is a refreshing treat that’s lighter than most traditional cakes, thanks to the whipped cream and popsicle base rather than heavy frosting or dense batter.
| Nutrient | Per Serving (1/9 cake) |
|---|---|
| Calories | 180 kcal |
| Fat | 10 g |
| Saturated Fat | 6 g |
| Carbohydrates | 20 g |
| Sugars | 18 g |
| Protein | 2 g |
The popsicles provide a fun fruity burst, while the graham cracker crust adds whole grain benefits if you choose the right kind. If you want a lower-sugar version, look for low-sugar or natural popsicles, or reduce powdered sugar in the whipped cream.
Keep in mind this recipe contains dairy and gluten unless you substitute accordingly. With fresh ingredients and homemade whipped cream, this dessert feels just a bit healthier than your average frozen treat.
Conclusion
Summertime just isn’t complete without something fun, colorful, and cool to beat the heat—and this Easy Frozen Bomb Pop Popsicle Cake fits the bill perfectly. It’s a recipe that’s as joyful to make as it is to eat, combining childhood nostalgia with grown-up ease and flavor.
Whether you’re throwing a backyard bash, celebrating a holiday, or just craving a no-fuss dessert, this cake invites you to get creative and enjoy the simple pleasures. You can tweak the flavors, play with layers, or keep it classic—the key is sharing that smile-inducing, icy sweetness with people you care about.
I keep this recipe handy because it reminds me that sometimes the best desserts come from the simplest ideas and a bit of summertime whimsy. Give it a try, and I’d love to hear how you make it your own!
Frequently Asked Questions about Easy Frozen Bomb Pop Popsicle Cake
Can I make this popsicle cake ahead of time?
Absolutely! This cake actually benefits from sitting in the freezer overnight. Just cover it tightly to prevent freezer burn, and slice when ready to serve.
What if I don’t have bomb pop popsicles?
You can substitute with any triple-flavored red, white, and blue popsicles or even single-flavor popsicles. Just try to keep the colors layered for the best visual effect.
Can I use whipped topping instead of heavy cream?
Whipped topping can work in a pinch, but homemade whipped cream holds better texture and flavor. If using whipped topping, fold gently and freeze as soon as possible.
How do I prevent the cake from melting too fast when serving?
Keep the cake in the freezer until just before serving and only take out small slices at a time. Using a warm knife helps you cut clean slices quickly.
Is this recipe suitable for kids?
Definitely! The vibrant colors and familiar bomb pop flavors make it a fun and safe treat for kids. Just watch the sugar content if that’s a concern.
Pin This Recipe!
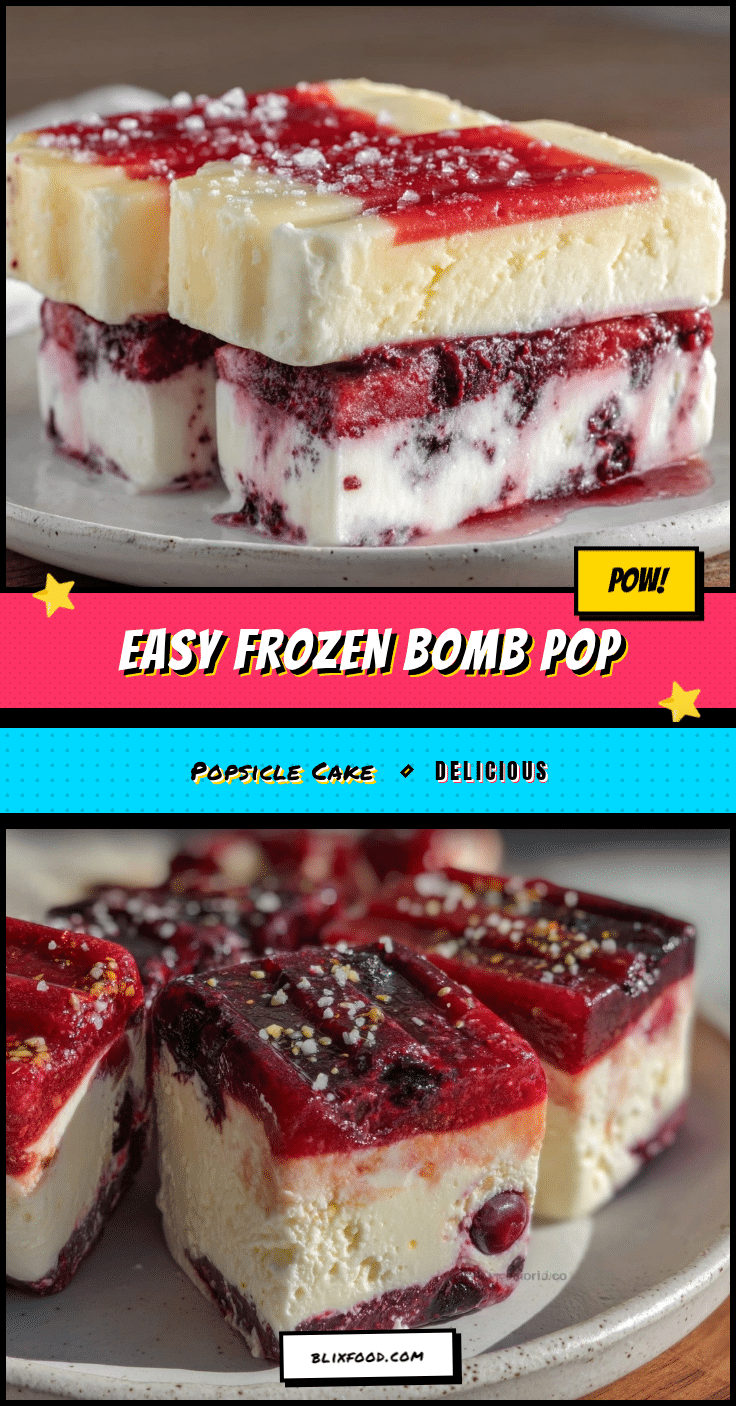
Easy Frozen Bomb Pop Popsicle Cake Recipe Perfect for Summer Parties
A fun, colorful, and easy no-bake frozen dessert that layers crushed bomb pop popsicles with whipped cream and a graham cracker crust, perfect for summer parties and nostalgic treats.
- Prep Time: 15 minutes
- Cook Time: 0 minutes
- Total Time: 4 hours 15 minutes
- Yield: 9 servings 1x
- Category: Dessert
- Cuisine: American
Ingredients
- 8–10 Bomb Pop Popsicles (classic triple-flavored red, white, and blue)
- 1 ½ cups (355 ml) cold heavy whipping cream
- ¼ cup (30 g) powdered sugar
- 1 teaspoon (5 ml) vanilla extract
- 1 cup (100 g) graham cracker crumbs
- 4 tablespoons (57 g) unsalted butter, melted
- Optional: 1 cup (150 g) fresh berries (strawberries, blueberries, or raspberries)
Instructions
- Prepare the crust: In a medium bowl, combine graham cracker crumbs with melted unsalted butter. Mix until evenly moistened.
- Press the crust firmly into the bottom of a 9×9-inch (23×23 cm) baking pan to create an even layer. Freeze for about 10 minutes to firm up.
- Crush the popsicles: Unwrap 8-10 bomb pop popsicles and crush them into chunky pieces using a spatula or hands.
- Whip the cream: Beat cold heavy whipping cream with powdered sugar and vanilla extract until soft peaks form. Avoid overbeating.
- Fold half of the crushed popsicle pieces gently into the whipped cream, keeping some chunks intact.
- Spread the whipped cream and popsicle mixture evenly over the chilled crust and smooth the top.
- Sprinkle the remaining crushed popsicles over the whipped cream layer.
- Cover the pan tightly with plastic wrap or parchment paper and freeze for at least 4 hours or overnight.
- Remove from freezer 10-15 minutes before slicing to soften slightly. Use a warm knife for clean slices.
Notes
Use cold whipping cream for best results. Do not overbeat the cream to avoid turning it into butter. Crush popsicles into chunks, not puree, to maintain texture. Freeze for at least 4 hours or overnight for best layering and flavor melding. Use a warm knife for clean slicing. For dairy-free version, substitute heavy cream with whipped coconut cream.
Nutrition
- Serving Size: 1/9 of the cake
- Calories: 180
- Sugar: 18
- Fat: 10
- Saturated Fat: 6
- Carbohydrates: 20
- Protein: 2
Keywords: frozen dessert, popsicle cake, bomb pop, summer party dessert, no-bake cake, patriotic dessert, easy dessert